Document intelligence controls
Configuring the Document intelligence controls involves configuring the Document intelligence management control and the Document intelligence details control.
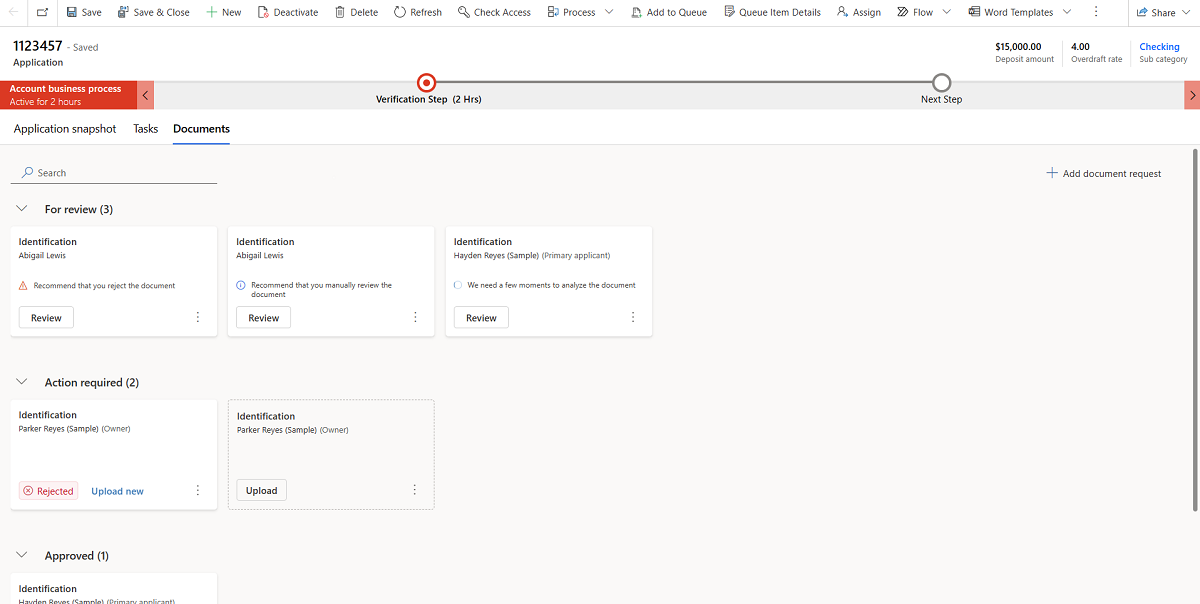
Configure Document intelligence management control
The Document intelligence management control allows you to show the document request entities as a card list grouped by statuses. You can either embed the control to a form subgrid with a document-related context (the form entity) or to the Documents main grid without context.
Add the Documents control to a form subgrid with context
Sign into Power Apps and go to your solution.
Under Tables, select the entity that is used as a document request context.
Note
The context entity must have a relationship with the polymorphic msfsi_context.
Go to the form to which you want to add the control.
Create a new tab for documents and select Expand first component to full tab.
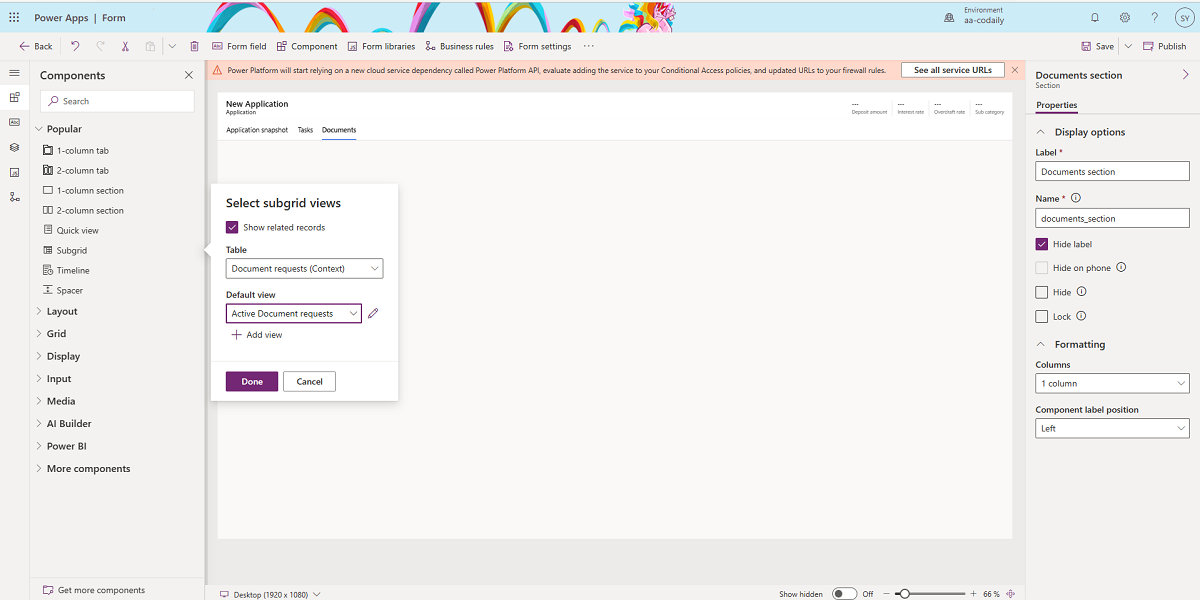
Under Component, select Grid > Subgrid.
Select Show related records.
Go to Tables > Document request, and then select the required view.
Save and publish the form, and then select Switch to classic.
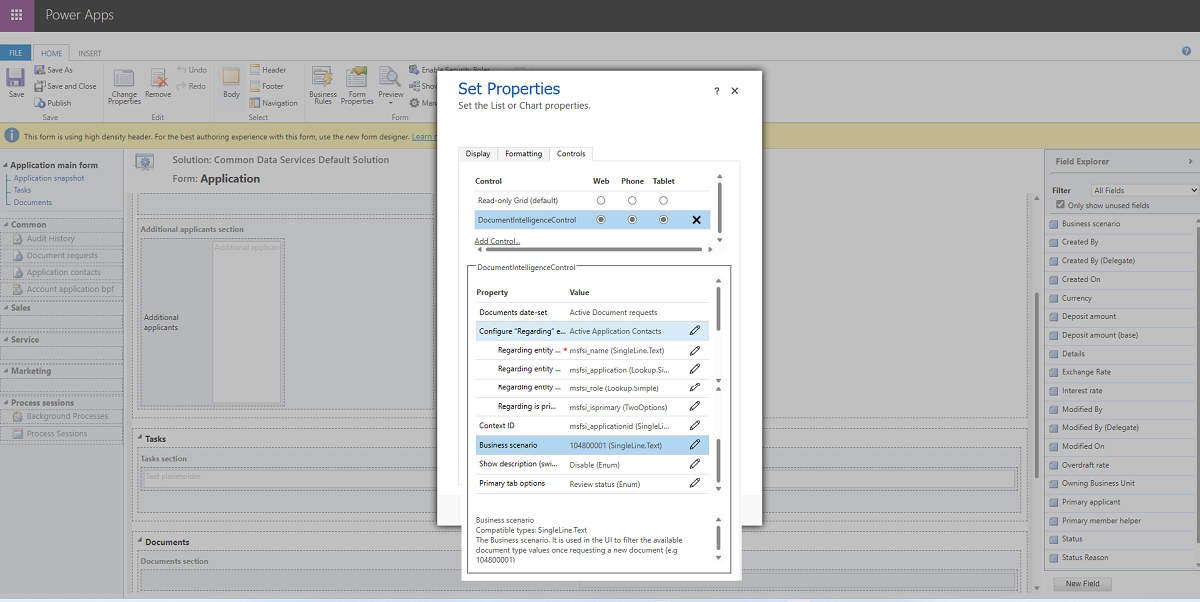
Select the subgrid component and switch to the Control tab.
Select Custom controls and DocumentIntelligenceControl. Select the form factors to which you want to add the control: Web, Phone, and Tablet.
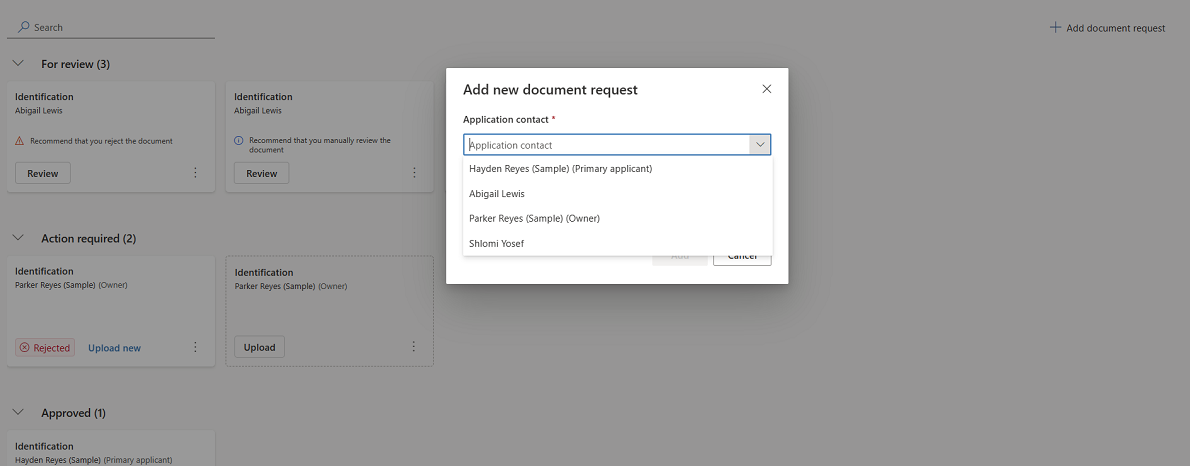
Configure the elements of the Regarding entity list as specified.
- Select the table and the view that you want to show under the Regarding list when adding a new document request.
Note
The table must have a relationship with the polymorphic msfsi_regarding column.
Regarding entity name: Select the column you want to use for displaying the name of the entity.
Regarding entity context (Optional): Select the column that connects the entity to the context. Keep the value empty to show a complete list of the Regarding entities that aren't filtered by context.
Regarding entity role (Optional): Select the column describing the Regarding role within the context.
Regarding Is Primary (Optional, for internal use): Keep this value empty because it's only relevant for the Onboarding application with an indication for the primary applicant.
Configure more elements as specified.
Context ID (Optional, only for subgrid): Select the Id of the form's main entity.
Business scenario (Optional): Enter a single option set value from msfsi_documentdefinitioncontext for filtering the document definition list by this value. Keep the value empty to show all the definitions.
Show descriptions: Select this value if you want to display the Description field in the control.
Primary tab options: Select which tab to display first under the Document details modal.
Select Save and publish.
Open the form and verify whether the controls show the right configuration.
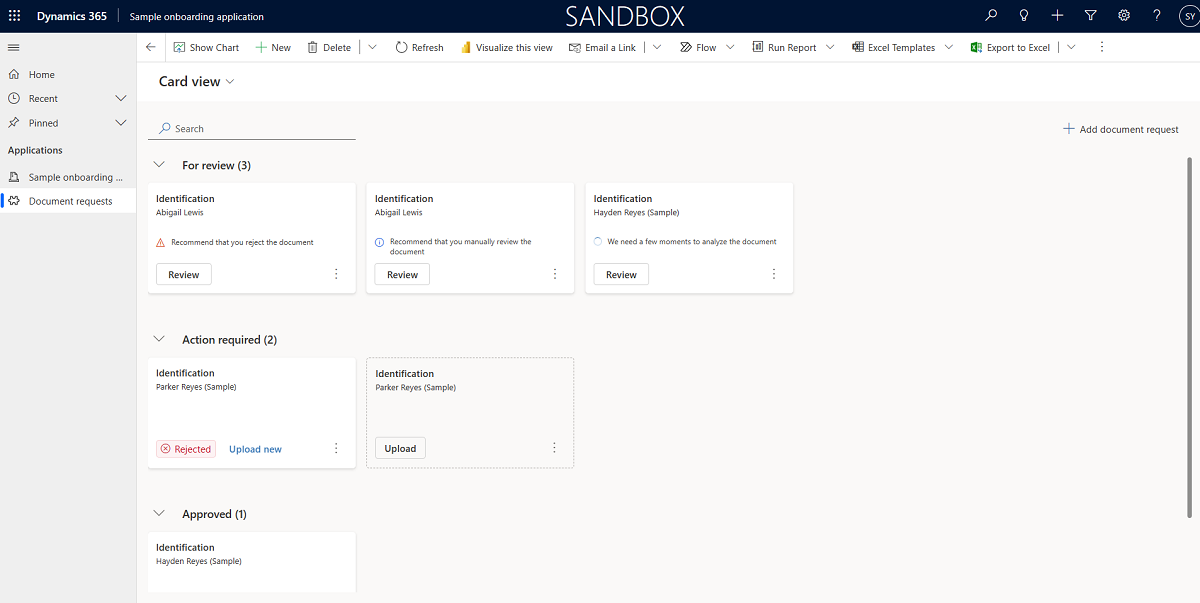
Add the Documents control to the Documents main grid without context
Sign into Power Apps and go to your solution.
Go to the Document request table.
Select Views > New view and create a view (with your custom filters), on top of the Document request table.
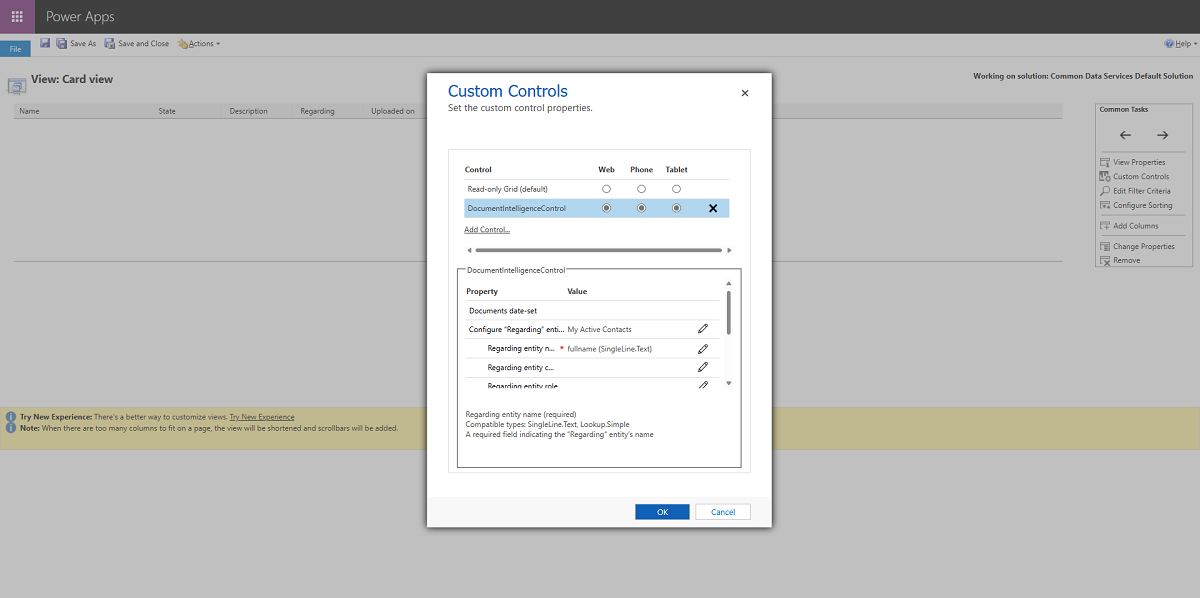
Select Switch to classic.
Select Custom controls and DocumentIntelligenceControl. Select the form factors to which you want to add the control: Web, Phone, and Tablet.
Configure the elements of the Regarding entity list as specified.
- Select the table and the view that you want to show under the Regarding list when adding a new document request.
Note
The table must have a relationship with the polymorphic msfsi_regarding column.
Regarding entity name: Select the column you want to use for displaying the name of the entity.
Regarding entity context (Optional, only for subgrid): Keep this value empty.
Regarding entity role (Optional, only for subgrid): Keep this value empty.
Regarding Is Primary (Optional, for internal use): Keep this value empty.
Configure more elements as specified.
Context ID (Optional, only for subgrid): Keep this value empty.
Business scenario (Optional): Enter a single option set value from msfsi_documentdefinitioncontext for filtering the document definition list by this value. Keep the value empty to show all the definitions.
Show descriptions: Select this option if you want to display the Description field in the control.
Primary tab options: Select which tab to display first under the Document details modal.
Select Save and publish.
Add the view to your model-driven app.
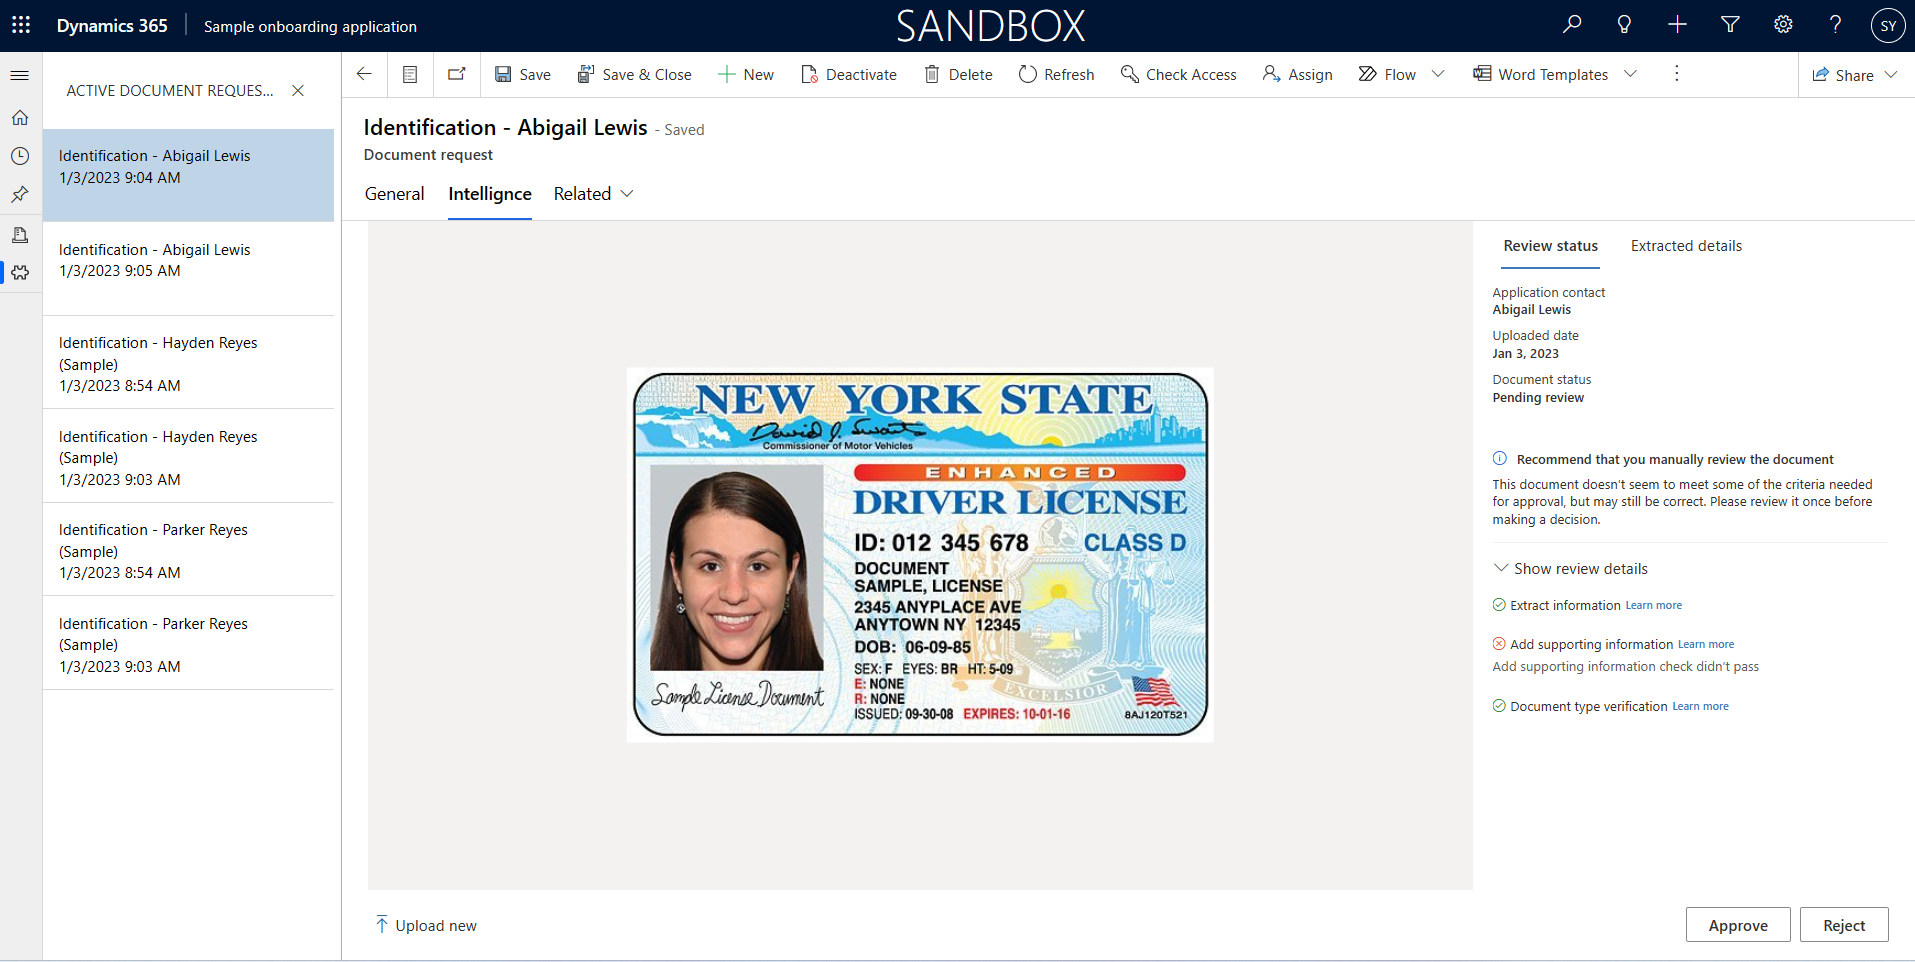
Configure Document intelligence details control
The Document intelligence details control allows you to show the intelligence details associated with a single document. You can either embed the control to a document request form or to a document request lookup in a different form. To embed the control to a document request form, you need to pass the Document Id.
Add the Document intelligence details control to a document request form
Sign into Power Apps and go to your solution.
Go to Tables > Document request > Forms, and select the main form for hosting the control.
Create a 1-column tab for documents and select Expand first component to full tab.
Hide the Name field label and the Owner field.
Drag the Name field to the tab. Clear the Show only unused table columns option if it's already used.
Hide the Name field label.
Save and publish the form, and select Switch to classic.
Select the Name field.
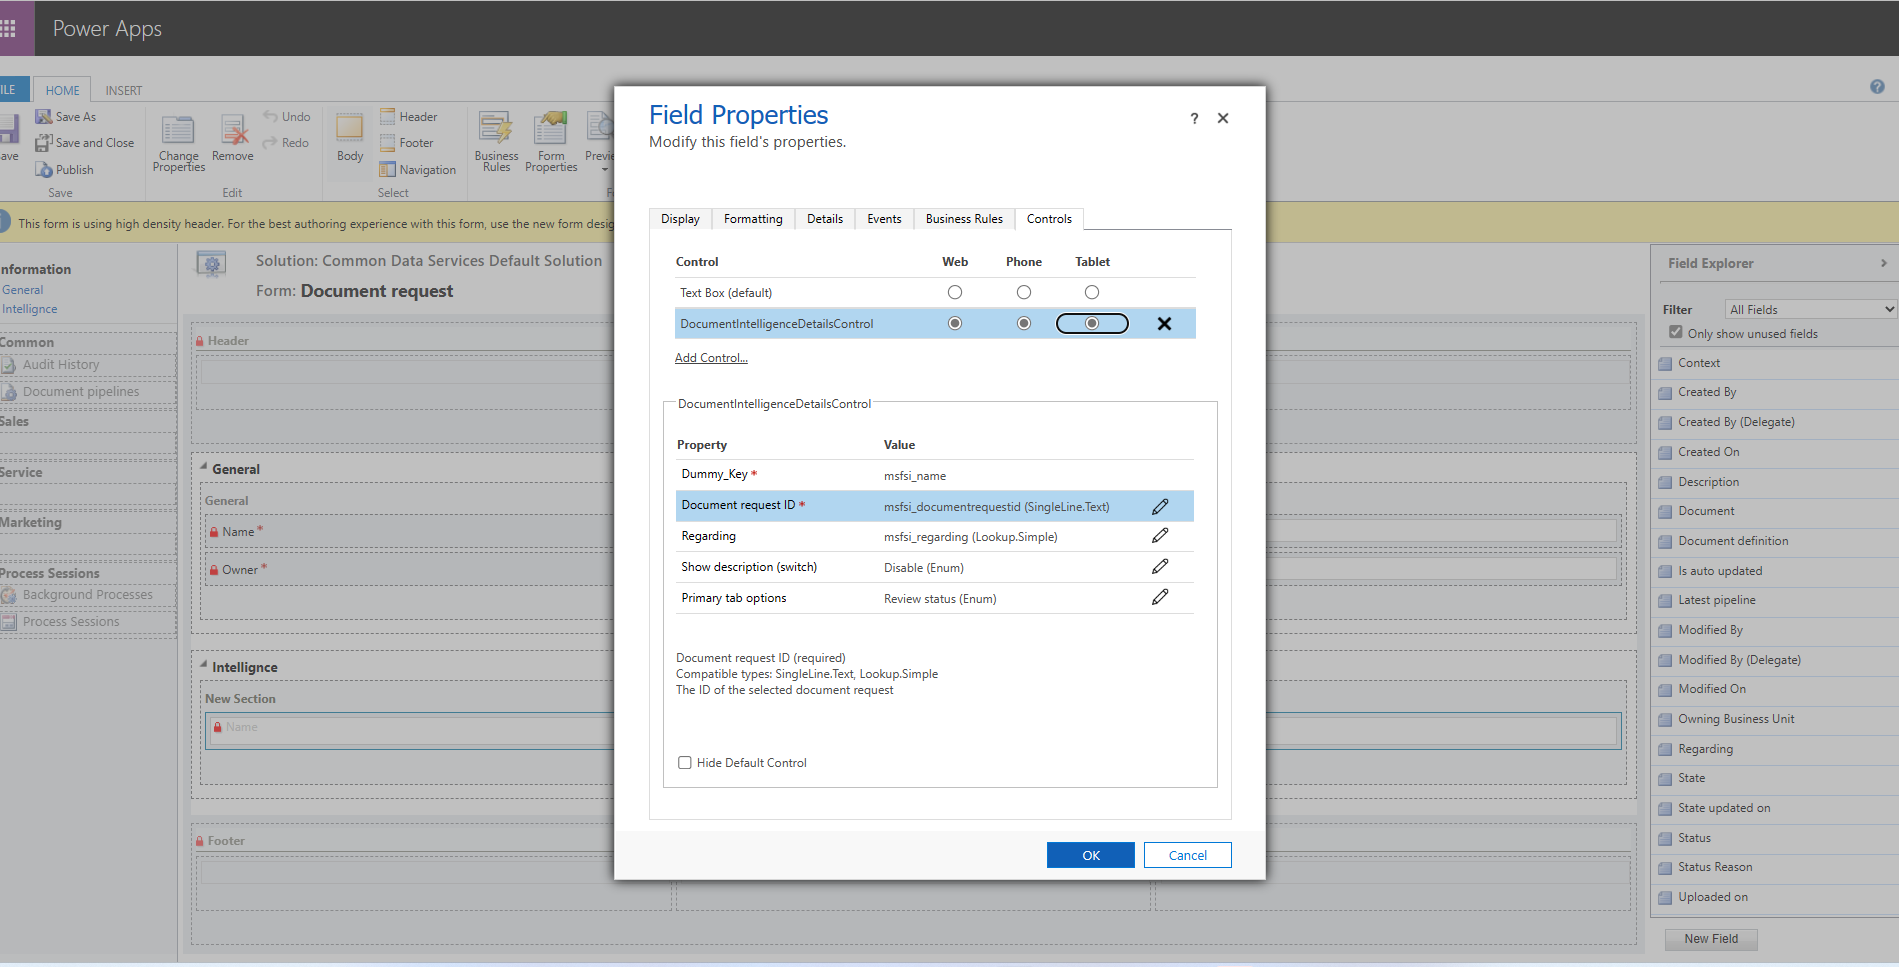
In the field properties, switch to the Control tab and select Add control.
Select DocumentIntelligenceDetailsControl. Select the form factors to which you want to add the control: Web, Phone, and Tablet.
Configure Document request ID as msfsi_documentrequestid.
Configure Regarding as msfsi_regarding.
Select Save and publish.
Go to the single document request entity and view the result.