Perform post-deployment configuration tasks (optional)
This article outlines extra optional steps that you can take after successful deployment and configuration of Fundraising and Engagement. With these optional steps, you can set up credit card payments and import sample data. These steps are the same whether you used the Microsoft Cloud for Nonprofit installer or followed the manual steps.
Set up credit card payments
Note
If your organization is going to accept credit card payments, follow these steps to set up credit card payment processing. Otherwise, skip this section.
You need to complete the steps in this section to support credit card payments in Fundraising and Engagement. First, you set up a payment processor record in the Fundraising and Engagement Power Platform app. Then you move the payment processing configuration to Azure.
Set up a payment processor
This section walks you through the process of setting up any of the following payment processors:
- Stripe payment gateway (Payment Intents or legacy Charge API)
- Moneris payment gateway
- iATS payment gateway
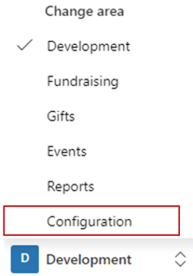
In Fundraising and Engagement, select Configuration under Change area.
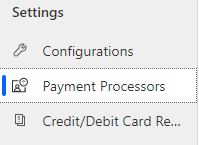
Under Settings, select Payment Processors.
Select New at the top of the screen.

Set up the payment processor record.
Note
Most organizations only have one payment processor, but you may add any payment processors that you have registered with.
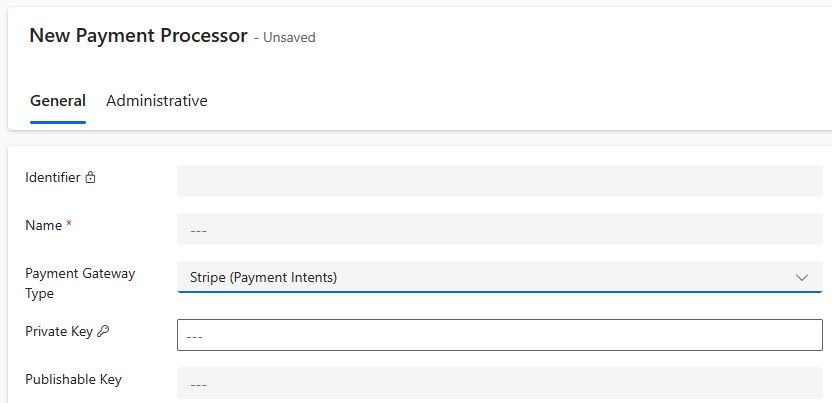
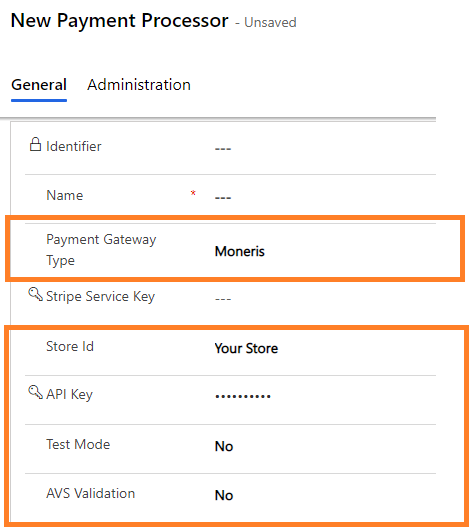
Enter the Name and Payment Gateway Type. In addition, enter the following information unique to each payment processor:
Stripe payment gateway: For the Stripe Payment Intents configuration, enter the Private Key and the Publishable Key supplied with your Stripe registration.
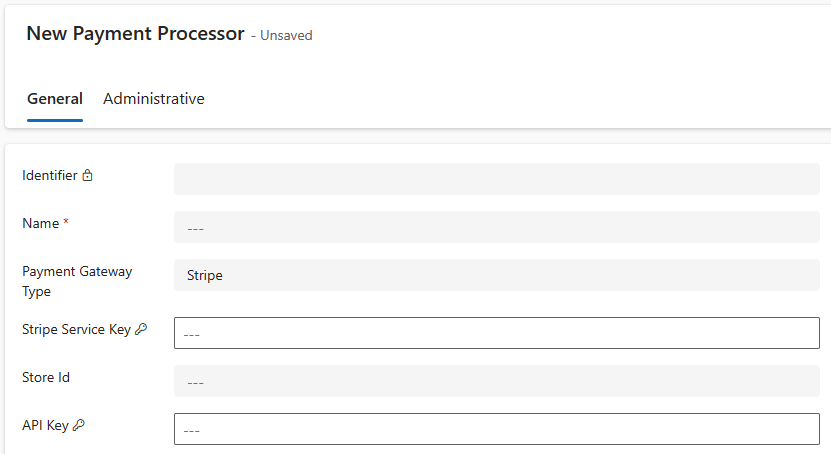
For the legacy method, you only need to name the payment processor and add the Stripe Service Key.
Note
The Stripe Service Key in the legacy experience is the same as the Private Key in the new Payment Intents experience.
Only the information in the following table is sent to Stripe with the payload.
Field Type Description Amount Long Positive integer in the smallest currency unit (100 cents to charge $1 or 100 to charge ¥100, a zero-decimal currency). Source String The payment method (credit card) authentication token. Currency String Three-letter currency code. Description String The invoice identifier. Currency (optional) String Only used for recurring transactions to hold the ID of the customer. Moneris payment gateway: The Store ID and API Key supplied with your Moneris registration.
Note
The Moneris payment gateway only works with Canadian dollars.
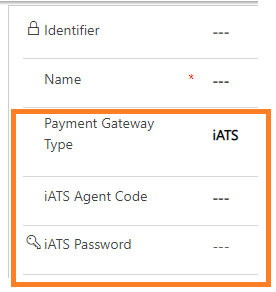
iATS payment gateway: The iATS Agent Code and iATS Password supplied and set up with your iATS registration.
Select Save at the top of the screen.
Associate the payment processor with a configuration record
In this section, you associate the newly created payment processor record with a configuration record. This action enables you to use credit card payments in Fundraising and Engagement.
Locate the configuration record that you wish to update under Active Configurations.
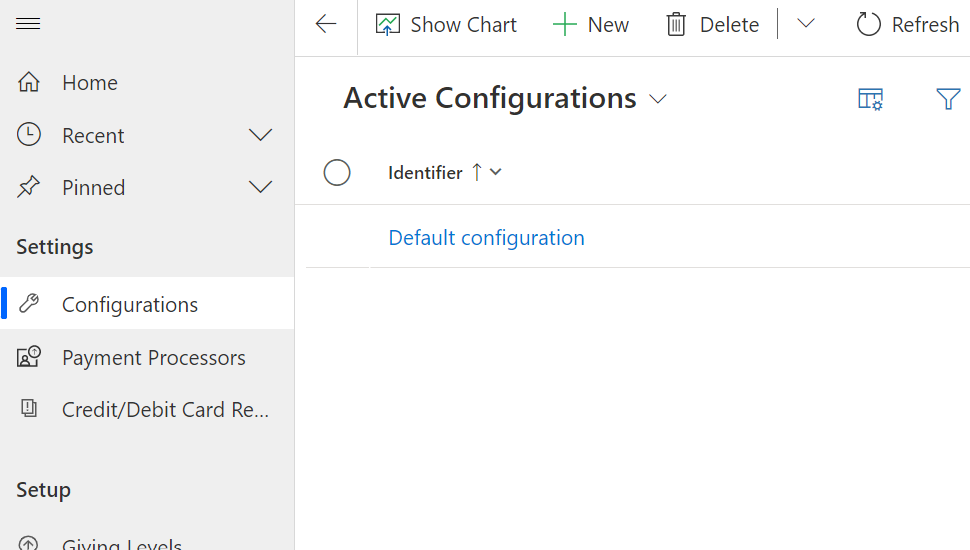
Open your configuration record.
Under Payment Processor, select your newly created payment processor record. If you have multiple payment processors, select the one that you want to associate with this configuration record.
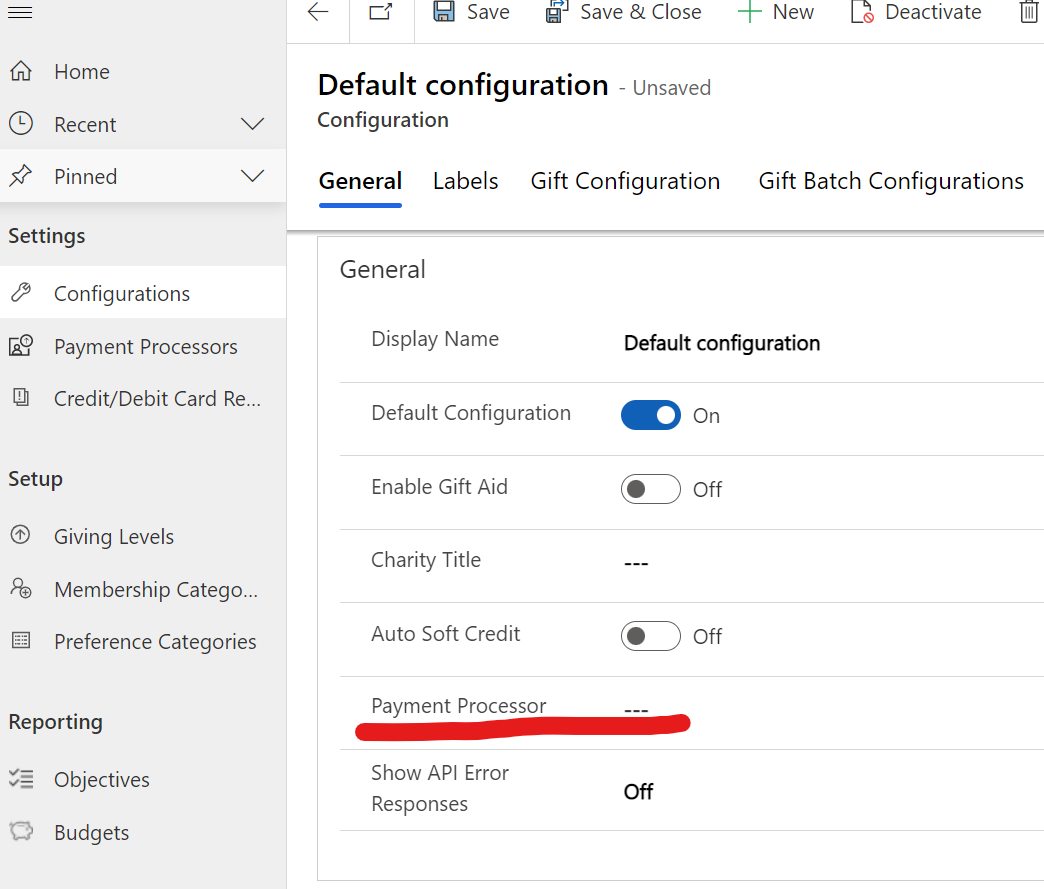
Select Save.
Transfer payment processor credentials to Azure
Make sure you have the following information available:
- <RESOURCE_GROUP>: The Microsoft Azure resource group name where Fundraising and Engagement is deployed
- <DYNAMICS_URL>: The URL of your Dynamics 365 environment
Follow the steps in Configure Azure Cloud Shell
Copy and paste the following bash script into the Azure Cloud Shell window you just set up, adding your resource group and URL to replace <RESOURCE_GROUP> and <DYNAMICS_URL>, and then select Enter.
bash ./importFromEnvironment.sh --group <RESOURCE_GROUP> --url <DYNAMICS_URL>Your Azure environment is updated with the payment processor information.
Important
If you don't run this bash script, the payment processor won't work.
Remove sensitive payment processor information
The payment processing information is now stored in your Microsoft Azure environment. The information is no longer needed in the Fundraising and Engagement Power Platform app. We recommend that you delete any sensitive information from the payment processor record for security reasons.
In Fundraising and Engagement, select Configuration under Change area.
Under Settings, select Payment Processors.
Open the payment processor, delete the following sensitive information, and then select Save.
Stripe Moneris iATS Stripe Service Key API Key iATS Agent Code API Key iATS Password
Important
If you move to a different payment processor or update any information, you'll need to rerun these steps.
Payment processing is now set up and ready to use.
Import sample data
Note
If you want to practice using sample data, follow these steps to download and import a sample dataset. Otherwise, skip this section.
Download the sample dataset from the Fundraising and Engagement GitHub repository. Use the FundraisingAndEngagement.Sample.Data.zip file in the samples folder.
Make sure a valid configuration record exists in the application and is associated with the user account before you import data.
To deploy the sample data set, you need the Configuration Migration tool, from the Power Apps developer tools. Download the tool from developer tools and resources.
Run the Configuration Migration tool.
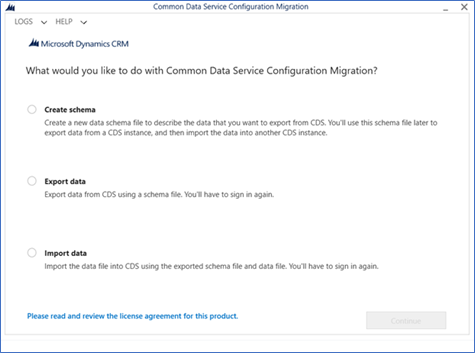
Select Import data, and then select Continue.
Select Display list of available organizations, and then select Login.
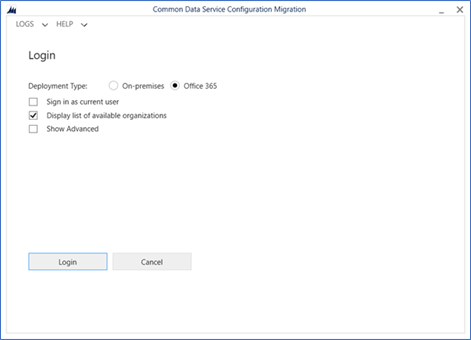
Select your environment from the list of available organizations, and then select Login.
After you sign in, you'll be prompted to select a sample data file to import.
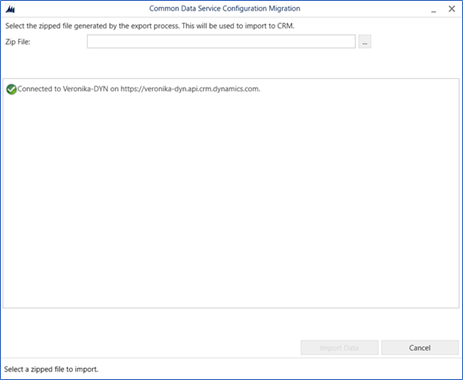
Select the FundraisingAndEngagement.Sample.Data.zip file that you downloaded, and then select Import Data.
Verify that the sample data is visible in the Fundraising and Engagement app.
See also
Configure Fundraising and Engagement
Set up and configure Microsoft Cloud for Nonprofit
Overview of Fundraising and Engagement