Deploy Fundraising and Engagement with installer
This article helps you set up or upgrade a new instance of Fundraising and Engagement within your Power Platform and Azure environments. We recommend using this method, which uses the Microsoft Cloud for Nonprofit installer. The Fundraising and Engagement solution doesn't update automatically, so you need to use these instructions whether you're upgrading or installing for the first time.
The instructions differ, depending on whether you're upgrading or installing a new version. In these cases, we've labeled the instructions as New deployment or Upgrade only. Instructions that don't have one of these labels apply to both scenarios.
We recommend taking the following actions, depending on whether you're deploying for the first time or upgrading:
New deployment: Read through this article to ensure you have all the information you need before you start to deploy.
Upgrade only: Ensure you have all the values used in your existing Microsoft Azure deployment to ensure a smooth upgrade.
Deploy or upgrade an installation
Prerequisites
It's important to review the following prerequisites before you deploy or upgrade through the Microsoft Cloud Solution Center:
You must be a Microsoft Power Platform admin, Dynamics 365 admin, or a tenant admin to deploy solutions in the Solution Center.
We recommended that you create a Power Platform environment in the admin center before the installation.
You must have licenses for the Microsoft Cloud for Nonprofit solutions and apps that you’re deploying. If your organization doesn't have the necessary licenses, you're notified during the deployment process. For more information, go to Licensing for Microsoft Cloud for Nonprofit.
You must have an active Azure subscription and have an Owner role assignment for the subscription you're deploying Fundraising and Engagement to. For more information, go to Azure role assignments.
Upgrade prerequisites and notes:
Go to What's new in Microsoft Cloud for Nonprofit and review the latest release before upgrading your environment to that version.
When you update to the most recent release from an older release, you might need to run all the update actions needed for each intermediate release.
If you customized your solution, you need to remove all dependencies on Fundraising and Engagement before upgrading. Go to "Can't Uninstall Solution" error occurs in Microsoft Dynamics 365 before proceeding.
The ConnectionSecrets--DataverseConnectionString has been removed from Fundraising and Engagement and is no longer used.
Configure Azure Cloud Shell
New deployment: If you plan to set up payment processing, we recommend configuring an Azure Cloud Shell instance. Configuring the instance helps you run the preprepared scripts to enable that process.
Upgrade only: You only need to follow this step if you previously didn't use payment processing and now want to use payment processing. If you previously used payment processing, then you can skip this step.
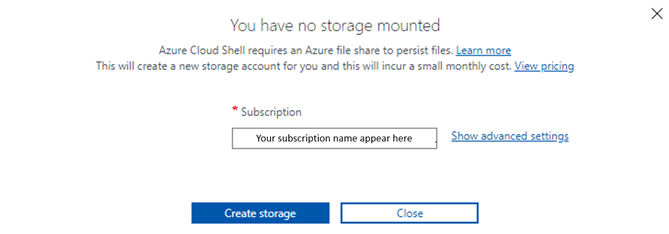
Open Azure Cloud Shell. If you get a message that says You have no storage mounted, select Create storage. This message doesn't appear if you have already set up storage.
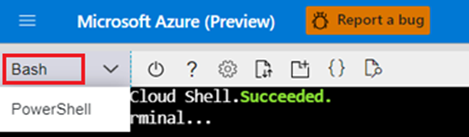
In the top-left corner, select Bash.
Copy the following command in the open Azure Cloud Shell window, and then select Enter.
wget -O - https://aka.ms/mc4n/bootstrap | bashCopy the following command in the open Azure Cloud Shell window, and then select Enter.
find . -type f -iname "*.sh" -exec chmod +x {} \;Copy the following command in the open Azure Cloud Shell window, and then select Enter.
az loginFollow the instructions to finish authenticating your account with Cloud Shell.
Deploy or upgrade Fundraising and Engagement
Navigate to the Microsoft Cloud Solution Center.
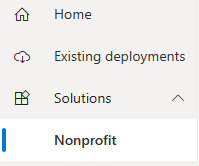
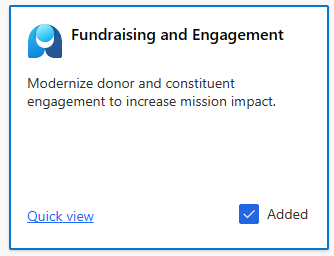
On the left pane, Select Solutions and then select Nonprofit from the expanded menu. The Fundraising and Engagement tile displays. To see more information about Fundraising and Engagement, select Quick view.
Select Add to download or upgrade to the latest version of Fundraising and Engagement.
Select Deploy.

The different steps to follow to set up Fundraising and Engagement display.
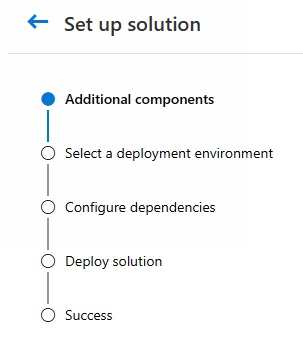
Add components
If you have a Dynamics 365 Customer Insights license, then Fundraising and Engagement Marketing insights is a free optional component that can help fundraisers understand which journeys a donor has participated in and their interactions with those journeys. These insights help fundraisers make better engagements with the donor in the future.
Select the radio button if you want to include Fundraising and Engagement Marketing insights. You can install this component later through existing deployments in Solution Center if you want.
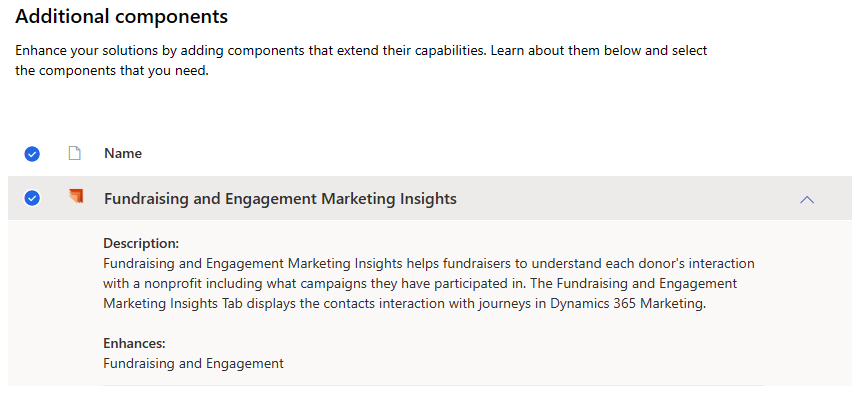
Select either Next or Skip to proceed.

Set a deployment environment
All fields are mandatory on this page and you must complete them for both new installations and upgrades. Be sure to scroll down to view all of them.
New deployment: You need a Power Platform environment to complete this section.
Upgrade only: If you previously used a Power Platform environment, you need to deploy to the same environment.
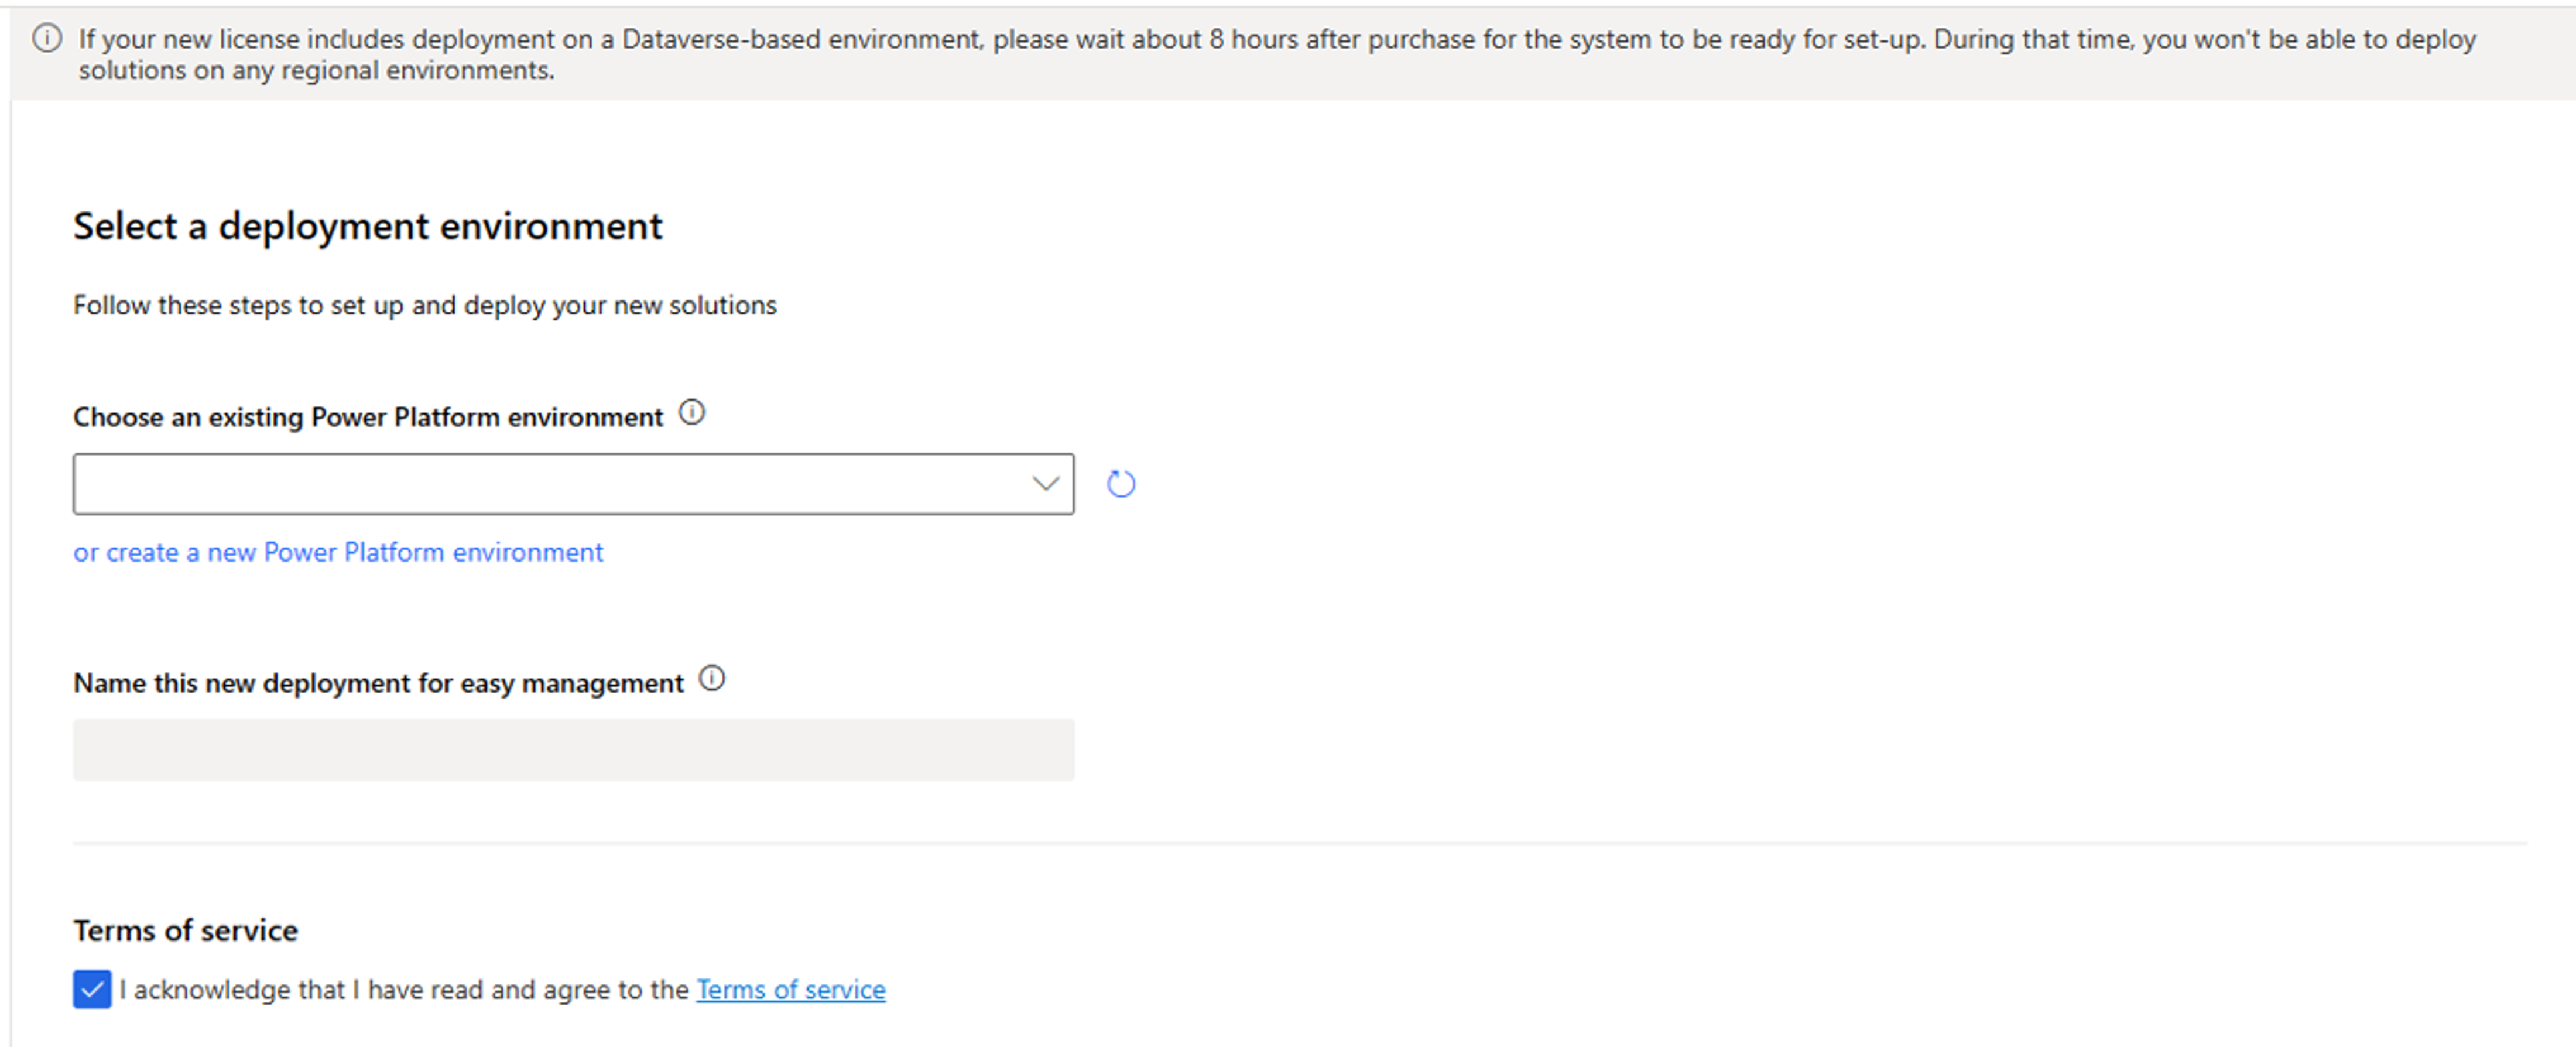
Choose an existing Power Platform environment: Select an existing environment or Create a new environment in the Power Platform admin center. You experience a delay between creating the platform and the platform appearing in the drop-down list.
 .":::
.":::Enter a user-friendly name for your deployment for easy identification and management.
Read and accept the Terms of service.

Select Next to continue.

A message appears while the system checks for any dependencies

Configure dependencies
The Configure dependencies page shows the results of the checks and any problems with the setup information.
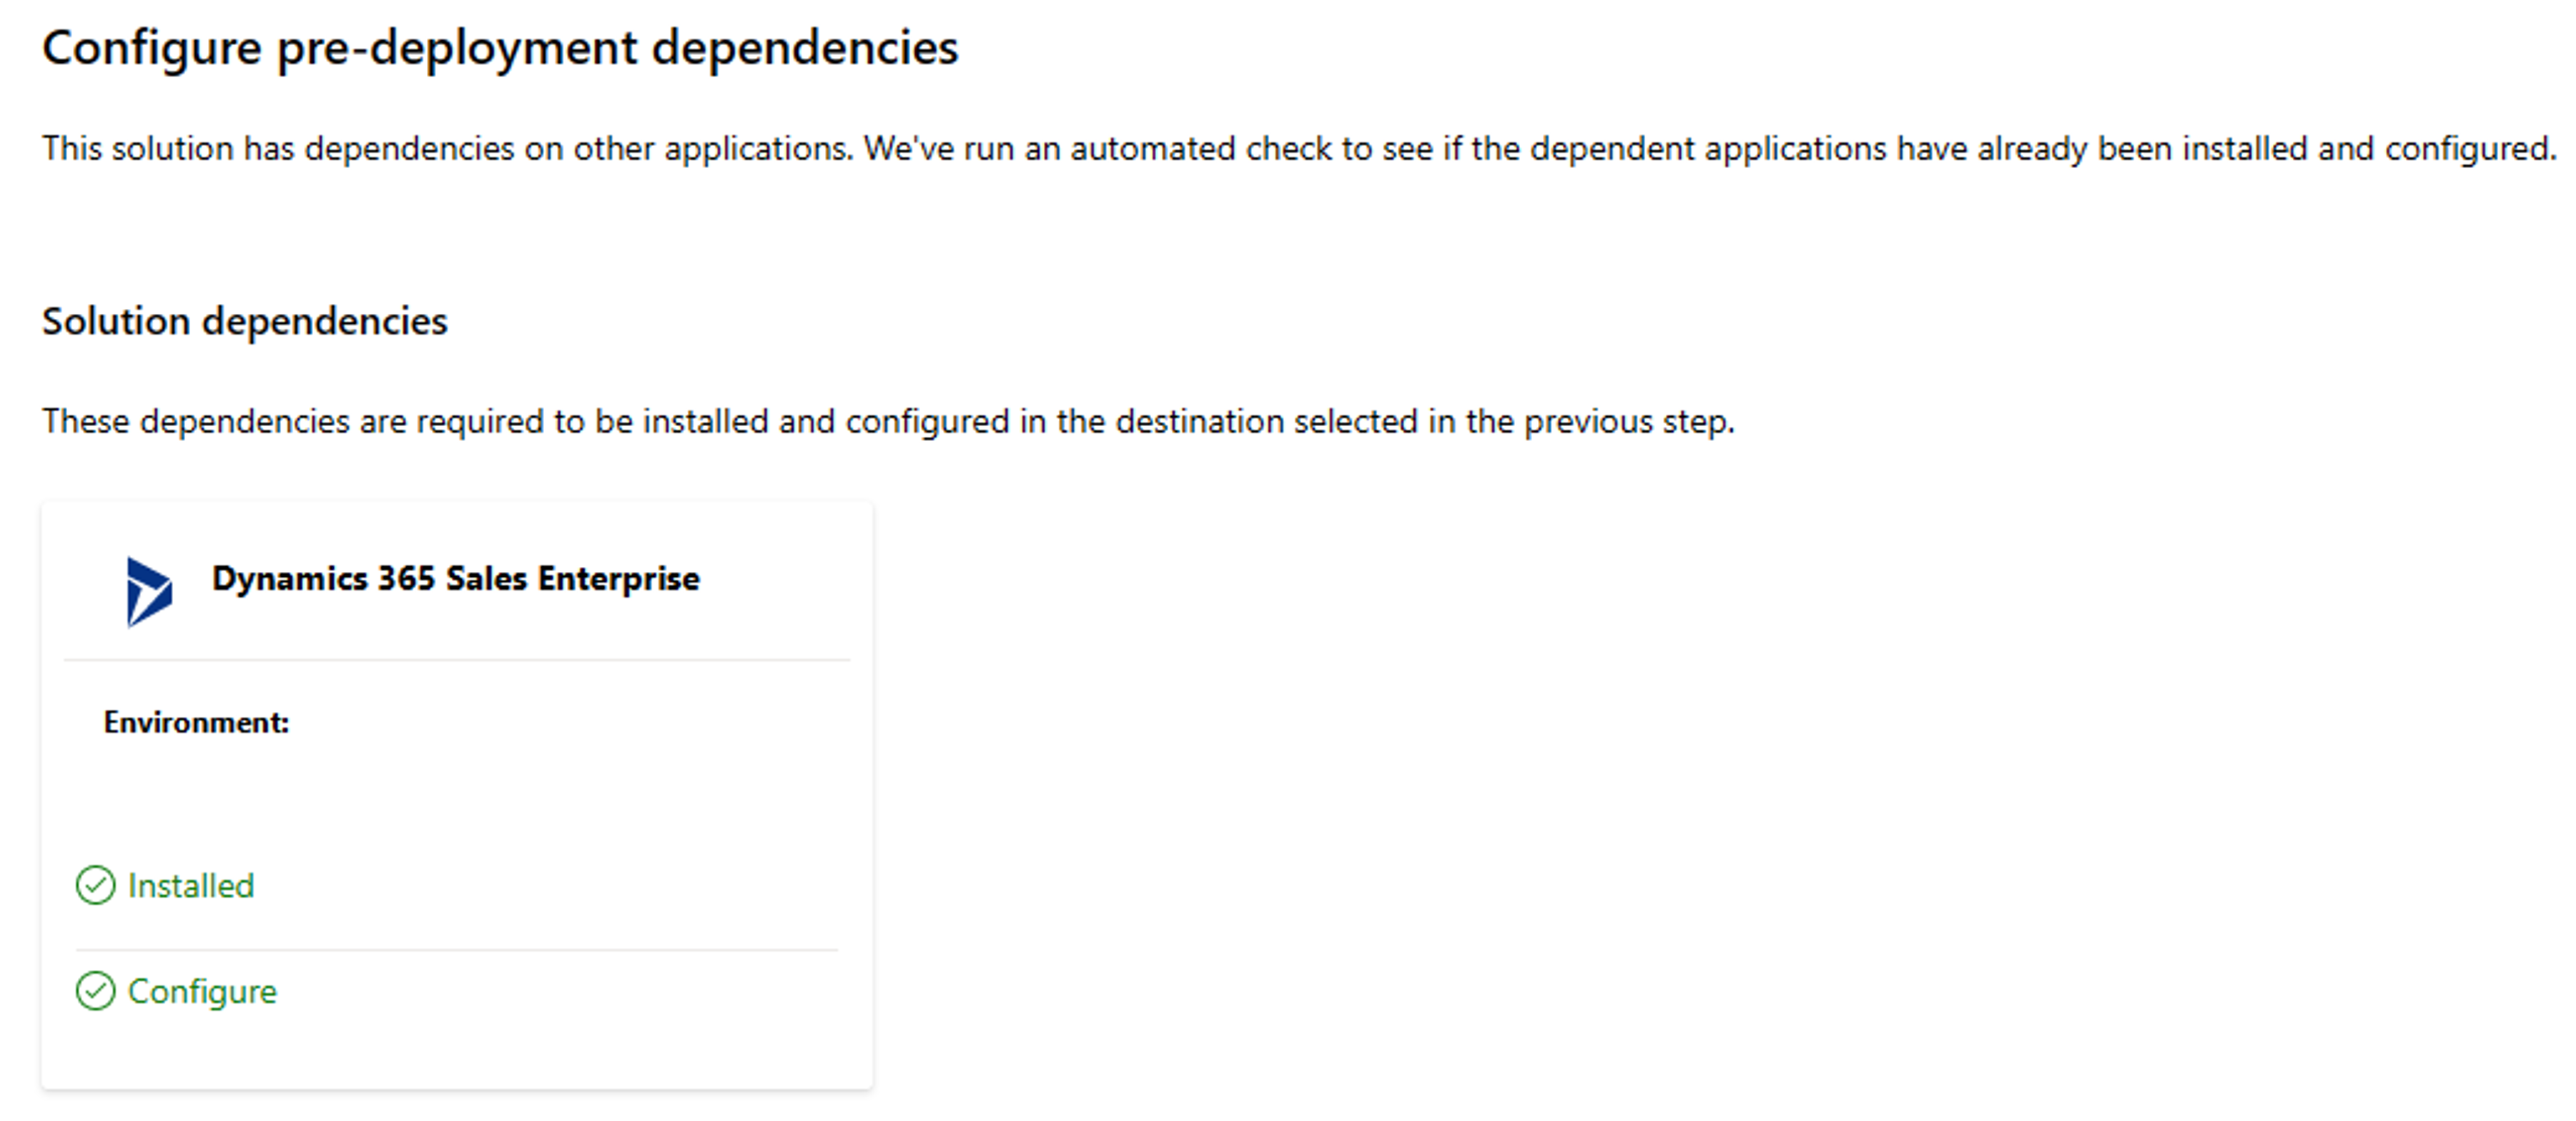
Select Deploy.

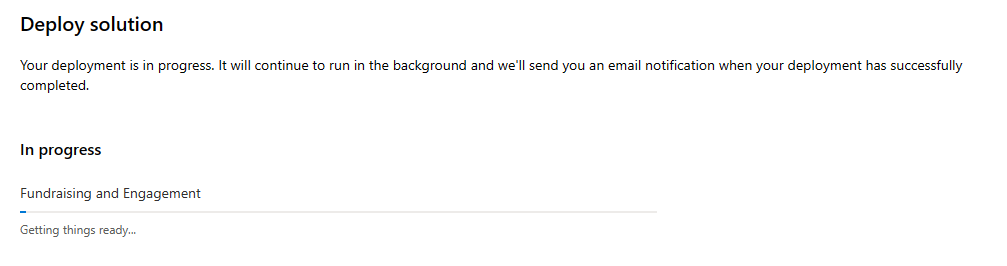
Deploy solution
On the Deploy solution page, a progress message appears while the deployment happens in background.
If the deployment is successful, a message displays saying that Fundraising and Engagement has successfully deployed.
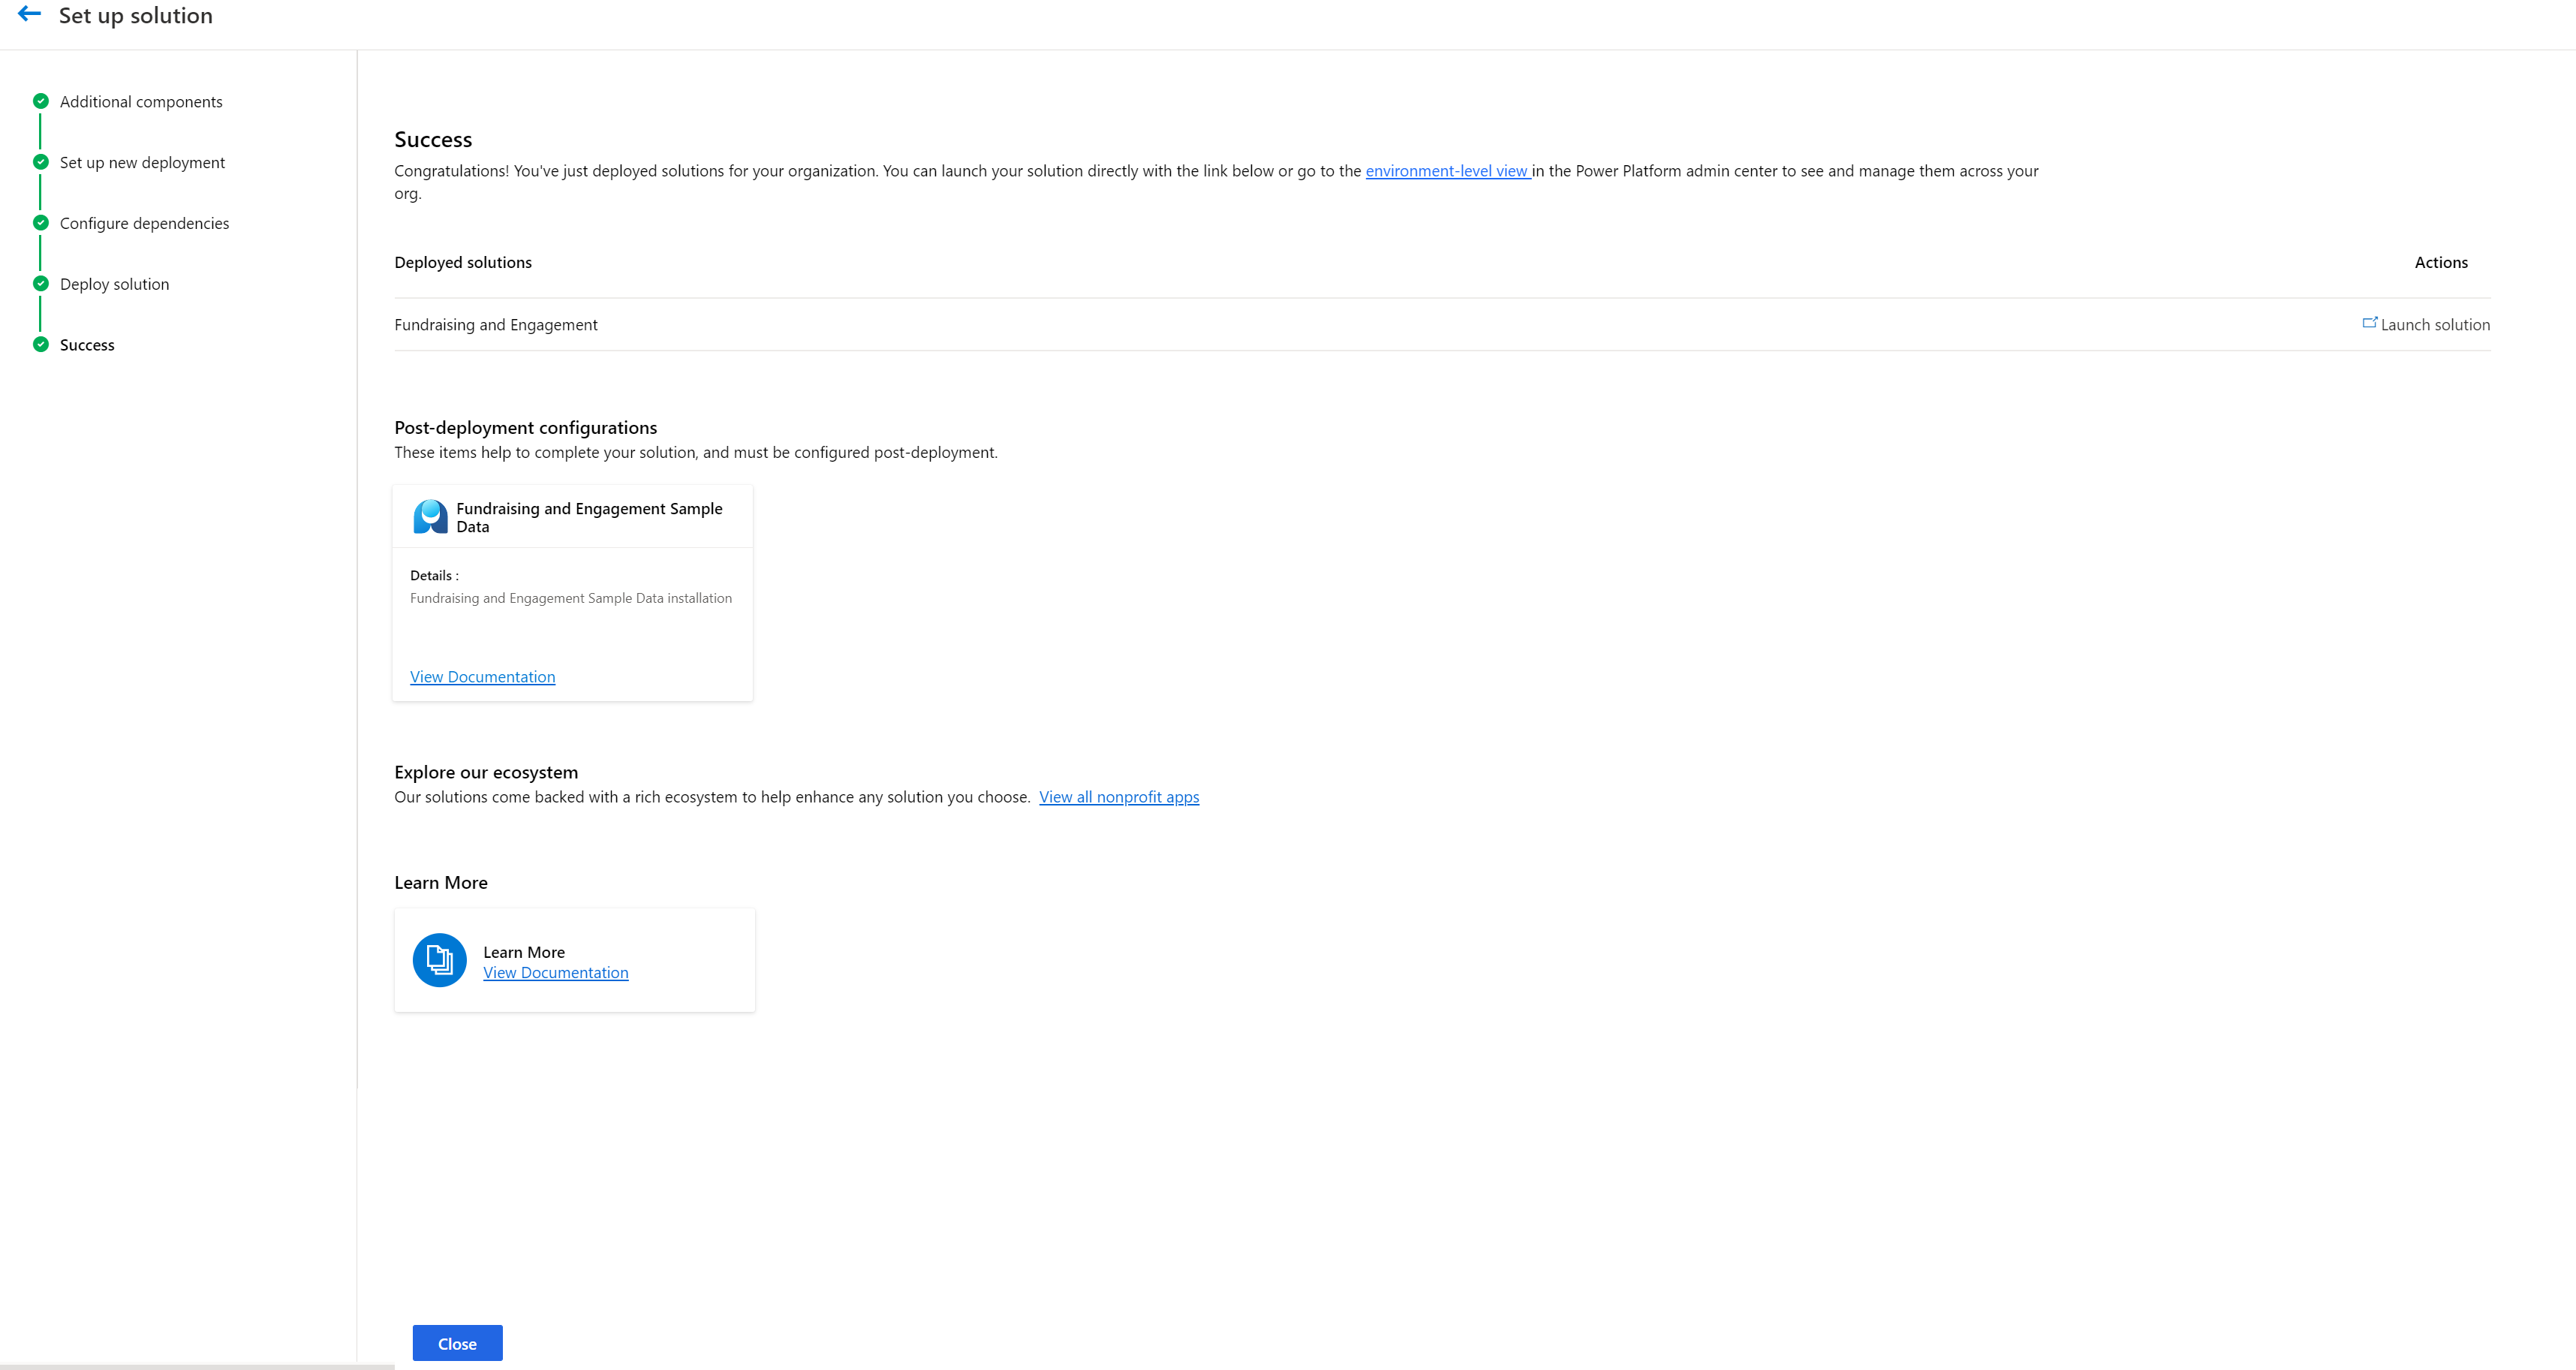
Select Fundraising and Engagement Configuration > Get it now to proceed with the Microsoft Cloud for Nonprofit installer.
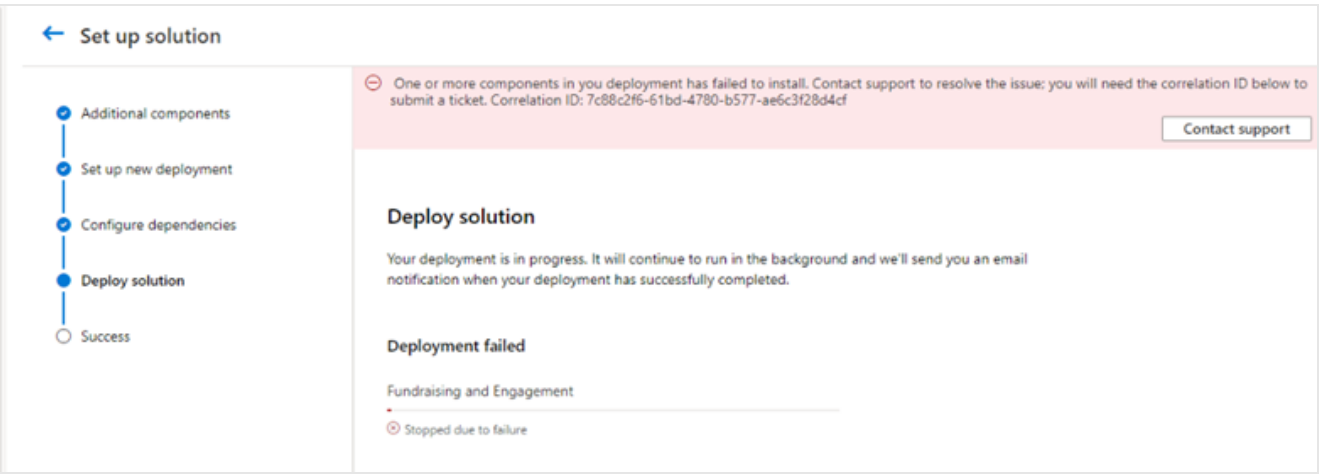
If the deployment is unsuccessful, a Deployment failed message displays. In this case, select the Contact support button.
Deploy or upgrade Fundraising and Engagement Azure Services
Prerequisites
New deployment:
- We recommend that you read through this guide to ensure you have all the information you need before you start to deploy.
- We recommend a dedicated resource group.
Upgrade only: Ensure that you have all the previously used values from your existing installation to ensure a smooth upgrade.
- Resource group: Note down your existing resource group.
- Client Name: You can find your Client Name in the Azure portal. Navigate to selected Resource Group and inspect the prefixes for existing resources for Fundraising and Engagement. They appear in the form of {prefix}-{resource}-{suffix}, where {prefix} is the existing Client Name to use for upgrading Fundraising and Engagement. For example, for resources named jl1-AI-prod and jl1-AppServicePlan-prod, jl1 is the prefix for the resources and is the Client Name value for upgrading.
- Environment: The value stored under a field called Env. You can find it in the Azure portal. Navigate to selected Resource Group and inspect the suffixes for existing resources for Fundraising and Engagement. They appear in the form of {prefix}-{resource}-{suffix}, where {suffix} is the existing Env value to use for upgrading Fundraising and Engagement. For example, for resources named jl1-AI-prod and jl1-AppServicePlan-prod, prod is the suffix for the resources and is the Env value for upgrading.
Installation
Navigate back to the Microsoft Cloud Solution Center.
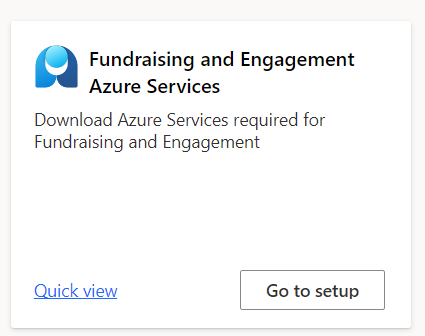
On the left pane, select Solutions and then select Nonprofit from the expanded menu. The Fundraising and Engagement Azure Services tile displays. To see more information about Fundraising and Engagement, select Quick view.
Select Go to setup, which takes you to the Azure portal to set up Azure services required for Fundraising and Engagement.
The Custom deployment page displays. All fields are mandatory, and you need to scroll down to view all of them.
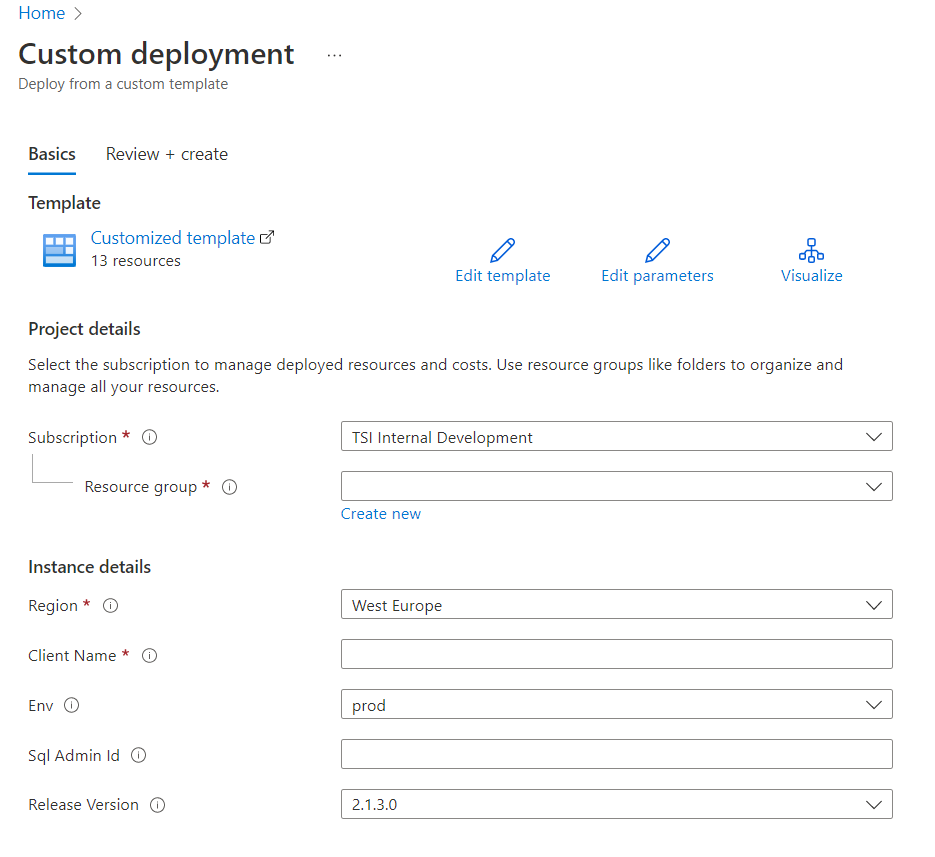
Subscription: Select your Azure subscription from the Subscription dropdown. You must have the role of Owner on the subscription.
Resource Group:
- New deployment: If you already have a resource group, select it from the Resource Group dropdown. Otherwise, select Create new. You need to refresh the list using the refresh button on the right of the drop-down menu to see new resource groups.
- Upgrade Only: Use the same resource group as your previous installation. Selecting a different resource group creates a new installation of Fundraising and Engagement.
Region: Select a region.
Client Name:
- New deployment: Enter the organization name.
- Upgrade Only: Use the same Client name as your previous installation, otherwise, the deployment creates new resources in the selected resource group for installing Fundraising and Engagement.
Env:
- New deployment: Select the type of environment you're setting up. The mappings correspond to frequently used environments. If in doubt, select prod for production.
- Upgrade Only: Select the same Env used for your previous installation of Fundraising and Engagement. Otherwise, the deployment creates new resources in the selected resource group for installing Fundraising and Engagement.
Sql Admin Id:
Upgrade Only: Enter the word existing.
New deployment: Enter the Microsoft Entra ID user or Group ID of the SQL server admin. To find the reference number:
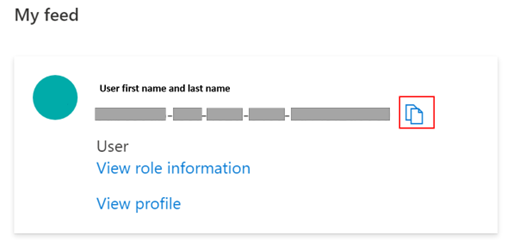
- Navigate to the Microsoft Entra ID admin center. You may need to sign in when you open the page.
- Locate the user and find the Object ID for the user account. The Object ID is a 30-character reference number with a mix of letters and numbers separated into five groups by dashes.
- Select the Copy to clipboard icon and paste the Object ID into the Sql Admin ID field.
Release Version: Select the latest version from the Release Version list. We recommend that you always deploy the latest version unless there's a specific reason not to.
Select the Review + create button and wait until the ARM templates deploys. If the deployment fails, you might need to manually remove Azure components, because you can't currently roll back Azure deployments.
Open Fundraising and Engagement to complete Azure services configuration. You can select the notification bar stating that your configuration isn’t complete, or you can open the Microsoft Cloud for Nonprofit installer from the deployment success page. The installer automatically configures Azure to work with Fundraising and Engagement.
Configure Azure services
We recommend that you continue the steps in this article to automatically configure Azure services with the Microsoft Cloud for Nonprofit installer. If you prefer, you can set up the system manually.
Run the Microsoft Cloud for Nonprofit installer
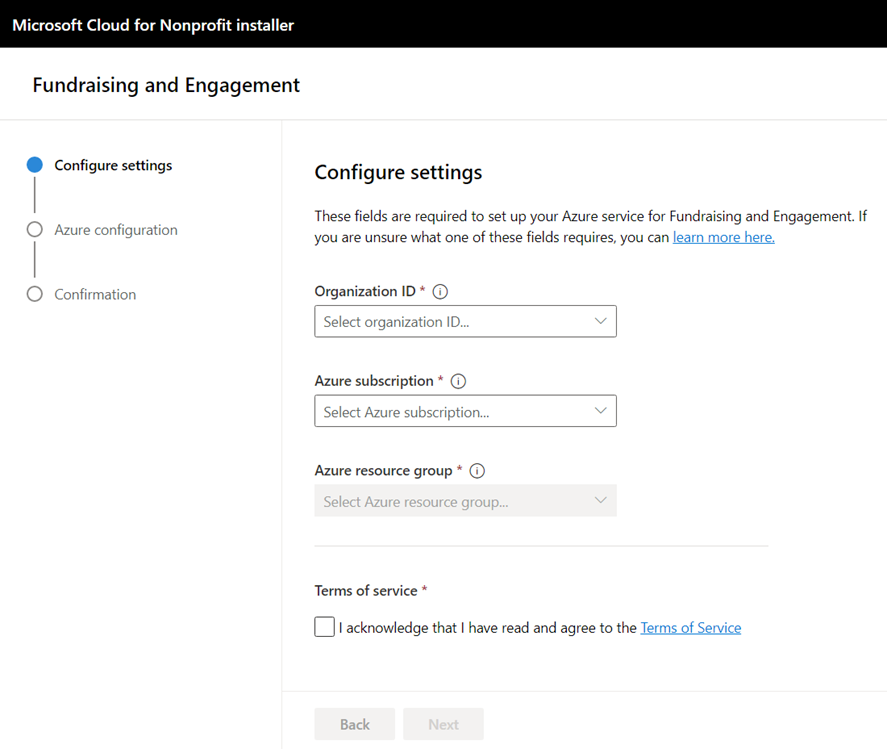
On the Configure settings page, complete the following information, and then select Next:
- Select your environment in the Organization ID dropdown.
- Select your Azure subscription from Azure subscription dropdown.
- Select your resource group from the Azure resource group dropdown.
- Under Terms of service, select the check box.
A message appears confirming service configuration in the background.

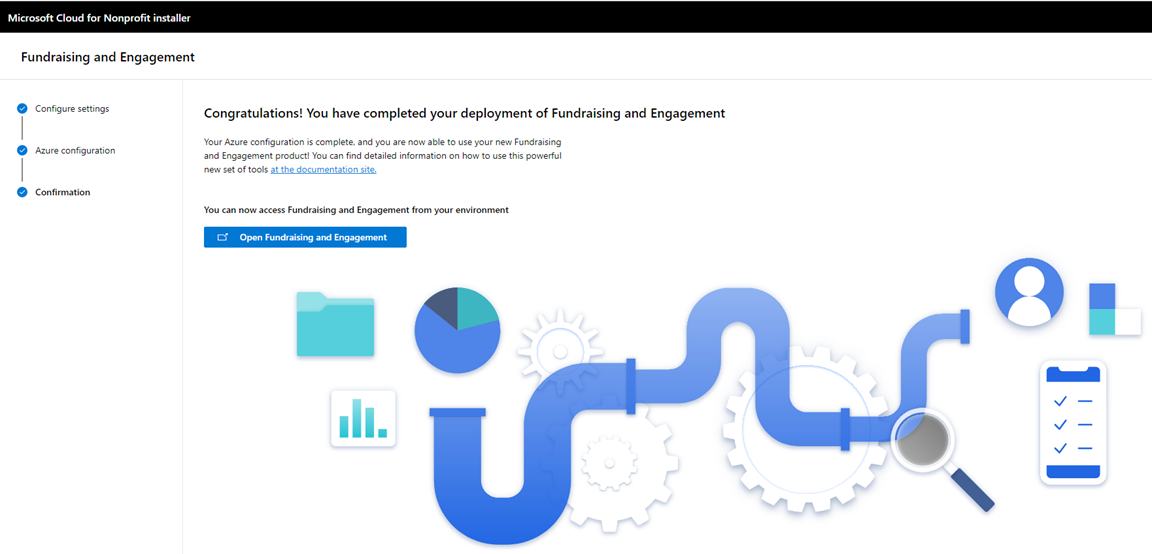
If everything configures successfully, the confirmation page appears. Select Open Fundraising and Engagement to continue setting up the system.
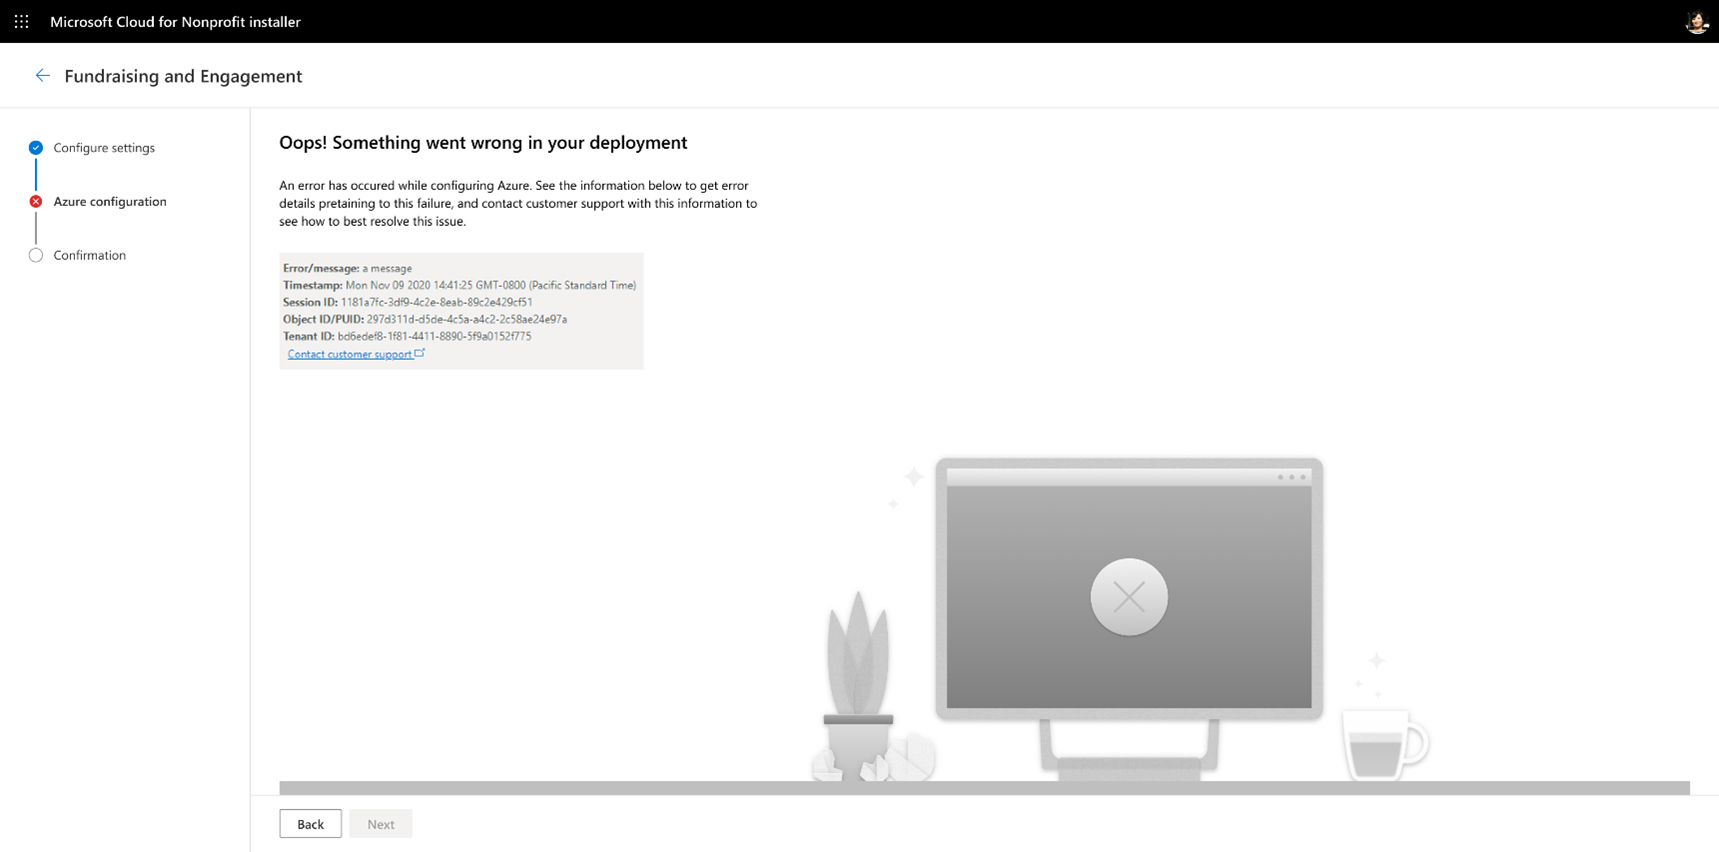
If the configuration fails, you need to restart the deployment or contact support. Ensure you provide all the information in the error message when contacting support to help in diagnosing the issue.
Next steps
- New deployment: To complete your deployment, go to Post-deployment configuration for Fundraising and Engagement.
- Upgrade only: Continue with this article to finish setting up your upgraded version of Fundraising and Engagement.
Move payment processor credentials to Azure key vault (Upgrade only)
If you're upgrading from a version older than 2.0.3.0, you also need to perform a manual migration of payment processor credentials. You can skip this if you have no payment processors configured.
To continue, you need the following information:
- <RESOURCE_GROUP>: The resource group name where Fundraising and Engagement is deployed.
- <DYNAMIC_URL>: The URL of your Dynamics 365 environment.
Follow the steps in Configure Azure Cloud Shell to prepare the Cloud Shell environment.
Open Azure Cloud Shell.
In the top-left corner, select Bash.
To import all your existing payment processor credentials to Azure Key Vault, run the following commands in the Azure Cloud Shell, swapping in your values for <RESOURCE_GROUP> and <DYNAMICS_URL>:
bash ./importFromEnvironment.sh --group <RESOURCE_GROUP> --url <DYNAMICS_URL>The payment processor credentials need to be removed from Dynamics 365.
- In your Fundraising and Engagement environment, select the Configurations tab on the bottom left menu.
- In Settings (left menu), delete these field values for each payment processor:
- Stripe Service Key
- API Key
- iATS Agent code
- iATS Password
Each time you make changes to the payment processor configuration, you need to rerun these steps.
Next Steps
- You have a successful deployment and used the installer: To complete your deployment, go to Post-deployment configuration for Fundraising and Engagement.
- You installed using the manual method and did not use the installer: Continue with this article to finish setting up your upgraded version of Fundraising and Engagement.
Unassign application user from Fundraising and Engagement Credentials column security profile
This section removes any extra privileges from the Dataverse user account. If you used the installer to upgrade then this step has already been done and should be ignored.
- In the Power Platform admin center, select Environments, and then select the Environment where you installed Fundraising and Engagement.
- Select the Settings button from the command bar.
- Expand the Users + permissions section.
- Select Column Security Profiles.
- Open the Fundraising and Engagement Azure App user profile. On the Users tab, take note of the username containing azure2dataverse.
- Return to Column Security Profiles.
- Open the Fundraising and Engagement Credentials profile. On the Users tab, remove the user you previously noted.
To complete your deployment, go to Post-deployment configuration for Fundraising and Engagement.
Troubleshoot the deployment
Failure occurs during ARM template deployment
The Solution Center deployment can't roll back an ARM template deployment. If the Solution Center ARM template fails because it didn't meet the prerequisites, you might need to manually remove created components. Then you can try the deployment again.
Incorrect parameter value entered when updating to a new version of ARM template
When you deploy a new version of the ARM template during the update procedure, you must enter values exactly according to instructions. The following list outlines the problems that incorrect values can cause, and how to address them:
- Client Name and Env: Entering values for Client Name or Env that are different from the previous installation can result in creating a second set of Azure resources (for example, two SQL servers instead of one, with the associated cost) in the target resource group. In this case, you need to manually delete the second set of resources and redeploy the ARM template.
ARM template deployment problem due to incorrect resource naming
Should you see an ARM template deployment failure due to naming problem, ensure that Client Name only uses alphanumeric characters. You can't use characters such as dot or dash.
Naming and unique name concepts
A failure during deployment of the template can occur because of the naming conventions used during the template setup. Resource names are externally addressable and must be unique. The template generates unique names for the created applications. If a namespace for a component within the template is already in use, the deployment fails. In this case, you must modify the organization name to create a unique naming convention.
For details on best practices for naming, go to Azure naming conventions.
Reaching maximum path length when deploying Azure components
If you're using Windows, the build or deployment of Azure components in Visual Studio might fail if the path of files created during the build reaches the maximum Windows path length. To avoid this issue, move the root of the fundraising-and-engagement Git repo to a different location in your file system with a shorter path.
See also
Configure Fundraising and Engagement
Set up and configure Microsoft Cloud for Nonprofit
Overview of Fundraising and Engagement
Get started with Microsoft Cloud for Nonprofit solutions powered by Dynamics 365