Note
Access to this page requires authorization. You can try signing in or changing directories.
Access to this page requires authorization. You can try changing directories.
Customize the opportunity close form so that sellers can capture details about the closed opportunity such as reason for closure and profit margin. These details help sales managers to draw key insights and develop a better strategy.
Prerequisites
- Enable customization of the Opportunity Close form
- Customizations are only supported on apps built on Unified Interface. If you're using a custom app, ensure that it's built on Unified Interface.
How to customize the Opportunity Close form
Step 1: Open the solution explorer page
The solution explorer page is where you can create and manage customizations.
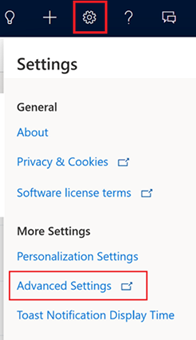
In the sales app, go to Settings > Advanced Settings.
Go to Customization > Customizations > Customize the System.
Step 2: Create a custom field in the Opportunity Close entity
The Opportunity Close entity has certain out-of-the-box fields. If the information you want to capture isn't available in the out-of-the-box fields, you can create a custom field. For example, if you want to capture the profit margin for all the won opportunities, you can create a new field called Profit Margin.
Note
If your organization is using a custom app, ensure that the Opportunity Close entity is added to the custom app module. Learn more about adding an entity to a custom app module
In the left pane, expand Tables and then Opportunity Close, and select Forms.
Note
If you are using the classic view, under Components, expand Entities, and then Opportunity Close entity, and select Forms.
Select the form to which you want to add the custom field.
On the Table columns pane, select + New table column, and enter a Display Name to generate the Name. Learn more about how to create and edit columns.
Save and publish the form.
When a field is added to the form, it's available for other forms of the same entity.
Step 3: Add the field to the Opportunity Close form
- Open the Opportunity Close form.
- Add the field to forms as required.
- For the Quick Create form type
- Add fields as required to the quick create opportunity close form.
Note
- You can’t delete or customize the out-of-the-box fields or entity relationships.
- Creating an Opportunity Close record (for example, from a related entity record or the Quick create menu) closes the related opportunity.
- Save and publish the form.
- Add fields as required to the quick create opportunity close form.
- For the Main form type
- Add fields as required to the main opportunity close form as added to the quick create form.
- Save and publish the form.
The Information form (main) is used to view details of the closed opportunity later on.
- For the Quick Create form type
Step 4: Pre-populate values in the Opportunity Close form from the corresponding opportunity
To pre-populate values in the Opportunity Close form from the corresponding opportunity, map the fields in the Opportunity entity to the corresponding fields in the Opportunity Close entity. For example, if you want to pre-populate the estimated revenue of the opportunity in the Opportunity Close form, you can do so by adding the estimated revenue field to the Opportunity Close form and then mapping the field to the corresponding field in the Opportunity entity. This mapping also ensures that the values are synchronized between the two entities.
If you want to pre-populate or synchronize values from other entities, use a plug-in or a client-side script to pre-populate and synchronize the values.
- In the solution explorer, go to Tables > Opportunity and under the Schema section, select Relationships.
- Open the Opportunity_OpportunityClose relationship schema with the One-to-many relationship type.
- In the Relationship window, Select Mappings.
- Select New to create field mapping between the Opportunity and Opportunity Close fields.
- Save the changes.
Step 5: Publish the customizations
After you're done with the customizations, select Publish All Customizations on the toolbar to make the changes available to users. Open your app and verify the changes.
Can't find the feature in your app?
There are a few possibilities:
- You don't have the necessary license to use this feature. Check out the comparison table and the licensing guide to see which features are available with your license.
- You don't have the necessary security role to use this feature.
- To configure or setup a feature, you need to have the Administration and customization roles
- To use sales-related features, you need to have the Primary sales roles
- Some tasks require specific Functional roles.
- Your administrator hasn't turned on the feature.
- Your organization is using a custom app. Check with your administrator for exact steps. The steps described in this article are specific to the out-of-the-box Sales Hub and Sales Professional apps.
Related information
Close opportunity as won or lost
Enable customization of the Opportunity Close form