Configure sales accelerator settings for sellers to personalize
The personalize sales accelerator settings allows sellers determine what happens when you complete an activity.
What can you configure?
As an administrator or sequence manager, you can configure sequences by using the following options to allow sellers to customize and personalize their experience:
Seller availability
Configure sellers’ availability to optimize workload by considering only business days and excluding the non-working days for the work list activities. Also, you can select the calendar type to identify the weekdays or work hours for sellers. Further, the wait time step also considers weekends and computes the activity schedule accordingly.
For example, let’s look at the following scenarios and understand the enhanced calendar and wait time computation work:
- With the calendar selection, the workflow works as:
- Task 1: Send an introductory email to customer (Wednesday)
- Task 2: Follow up with a call after three days (Task will be displayed on the following Monday, which is the subsequent working day).
- With the enhanced calendar and wait time calculation, the workflow works as:
- Task 1: Send an introductory email to customer (Wednesday)
- Task 2: Follow up with a call after three days (Task will be displayed on the following Tuesday considering that the wait time takes weekends as non-working days).
Note
Starting from April 1, 2024, you can't set the seller's availability through Outlook. More information: Deprecation of setting seller availability using Outlook calendar
Follow these steps:
Sign in to your sales app, and in the lower-left corner of the page, go to Change area
 > Sales Insights settings.
On the site map, under Sales accelerator, select Sequences.
On the Sequences page, select Settings.

On the Settings page, select Seller availability.
Turn on the Seller availability settings toggle.
Sellers can configure work hours, time off, and non-working hours through the Dynamics 365 calendar in personal settings. To know more on configuring sellers’ work availability, see Configure your work availability.
Under the Wait time computation selection, select Wait time computation from which the sequence steps consider seller’s work week and working hours for the activities to be adjusted based on business days.
Note
If you want the sequence steps to consider all days of the week, don’t select the Wait time computation option.
Select the option for wait time activity to skip non-work hours and move it to the following working day. For example, a seller configures weekends as non-working hours, and the wait time activity falls on a Saturday. With the Wait time computation option enabled, the wait time activity scheduled Saturday (non-working hours) will be moved to the following working day (Monday) and subsequently, other activities are moved in the order they're defined. When selected, the Wait time computation option is enabled for all sequences. However, if you want to disable the Wait time computation option for a sequence, do the following steps:
Open the sequence.
On the sequence page, select Options.
Note
Deactivate the sequence before you edit the options.
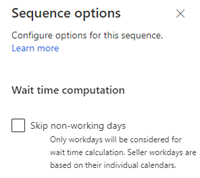
On the Sequence options pane, under the Wait time computation section, clear the check box for Skip non-working days.
Select Save.
Sequence activities
Configure the linking of sequence steps and activities to automatically create linked activities for sellers' upcoming sequence steps. Linked activities are added to seller timelines for the next sequence step.
Follow these steps:
Sign in to your sales app, and in the lower-left corner of the page, go to Change area
 > Sales Insights settings.
On the site map under Sales accelerator, select Sequence.
On the Sequences page, select Settings.

On the Settings page, select Sequence activities.
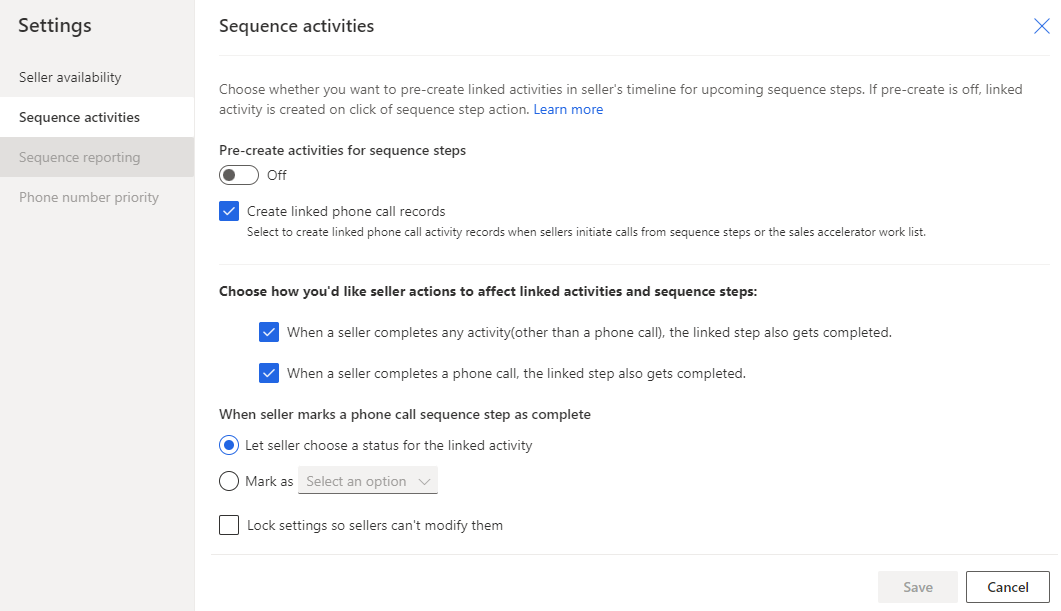
Turn on the Create linked activities toggle.
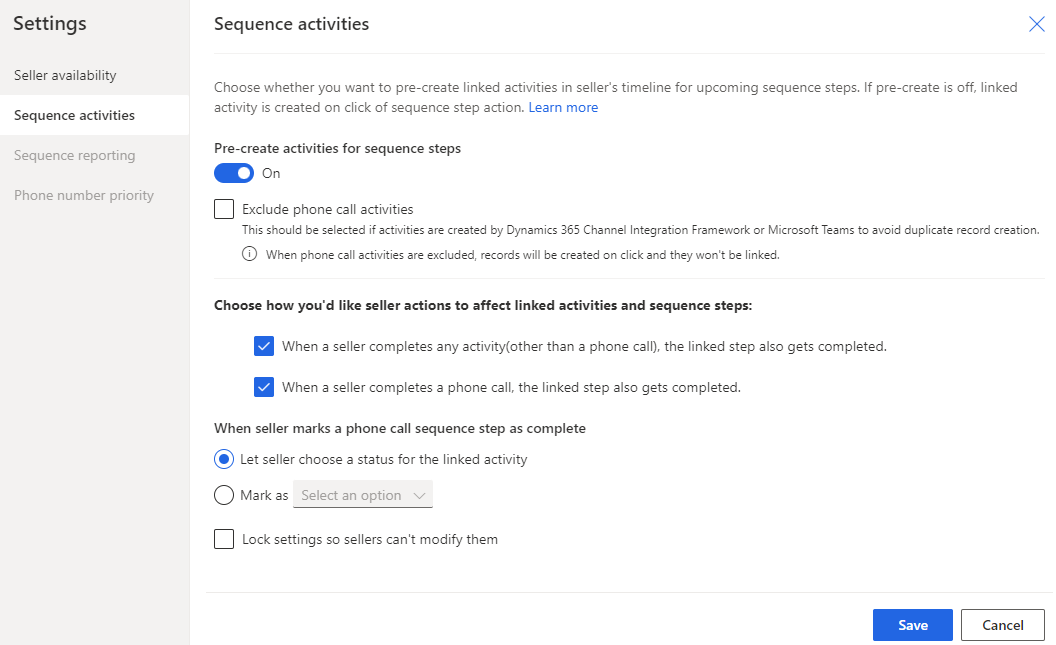
Select the Exclude phone call activities checkbox to avoid creating a duplicate phone call activity when you're using Dynamics 365 Channel Integration Framework as your phone system. If you don't select this option, a duplicate phone call activity is created on the timeline and a duplicate activity is created when the step is waiting to be completed on the record.
Note
When turned off, activities will not be created automatically. However, activities are created on the timeline only when sellers select the activity in the Up next widget.
Configure activities and steps. You can choose how the actions that sellers perform on steps affect linked activities and sequence steps.
Action Description When a seller completes any activity(other than a phone call), the linked step also gets completed. When you select this checkbox and sellers complete the activity through the timeline, the sequence step that's related to this activity is automatically marked as complete. When a seller completes a phone call, the linked step also gets completed. When you select this checkbox and sellers make a phone call through the timeline, the sequence step that's related to this activity is automatically marked as complete. When seller marks a phone call sequence step as complete When sellers complete a phone call activity in the sequence step, you can choose to let sellers enter the status of the activity or enter a default value that has been defined for your organization. Note
Select the Lock settings so sellers can't modify them checkbox to prevent sellers from updating the sequence activities configuration.
Select Save.
Sequence reporting
Enable sales accelerator reports to help your sales manager view and understand their team's historical operational metrics, key performance indicators (KPIs), and sequence stats page.
Follow these steps:
Sign in to your sales app, and in the lower-left corner of the page, go to Change area
 > Sales Insights settings.
On the site map under Sales accelerator, select Sequence.
On the Sequences page, select Settings.

On the Settings page, select Sequence reporting.
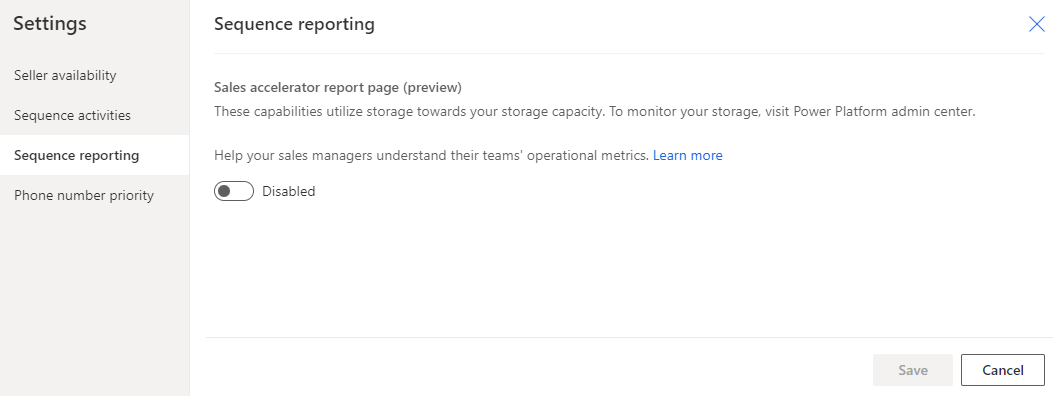
Turn on the toggle.
In the confirmation message, select Enable.
By default, users with sales manager and sequence manager roles can view the reports. To grant view access to other roles, provide read access at the organizational level for the sales acceleration reports table. More information: Security roles and privileges
Note
After you enable the option, the application might take up to 24 hours to display the data in the reports. Subsequently, the reports will be refreshed every 24 hours. You can view the last updated date in the upper-right corner of the sales acceleration report page.
To know how sales managers use:
- Metrics and KPIs, go to Understand sales acceleration reporting.
- Sequence stats, go to Understand sequence stats.
Phone number priority
When a phone system is configured in your organization, sellers can make calls directly through the sales accelerator feature. Under Phone number priority, select the phone numbers for Default, Fallback1, and Fallback2. When sellers initiate calls through a sequence step or the work list, the softphone chooses the phone numbers in the order they're listed.
For example, you can select Business Phone in Default, Mobile Phone in Fallback1, and Home Phone in Fallback2. When sellers initiate a call, the number in the Default option is dialed if it's available. If it isn't available, the call goes to the next option.
Follow these steps:
Sign in to your sales app, and in the lower-left corner of the page, go to Change area
 > Sales Insights settings.
On the site map under Sales accelerator, select Sequence.
On the Sequences page, select Settings.

On the Settings page, select Phone number priority.
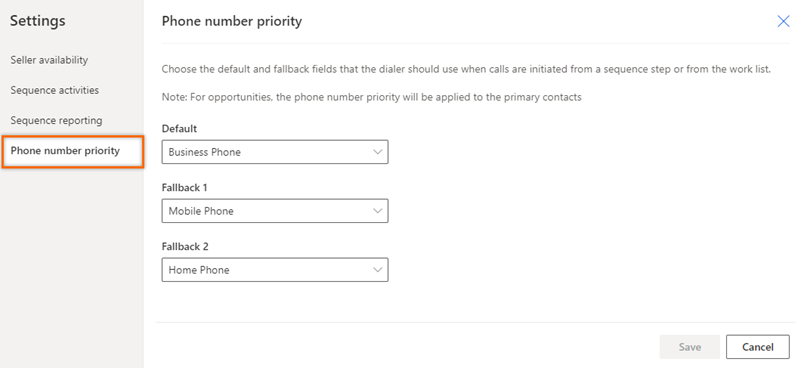
Select phone number options for Default, Fallback1, and Fallback2.
Select Save.
Note
For opportunities, the phone number priority will be applied to the primary contacts.
Can't find the feature in your app?
There are a few possibilities:
- You don't have the necessary license to use this feature. Check out the comparison table and the licensing guide to see which features are available with your license.
- You don't have the necessary security role to use this feature.
- To configure or setup a feature, you need to have the Administration and customization roles
- To use sales-related features, you need to have the Primary sales roles
- Some tasks require specific Functional roles.
- Your administrator hasn't turned on the feature.
- Your organization is using a custom app. Check with your administrator for exact steps. The steps described in this article are specific to the out-of-the-box Sales Hub and Sales Professional apps.