Note
Access to this page requires authorization. You can try signing in or changing directories.
Access to this page requires authorization. You can try changing directories.
Customize the sales accelerator workspace by configuring filters, sorting, and the appearance of work items.
Customize the workspace for sellers
After the first-run setup of the sales accelerator, you can customize the workspace to meet your sellers' needs. For example, if sellers want to filter work items based on currency type for leads, add a filter with the record type Lead and the field Currency. Learn how sellers can use custom filters.
Sign in to the Sales Hub app. In the lower-left corner of the page, go to Change area
 > Sales Insights settings.
Under Sales accelerator, select Workspace.

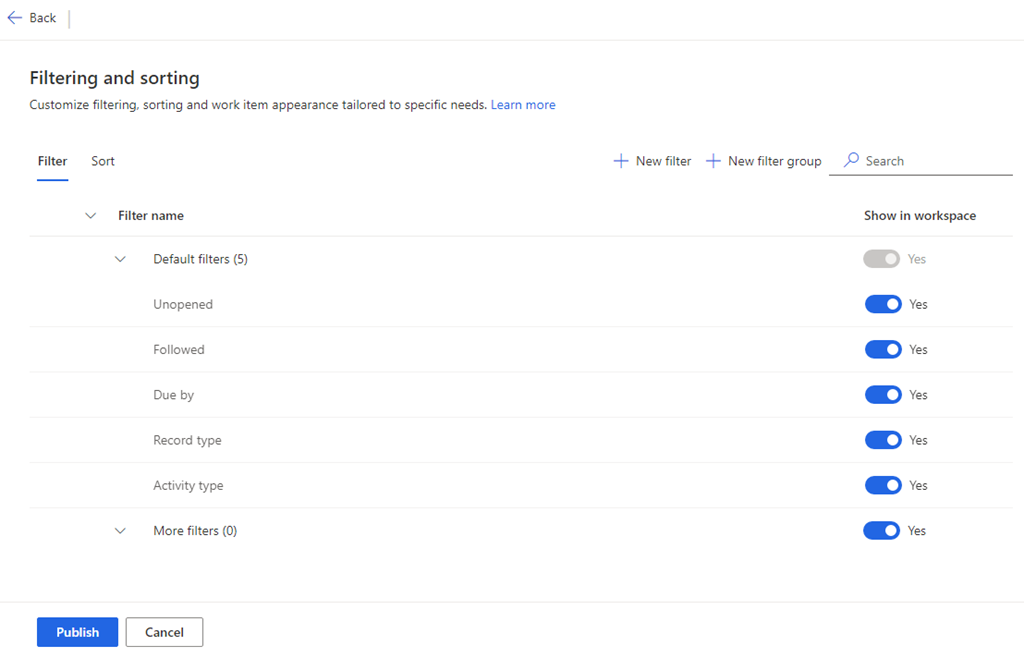
In the Customize workspace section, select Filtering and sorting. The Filters page opens. Here you can do the following tasks:
Manage filters
Filters help your sellers target specific work items in the sales accelerator workspace. In the Filter tab of the Filtering and sorting page, you can:
- Add basic and advanced filters
- Add groups
- Hide filters
- Edit custom filters and groups
- Move filters to a group
- Delete custom filters and groups
Add basic and advanced filters
You can create two types of filters:
- Basic filters: Filters based on simple expressions
- Advanced filters: Filters based on complex expressions that combine multiple fields using the AND operator
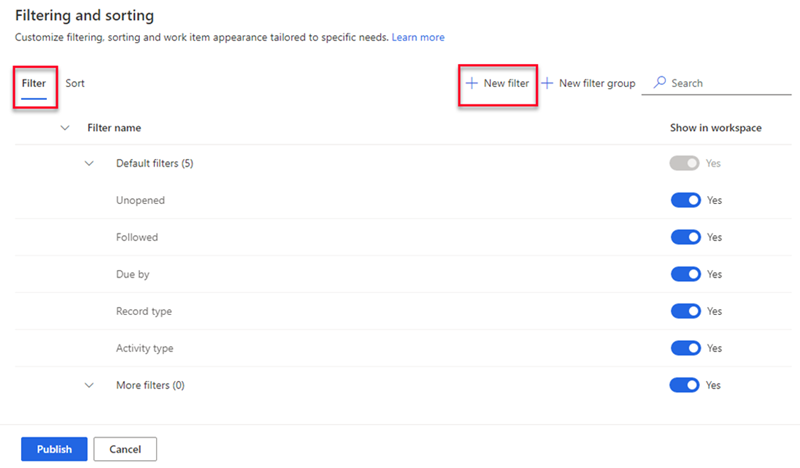
In the Filter tab, select New filter.
In the Create a new filter pane, select the following options as required.
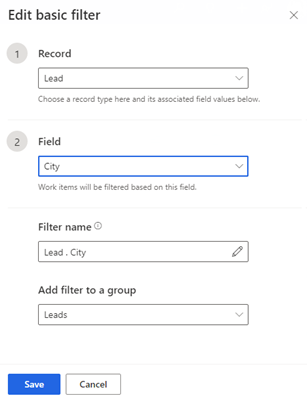
For a basic filter, enter the following information:
Parameter Description Record Select the type of record that you want to use to filter the work list. You can select only the record types that you added during the content and layout configuration when you set up the sales accelerator.
For more information, go to step 7 in First-run set up.
The parameters Field and Filter name won't be active until you choose the record type.Field Select the field that you want to use to filter the work list. The fields in the list are the basic attributes of the record type you selected. Filter name Enter a name for the filter. By default, the name is record type.field; for example, Lead.Currency. Add filter to a group Select a group to add the filter to. Grouping filters helps sellers to easily identify and apply them. If you don't select a group, the filter is added to the default More filters group. Learn how to add groups. 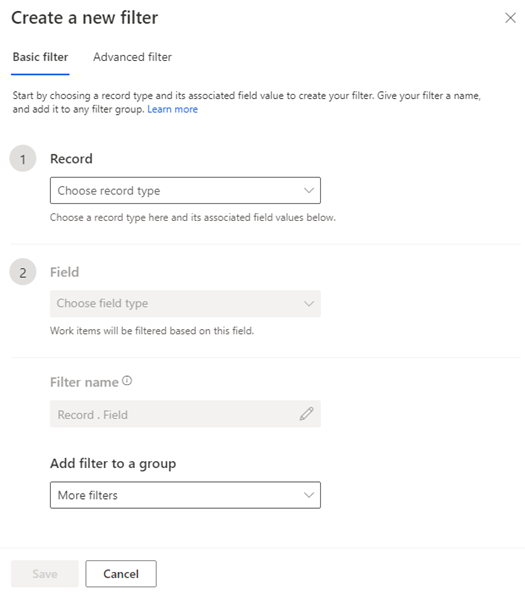
For an advanced filter, select the Advanced filter tab and enter the following information:
Parameter Description Record Select the type of record that you want to use to filter the work list. You can select only the record types that you added during the content and layout configuration when you set up the sales accelerator.
For more information, go to step 7 in First-run set up.
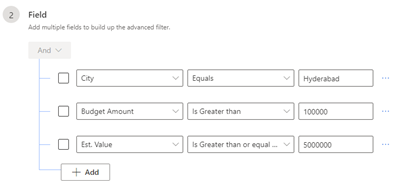
The parameters Field and Filter name won't be active until you choose the record type.Field Select Add. In the field options, select the field, operator, and value. To filter the work list on multiple fields using the AND operator, select Add and enter more filter conditions. The fields in the list are the basic attributes of the record type you selected.
The following screenshot is an example of an advanced filter with multiple fields:
Filter name Enter a name for the filter. Add filter to a group Select a group to add the filter to. Grouping filters helps sellers to easily identify and apply them. If you don't select a group, the filter is added to the default More filters group. Learn how to add groups. 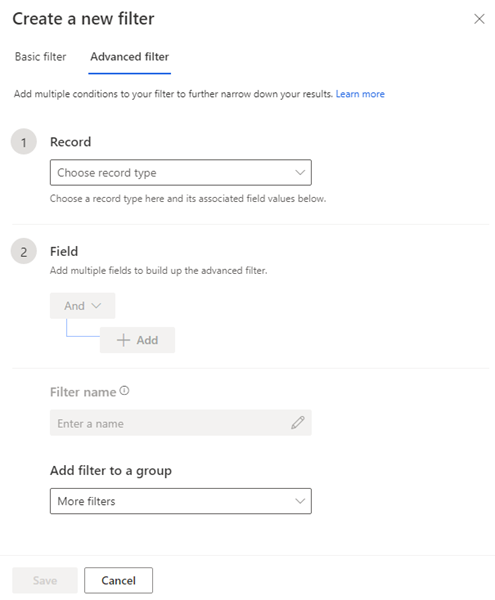
Save and publish the filter.
Add groups
Filter groups allow you to organize filters so that sellers can easily identify them.
Use one of the following methods to create a filter group:
- In the Filter tab, select New group.
- While creating a filter, in the Add filter to a group list, select Create a new filter group.
Under New filter group, enter the name of the new group.
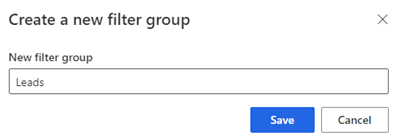
Save and publish the group.
Hide filters
You can hide any filter to prevent it from appearing in the filter list. You can hide an entire group of filters, too.
In the Filter tab, under Show in workspace, turn off the filter or group you want to hide.
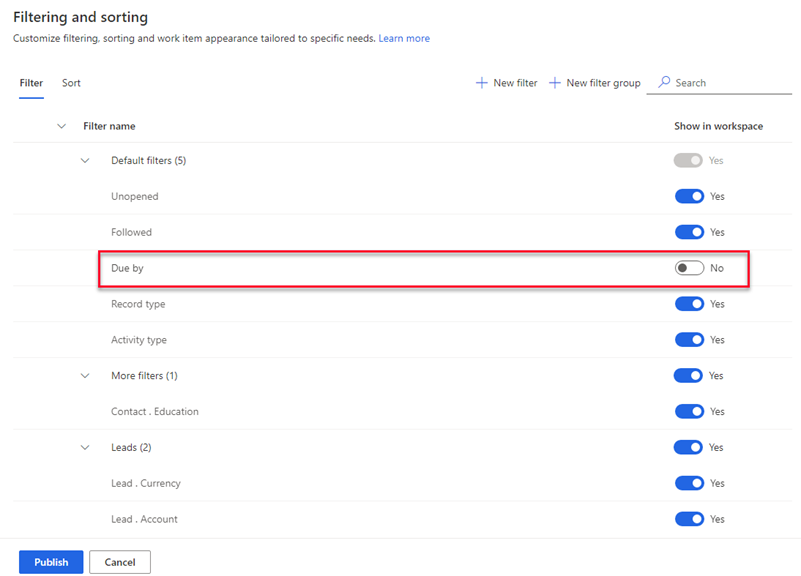
Select Publish.
The filter is hidden from the list that sellers use. However, the filter is still available in the application and you can turn it on again at any time.
Edit custom filters and groups
You can edit filters and groups that you created. You can't edit the out-of-the-box filters that are listed under the Default filters group.
In the Filter tab, hover over the filter or group and select More options > Edit (
 ).
).
Update the filter as required, and then save and publish.
Move filters to a group
You can move filters that you created to a different group. You can't move the out-of-the-box filters to a custom group or move custom filters to the Default filters group.
In the Filter tab, select the filter, and then select Move to (
 ).
).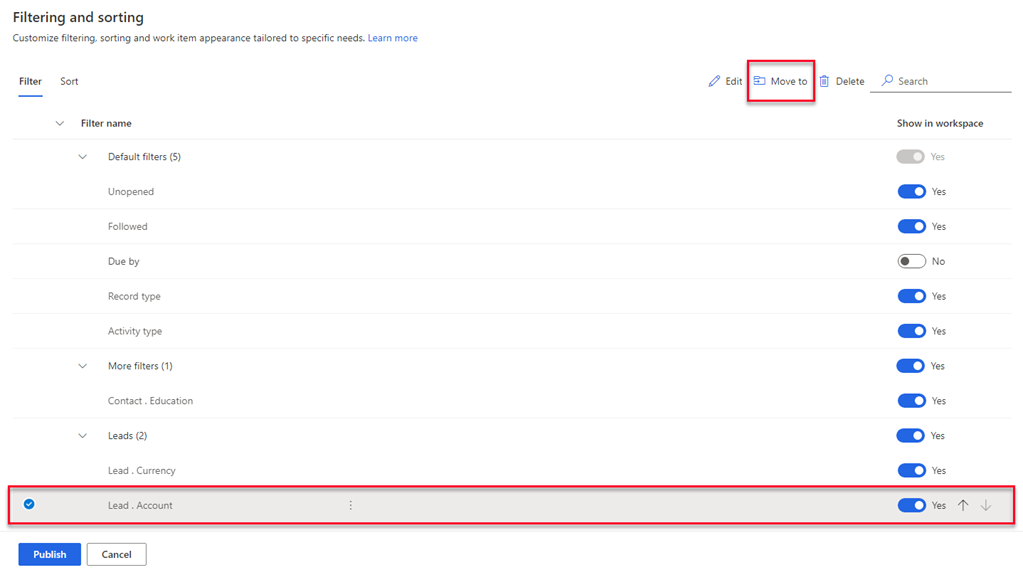
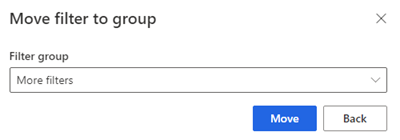
In the Filter group list, select the group you want to move the filter to.
Select Move and then publish the filter list.
Delete custom filters and groups
You can delete filters and groups that you created if your organization no longer needs them. You can't delete the filters that are available out-of-the-box under the Default filters group.
Note
When you delete a group, all filters in the group are also deleted.
In the Filter tab, select one or more filters or groups.
Select Delete (
 ).
).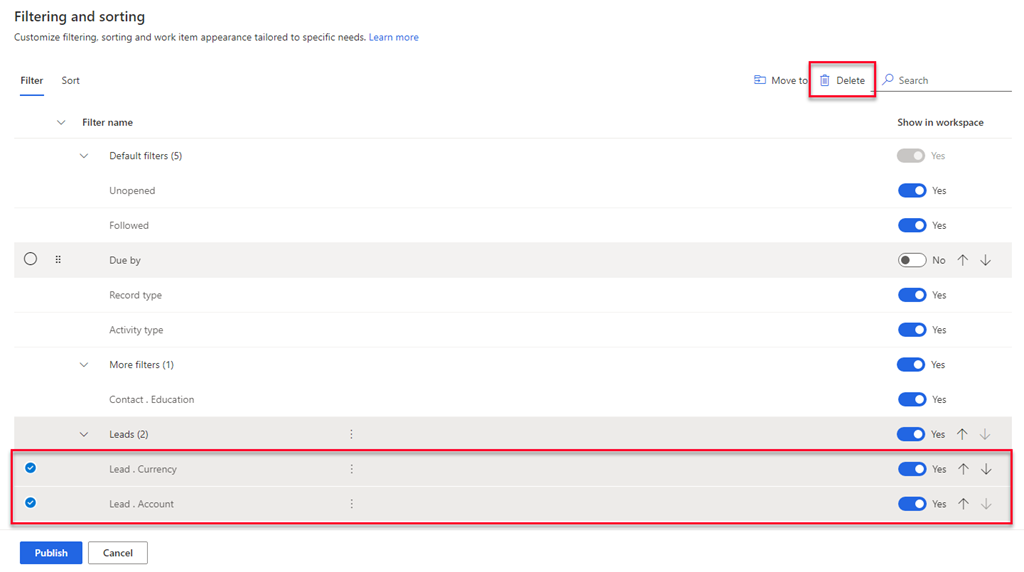
In the confirmation message, select Delete permanently.
Select Publish.
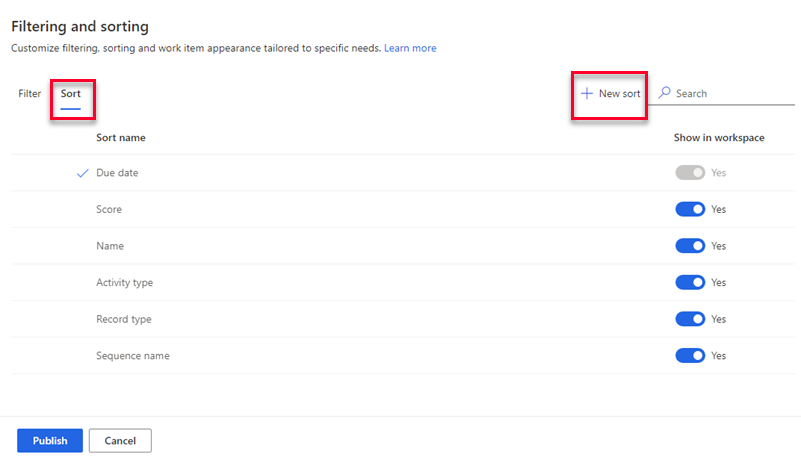
Manage sorting
Sorting determines the order in which sellers view their work items. By default, sellers can sort work items by activity type, due date, name, record type, score, and sequence name.
In the Sort tab of the Filtering and sorting page, you can:
- Add a custom sort
- Choose a sort type as the default
- Edit a sort type
- Hide a sort
- Change the sort order
- Delete a sort
Add a custom sort
You can create sorts based on your sellers' requirements.
In the Sort tab, select New sort.
In the Create new sort pane, enter the following information as required.
Parameter Description Record Select the type of record that you want to use to sort the work list. You can select only the record types that you added during the content and layout configuration when you set up the sales accelerator.
For more information, go to step 7 in First-run set up.
The parameters Field and Sort name won't be active until you choose the record type.Field Select a field to use to sort the work list. The fields in the list are the basic attributes of the selected record type. Sort name Enter a name for the sort. By default, the name is record type.field; for example, Lead.Name. Make this the default sort Select this option to make this sort the default for the work list when sellers open the sales accelerator. 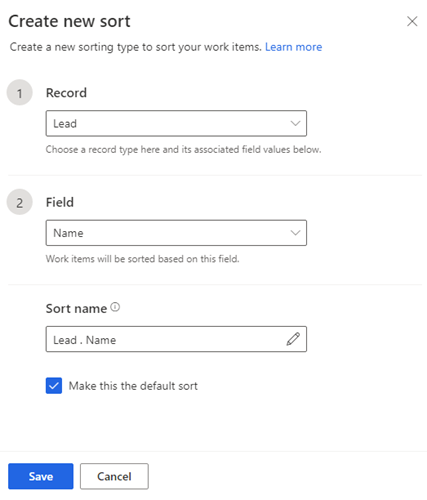
Select Save.
Choose a sort type as the default
You can choose a sort as the default for work items when sellers open the sales accelerator workspace. You can edit, but not delete or hide, a default sort type. A check mark indicates the default sort type.
In the Sort tab, select the sort type that you want to set as the default.
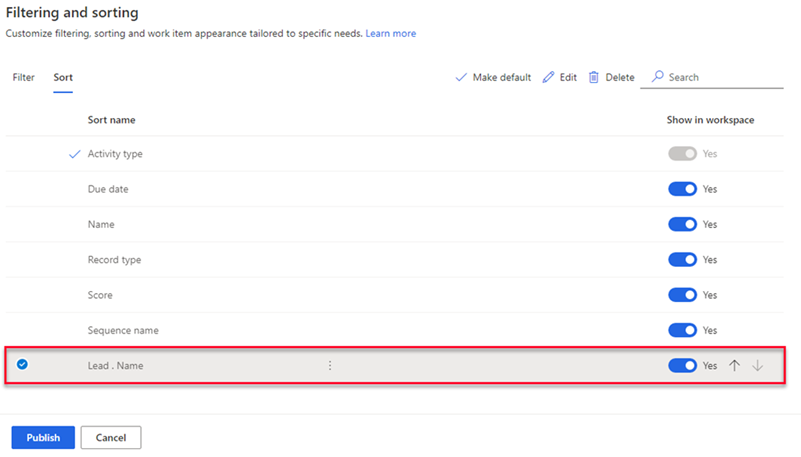
Select Make default.
Note
You can also hover over a sort type and select More options > Make default.
Select Publish.
Edit a sort type
You can edit sort types that you created. You can't edit the out-of-the-box sort types.
In the Sort tab, select the sort type, and then select Edit.
Note
You can also hover over the sort type and select More options > Edit (
).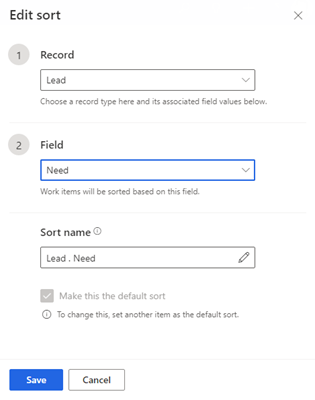
Update the sort as required, and then save and publish.
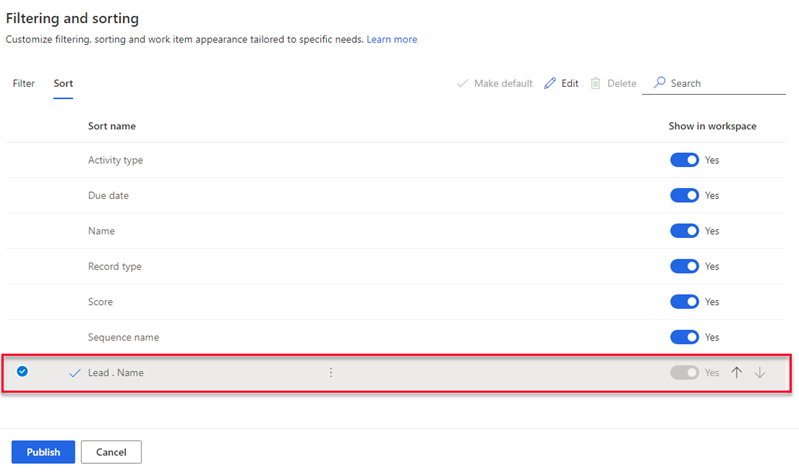
Hide a sort
You can hide a sort to prevent it from appearing in the sort list. You can't hide the default sort type.
In the Sort tab, under Show in workspace column, turn off the toggle for the sort you want to hide.
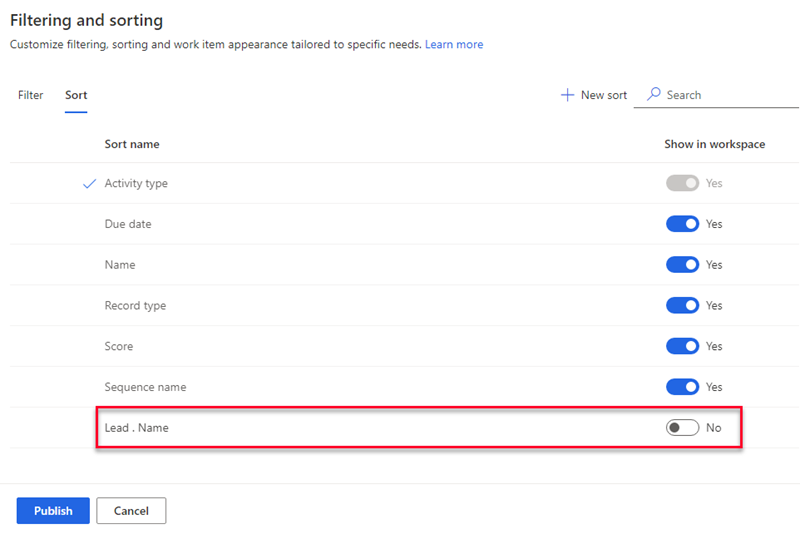
Select Publish.
The sort is hidden from the list that sellers use. However, the sort is still available in the application and you can turn it on again at any time.
Change the sort order
You can arrange the list of sort types in the order you want them to appear to sellers when they open the sales accelerator workspace.
In the Sort tab, select a sort type.
Use the up and down arrows to change its position in the list.
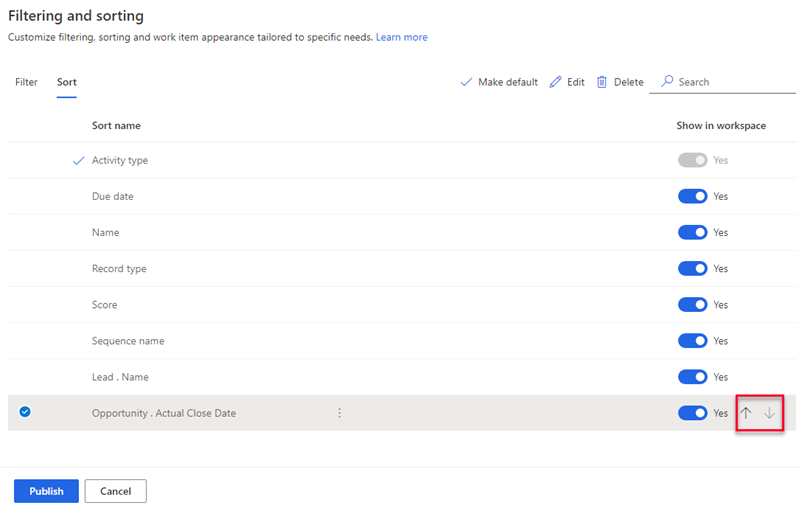
Select Publish.
Delete a sort
You can delete sort types that you created if your organization no longer needs them. You can't delete the out-of-the-box sort types.
In the Sort tab, select one or more sort types.
Select Delete (
).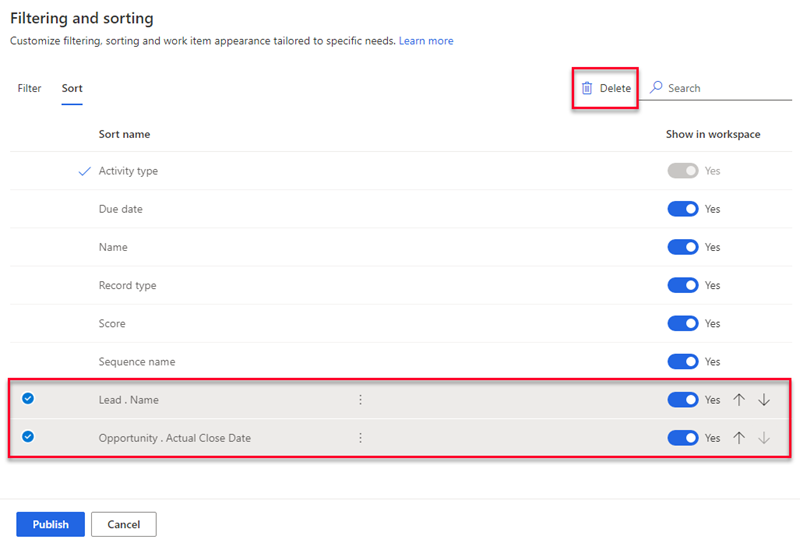
In the confirmation message, select Delete permanently.
Select Publish.
Configure work item appearance
The work list in the sales accelerator helps sellers to prioritize their time and effort. Customize work items to display the most relevant and important information in the work list. You can customize work items for each entity type that your sellers work with. Learn how to customize the appearance of work items.
Can't find the feature in your app?
There are a few possibilities:
- You don't have the necessary license to use this feature. Check out the comparison table and the licensing guide to see which features are available with your license.
- You don't have the necessary security role to use this feature.
- To configure or setup a feature, you need to have the Administration and customization roles
- To use sales-related features, you need to have the Primary sales roles
- Some tasks require specific Functional roles.
- Your administrator hasn't turned on the feature.
- Your organization is using a custom app. Check with your administrator for exact steps. The steps described in this article are specific to the out-of-the-box Sales Hub and Sales Professional apps.
Related information
What is the sales accelerator?
Configure the sales accelerator
Manage access and record types