Note
Access to this page requires authorization. You can try signing in or changing directories.
Access to this page requires authorization. You can try changing directories.
Help your team focus on what matters most with a prioritized list of upcoming activities and tasks.
Overview
The sales accelerator is an engagement platform that helps you understand your customers' needs and respond in meaningful ways. It allows your sellers to engage with your customers by using multiple channels within one workspace. The sales accelerator in Dynamics 365 provides a tailored experience for sellers by minimizing the time they spend on their search for the best next customer to reach out to. It gathers information from multiple sources and lets sellers focus on how to best approach their customers. It helps sellers to sell smartly, by building a strong and prioritized pipeline, offering context, and surfacing automated recommendations throughout a sales sequence that helps to speed the sales process. More information: What is the sales accelerator?
Licensing options
When you set up the sales accelerator with the Dynamics 365 Sales Enterprise license, you get 1,500 sequence-connected records per month. If you need more than 1,500 sequence-connected records per month, upgrade to Dynamics 365 Sales Premium.
Set up the sales accelerator
On the Sales settings page, select Sales accelerator > Quick setup.
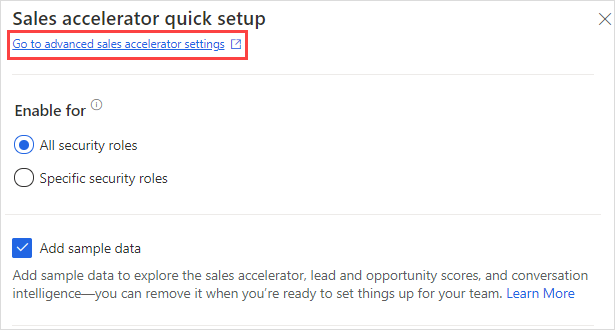
The Sales accelerator quick setup panel is displayed.
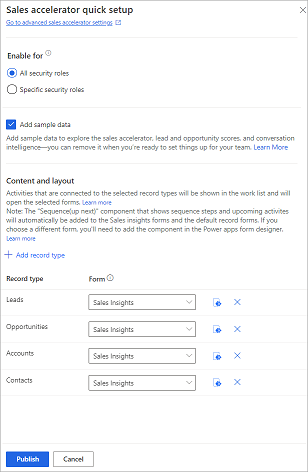
In the Enable for section, choose one of the following options to grant permissions to use sales accelerator features:
- All security roles: Select this option to give access to view the sales accelerator in the Sales Hub app to all the security roles in your organization.
- Specific security roles: Select this option to specify security roles to give access to view the sales accelerator in the Sales Hub app to just a few users. Use the lookup box to add the security roles.
To add sample data for exploring the feature, select Add sample data.
Note
The capability to install sample data is available only in your sandbox or trial environments. When you add sample data, you'll also see predictive lead and opportunity scoring on the Sales Insights form. Adding the sample data might take a few minutes. If you choose to ignore sample data installation at this point, you can add it later when you need it.
In the Content and layout section, select the record types and their corresponding related forms that are required in your organization.
To add more record types, select Add record type, and then select a record from the dropdown list. The selected record type will display the Sequence (up next) widget. You can select out-of-the-box tables—such as Accounts, Contacts, Leads, and Opportunities—or custom tables.
Note
- Ensure that the record types you select are the ones that activities are usually connected to. Sales managers use the record types to configure the sequence that will be assigned to records to be displayed in the app.
- To view the custom record types in the list, go to Settings > Customizations > Customize the System > Components > Entities. Under Communication & Collaboration, enable the options Activities, Connections, and Sending email (If an email field does not exist, one will be created).
- To add the Up next widget to your custom entity form, go to Add the Up next widget to an entity form.
Select a form for the selected record.
Note
- You can remove the record types that no longer need to have automated activities associated with them. Select the X icon next to the record type to remove it from the list. Note that if the records in the deleted record type are associated with a sequence, these records will continue to be associated with the sequence.
- To know how records are populated in the work list, go to View my records by using the work list.
To publish the changes, select Publish.
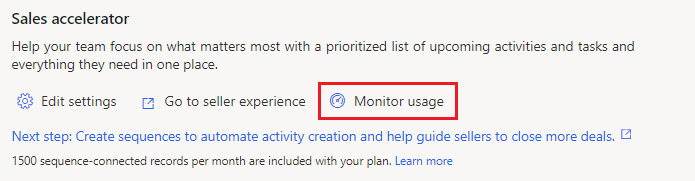
After the settings are published, you can open the seller's interface for the sales accelerator by selecting Go to seller experience under Sales accelerator. Sellers can immediately use the sales accelerator for manually created activities. However, you can also guide your sellers by creating sequences. For information about creating sequences, go to Manage sequences.
Advanced settings
If you want to make advanced configurations for sales accelerator, select Go to advanced sales accelerator settings at the top of the quick setup panel. For information about advanced configurations, go to Configure the sales accelerator for Sales Premium.
Add the sales accelerator to a custom app
If you've created a custom app, you can add the sales accelerator to it from the app designer. More information: Add the sales accelerator site map entry to custom app
Monitor usage
As an administrator, you can monitor the number of records that have been connected to sequences over a period of seven months.
If you're using the sales accelerator with your Sales Enterprise license, you get 1,500 sequence-connected records per month. A warning symbol is displayed whenever the usage exceeds the monthly limit. Hover over the symbol to see the message. In such a case, you must upgrade to the Sales Premium license to enjoy full benefits with no monthly limit.
Important
- The data in the usage panel is refreshed every 24 hours.
- Usage metrics are powered by the Power Automate flow Sales insights sequence daily usage flow. Without this flow, the usage report won't reflect the correct data. If the Power Automate flow is disabled, you must enable the flow to reactivate usage metrics. For information on enabling the flow, go to Turn flows on.
To monitor the usage of the sales accelerator
On the Get started with digital sales page, under Sales accelerator, select Monitor usage.
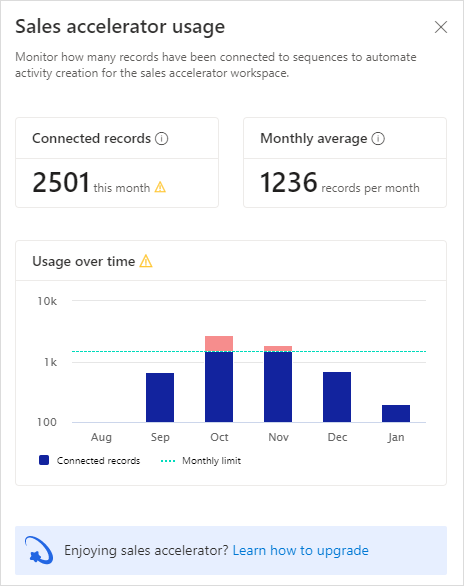
The Sales accelerator usage panel is displayed with the following information:
Connected records: Displays the total number of records connected to sequences so far in the current month. If the monthly limit is exceeded in a month (for Sales Enterprise license users), a warning symbol is displayed.
Monthly average: Displays the average number of records connected to sequences over the last six full months of usage.
Usage over time: Displays the monthly usage of the sales accelerator for the last six months in a graphical format. If the monthly limit is exceeded in a month (for Sales Enterprise license users), a warning symbol is displayed.
The monthly limit is shown with a blue line in the graph. When the limit is exceeded in a month, the number of records in excess of 1,500 are shown in red.
Turn off the sales accelerator
If you want to turn off the sales accelerator, you can do it from the advanced settings.
Select Go to advanced sales accelerator settings at the top of the quick setup panel.
On the Sales accelerator setup page, select Unpublish.
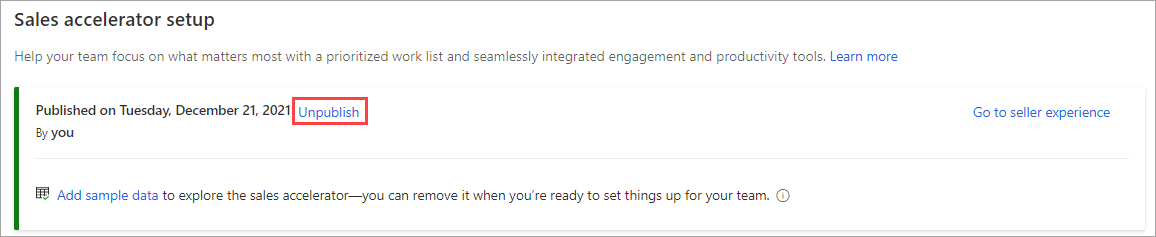
In the confirmation dialog, select Unpublish.
Add the sequence (Up next) widget to a custom form
By default, the Up next widget is available only in the out-of-the-box Sales Insights, lead, and opportunity forms. If you're using customized forms, you can display the Up next widget on your custom forms. For information about adding the Up next widget to a custom form, go to Add the Up next widget to a custom form For information about using the Up next widget, go to Connect with customers through a record or the Up next widget.
Related information
Microsoft Teams collaboration
Microsoft Teams calls with conversation intelligence
Lead and opportunity scoring