Sign in users in a sample WPF desktop application
This guide uses a sample Windows Presentation Foundation (WPF) application to show you how to add authentication to a WPF desktop application. The sample application enables users to sign in and sign out. The sample desktop application uses Microsoft Authentication Library for .NET for .NET to handle authentication.
Prerequisites
- Visual Studio Code or another code editor.
- .NET 7.0 or later.
- An external tenant. To create one, choose from the following methods:
- (Recommended) Use the Microsoft Entra External ID extension to set up an external tenant directly in Visual Studio Code.
- Create a new external tenant in the Microsoft Entra admin center.
Register the desktop app
To enable your application to sign in users with Microsoft Entra, Microsoft Entra External ID must be made aware of the application you create. The app registration establishes a trust relationship between the app and Microsoft Entra. When you register an application, External ID generates a unique identifier known as an Application (client) ID, a value used to identify your app when creating authentication requests.
The following steps show you how to register your app in the Microsoft Entra admin center:
Sign in to the Microsoft Entra admin center as at least an Application Developer.
If you have access to multiple tenants, use the Settings icon
 in the top menu to switch to your external tenant from the Directories + subscriptions menu.
Browse to Identity >Applications > App registrations.
Select + New registration.
In the Register an application page that appears;
- Enter a meaningful application Name that is displayed to users of the app, for example ciam-client-app.
- Under Supported account types, select Accounts in this organizational directory only.
Select Register.
The application's Overview pane displays upon successful registration. Record the Application (client) ID to be used in your application source code.
Specify your app platform
To specify your app type to your app registration, follow these steps:
- Under Manage, select Authentication.
- On the Platform configurations page, select Add a platform, and then select Mobile and desktop applications option.
- In the input field under Custom redirect URI, manually enter
https://login.microsoftonline.com/common/oauth2/nativeclient, then select Configure. If you select this URI on the select box, you may get a redirect URI error.
Grant admin consent
Once you register your application, it gets assigned the User.Read permission. However, since the tenant is an external tenant, the customer users themselves can't consent to this permission. You as the admin must consent to this permission on behalf of all the users in the tenant:
From the App registrations page, select the application that you created (such as ciam-client-app) to open its Overview page.
Under Manage, select API permissions.
- Select Grant admin consent for <your tenant name>, then select Yes.
- Select Refresh, then verify that Granted for <your tenant name> appears under Status for the permission.
Create a user flow
Follow these steps to create a user flow a customer can use to sign in or sign up for an application.
Sign in to the Microsoft Entra admin center as at least an External ID User Flow Administrator.
If you have access to multiple tenants, use the Settings icon
in the top menu to switch to your external tenant from the Directories + subscriptions menu.Browse to Identity > External Identities > User flows.
Select + New user flow.
On the Create page:
Enter a Name for the user flow, such as SignInSignUpSample.
In the Identity providers list, select Email Accounts. This identity provider allows users to sign-in or sign-up using their email address.
Note
Additional identity providers will be listed here only after you set up federation with them. For example, if you set up federation with Google, Facebook, Apple or an OIDC identity provider, you'll be able to select those additional identity providers here.
Under Email accounts, you can select one of the two options. For this tutorial, select Email with password.
- Email with password: Allows new users to sign up and sign in using an email address as the sign-in name and a password as their first factor credential.
- Email one-time-passcode: Allows new users to sign up and sign in using an email address as the sign-in name and email one-time passcode as their first factor credential. Email one-time passcode must be enabled at the tenant level (All Identity Providers > Email One-time-passcode) for this option to be available at the user flow level.
Under User attributes, choose the attributes you want to collect from the user upon sign-up. By selecting Show more, you can choose attributes and claims for Country/Region, Display Name, and Postal Code. Select OK. (Users are only prompted for attributes when they sign up for the first time.)
Select Create. The new user flow appears in the User flows list. If necessary, refresh the page.
To enable self-service password reset, use the steps in Enable self-service password reset article.
Associate the WPF application with the user flow
For the customer users to see the sign-up or sign-in experience when they use your app, you need to associate your app with a user flow. Although many applications can be associated with your user flow, a single application can only be associated with one user flow.
On the sidebar menu, select Identity.
Select External Identities, then User flows.
In the User flows page, select the User flow name you created earlier, for example, SignInSignUpSample.
Under Use, select Applications.
Select Add application.
Select the application from the list such as ciam-client-app or use the search box to find the application, and then select it.
Choose Select.
Once you associate your app with a user flow, you can test your user flow by simulating a user’s sign-up or sign-in experience with your application from within the Microsoft Entra admin center. To do so, use the steps in Test your sign-up and sign-in user flow.
Clone or download sample WPF application
To obtain the sample application, you can either clone it from GitHub or download it as a .zip file.
To clone the sample, open a command prompt and navigate to where you wish to create the project, and enter the following command:
git clone https://github.com/Azure-Samples/ms-identity-ciam-dotnet-tutorial.gitDownload the .zip file. Extract it to a file path where the length of the name is fewer than 260 characters.
Configure the sample WPF app
Open the project in your IDE (like Visual Studio or Visual Studio Code) to configure the code.
In your code editor, open the appsettings.json file in the ms-identity-ciam-dotnet-tutorial > 1-Authentication > 5-sign-in-dotnet-wpf folder.
Replace
Enter_the_Application_Id_Herewith the Application (client) ID of the app you registered earlier.Replace
Enter_the_Tenant_Subdomain_Herewith the Directory (tenant) subdomain. For example, if your primary domain is contoso.onmicrosoft.com, replaceEnter_the_Tenant_Subdomain_Herewith contoso. If you don't have your primary domain, learn how to read tenant details.
Run and test sample WPF desktop app
Open a console window, and change to the directory that contains the WPF desktop sample app:
cd 1-Authentication\5-sign-in-dotnet-wpfIn your terminal, run the app by running the following command:
dotnet runAfter you launch the sample, you should see a window with a Sign-In button. Select the Sign-In button.
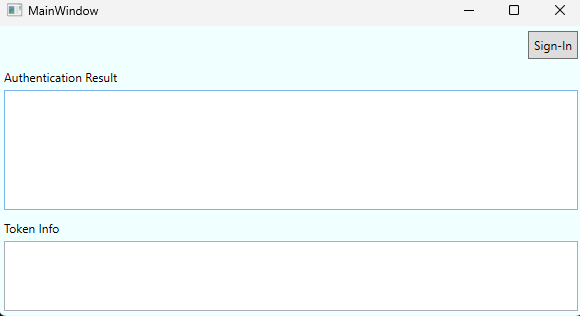
On the sign-in page, enter your account email address. If you don't have an account, select No account? Create one, which starts the sign-up flow. Follow through this flow to create a new account and sign in.
Once you sign in, you'll see a screen displaying successful sign-in and basic information about your user account stored in the retrieved token. The basic information is displayed in the Token Info section of the sign-in screen
How it works
The main configuration for the public client application is handled within the App.xaml.cs file. A PublicClientApplication is initialized along with a cache for storing access tokens. The application will first check whether there's a cached token that can be used to sign the user in. If there's no cached token, the user will be prompted to provide credentials and sign-in. Upon signing-out, the cache is cleared of all accounts and all corresponding access tokens.