Note
Access to this page requires authorization. You can try signing in or changing directories.
Access to this page requires authorization. You can try changing directories.
In this tutorial, you build an Electron desktop application that signs in users and calls Microsoft Graph by using the authorization code flow with PKCE. The desktop app you build uses the Microsoft Authentication Library (MSAL) for Node.js.
Applies to:  Workforce tenants (learn more)
In this tutorial, you:
- Register the application in the Azure portal
- Create an Electron desktop app project
- Add authentication logic to your app
- Add a method to call a web API
- Add app registration details
- Test the app
Prerequisites
- A workforce tenant. You can use your Default Directory or set up a new tenant.
- Register a new app in the Microsoft Entra admin center, configured for Accounts in this organizational directory only. Refer to Register an application for more details. Record the following values from the application Overview page for later use:
- Application (client) ID
- Directory (tenant) ID
- Add the following redirect URIs using the Mobile and desktop applications platform configuration. Refer to How to add a redirect URI in your application for more details.
- Redirect URI:
http://localhost
- Redirect URI:
- Node.js
- Electron
- Visual Studio Code or another code editor
Create the project
Note
The Electron sample provided in this tutorial is specifically designed to work with MSAL-node. MSAL-browser is not supported in Electron applications. Ensure you complete the following steps to set up your project correctly.
Create a folder to host your application, for example ElectronDesktopApp.
First, change to your project directory in your terminal and then run the following
npmcommands:npm init -y npm install --save @azure/msal-node @microsoft/microsoft-graph-client isomorphic-fetch bootstrap jquery popper.js npm install --save-dev electron@20.0.0Then, create a folder named App. Inside this folder, create a file named index.html that will serve as UI. Add the following code there:
<!DOCTYPE html>
<html lang="en">

<head>
    <meta charset="UTF-8">
    <meta name="viewport" content="width=device-width, initial-scale=1.0, shrink-to-fit=no">
    <meta http-equiv="Content-Security-Policy" content="script-src 'self'" />
    <title>MSAL Node Electron Sample App</title>

    <!-- adding Bootstrap 4 for UI components  -->
    <link rel="stylesheet" href="../node_modules/bootstrap/dist/css/bootstrap.min.css">
</head>

<body>
    <nav class="navbar navbar-expand-lg navbar-dark bg-primary">
        <a class="navbar-brand">Microsoft identity platform</a>
        <div class="btn-group ml-auto dropleft">
            <button type="button" id="signIn" class="btn btn-secondary" aria-expanded="false">
                Sign in
            </button>
            <button type="button" id="signOut" class="btn btn-success" hidden aria-expanded="false">
                Sign out
            </button>
        </div>
    </nav>
    <br>
    <h5 class="card-header text-center">Electron sample app calling MS Graph API using MSAL Node</h5>
    <br>
    <div class="row" style="margin:auto">
        <div id="cardDiv" class="col-md-6" style="display:none; margin:auto">
            <div class="card text-center">
                <div class="card-body">
                    <h5 class="card-title" id="WelcomeMessage">Please sign-in to see your profile and read your mails
                    </h5>
                    <div id="profileDiv"></div>
                    <br>
                    <br>
                    <button class="btn btn-primary" id="seeProfile">See Profile</button>
                </div>
            </div>
        </div>
    </div>

    <!-- importing bootstrap.js and supporting js libraries -->
    <script src="../node_modules/jquery/dist/jquery.js"></script>
    <script src="../node_modules/popper.js/dist/umd/popper.js"></script>
    <script src="../node_modules/bootstrap/dist/js/bootstrap.js"></script>

    <!-- importing app scripts | load order is important -->
    <script src="./renderer.js"></script>

</body>

</html>
Next, create file named main.js and add the following code:
/*
 * Copyright (c) Microsoft Corporation. All rights reserved.
 * Licensed under the MIT License.
 */

const path = require("path");
const { app, ipcMain, BrowserWindow } = require("electron");

const AuthProvider = require("./AuthProvider");
const { IPC_MESSAGES } = require("./constants");
const { protectedResources, msalConfig } = require("./authConfig");
const getGraphClient = require("./graph");

let authProvider;
let mainWindow;

function createWindow() {
    mainWindow = new BrowserWindow({
        width: 800,
        height: 600,
        webPreferences: { preload: path.join(__dirname, "preload.js") },
    });

    authProvider = new AuthProvider(msalConfig);
}

app.on("ready", () => {
    createWindow();
    mainWindow.loadFile(path.join(__dirname, "./index.html"));
});

app.on("window-all-closed", () => {
    app.quit();
});

app.on('activate', () => {
    // On OS X it's common to re-create a window in the app when the
    // dock icon is clicked and there are no other windows open.
    if (BrowserWindow.getAllWindows().length === 0) {
        createWindow();
    }
});


// Event handlers
ipcMain.on(IPC_MESSAGES.LOGIN, async () => {
    const account = await authProvider.login();

    await mainWindow.loadFile(path.join(__dirname, "./index.html"));

    mainWindow.webContents.send(IPC_MESSAGES.SHOW_WELCOME_MESSAGE, account);
});

ipcMain.on(IPC_MESSAGES.LOGOUT, async () => {
    await authProvider.logout();

    await mainWindow.loadFile(path.join(__dirname, "./index.html"));
});

ipcMain.on(IPC_MESSAGES.GET_PROFILE, async () => {
    const tokenRequest = {
        scopes: protectedResources.graphMe.scopes
    };

    const tokenResponse = await authProvider.getToken(tokenRequest);
    const account = authProvider.account;

    await mainWindow.loadFile(path.join(__dirname, "./index.html"));

    const graphResponse = await getGraphClient(tokenResponse.accessToken)
        .api(protectedResources.graphMe.endpoint).get();

    mainWindow.webContents.send(IPC_MESSAGES.SHOW_WELCOME_MESSAGE, account);
    mainWindow.webContents.send(IPC_MESSAGES.SET_PROFILE, graphResponse);
});
In the code snippet above, we initialize an Electron main window object and create some event handlers for interactions with the Electron window. We also import configuration parameters, instantiate authProvider class for handling sign-in, sign-out and token acquisition, and call the Microsoft Graph API.
In the same folder (App), create another file named renderer.js and add the following code:
// Copyright (c) Microsoft Corporation. All rights reserved.
// Licensed under the MIT License

/**
 * The renderer API is exposed by the preload script found in the preload.ts
 * file in order to give the renderer access to the Node API in a secure and
 * controlled way
 */
const welcomeDiv = document.getElementById('WelcomeMessage');
const signInButton = document.getElementById('signIn');
const signOutButton = document.getElementById('signOut');
const seeProfileButton = document.getElementById('seeProfile');
const cardDiv = document.getElementById('cardDiv');
const profileDiv = document.getElementById('profileDiv');

window.renderer.showWelcomeMessage((event, account) => {
    if (!account) return;

    cardDiv.style.display = 'initial';
    welcomeDiv.innerHTML = `Welcome ${account.name}`;
    signInButton.hidden = true;
    signOutButton.hidden = false;
});

window.renderer.handleProfileData((event, graphResponse) => {
    if (!graphResponse) return;

    console.log(`Graph API responded at: ${new Date().toString()}`);
    setProfile(graphResponse);
});

// UI event handlers
signInButton.addEventListener('click', () => {
    window.renderer.sendLoginMessage();
});

signOutButton.addEventListener('click', () => {
    window.renderer.sendSignoutMessage();
});

seeProfileButton.addEventListener('click', () => {
    window.renderer.sendSeeProfileMessage();
});

const setProfile = (data) => {
    if (!data) return;

    profileDiv.innerHTML = '';

    const title = document.createElement('p');
    const email = document.createElement('p');
    const phone = document.createElement('p');
    const address = document.createElement('p');

    title.innerHTML = '<strong>Title: </strong>' + data.jobTitle;
    email.innerHTML = '<strong>Mail: </strong>' + data.mail;
    phone.innerHTML = '<strong>Phone: </strong>' + data.businessPhones[0];
    address.innerHTML = '<strong>Location: </strong>' + data.officeLocation;

    profileDiv.appendChild(title);
    profileDiv.appendChild(email);
    profileDiv.appendChild(phone);
    profileDiv.appendChild(address);
}
The renderer methods are exposed by the preload script found in the preload.js file in order to give the renderer access to the Node API in a secure and controlled way
Then, create a new file preload.js and add the following code:
// Copyright (c) Microsoft Corporation. All rights reserved.
// Licensed under the MIT License

const { contextBridge, ipcRenderer } = require('electron');

/**
 * This preload script exposes a "renderer" API to give
 * the Renderer process controlled access to some Node APIs
 * by leveraging IPC channels that have been configured for
 * communication between the Main and Renderer processes.
 */
contextBridge.exposeInMainWorld('renderer', {
    sendLoginMessage: () => {
        ipcRenderer.send('LOGIN');
    },
    sendSignoutMessage: () => {
        ipcRenderer.send('LOGOUT');
    },
    sendSeeProfileMessage: () => {
        ipcRenderer.send('GET_PROFILE');
    },
    handleProfileData: (func) => {
        ipcRenderer.on('SET_PROFILE', (event, ...args) => func(event, ...args));
    },
    showWelcomeMessage: (func) => {
        ipcRenderer.on('SHOW_WELCOME_MESSAGE', (event, ...args) => func(event, ...args));
    },
});
This preload script exposes a renderer API to give the renderer process controlled access to some Node APIs by applying IPC channels that have been configured for communication between the main and renderer processes.
Finally, create a file named constants.js that will store the strings constants for describing the application events:
/*
 * Copyright (c) Microsoft Corporation. All rights reserved.
 * Licensed under the MIT License.
 */

const IPC_MESSAGES = {
    SHOW_WELCOME_MESSAGE: 'SHOW_WELCOME_MESSAGE',
    LOGIN: 'LOGIN',
    LOGOUT: 'LOGOUT',
    GET_PROFILE: 'GET_PROFILE',
    SET_PROFILE: 'SET_PROFILE',
}

module.exports = {
    IPC_MESSAGES: IPC_MESSAGES,
}
You now have a simple GUI and interactions for your Electron app. After completing the rest of the tutorial, the file and folder structure of your project should look similar to the following:
ElectronDesktopApp/
├── App
│   ├── AuthProvider.js
│   ├── constants.js
│   ├── graph.js
│   ├── index.html
|   ├── main.js
|   ├── preload.js
|   ├── renderer.js
│   ├── authConfig.js
├── package.json
Add authentication logic to your app
In App folder, create a file named AuthProvider.js. The AuthProvider.js file will contain an authentication provider class that will handle login, logout, token acquisition, account selection and related authentication tasks using MSAL Node. Add the following code there:
/*
 * Copyright (c) Microsoft Corporation. All rights reserved.
 * Licensed under the MIT License.
 */

const { PublicClientApplication, InteractionRequiredAuthError } = require('@azure/msal-node');
const { shell } = require('electron');

class AuthProvider {
    msalConfig
    clientApplication;
    account;
    cache;

    constructor(msalConfig) {
        /**
         * Initialize a public client application. For more information, visit:
         * https://github.com/AzureAD/microsoft-authentication-library-for-js/blob/dev/lib/msal-node/docs/initialize-public-client-application.md
         */
        this.msalConfig = msalConfig;
        this.clientApplication = new PublicClientApplication(this.msalConfig);
        this.cache = this.clientApplication.getTokenCache();
        this.account = null;
    }

    async login() {
        const authResponse = await this.getToken({
            // If there are scopes that you would like users to consent up front, add them below
            // by default, MSAL will add the OIDC scopes to every token request, so we omit those here
            scopes: [],
        });

        return this.handleResponse(authResponse);
    }

    async logout() {
        if (!this.account) return;

        try {
            /**
             * If you would like to end the session with AAD, use the logout endpoint. You'll need to enable
             * the optional token claim 'login_hint' for this to work as expected. For more information, visit:
             * https://learn.microsoft.com/azure/active-directory/develop/v2-protocols-oidc#send-a-sign-out-request
             */
            if (this.account.idTokenClaims.hasOwnProperty('login_hint')) {
                await shell.openExternal(`${this.msalConfig.auth.authority}/oauth2/v2.0/logout?logout_hint=${encodeURIComponent(this.account.idTokenClaims.login_hint)}`);
            }

            await this.cache.removeAccount(this.account);
            this.account = null;
        } catch (error) {
            console.log(error);
        }
    }

    async getToken(tokenRequest) {
        let authResponse;
        const account = this.account || (await this.getAccount());

        if (account) {
            tokenRequest.account = account;
            authResponse = await this.getTokenSilent(tokenRequest);
        } else {
            authResponse = await this.getTokenInteractive(tokenRequest);
        }

        return authResponse || null;
    }

    async getTokenSilent(tokenRequest) {
        try {
            return await this.clientApplication.acquireTokenSilent(tokenRequest);
        } catch (error) {
            if (error instanceof InteractionRequiredAuthError) {
                console.log('Silent token acquisition failed, acquiring token interactive');
                return await this.getTokenInteractive(tokenRequest);
            }

            console.log(error);
        }
    }

    async getTokenInteractive(tokenRequest) {
        try {
            const openBrowser = async (url) => {
                await shell.openExternal(url);
            };

            const authResponse = await this.clientApplication.acquireTokenInteractive({
                ...tokenRequest,
                openBrowser,
                successTemplate: '<h1>Successfully signed in!</h1> <p>You can close this window now.</p>',
                errorTemplate: '<h1>Oops! Something went wrong</h1> <p>Check the console for more information.</p>',
            });

            return authResponse;
        } catch (error) {
            throw error;
        }
    }

    /**
     * Handles the response from a popup or redirect. If response is null, will check if we have any accounts and attempt to sign in.
     * @param response
     */
    async handleResponse(response) {
        if (response !== null) {
            this.account = response.account;
        } else {
            this.account = await this.getAccount();
        }

        return this.account;
    }

    /**
     * Calls getAllAccounts and determines the correct account to sign into, currently defaults to first account found in cache.
     * https://github.com/AzureAD/microsoft-authentication-library-for-js/blob/dev/lib/msal-common/docs/Accounts.md
     */
    async getAccount() {
        const currentAccounts = await this.cache.getAllAccounts();

        if (!currentAccounts) {
            console.log('No accounts detected');
            return null;
        }

        if (currentAccounts.length > 1) {
            // Add choose account code here
            console.log('Multiple accounts detected, need to add choose account code.');
            return currentAccounts[0];
        } else if (currentAccounts.length === 1) {
            return currentAccounts[0];
        } else {
            return null;
        }
    }
}

module.exports = AuthProvider;
In the code snippet above, we first initialized MSAL Node PublicClientApplication by passing a configuration object (msalConfig). We then exposed login, logout and getToken methods to be called by main module (main.js). In login and getToken, we acquire ID and access tokens using MSAL Node acquireTokenInteractive public API.
Add Microsoft Graph SDK
Create a file named graph.js. The graph.js file will contain an instance of the Microsoft Graph SDK Client to facilitate accessing data on the Microsoft Graph API, using the access token obtained by MSAL Node:
const { Client } = require('@microsoft/microsoft-graph-client');
require('isomorphic-fetch');

/**
 * Creating a Graph client instance via options method. For more information, visit:
 * https://github.com/microsoftgraph/msgraph-sdk-javascript/blob/dev/docs/CreatingClientInstance.md#2-create-with-options
 * @param {String} accessToken
 * @returns
 */
const getGraphClient = (accessToken) => {
    // Initialize Graph client
    const graphClient = Client.init({
        // Use the provided access token to authenticate requests
        authProvider: (done) => {
            done(null, accessToken);
        },
    });

    return graphClient;
};

module.exports = getGraphClient;
Add app registration details
Create an environment file to store the app registration details that will be used when acquiring tokens. To do so, create a file named authConfig.js inside the root folder of the sample (ElectronDesktopApp), and add the following code:
/*
 * Copyright (c) Microsoft Corporation. All rights reserved.
 * Licensed under the MIT License.
 */

const { LogLevel } = require("@azure/msal-node");

/**
 * Configuration object to be passed to MSAL instance on creation.
 * For a full list of MSAL.js configuration parameters, visit:
 * https://github.com/AzureAD/microsoft-authentication-library-for-js/blob/dev/lib/msal-node/docs/configuration.md
 */
const AAD_ENDPOINT_HOST = "Enter_the_Cloud_Instance_Id_Here"; // include the trailing slash

const msalConfig = {
    auth: {
        clientId: "Enter_the_Application_Id_Here",
        authority: `${AAD_ENDPOINT_HOST}Enter_the_Tenant_Info_Here`,
    },
    system: {
        loggerOptions: {
            loggerCallback(loglevel, message, containsPii) {
                console.log(message);
            },
            piiLoggingEnabled: false,
            logLevel: LogLevel.Verbose,
        },
    },
};

/**
 * Add here the endpoints and scopes when obtaining an access token for protected web APIs. For more information, see:
 * https://github.com/AzureAD/microsoft-authentication-library-for-js/blob/dev/lib/msal-browser/docs/resources-and-scopes.md
 */
const GRAPH_ENDPOINT_HOST = "Enter_the_Graph_Endpoint_Here"; // include the trailing slash

const protectedResources = {
    graphMe: {
        endpoint: `${GRAPH_ENDPOINT_HOST}v1.0/me`,
        scopes: ["User.Read"],
    }
};


module.exports = {
    msalConfig: msalConfig,
    protectedResources: protectedResources,
};
Fill in these details with the values you obtain from Azure app registration portal:
Enter_the_Tenant_Id_hereshould be one of the following:- If your application supports accounts in this organizational directory, replace this value with the Tenant ID or Tenant name. For example,
contoso.microsoft.com. - If your application supports accounts in any organizational directory, replace this value with
organizations. - If your application supports accounts in any organizational directory and personal Microsoft accounts, replace this value with
common. - To restrict support to personal Microsoft accounts only, replace this value with
consumers.
- If your application supports accounts in this organizational directory, replace this value with the Tenant ID or Tenant name. For example,
Enter_the_Application_Id_Here: The Application (client) ID of the application you registered.Enter_the_Cloud_Instance_Id_Here: The Azure cloud instance in which your application is registered.- For the main (or global) Azure cloud, enter
https://login.microsoftonline.com/. - For national clouds (for example, China), you can find appropriate values in National clouds.
- For the main (or global) Azure cloud, enter
Enter_the_Graph_Endpoint_Hereis the instance of the Microsoft Graph API the application should communicate with.- For the global Microsoft Graph API endpoint, replace both instances of this string with
https://graph.microsoft.com/. - For endpoints in national cloud deployments, see National cloud deployments in the Microsoft Graph documentation.
- For the global Microsoft Graph API endpoint, replace both instances of this string with
Test the app
You've completed creation of the application and are now ready to launch the Electron desktop app and test the app's functionality.
- Start the app by running the following command from within the root of your project folder:
electron App/main.js
- In application main window, you should see the contents of your index.html file and the Sign In button.
Test sign in and sign out
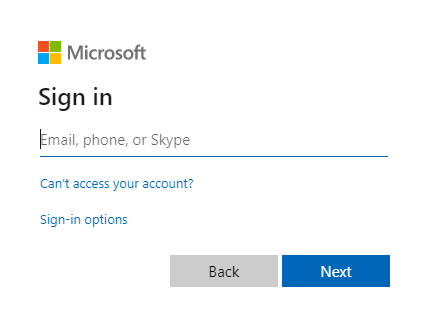
After the index.html file loads, select Sign In. You're prompted to sign in with the Microsoft identity platform:
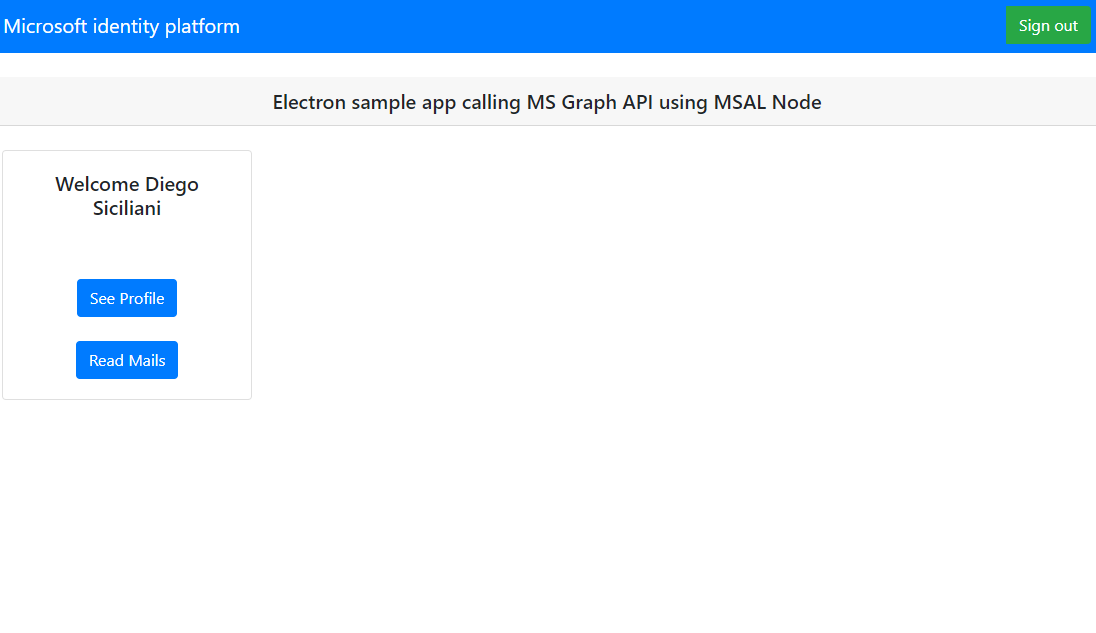
If you consent to the requested permissions, the web applications displays your user name, signifying a successful login:
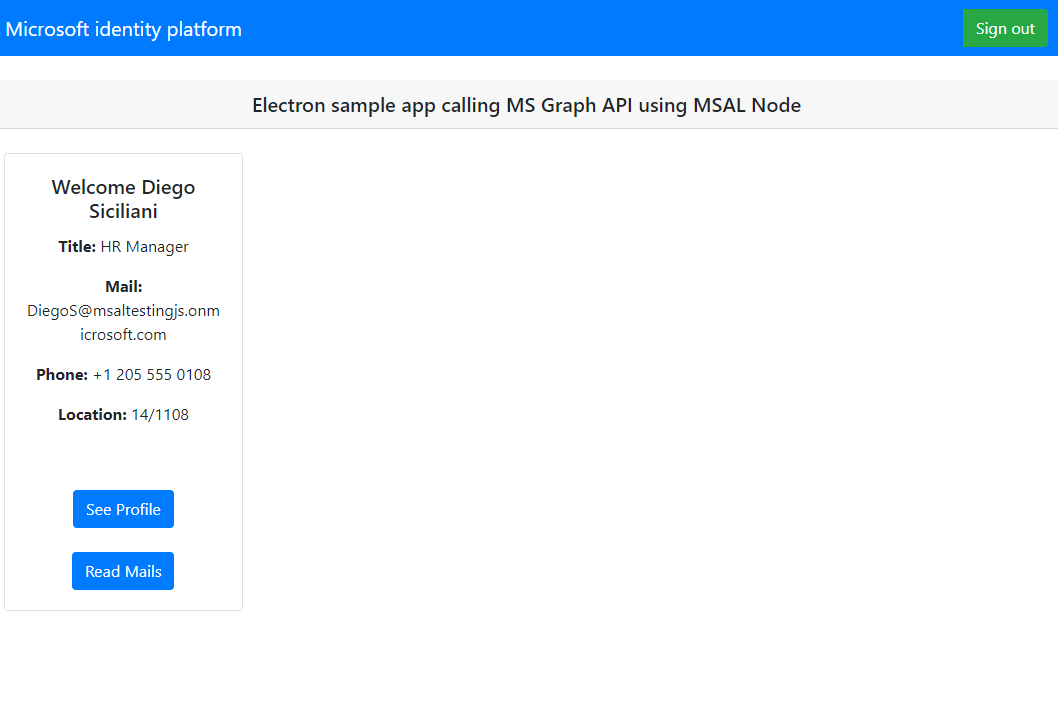
Test web API call
After you sign in, select See Profile to view the user profile information returned in the response from the call to the Microsoft Graph API. After consent, you'll view the profile information returned in the response:
How the application works
When a user selects the Sign In button for the first time, the acquireTokenInteractive method of MSAL Node. This method redirects the user to sign-in with the Microsoft identity platform endpoint and validates the user's credentials, obtains an authorization code and then exchanges that code for an ID token, access token, and refresh token. MSAL Node also caches these tokens for future use.
The ID token contains basic information about the user, like their display name. The access token has a limited lifetime and expires after 24 hours. If you plan to use these tokens for accessing protected resource, your back-end server must validate it to guarantee the token was issued to a valid user for your application.
The desktop app you've created in this tutorial makes a REST call to the Microsoft Graph API using an access token as bearer token in request header (RFC 6750).
The Microsoft Graph API requires the user.read scope to read a user's profile. By default, this scope is automatically added in every application that's registered in the Azure portal. Other APIs for Microsoft Graph, and custom APIs for your back-end server, might require extra scopes. For example, the Microsoft Graph API requires the Mail.Read scope in order to list the user's email.
As you add scopes, your users might be prompted to provide another consent for the added scopes.
Help and support
If you need help, want to report an issue, or want to learn about your support options, see Help and support for developers.
Next steps
If you'd like to dive deeper into Node.js and Electron desktop application development on the Microsoft identity platform, see our multi-part scenario series: