Note
Access to this page requires authorization. You can try signing in or changing directories.
Access to this page requires authorization. You can try changing directories.
This tutorial describes how to use Azure Logic Apps workflow to implement Microsoft Entra ID API-driven inbound provisioning. Using the steps in this tutorial, you can convert a CSV file containing HR data into a bulk request payload and send it to the Microsoft Entra provisioning /bulkUpload API endpoint. The article also provides guidance on how the same integration pattern can be used with any system of record.
Integration scenario
Business requirement
Your system of record periodically generates CSV file exports containing worker data. You want to implement an integration that reads data from the CSV file and automatically provisions user accounts in your target directory (on-premises Active Directory for hybrid users and Microsoft Entra ID for cloud-only users).
Implementation requirement
From an implementation perspective:
- You want to use an Azure Logic Apps workflow to read data from the CSV file exports available in an Azure File Share and send it to the inbound provisioning API endpoint.
- In your Azure Logic Apps workflow, you don't want to implement the complex logic of comparing identity data between your system of record and target directory.
- You want to use Microsoft Entra provisioning service to apply your IT managed provisioning rules to automatically create/update/enable/disable accounts in the target directory (on-premises Active Directory or Microsoft Entra ID).

Integration scenario variations
While this tutorial uses a CSV file as a system of record, you can customize the sample Azure Logic Apps workflow to read data from any system of record. Azure Logic Apps provides a wide range of built-in connectors and managed connectors with pre-built triggers and actions that you can use in your integration workflow.
Here's a list of enterprise integration scenario variations, where API-driven inbound provisioning can be implemented with a Logic Apps workflow.
| # | System of record | Integration guidance on using Logic Apps to read source data |
|---|---|---|
| 1 | Files stored on SFTP server | Use either the built-in SFTP connector or managed SFTP SSH connector to read data from files stored on the SFTP server. |
| 2 | Database table | If you're using an Azure SQL server or on-premises SQL Server, use the SQL Server connector to read your table data. If you're using an Oracle database, use the Oracle database connector to read your table data. |
| 3 | On-premises and cloud-hosted SAP S/4 HANA or Classic on-premises SAP systems, such as R/3 and ECC |
Use the SAP connector to retrieve identity data from your SAP system. For examples on how to configure this connector, refer to common SAP integration scenarios using Azure Logic Apps and the SAP connector. |
| 4 | IBM MQ | Use the IBM MQ connector to receive provisioning messages from the queue. |
| 5 | Dynamics 365 Human Resources | Use the Dataverse connector to read data from Dataverse tables used by Microsoft Dynamics 365 Human Resources. |
| 6 | Any system that exposes REST APIs | If you don't find a connector for your system of record in the Logic Apps connector library, You can create your own custom connector to read data from your system of record. |
After reading the source data, apply your pre-processing rules and convert the output from your system of record into a bulk request that can be sent to the Microsoft Entra provisioning bulkUpload API endpoint.
Important
If you'd like to share your API-driven inbound provisioning + Logic Apps integration workflow with the community, create a Logic app template, document steps on how to use it and submit a pull request for inclusion in the GitHub repository entra-id-inbound-provisioning.
How to use this tutorial
The Logic Apps deployment template published in the Microsoft Entra inbound provisioning GitHub repository automates several tasks. It also has logic for handling large CSV files and chunking the bulk request to send 50 records in each request. Here's how you can test it and customize it per your integration requirements.
Note
The sample Azure Logic Apps workflow is provided "as-is" for implementation reference. If you have questions related to it or if you'd like to enhance it, please use the GitHub project repository.
| # | Automation task | Implementation guidance | Advanced customization |
|---|---|---|---|
| 1 | Read worker data from the CSV file. | The Logic Apps workflow uses an Azure Function to read the CSV file stored in an Azure File Share. The Azure Function converts CSV data into JSON format. If your CSV file format is different, update the workflow step "Parse JSON" and "Construct SCIMUser". | If your system of record is different, check guidance provided in the section Integration scenario variations on how to customize the Logic Apps workflow by using an appropriate connector. |
| 2 | Pre-process and convert data to SCIM format. | By default, the Logic Apps workflow converts each record in the CSV file to a SCIM Core User + Enterprise User representation. If you plan to use custom SCIM schema extensions, update the step "Construct SCIMUser" to include your custom SCIM schema extensions. | If you want to run C# code for advanced formatting and data validation, use custom Azure Functions. |
| 3 | Use the right authentication method | You can either use a service principal or use managed identity to access the inbound provisioning API. Update the step "Send SCIMBulkPayload to API endpoint" with the right authentication method. | - |
| 4 | Provision accounts in on-premises Active Directory or Microsoft Entra ID. | Configure API-driven inbound provisioning app. This generates a unique /bulkUpload API endpoint. Update the step "Send SCIMBulkPayload to API endpoint" to use the right bulkUpload API endpoint. | If you plan to use bulk request with custom SCIM schema, then extend the provisioning app schema to include your custom SCIM schema attributes. |
| 5 | Scan the provisioning logs and retry provisioning for failed records. | This automation isn't yet implemented in the sample Logic Apps workflow. To implement it, refer to the provisioning logs Graph API. | - |
| 6 | Deploy your Logic Apps based automation to production. | Once you have verified your API-driven provisioning flow and customized the Logic Apps workflow to meet your requirements, deploy the automation in your environment. | - |
Step 1: Create an Azure Storage account to host the CSV file
The steps documented in this section are optional. If you already have an existing storage account or would like to read the CSV file from another source like SharePoint site or Blob storage, update the Logic App to use your connector of choice.
- Sign in to the Azure portal as at least an Application Administrator.
- Search for "Storage accounts" and create a new storage account.
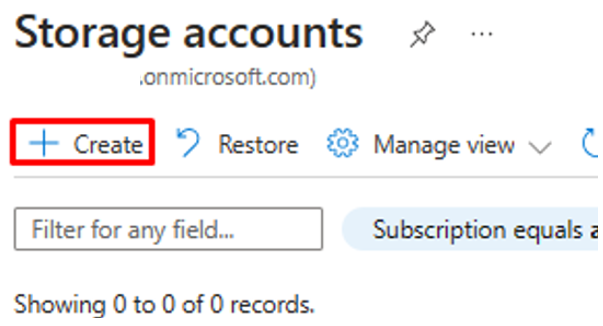
- Assign a resource group and give it a name.

- After the storage account is created, go to the resource.
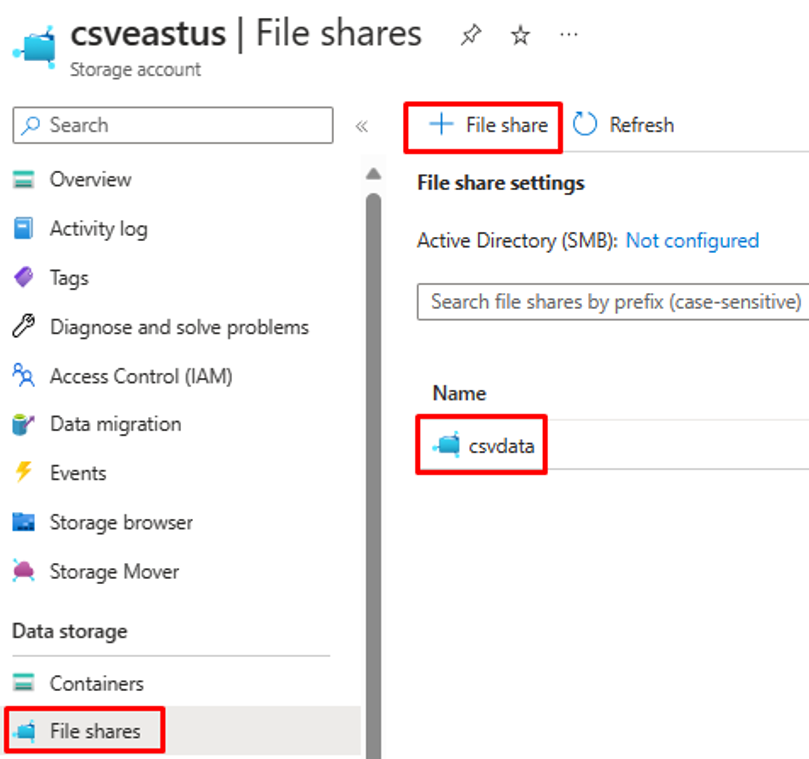
- Select "File share" menu option and create a new file share.

- Verify that the file share creation is successful.
- Upload a sample CSV file to the file share using the upload option.
- Here's a screenshot of the columns in the CSV file.


Step 2: Configure Azure Function CSV2JSON converter
In the browser associated with your Azure portal, open the GitHub repository URL - https://github.com/joelbyford/CSVtoJSONcore.
Select the link "Deploy to Azure" to deploy this Azure Function to your Azure tenant.

Specify the resource group under which to deploy this Azure function.

If you get the error "This region has quota of 0 instances", try selecting a different region.
Ensure that the deployment of the Azure Function as an App Service is successful.
Go to the resource group and open the WebApp configuration. Ensure it's in "Running" state. Copy the default domain name associated with the Web App.

Run the following PowerShell script to test if the CSVtoJSON endpoint works as expected. Set the correct values for the variables
$csvFilePathand$uriin the script.# Step 1: Read the CSV file $csvFilePath = "C:\Path-to-CSV-file\hr-user-data.csv" $csvContent = Get-Content -Path $csvFilePath # Step 2: Set up the request $uri = "https://az-function-webapp-your-domain/csvtojson" $headers = @{ "Content-Type" = "text/csv" } $body = $csvContent -join "`n" # Join the CSV lines into a single string # Step 3: Send the POST request $response = Invoke-WebRequest -Uri $uri -Method POST -Headers $headers -Body $body # Output and format the JSON response $response.Content | ConvertFrom-JSON | ConvertTo-JSONIf the Azure Function deployment is successful, then the last line of the script outputs the JSON version of the CSV file.
 .
.To allow Logic Apps to invoke this Azure Function, in the CORS setting for the WebApp enter asterisk (*) and "Save" the configuration.


Step 3: Configure API-driven inbound user provisioning
- Configure API-driven inbound user provisioning.
Step 4: Configure your Azure Logic Apps workflow
Select the button below to deploy the Azure Resource Manager template for the CSV2SCIMBulkUpload Logic Apps workflow.
Under instance details, update the highlighted items, copy-pasting values from the previous steps.
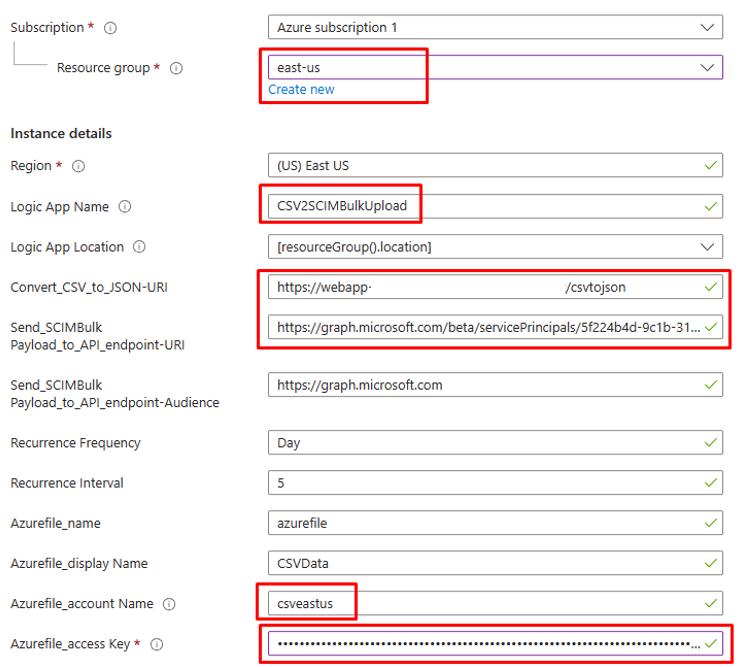
For the
Azurefile_access Keyparameter, open your Azure file storage account and copy the access key present under "Security and Networking".

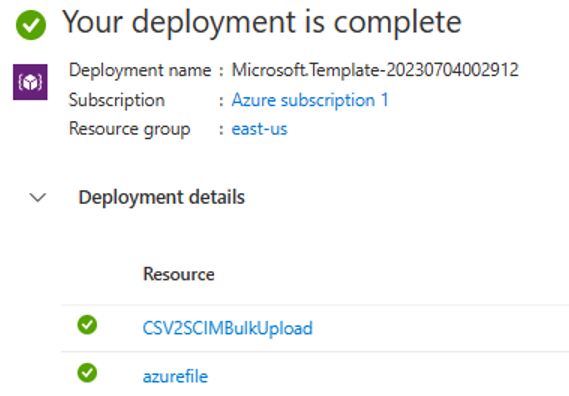
Select "Review and Create" option to start the deployment.
Once the deployment is complete, you see the following message.


Step 5: Configure system assigned managed identity
- Visit the Settings -> Identity blade of your Logic Apps workflow.
- Enable System assigned managed identity.

- You'll see a prompt to confirm the use of the managed identity. Select Yes.
- Grant the managed identity permissions to perform bulk upload.

Step 6: Review and adjust the workflow steps
Open the Logic App in the designer view.
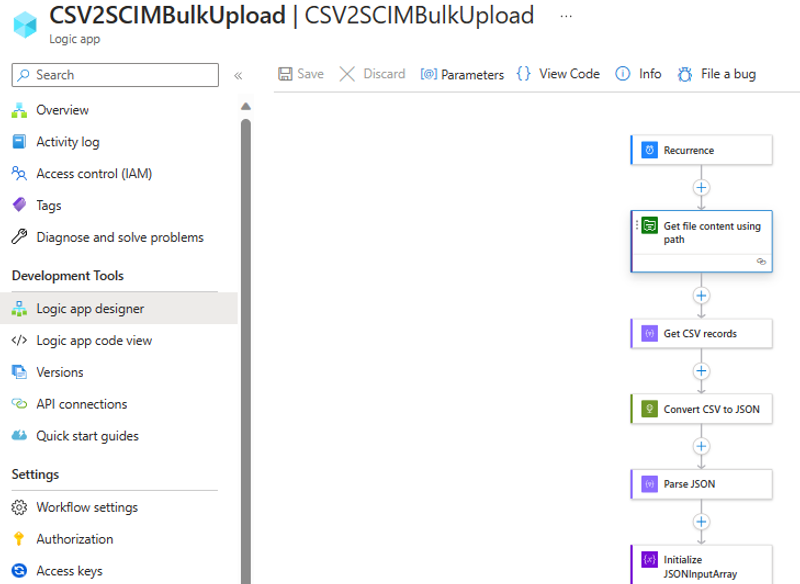
Review the configuration of each step in the workflow to make sure it's correct.
Open the "Get file content using path" step and correct it to browse to the Azure File Storage in your tenant.
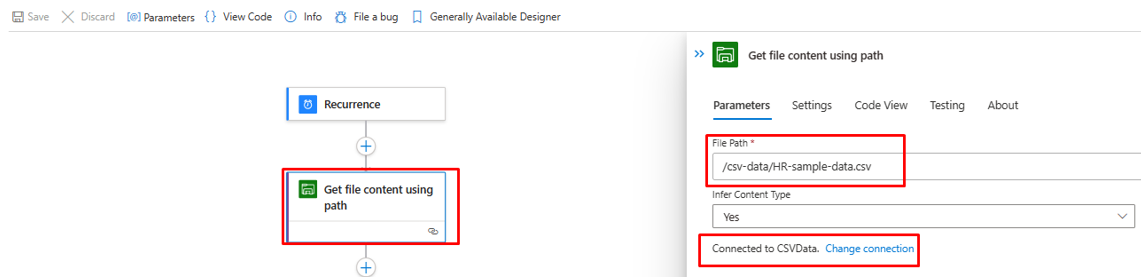
Update the connection if necessary.
Make sure your "Convert CSV to JSON" step is pointing to the right Azure Function Web App instance.

If your CSV file content / headers is different, then update the "Parse JSON" step with the JSON output that you can retrieve from your API call to the Azure Function. Use PowerShell output from Step 2.

In the step "Construct SCIMUser", ensure that the CSV fields map correctly to the SCIM attributes that will be used for processing.

In the step "Send SCIMBulkPayload to API endpoint", ensure you're using the right API endpoint and authentication mechanism.


Step 7: Run trigger and test your Logic Apps workflow
- In the "Generally Available" version of the Logic Apps designer, select on Run Trigger to manually execute the workflow.

- After the execution is complete, review what action Logic Apps performed in each iteration.
- In the final iteration, you should see the Logic Apps upload data to the inbound provisioning API endpoint. Look for
202 Acceptstatus code. You can copy-paste and verify the bulk upload request.

