Note
Access to this page requires authorization. You can try signing in or changing directories.
Access to this page requires authorization. You can try changing directories.
In this article, you learn how to install and configure the Microsoft Entra Connect Health agents.
Learn how to download the agents.
Note
Microsoft Entra Connect Health is not available in the China sovereign cloud.
Requirements
The following table lists requirements for using Microsoft Entra Connect Health:
| Requirement | Description |
|---|---|
| You have a Microsoft Entra ID P1 or P2 subscription. | Microsoft Entra Connect Health is a feature of Microsoft Entra ID P1 or P2. For more information, see Sign up for Microsoft Entra ID P1 or P2. To start a free 30-day trial, see Start a trial. |
| You're a Global Administrator in Microsoft Entra ID. | Currently, only Global Administrator accounts can install and configure health agents. For more information, see Administering your Microsoft Entra directory. By using Azure role-based access control (Azure RBAC), you can allow other users in your organization to access Microsoft Entra Connect Health. For more information, see Azure RBAC for Microsoft Entra Connect Health. Important: Use a work or school account to install the agents. You can't use a Microsoft account to install the agents. For more information, see Sign up for Azure as an organization. |
| The Microsoft Entra Connect Health agent is installed on each targeted server. | Health agents must be installed and configured on targeted servers so that they can receive data and provide monitoring and analytics capabilities. For example, to get data from your Active Directory Federation Services (AD FS) infrastructure, you must install the agent on the AD FS server and on the Web Application Proxy server. Similarly, to get data from your on-premises AD Domain Services infrastructure, you must install the agent on the domain controllers. |
| The Azure service endpoints have outbound connectivity. | During installation and runtime, the agent requires connectivity to Microsoft Entra Connect Health service endpoints. If firewalls block outbound connectivity, add the outbound connectivity endpoints to an allowlist. |
| Outbound connectivity is based on IP addresses. | For information about firewall filtering based on IP addresses, see Azure IP ranges. |
| TLS inspection for outbound traffic is filtered or disabled. | The agent registration step or data upload operations might fail if there's TLS inspection or termination for outbound traffic at the network layer. For more information, see Set up TLS inspection. |
| Firewall ports on the server are running the agent. | The agent requires the following firewall ports to be open so that it can communicate with the Microsoft Entra Connect Health service endpoints: - TCP port 443 - TCP port 5671 The latest version of the agent doesn't require port 5671. Upgrade to the latest version so that only port 443 is required. For more information, see Hybrid identity required ports and protocols. |
| If Internet Explorer enhanced security is enabled, allow specified websites. | If Internet Explorer enhanced security is enabled, allow the following websites on the server where you install the agent: - https://login.microsoftonline.com - https://secure.aadcdn.microsoftonline-p.com - https://login.windows.net - https://aadcdn.msftauth.net - The federation server for your organization that's trusted by Microsoft Entra ID (for example, https://sts.contoso.com). For more information, see How to configure Internet Explorer. If you have a proxy in your network, see the note that appears at the end of this table. |
| PowerShell version 5.0 or later is installed. | Windows Server 2016 includes PowerShell version 5.0. |
Important
Windows Server Core doesn't support installing the Microsoft Entra Connect Health agent.
Note
If you have a highly locked-down and restricted environment, you need to add more URLs than the URLs the table lists for Internet Explorer enhanced security. Also add URLs that are listed in the table in the next section.
Important
Microsoft Entra Connect Health now supports installation using the Hybrid Identity Administrator role. If you installed Microsoft Entra Connect Sync using an account with the role, the Entra Connect Health agent will automatically be in active state and you will not need to do a re-install using a Global Administrator account.
New versions of the agent and auto upgrade
If a new version of the health agent is released, any existing, installed agents are automatically updated.
Outbound connectivity to Azure service endpoints
During installation and runtime, the agent needs connectivity to Microsoft Entra Connect Health service endpoints. If firewalls block outbound connectivity, make sure that the URLs in the following table aren't blocked by default.
Don't disable security monitoring or inspection of these URLs. Instead, allow them as you would allow other internet traffic.
These URLs allow communication with Microsoft Entra Connect Health service endpoints. Later in this article, you'll learn how to check outbound connectivity by using Test-MicrosoftEntraConnectHealthConnectivity.
| Domain environment | Required Azure service endpoints |
|---|---|
| General public | - *.blob.core.windows.net - *.aadconnecthealth.azure.com - **.servicebus.windows.net - Port: 5671 (If 5671 is blocked, the agent falls back to 443, but we recommend that you use port 5671. This endpoint isn't required in the latest version of the agent.)- *.adhybridhealth.azure.com/- https://management.azure.com - https://policykeyservice.dc.ad.msft.net/ - https://login.windows.net - https://login.microsoftonline.com - https://secure.aadcdn.microsoftonline-p.com - https://www.office.com (This endpoint is used only for discovery purposes during registration.)- https://aadcdn.msftauth.net - https://aadcdn.msauth.net - https://autoupdate.msappproxy.net - http://www.microsoft.com - https://www.microsoft.com |
| Azure Government | - *.blob.core.usgovcloudapi.net - *.servicebus.usgovcloudapi.net - *.aadconnecthealth.microsoftazure.us - https://management.usgovcloudapi.net - https://policykeyservice.aadcdi.azure.us - https://login.microsoftonline.us - https://secure.aadcdn.microsoftonline-p.com - https://www.office.com (This endpoint is used only for discovery purposes during registration.)- https://aadcdn.msftauth.net - https://aadcdn.msauth.net - https://autoupdate.msappproxy.us - http://www.microsoft.com - https://www.microsoft.com |
Download the agents
To download and install the Microsoft Entra Connect Health agent:
- Make sure that you satisfy the requirements to install Microsoft Entra Connect Health.
- Get started using Microsoft Entra Connect Health for AD FS:
- Get started using Microsoft Entra Connect Health for sync:
- Download and install the latest version of Microsoft Entra Connect. The health agent for sync is installed as part of the Microsoft Entra Connect installation (version 1.0.9125.0 or later).
- Get started using Microsoft Entra Connect Health for AD Domain Services:
Install the agent for AD FS
For information on installing and monitoring AD FS with the Microsoft Entra Connect Health agent, see Microsoft Entra Connect Health agents for AD FS.
Install the agent for sync
The Microsoft Entra Connect Health agent for sync is installed automatically in the latest version of Microsoft Entra Connect. To use Microsoft Entra Connect for sync, download the latest version of Microsoft Entra Connect and install it.
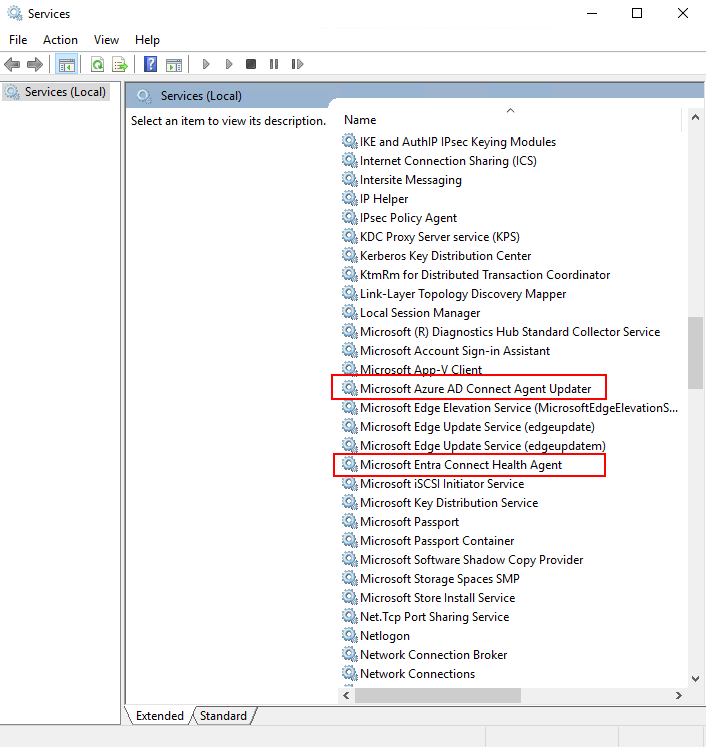
To verify that the agent has been installed, look for the following services on the server. If you completed the configuration, the services should already be running. Otherwise, the services are stopped until the configuration is complete.
- Microsoft Entra Connect Agent Updater
- Microsoft Entra Connect Health Agent
Note
Remember that you must have Microsoft Entra ID P1 or P2 to use Microsoft Entra Connect Health. If you don't have Microsoft Entra ID P1 or P2, you can't complete the configuration in the Microsoft Entra admin center. For more information, see the requirements.
Manually register Microsoft Entra Connect Health for sync
If the Microsoft Entra Connect Health for sync agent registration fails after you successfully install Microsoft Entra Connect, you can use a PowerShell command to manually register the agent.
Important
Use this PowerShell command only if the agent registration fails after you install Microsoft Entra Connect.
Manually register the Microsoft Entra Connect Health agent for sync by using the following PowerShell command. The Microsoft Entra Connect Health services will start after the agent has been successfully registered.
Register-MicrosoftEntraConnectHealthAgent -AttributeFiltering $true -StagingMode (Get-ADSyncScheduler).StagingModeEnabled
The command takes following parameters:
AttributeFiltering:$true(default) if Microsoft Entra Connect isn't syncing the default attribute set and has been customized to use a filtered attribute set. Otherwise, use$false.StagingMode:$false(default) if the Microsoft Entra Connect server is not in staging mode. If the server is configured to be in staging mode, use$true. You can determine if the server is in staging mode with(Get-ADSyncScheduler).StagingModeEnabled.
When you're prompted for authentication, use the same Global Administrator account (such as admin@domain.onmicrosoft.com) that you used to configure Microsoft Entra Connect.
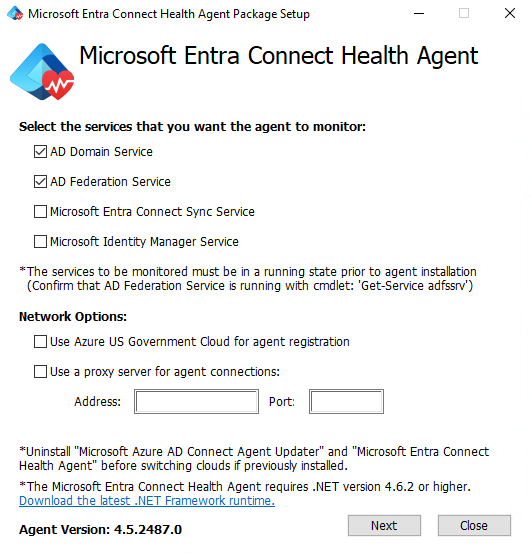
Install the agent for AD Domain Services
To start the agent installation, double-click the .exe file that you downloaded. In the first window, select Install.
When you're prompted, sign in by using a Microsoft Entra account that has permissions to register the agent. By default, the Hybrid Identity Administrator account has permissions.
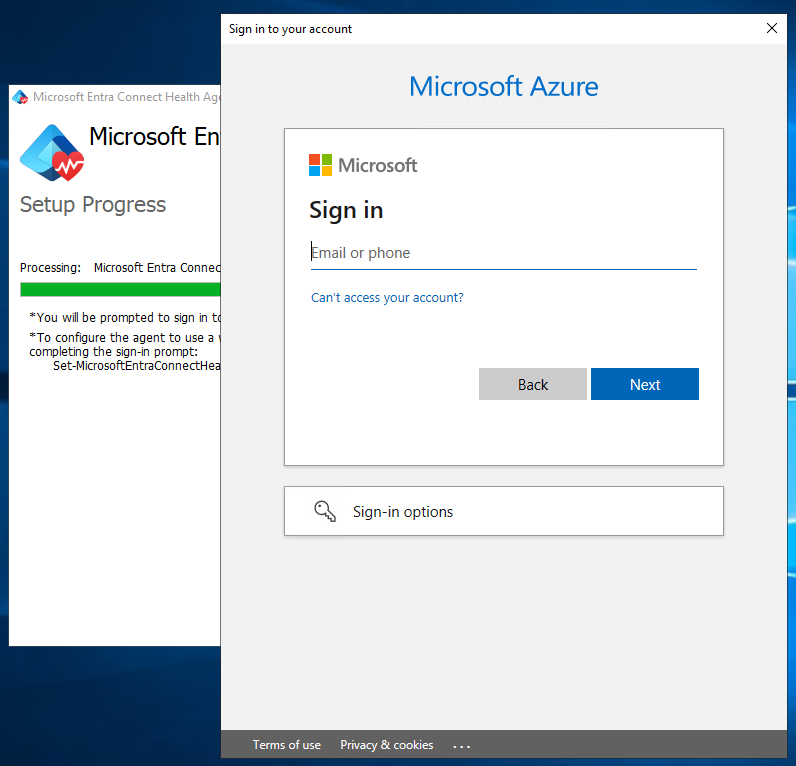
After you sign in, the installation process will complete and you can close the window.
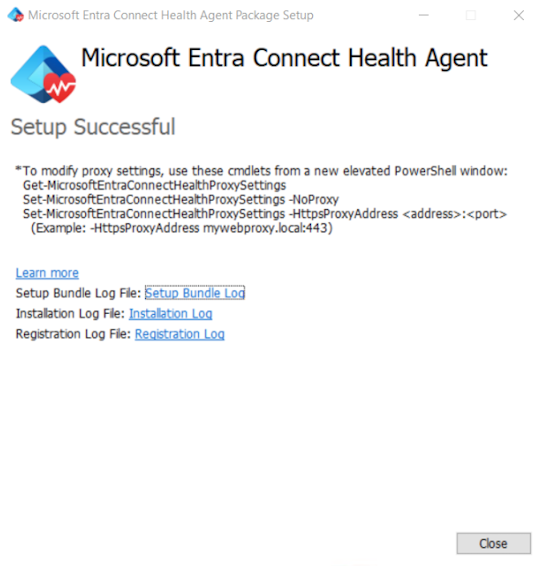
At this point, the agent services should start to automatically allow the agent to securely upload the required data to the cloud service.
To verify that the agent was installed, look for the following services on the server. If you completed the configuration, they should already be running. Otherwise, they're stopped until the configuration is complete.
- Microsoft Entra Connect Agent Updater
- Microsoft Entra Connect Health Agent
Quickly install the agent on multiple servers
Create a user account in Microsoft Entra ID. Secure the account by using a password.
Assign the Owner role for this local Microsoft Entra account in Microsoft Entra Connect Health by using the portal. Assign the role to all service instances.
Download the .exe MSI file in the local domain controller for the installation.
Run the following script. Replace the parameters with your new user account and its password.
AdHealthAddsAgentSetup.exe /quiet AddsMonitoringEnabled=1 SkipRegistration=1
Start-Sleep 30
$userName = "NEWUSER@DOMAIN"
$secpasswd = ConvertTo-SecureString "PASSWORD" -AsPlainText -Force
$myCreds = New-Object System.Management.Automation.PSCredential ($userName, $secpasswd)
Import-Module "C:\Program Files\Microsoft Azure AD Connect Health Agent\Modules\AdHealthConfiguration"

Register-MicrosoftEntraConnectHealthAgent -Credential $myCreds
When you finish, you can remove access for the local account by completing one or more of the following tasks:
- Remove the role assignment for the local account for Microsoft Entra Connect Health.
- Rotate the password for the local account.
- Disable the Microsoft Entra local account.
- Delete the Microsoft Entra local account.
Register the agent by using PowerShell
After you install the relevant agent setup.exe file, you can register the agent by using the following PowerShell commands, depending on the role. Open PowerShell as administrator and run the relevant command:
Register-MicrosoftEntraConnectHealthAgent
Note
To register against sovereign clouds, use the following command lines:
Register-MicrosoftEntraConnectHealthAgent -UserPrincipalName upn-of-the-user
These commands accept Credential as a parameter to complete the registration non-interactively or to complete the registration on a computer that runs Server Core. Keep these factors in mind:
- You can capture
Credentialin a PowerShell variable that's passed as a parameter. - You can provide any Microsoft Entra identity that has permissions to register the agents, and which does not have multifactor authentication enabled.
- By default, Global Administrators have permissions to register the agents. You can also allow less-privileged identities to do this step. For more information, see Azure RBAC.
    $cred = Get-Credential
    Register-MicrosoftEntraConnectHealthAgent -Credential $cred
Configure Microsoft Entra Connect Health agents to use HTTP proxy
You can configure Microsoft Entra Connect Health agents to work with an HTTP proxy.
Note
Netsh WinHttp set ProxyServerAddressisn't supported. The agent uses System.Net instead of Windows HTTP Services to make web requests.- The configured HTTP proxy address is used to pass through encrypted HTTPS messages.
- Authenticated proxies (using HTTPBasic) aren't supported.
Change the agent proxy configuration
To configure the Microsoft Entra Connect Health agent to use an HTTP proxy, you can:
- Import existing proxy settings.
- Specify proxy addresses manually.
- Clear the existing proxy configuration.
Note
To update the proxy settings, you must restart all Microsoft Entra Connect Health agent services. To restart all the agents, run the following command:
Restart-Service AzureADConnectHealthAgent*
Import existing proxy settings
You can import Internet Explorer HTTP proxy settings so that Microsoft Entra Connect Health agents can use the settings. On each of the servers that run the health agent, run the following PowerShell command:
Set-MicrosoftEntraConnectHealthProxySettings -ImportFromInternetSettings
You can import WinHTTP proxy settings so that the Microsoft Entra Connect Health agents can use them. On each of the servers that run the health agent, run the following PowerShell command:
Set-MicrosoftEntraConnectHealthProxySettings -ImportFromWinHttp
Specify proxy addresses manually
You can manually specify a proxy server. On each of the servers that run the health agent, run the following PowerShell command:
Set-MicrosoftEntraConnectHealthProxySettings -HttpsProxyAddress address:port
Here's an example:
Set-MicrosoftEntraConnectHealthProxySettings -HttpsProxyAddress myproxyserver:443
In this example:
- The
addresssetting can be a DNS-resolvable server name or an IPv4 address. - You can omit
port. If you do, 443 is the default port.
Clear the existing proxy configuration
You can clear the existing proxy configuration by running the following command:
Set-MicrosoftEntraConnectHealthProxySettings -NoProxy
Read current proxy settings
You can read the current proxy settings by running the following command:
Get-MicrosoftEntraConnectHealthProxySettings
Test connectivity to the Microsoft Entra Connect Health service
Occasionally, the Microsoft Entra Connect Health agent loses connectivity with the Microsoft Entra Connect Health service. Causes of this connectivity loss might include network problems, permissions problems, and various other problems.
If the agent can't send data to the Microsoft Entra Connect Health service for longer than two hours, the following alert appears in the portal: Health Service data is not up to date.
You can find out whether the affected Microsoft Entra Connect Health agent can upload data to the Microsoft Entra Connect Health service by running the following PowerShell command:
Test-MicrosoftEntraConnectHealthConnectivity -Role ADFS
The Role parameter currently takes the following values:
ADFSSyncADDS
Note
To use the connectivity tool, you must first register the agent. If you can't complete the agent registration, make sure that you meet all the requirements for Microsoft Entra Connect Health. Connectivity is tested by default during agent registration.
Next steps
Check out the following related articles:
- Microsoft Entra Connect Health
- Microsoft Entra Connect Health operations
- Using Microsoft Entra Connect Health with AD FS
- Using Microsoft Entra Connect Health for sync
- Using Microsoft Entra Connect Health with AD Domain Services
- Microsoft Entra Connect Health FAQ
- Microsoft Entra Connect Health version history