Tutorial: Microsoft Entra ID integration with Oracle HCM
The Inbound Provisioning API is a capability that allows you to create, update, and delete users in Microsoft Entra ID and on-premises Active Directory from an external source, such as Oracle Human Capital Management (HCM). This capability enables organizations to improve productivity, strengthen security and more easily meet compliance and regulatory requirements.
You can use Microsoft Entra ID Governance to automatically ensure that the right people have the right access to the right resources. This access includes identity and access process automation, delegation to business groups, and increased visibility.
In this tutorial, we guide you through the steps and best practices for integrating Oracle HCM with Microsoft Entra ID via API-driven provisioning. You'll learn how to:
- Prepare your environment and configure the API settings
- Export your worker data from Oracle HCM in CSV format and transform it to the system for cross-domain identity management (SCIM) format using Microsoft scripts
- Send your worker data to the Inbound Provisioning API using PowerShell or Logic Apps
- Perform delta syncs to keep your worker data up to date using Oracle ATOM feed APIs or HCM Extracts
- Configure writeback (if necessary) from Microsoft Entra ID to Oracle HCM using the Oracle HCM SCIM APIs
Terminology
Oracle HCM Fusion Cloud (oracle.com): This guide focuses specifically on how to integrate from Oracle HCM Fusion Cloud to Microsoft Entra ID. Other Oracle offerings, such as PeopleSoft and Taleo, aren't in scope for this tutorial.
Licensing:
Microsoft Entra ID P1 / EMS E3 / Microsoft 365 E3: These licenses allow you to use our new API-driven provisioning feature.
Microsoft Entra ID Governance license: This add-on license is required to configure lifecycle workflows.
Azure subscription: This subscription is required if you plan to use Azure Logic Apps.
Prerequisites
Before you start integrating Oracle HCM with Microsoft Entra ID using the Inbound Provisioning API, you need to ensure that you have the following prerequisites:
An Oracle HCM (oracle.com) account with privileges to:
- View and export HCM data.
- Access the Oracle HCM REST APIs. For this tutorial, we referenced Human Resources 24A (oracle.com). and Applications Common 24A (oracle.com).
A Microsoft Entra ID tenant with a minimum P1 license (or EMS E3 / Microsoft 365 E3):
To install the provisioning agent (hybrid users only), you'll need access to the Microsoft Windows server connected to your AD Domain.
To create a gallery app and provisioning job, you'll need Microsoft Entra with Application Admin and Hybrid Identity Admin roles.
Integration overview
There are three main sync scenarios that you can use to set up an HR integration. The diagram in this section illustrates these sync scenarios. This guide is split up and organized into three sections. For each workflow, we provide a recommendation on how to configure the workflow.
Initial / full sync is the process of synchronizing all worker data between two systems, in this case: Oracle HCM and Microsoft Entra ID directly or to on-premises Active Directory (on-premises AD). This process includes all worker identities and attributes such as personal information, contact information, employment information, and more. A full sync is typically performed during the initial integration setup to ensure that all worker data is consistent and up to date across both systems.
Delta sync is the process of synchronizing only the changes or updates that occurred since the last sync with Oracle HCM. Delta syncs are typically performed after the initial full sync to keep worker data up to date with any changes that occur in the source system. This process includes new employees, updated employee data, or deleted employees. Delta syncs are incremental updates and are faster and more efficient than performing a full sync every time any worker data changes.
Writeback is the optional process of sending user attribute changes that occur in Microsoft Entra ID (such as username, email, and phone numbers) back to Oracle HCM.

Integration steps
| # | Step | What to do | Who to engage |
|---|---|---|---|
| 1. | Determine which set of attributes you want to provision from HCM | • Reference this list of HCM attributes and determine which attributes you wish to export to Microsoft Entra ID • Map Oracle HCM attributes to SCIM attributes • Define unique ID generation and transformation rules |
Oracle HCM Admin & IT Admin |
| 2. | Grant permissions to the inbound provisioning API | Create an application to represent your API client and grant it permissions to send data to the inbound provisioning endpoint | IT Admin - Privileged Role Administrator |
| 3. | Determine your provisioning target: Are you provisioning cloud-only identities to Microsoft Entra ID or hybrid identities to on-premises AD? | If your target is Microsoft Entra ID (cloud-only identity provisioning): • Configure gallery app • Map SCIM to Microsoft Entra attributes If your target is on-premises AD (hybrid identity provisioning): • Download and configure provisioning agent • Configure gallery app • Map SCIM attributes to on-premises Active Directory • Update your Microsoft Entra Connect Sync and cloud sync mappings to flow new HR attributes to Entra ID |
For provisioning agent installation, involve Windows admin For gallery app configuration, engage admin with Application Admin privileges |
| 4. | Perform initial sync to send full scope of data to provisioning endpoint | • Prepare for initial sync • Perform CSV export and send data to API • Validate that the right workers have been matched and are present in Microsoft Entra / AD |
IT Admin |
| 5. | Perform delta syncs to keep data in Microsoft Entra ID up to date | Use one of these methods: • Use CSV extracts • Use Atom Feed APIs |
IT Admin |
| 6. | Writeback data to Oracle HCM | • Configure and run writeback provisioning job | IT Admin |
| 7. | Recommended: Configure Microsoft Entra lifecycle workflows | • Automate your Joiner, Mover, Leaver processes using Microsoft Entra • Governance license required |
IT Admin |
Configure gallery application
Before you can configure the provisioning job in Microsoft Entra, you need to determine if the target for your provisioning is on-premises AD or Microsoft Entra ID. If you wish to have hybrid users with an on-premises dependency, AD becomes your target. If your users are cloud only, you can provision them directly to Microsoft Entra ID.
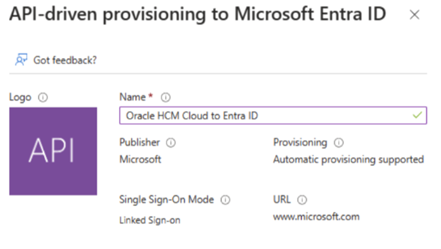
For cloud-only users
Create and configure the gallery application API-driven provisioning to Microsoft Entra ID by following these steps:
Create the gallery application, then name the application Oracle HCM Cloud to Entra ID provisioning.
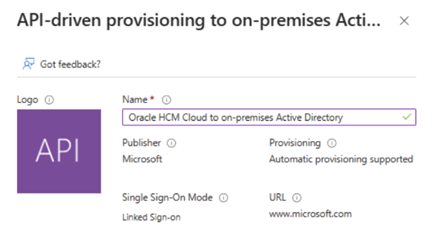
For hybrid users
Work with your Windows admin to install the provisioning agent on a domain-joined Windows server, then follow these steps:
Create the gallery application, then name the application Oracle HCM Cloud to on-premises Active Directory.
Prepare for initial sync
Before sending your initial sync payload, you need to make sure your data is prepared to properly sync with Microsoft Entra. The following steps help ensure a smooth integration.
Matching identifier presence and uniqueness: The provisioning service uses a matching attribute to uniquely identify and link worker records in your Oracle system with corresponding user accounts in AD / Microsoft Entra ID. The default matching attribute pair is Person Number in Oracle HCM mapped to employee ID attribute in Microsoft Entra ID / on-premises AD. Ensure that the value of employee ID is populated in Microsoft Entra ID (for cloud-only users) and on-premises AD (for hybrid users) before initiating full sync, as it uniquely identifies users.
Use scoping filters to skip HR records that are no longer relevant: HR systems have several years of employment data probably going all the way back to the 1970s. On the other hand, your IT team may only be interested in the list currently active employees and termination records that will come through after go-live. To filter out HR records that are no longer relevant from your IT team perspective, identify scoping filters rules that you can configure in Microsoft Entra.
CSV export for initial sync
In this step, you'll export your worker data from Oracle HCM in CSV format and transform it to SCIM format using the Microsoft CSV to SCIM scripts. This step allows you to send your worker data to the Inbound Provisioning API in a standards-based payload that it can understand and process.
Share the list of Oracle HCM worker attributes you wish to export with your Oracle HCM administrator. To export your worker data from Oracle HCM in CSV format, Oracle provides multiple options.
HCM Extract tool: The main way to retrieve data in bulk from Oracle HCM Cloud is by using HCM Extracts, a tool for generating data files and reports. HCM Extracts has a dedicated interface for specifying the records and attributes to be extracted. With this tool, you can:
- Identify records for extraction using complex selection criteria
- Define data elements in an HCM extract using fast formula database items and rules
Note
To get started with creating HCM Extracts, refer to Define Extracts (oracle.com).
Oracle BI Publisher: Supports both scheduled and unplanned reporting, based on either predefined Oracle Transactional Business Intelligence analysis structures or your own data models. You can generate reports in various formats. To use Oracle BI Publisher for outbound integrations, you generate reports in a format suitable for automatic downstream processing, such as XML or CSV. To get started with creating your BI Publisher report, refer to Define the BI Publisher Template in HCM Extracts (oracle.com).
Oracle Integration Cloud (OIC) Service: If you have a subscription to OIC, you can configure the integration with the Oracle HCM Adapter (oracle.com) to extract the required data from Oracle HCM. Oracle provides a guide (oracle.com) that you can use to get started.
Note
Work with your Oracle HCM administrator to export your required attributes into a CSV file.
After you've exported your worker data to a CSV file, you need to transform the CSV to SCIM format so that the payload is in a format that we can accept. We provide documentation and sample code for how to transform your CSV into a SCIM payload via two methods: PowerShell and Azure Logic Apps.
Here are links for performing this transformation with each method:
PowerShell: API-driven inbound provisioning with PowerShell script
Azure Logic Apps: API-driven inbound provisioning with Azure Logic Apps
The inbound provisioning process includes sending the provisioning payload. Before you send the payload, make sure to select Start provisioning in the Microsoft Entra admin center to ensure that the provisioning job is listening to new requests. Before sending the full file for processing, send 5-10 records to validate the correct matching of workers and attributes. After the payload is sent, the users will show up briefly in your Microsoft Entra tenant /on-premises AD.
Delta syncs
After you've sent your worker data to the Inbound Provisioning API for the initial sync, you need to perform delta syncs to keep your worker data up to date. Delta syncs are incremental updates that only send the changes that occurred since the last sync, such as new workers, updated workers, or deleted workers.
To perform delta syncs, you have three options:
Option 1: Use the Oracle ATOM feed APIs to get real-time notifications of worker changes in Oracle HCM and send them to the Inbound Provisioning API.
Option 2: Use CSV Extracts to generate periodic reports of worker changes in Oracle HCM and send the extracts to the Inbound Provisioning API using your own automation tool or Logic Apps.
Option 3: Use the Oracle Integration Cloud Service (oracle.com). If you have a subscription to OIC, you can configure the integration with the Oracle HCM Adapter (oracle.com) to extract the required data from Oracle HCM. Oracle provides a guide (oracle.com) that you can use to get started.
Option 1: Use the Oracle ATOM feed APIs
The Oracle ATOM feed APIs provide real-time notifications of worker changes in Oracle HCM. You can subscribe to the ATOM feed APIs and receive a JSON representation of attributes that contain the worker data that changed. You can then transform the JSON to SCIM format and send them to the Inbound Provisioning API using our sample PowerShell script or Logic Apps integration.
If you intend to use the ATOM feeds integration, make sure to turn on ATOM feeds immediately after your initial sync. A delay in this step can lead to loss of changes.
To get started with Oracle's ATOM feeds, reference the Oracle documentation (oracle.com) and tutorial (oracle.com). We recommend subscribing to the Employee workspace (oracle.com) and applying these Atom Feed collections: newhire, empassignment, empupdate, termination, cancelworkrelship, and workrelshipupdate.
Once you've configured ATOM feeds in your HCM tenant, you'll need to create a custom module that reads the output of the ATOM feed API and sends the data to Microsoft Entra ID in a SCIM payload format using the Inbound Provisioning API.
The logic in the custom module is responsible for handling the following scenarios:
- Data validation
- Unique ID generation
- Sequencing of ATOM feeds
- Conversion of ATOM feeds to SCIM payloads
- Error handling
We recommend using an Oracle HCM partner or a Microsoft System Integrator to build this custom module. You can host this custom module either in an Oracle middleware like Oracle Integration Cloud, or in Azure cloud as an Azure function, Azure Logic Apps, or Azure Data Factory pipeline.
Implement Joiner Scenario
Joiner scenarios specifically address the onboarding process for new hires. Oracle HCM ATOM feeds returns data for joiners as documented here: Fusion Cloud HCM Integration with External Entitlement Management Systems (oracle.com).
Read data from the new hire ATOM feed and implement logic in your custom module to ensure the following data elements are present in the SCIM payload: personal data, contact data, employment information, and job information.
If required after getting the ATOM feed for joiner scenarios, query the Workers or Employees endpoints to retrieve additional worker attributes.
To trigger Microsoft Entra Lifecycle Workflows for new hires, be sure to include the custom SCIM attribute for the employee’s hire date: urn:ietf:params:scim:schemas:extension:COMPANYNAME:1.0:User:HireDate.
Use the Oracle HCM field EffectiveStartDate to set the value for the hire date. Refer to the SCIM payload example.
Implement Mover Scenario
Mover scenarios are triggered in Oracle HCM when a worker is converted from full-time to contractor or vice-versa, when an assignment change occurs, when a work relationship change occurs, when there is a transfer, or when there is a promotion. Oracle HCM ATOM feeds returns data for movers as documented here: Fusion Cloud HCM Integration with External Entitlement Management Systems (oracle.com).
Make sure to fetch the new values of attributes that changed in Oracle HCM. These values can often be fetched from the Changed Attributes section of the ATOM feed response. If required, query the Workers or Employees endpoints directly to retrieve additional worker attributes.
Use the data retrieved to construct a SCIM payload. Refer to the SCIM payload example.
Implement Leaver Scenario
Leaver scenarios occur when a worker’s employment with the organization is terminated, either voluntarily or involuntarily. Oracle HCM ATOM feeds returns data for leavers as documented here: Fusion Cloud HCM Integration with External Entitlement Management Systems (oracle.com). Read data from the ATOM feed and construct the SCIM payload.
To trigger Lifecycle Workflows for leavers, be sure to include the custom SCIM attribute for the employee’s leave date: urn:ietf:params:scim:schemas:extension:COMPANYAME:1.0:User:TermDate
Use the Oracle HCM field EffectiveDate to set the value for the termination date. Refer to the SCIM payload example.
SCIM payload example
Transform the JSON payloads associated with the Joiner, Mover, and Leaver scenarios to create a SCIM payload to send to the Microsoft API-driven provisioning endpoint.
Here is a generic example of how the Oracle HCM attributes could map to attributes in the SCIM payload based on the Oracle HCM to SCIM worksheet:
{
"schemas": ["urn:ietf:params:scim:api:messages:2.0:BulkRequest"],
"Operations": [

{

    "method": "POST",
    "bulkId": "897401c2-2de4-4b87-a97f-c02de3bcfc61",
    "path": "/Users",
    "data": {
        "schemas": ["urn:ietf:params:scim:schemas:core:2.0:User",
        "urn:ietf:params:scim:schemas:extension:enterprise:2.0:User"],
        "externalId": "<Oracle HCM workers.PersonNumber>",
        "userName": "<Oracle HCM employee.UserName>",
        "name": {
            "familyName": "<Oracle HCM workers.names.LastName>",
            "givenName": "<Oracle HCM workers.names.FirstName> ",
            "middleName": "<Oracle HCM workers.names.MiddleName>",
               },
        "displayName": "<Oracle HCM workers.DisplayName>",
        "emails": [
        {
          "value": "<Oracle HCM workers.emails.EmailAddress> ",
          "type": "work",
          "primary": true
        }
        ],
        "addresses": [
        {
          "type": "work",
          "streetAddress": "<Oracle HCM workers.addresses.AddressLine1>",
          "locality": "<Oracle HCM workers.addresses.TownorCity>",
          "region": "<Oracle HCM workers.addresses.Region1>",
          "postalCode": "<Oracle HCM workers addresses.PostalCode> ",
          "country": "<Oracle HCM workers addresses.Country> ",
          "primary": true
        }
        ],
        "phoneNumbers": [
        {
          "value": "<Oracle HCM workers. phones.PhoneNumber ",
          "type": "work"
        }
        ],
        "userType": "<Oracle HCM workers.workRelationships.WorkerType ",
        "title": " <Oracle HCM worker.workRelationships.assignments.JobName",
         "active":true,
        "urn:ietf:params:scim:schemas:extension:enterprise:2.0:User": {
             "employeeNumber": "<Oracle HCM workers.PersonNumber> ",
             "division": "<Oracle HCM worker.workRelationships.assignments.BusinessUnitId> ",
             "department": "<Oracle HCM worker.workRelationships.assignments.DepartmentId >",
             "manager": {
               "value": "<Oracle HCM worker.workRelationships.assignments.allReports.ManagerPersonNumber> ",
                 "displayName": "<Oracle HCM worker.workRelationships.assignments.allReports.ManagerDisplayName"
             }
        }
    }
}


],
"failOnErrors": null
}
Once you format the SCIM bulk request, you can then send the data to the bulkUpload API endpoint via API-driven provisioning.
Before enabling the integration, run manual tests and verifications to validate the SCIM bulk request payload structure. You may use tools, such as Postman or Graph Explorer to confirm that the bulk request payloads are processed as expected.
Note
If you don't want to engage a partner or build your own custom module, we recommend using the HCM Extract tool described in the next section.
Option 2: Use CSV extracts
Similar to the method used in the initial sync, you can also use CSV extracts to handle your delta syncs. You can configure your extract to only run new changes from the previous sync. Or, you can send the full scope of your worker data and the Microsoft Entra ID Provisioning Service manages and update any changes such as new hires, attributes changes, and terminations.
Similar to initial sync, you can also use multiple options to obtain the CSV extract:
HCM Extract tool: The main way to retrieve data in bulk from Oracle HCM Cloud is by using HCM Extracts, a tool for generating data files and reports. HCM Extracts has a dedicated interface for specifying the records and attributes to be extracted. With this tool, you can:
Identify records for extraction using complex selection criteria.
Define data elements in an HCM extract using fast formula database items and rules.
Note
To get started with creating your HCM Extracts, refer to Define Extracts (oracle.com).
Oracle BI Publisher: Oracle BI Publisher supports both scheduled and unplanned reporting, based on either predefined Oracle Transactional Business Intelligence analysis structures or your own data models. You can generate reports in various formats. To use Oracle BI Publisher for outbound integrations, you generate reports in a format suitable for automatic downstream processing, such as XML or CSV. To get started with creating your BI Publisher report, refer to Define the BI Publisher Template in HCM Extracts (oracle.com).
Oracle Integration Cloud (OIC) service: If you have a subscription to OIC, you can configure the integration with the Oracle HCM Adapter (oracle.com) to extract the required data from Oracle HCM. Oracle provides a guide (oracle.com) that you can use to get started.
Once you have your worker data in CSV format, use either of the following two methods to convert that into a SCIM payload and send the data to our provisioning service.
PowerShell: API-driven inbound provisioning with PowerShell script
Logic Apps: API-driven inbound provisioning with Azure Logic App
Writeback from Microsoft Entra ID to Oracle HCM
After you've synchronized your worker data from Oracle HCM using the Inbound Provisioning API, you may want to configure writeback from the Microsoft Entra Provisioning Service to Oracle HCM. Writeback is the process of sending user changes that occur in Microsoft Entra ID back to Oracle HCM, such as username, email, and phone numbers. This process ensures that your data is consistent and accurate across both systems.
To configure writeback, you'll need to use the Oracle HCM SCIM APIs (oracle.com). These APIs are RESTful web services that allow you to create, update, and delete users in Oracle HCM from an external source, such as Microsoft Entra. You can use the Microsoft Entra Provisioning Service to connect Microsoft Entra to the Oracle HCM SCIM APIs and map the user attributes that you want to writeback.
To set up writeback, you'll need to configure an outbound provisioning job to your Oracle HCM tenant. To configure writeback, you'll need the following info:
REST server URL, which is normally the URL of your Oracle Cloud Service. It should look something like this: https://servername.fa.us2.oraclecloud.com.
Secret token from HCM environment that provides your HCM tenant with access to other systems, such as Microsoft Entra.
- Create an OAUTH token in HCM and save it for use in the steps here. You can create an OAUTH token by going to step four in the following guide (oracle.com).
Once you have your REST server URL and your secret token, follow the steps here to configure the writeback job in Microsoft Entra:
Create a new Enterprise application.
Select the Provisioning option and switch the mode to Automatic.
Enter the endpoint URL of your Oracle HCM tenant and the authentication token in the REST server URL and Secret token fields.
Test the connection, then save the settings.
Go back to the Provisioning overview page for this application and select Edit provisioning. Click the arrow under mappings, then select the link of the mapping schema.
In the edit Attribute Mapping section, select only the Update operation under Target object actions.
You'll notice that HCM attributes are automatically populated in the Attribute mappings section. Only remove attributes that you don't want to writeback data.
Save the settings, then enable the provisioning status.
Use Microsoft Entra's Provision on Demand capability to test and validate the writeback integration.
Once you've validated the workflow, start the job and keep it running for Microsoft Entra to continuously sync data back to Oracle HCM.
Appendix
Worksheet 1: Oracle HCM attributes
The table in this section represents attributes that you can export from Oracle HCM. The names of these attributes may differ in your HCM system, but this list represents a common list of attributes in an HR integration. Determine which attributes you wish to export for your integration.
| Oracle HCM attribute (from CSV file) | Required or mandatory |
|---|---|
| Person Number | Mandatory |
| Account Status | Mandatory -> set value to True for nonterminated workers |
| Street Address | |
| City | |
| State | |
| Postal Code | |
| Country | |
| Department Name | |
| Division | |
| Company | |
| Username | |
| First Name | Mandatory |
| Last Name | Mandatory |
| Job Code | |
| Job Name | |
| Email Address | |
| Manager | |
| Mobile Phone Number | |
| Phone Number | |
| Work Address | |
| Phone Number | |
| Hire Date | Required by Lifecycle Workflows |
| Termination Date | Required by Lifecycle Workflows |
Note
We've included blank rows in the above worksheet, so you can add other attributes not in this list for inclusion in your provisioning job.
Worksheet 2: Oracle HCM to SCIM attribute mapping
The table in this section displays a sample mapping from the Oracle HCM attributes to the generic SCIM attributes supported by the API.
| Oracle HCM attribute (from CSV file) | SCIM attribute |
|---|---|
| Person Number | ExternalId |
| Account Status | Active |
| Street Address | addresses[type eq "work"].streetAddress |
| City | addresses[type eq "work"].locality |
| State | addresses[type eq "work"].region |
| Postal Code | addresses[type eq "work"].postalCode |
| Country | addresses[type eq "work"].country |
| Department Name | urn:ietf:params:scim:schemas: extension:enterprise:2.0:User:department |
| Division | urn:ietf:params:scim:schemas: extension:enterprise:2.0:User:division |
| Company | urn:ietf:params:scim:schemas:extension:enterprise:2.0:User:organization |
| Username | displayName |
| First Name | name.givenName |
| Last Name | name.familyName |
| Job Code | urn:ietf:params:scim:schemas:extension:COMPANYNAME:1.0:User:JobCode |
| Job Name | title |
| Email Address | emails[type eq "work"].value |
| Manager | urn:ietf:params:scim:schemas:extension: enterprise:2.0:User:manager |
| Mobile Phone Number | phoneNumbers[type eq "mobile"].value |
| Phone Number | phoneNumbers[type eq "work"].value |
| Work Address | addresses[type eq "work"].formatted |
| Hire Date | urn:ietf:params:scim:schemas:extension:COMPANYNAME:1.0:User:HireDate |
| Termination Date | urn:ietf:params:scim:schemas:extension:COMPANYAME:1.0:User:TermDate |
Worksheet 3: Define unique ID generation and transformation rules
The table in this section describes certain attributes that require unique generation or specific transformation rules. These include three commonly used attributes that have additional rules to set their value. Reference the links to populate these attributes properly.
| Attribute | How to set attribute value |
|---|---|
| userPrincipalName (mandatory) | Plan cloud HR application to Microsoft Entra user provisioning |
| SamAccountName (on-premises AD only) | Plan cloud HR application to Microsoft Entra user provisioning |
| parentDistinguishedName (on-premises AD only) | Plan cloud HR application to Microsoft Entra user provisioning |
Worksheet 4: SCIM attributes on-premises AD attributes mapping
The table in this section represents the set of on-premises attributes that Active Directory supports. Map your SCIM attributes to the attributes in this table if your provisioning target is Active Directory.
| SCIM attribute | On-premises AD attribute |
|---|---|
| ExternalId | employeeID |
| Active | accountDisabled |
| addresses[type eq "work"].streetAddress | streetAddress |
| addresses[type eq "work"].locality | l |
| addresses[type eq "work"].region | st |
| addresses[type eq "work"].postalCode | postalCode |
| addresses[type eq "work"].country | co |
| urn:ietf:params:scim:schemas:extension:enterprise:2.0:User:department | department |
| urn:ietf:params:scim:schemas:extension:enterprise:2.0:User:division | division |
| urn:ietf:params:scim:schemas:extension:enterprise:2.0:User:organization | company |
| displayName | cn |
| name.givenName | givenName |
| name.familyName | sn |
| urn:ietf:params:scim:schemas:extension:COMPANYNAME:1.0:User:JobCode | extensionAttribute1 |
| title | title |
| emails[type eq "work"].value | <Generated by AD> |
| urn:ietf:params:scim:schemas:extension:enterprise:2.0:User:manager | manager |
| phoneNumbers[type eq "mobile"].value | mobile |
| phoneNumbers[type eq "work"].value | telephoneNumber |
| addresses[type eq "work"].formatted | physicalDeliveryOfficeName |
| urn:ietf:params:scim:schemas:extension:COMPANYNAME:1.0:User:HireDate | extensionAttribute2 |
| urn:ietf:params:scim:schemas:extension:COMPANYAME:1.0:User:TermDate | extensionAttribute3 |
Note
If you're defining SCIM schema extension attributes that don't have a corresponding on-premises AD attribute, you can map them to extensionAttributes 1-15 or extend the AD schema to add a new auxiliary object class with required attributes.
Worksheet 5: On-premises AD to Microsoft Entra ID mapping
Once you have your identities synced to on-premises AD, you can send them to Microsoft Entra ID via cloud sync or Microsoft Entra ID connect. Reference the linked documentation on how to use these tools.
The table in this section is an example attribute mapping from the AD attributes included in Worksheet 4 to Microsoft Entra attributes.
Note
The custom attribute extensionAttribute1 is the worker's job code. In the previous table, it was mapped to AD extensionAttribute1. But here we're mapping it to Microsoft Entra extensionAttribute1, because there's no corresponding attribute in Microsoft Entra. The extensionAttribute2 and extensionAttribute3 (hire date and termination date) are mapped accordingly.
| On-premises AD attribute | Microsoft Entra attribute |
|---|---|
| streetAddress | streetAddress |
| l | city |
| st | state |
| postalCode | postalCode |
| co | country |
| department | department |
| division | EmployeeOrgData.division |
| company | companyName |
| cn | displayName |
| givenName | givenName |
| sn | surname |
| extensionAttribute1 | extensionAttribute1 |
| title | jobTitle |
| <Generated by AD> | |
| manager | manager |
| mobile | mobile |
| telephoneNumber | telephoneNumber |
| physicalDeliveryOfficeName | physicalDeliveryOfficeName |
| extensionAttribute2 | employeeHireDate |
| extensionAttribute3 | employeeLeaveDateTime |
Worksheet 6: SCIM attribute to Microsoft Entra attributes mapping
The table in this section represents the set of attributes that Microsoft Entra ID supports. Map your SCIM attributes to the attributes in this table if your provisioning target is Microsoft Entra ID. To add custom SCIM attributes to your gallery application, refer to Extend API-driven provisioning to sync custom attributes.
| SCIM attribute | Microsoft Entra attribute |
|---|---|
| ExternalId | employeeId |
| Active | accountEnabled |
| addresses[type eq "work"].streetAddress | streetAddress |
| addresses[type eq "work"].locality | city |
| addresses[type eq "work"].region | state |
| addresses[type eq "work"].postalCode | postalCode |
| addresses[type eq "work"].country | country |
| urn:ietf:params:scim:schemas:extension:enterprise:2.0:User:department | department |
| urn:ietf:params:scim:schemas:extension:enterprise:2.0:User:division | EmployeeOrgData.division |
| urn:ietf:params:scim:schemas:extension:enterprise:2.0:User:organization | companyName |
| displayName | displayName |
| name.givenName | givenName |
| name.familyName | surname |
| urn:ietf:params:scim:schemas:extension:COMPANYNAME:1.0:User:JobCode | extensionAttribute1 |
| title | jobTitle |
| emails[type eq "work"].value | |
| urn:ietf:params:scim:schemas:extension:enterprise:2.0:User:manager | manager |
| phoneNumbers[type eq "mobile"].value | mobile |
| phoneNumbers[type eq "work"].value | telephoneNumber |
| addresses[type eq "work"].formatted | physicalDeliveryOfficeName |
| urn:ietf:params:scim:schemas:extension:COMPANYNAME:1.0:User:HireDate | employeeHireDate |
| urn:ietf:params:scim:schemas:extension:COMPANYAME:1.0:User:TermDate | employeeLeaveDateTime |
Acknowledgements
We thank the following partners for their help reviewing and contributing to this tutorial:
- Michael Starkweather, Director at PwC
- Rob Allen, Director of Architecture and Technology at ActiveIdM
- Ray Nalette, Technical Delivery Manager at ActiveIdM
- Randy Robb, Principal Consultant at Oxford Computer Group
- Frank Urena, Principal Architect at Oxford Computer Group
- Nick Herbert, Vice President of Sales at Oxford Computer Group
- Steve Brugger, CEO at Oxford Computer Group
Next steps
Feedback
Coming soon: Throughout 2024 we will be phasing out GitHub Issues as the feedback mechanism for content and replacing it with a new feedback system. For more information see: https://aka.ms/ContentUserFeedback.
Submit and view feedback for