Note
Access to this page requires authorization. You can try signing in or changing directories.
Access to this page requires authorization. You can try changing directories.
Microsoft Copilot Studio is a low-code studio where you build AI agents, connect them to your data and systems, and publish them to the channels your users already work in.
You can add a Fabric data agent to a Copilot Studio agent as a tool. The Copilot Studio agent then calls the Fabric data agent the same way it calls any other tool. The Fabric data agent runs in Fabric, applies the permissions on the underlying data sources, and returns answers grounded in your data that lives in Fabric OneLake.
This article shows you how to add a Fabric data agent as a tool, test the result, and publish your Copilot Studio agent to a channel such as Microsoft Teams or Microsoft 365 Copilot.
Important
When you consume Fabric data agents in Microsoft Copilot Studio, responses returned by the Fabric data agent might be sent outside the Fabric compliance boundary or geographic region. They're processed or stored according to the terms and data handling policies that apply to Microsoft Copilot Studio.
Prerequisites
- A paid F2 or higher Fabric capacity, or a Power BI Premium per capacity (P1 or higher) capacity with Microsoft Fabric enabled.
- Enable cross-geo processing and cross-geo storing for AI, based on the requirements explained in Fabric data agent tenant settings.
- At least one of these data sources, with data: a warehouse, a lakehouse, a Power BI semantic model, a KQL database, a mirrored database, or an ontology. You must have read access to the data source.
- A Microsoft 365 Copilot license, and a user license for each person who builds and manages agents.
Before you begin
Check the following items before you add a Fabric data agent to a Copilot Studio agent:
- The data agent works. Confirm that the data agent answers questions as expected in Fabric.
- The data agent is published. Only published Fabric data agents are available in Copilot Studio. Publish the data agent with a rich, detailed description.
- Both agents are in the same tenant. The Fabric data agent and the Copilot Studio agent must be in the same tenant.
- You use the same account. Sign in to Microsoft Fabric and Microsoft Copilot Studio with the same account.
- You have the right permissions. You need at least read access to the Fabric data agent, read access to its underlying data sources, and permission to create and modify agents in Microsoft Copilot Studio. For more information about data agent permissions, see Fabric data agent sharing and permission management.
How a Fabric data agent works as a tool
Copilot Studio agents built on the GitHub Copilot harness reason over the instructions, knowledge sources, and tools that you give them, and decide which tool to call for each request.
When you add a Fabric data agent as a tool, the orchestrator in Copilot Studio decides when to call it. It makes that decision based on the description you write for the data agent, so a clear and detailed description is important.
The Fabric data agent itself continues to run in Fabric. Permissions on the underlying data sources still apply, and the answer returns to the Copilot Studio agent as a tool result.
You can add more than one Fabric data agent to the same Copilot Studio agent, along with other tools and knowledge sources.
Note
This article covers the tool-based experience. In earlier releases, you added a Fabric data agent from the Agents category as a connected agent. For that experience, see Consume a data agent in Microsoft Copilot Studio.
Step 1: Create a Copilot Studio agent
If you already have an agent, open it and go to Step 2.
Go to Microsoft Copilot Studio and select your environment.
On the left pane, select Agents, where you can see the list of your agents.
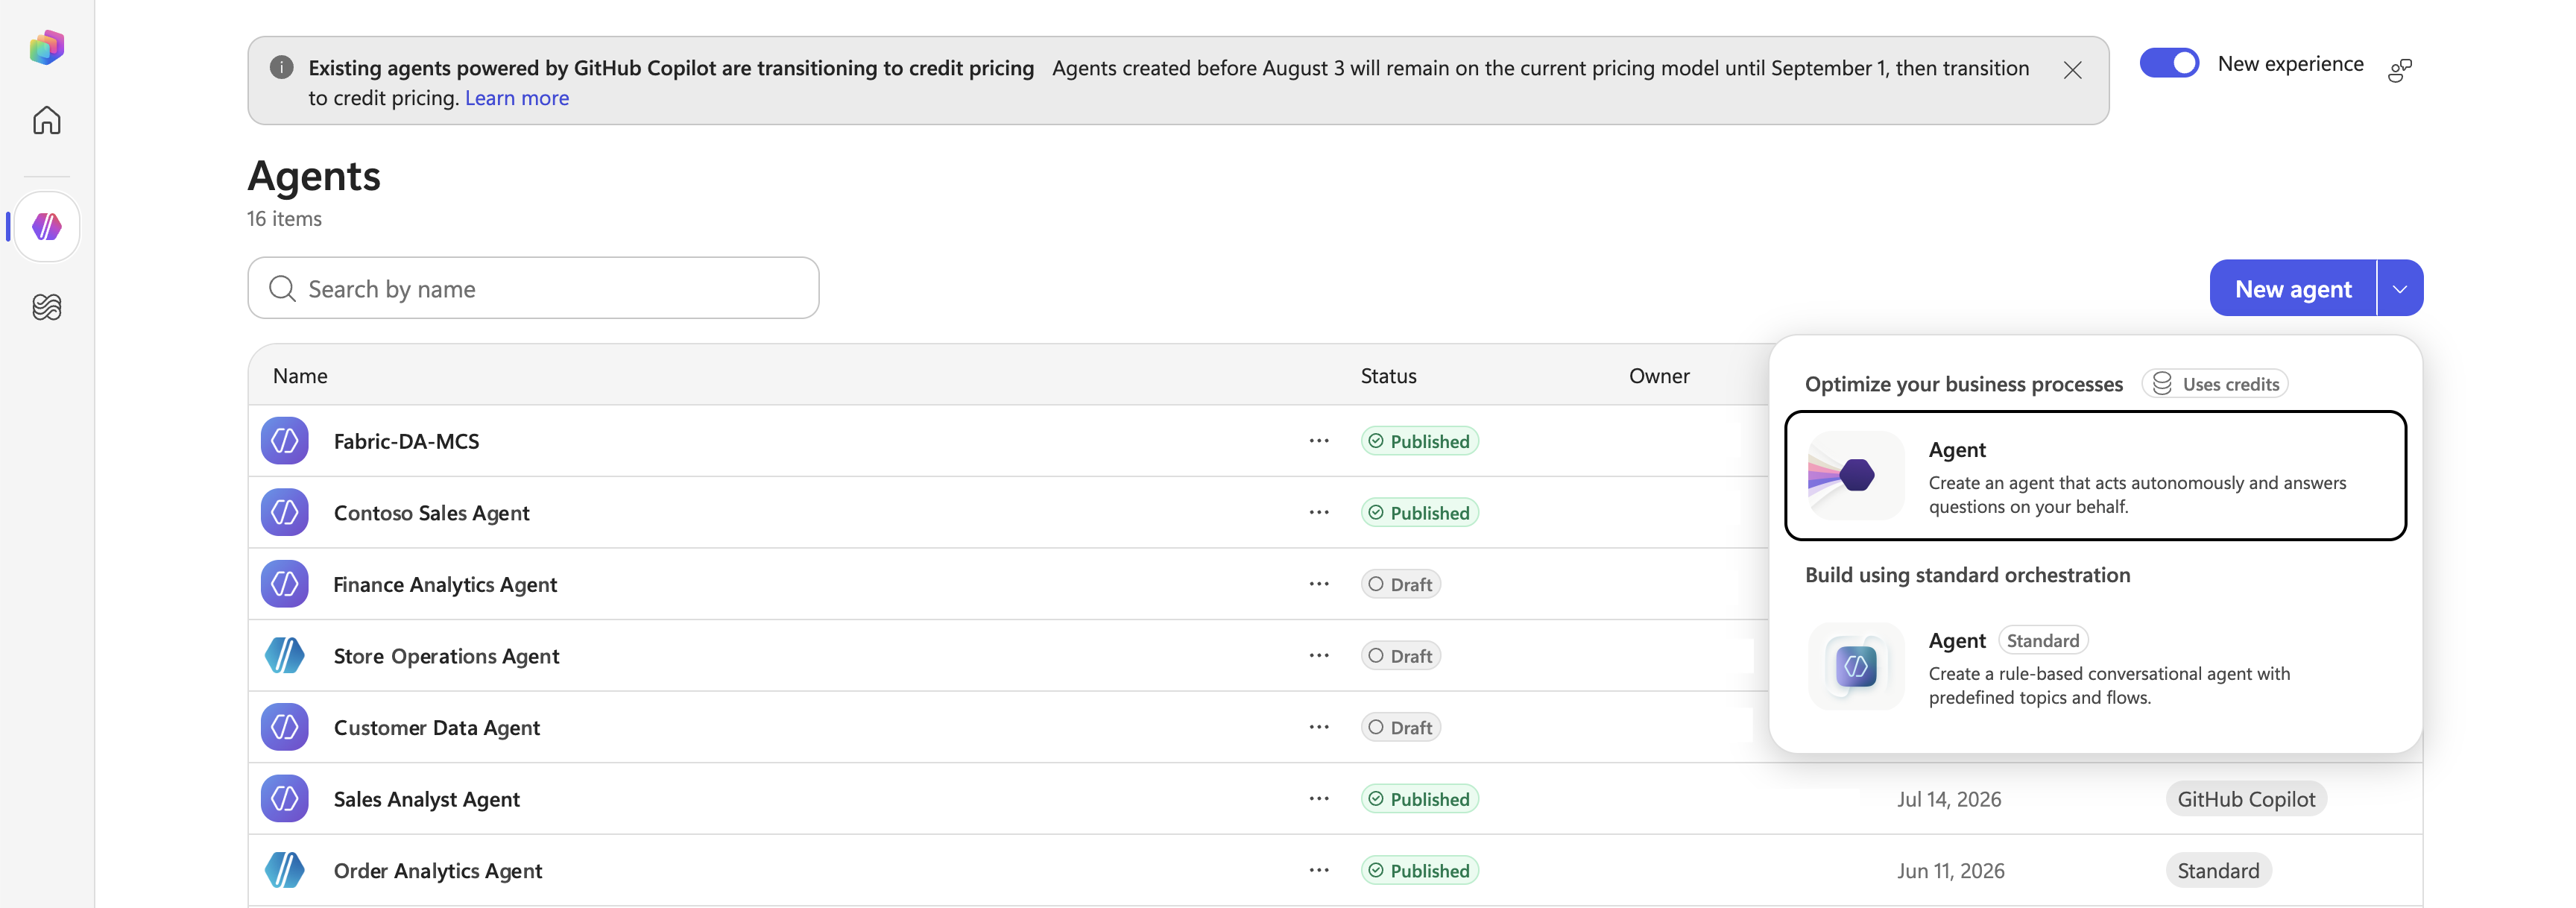
Select the arrow next to New agent, and then select Agent under Optimize your business processes. This agent runs on the GitHub Copilot harness, which supports adding a Fabric data agent as a tool.
Give the agent a Name.
Important
If you select New agent directly instead of the arrow, Copilot Studio creates the agent without asking you which type to use. The steps in this article apply to agents that run on the GitHub Copilot harness.
Step 2: Add the Fabric data agent as a tool
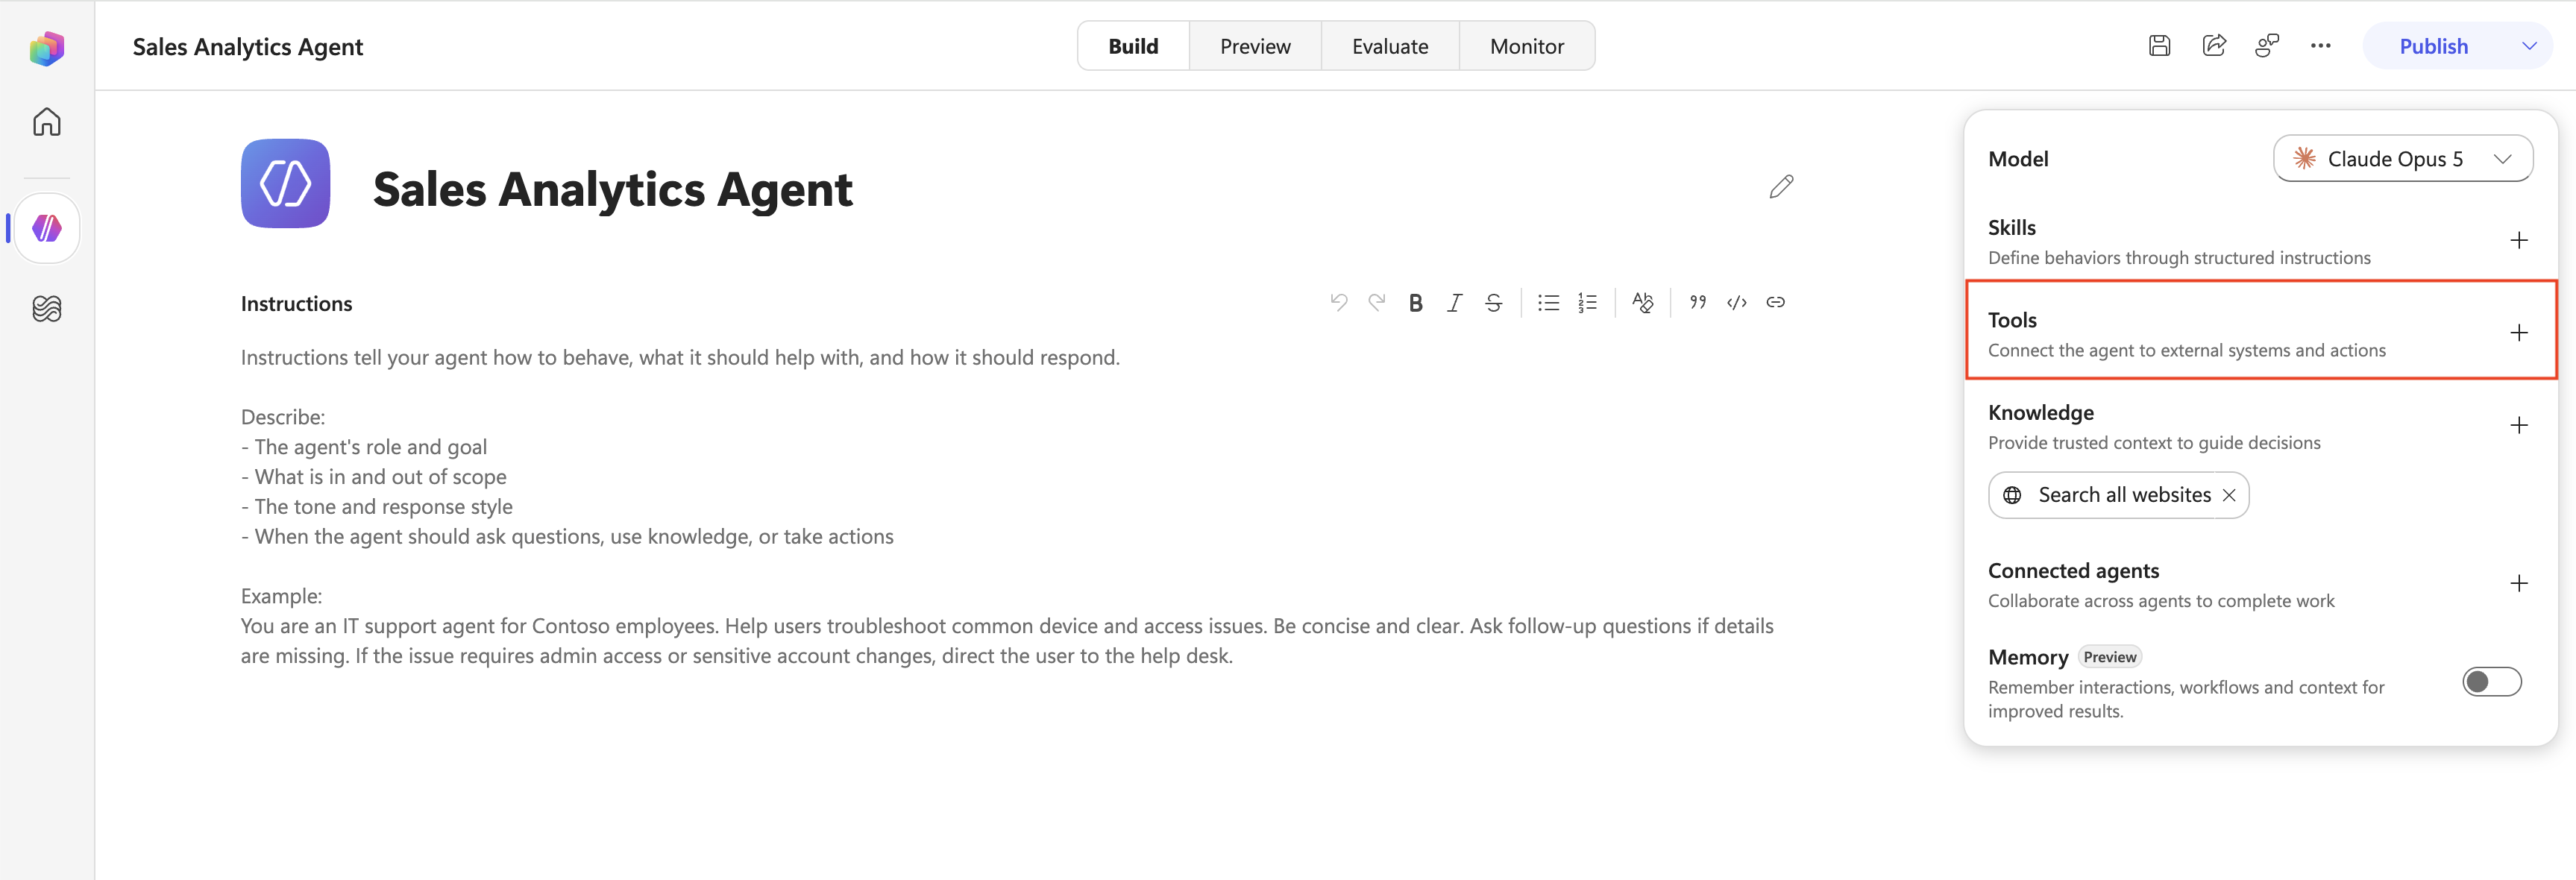
Open your agent on the Build tab. In the pane on the right, go to Tools and select the plus sign (+) to open the Add a tool dialog.
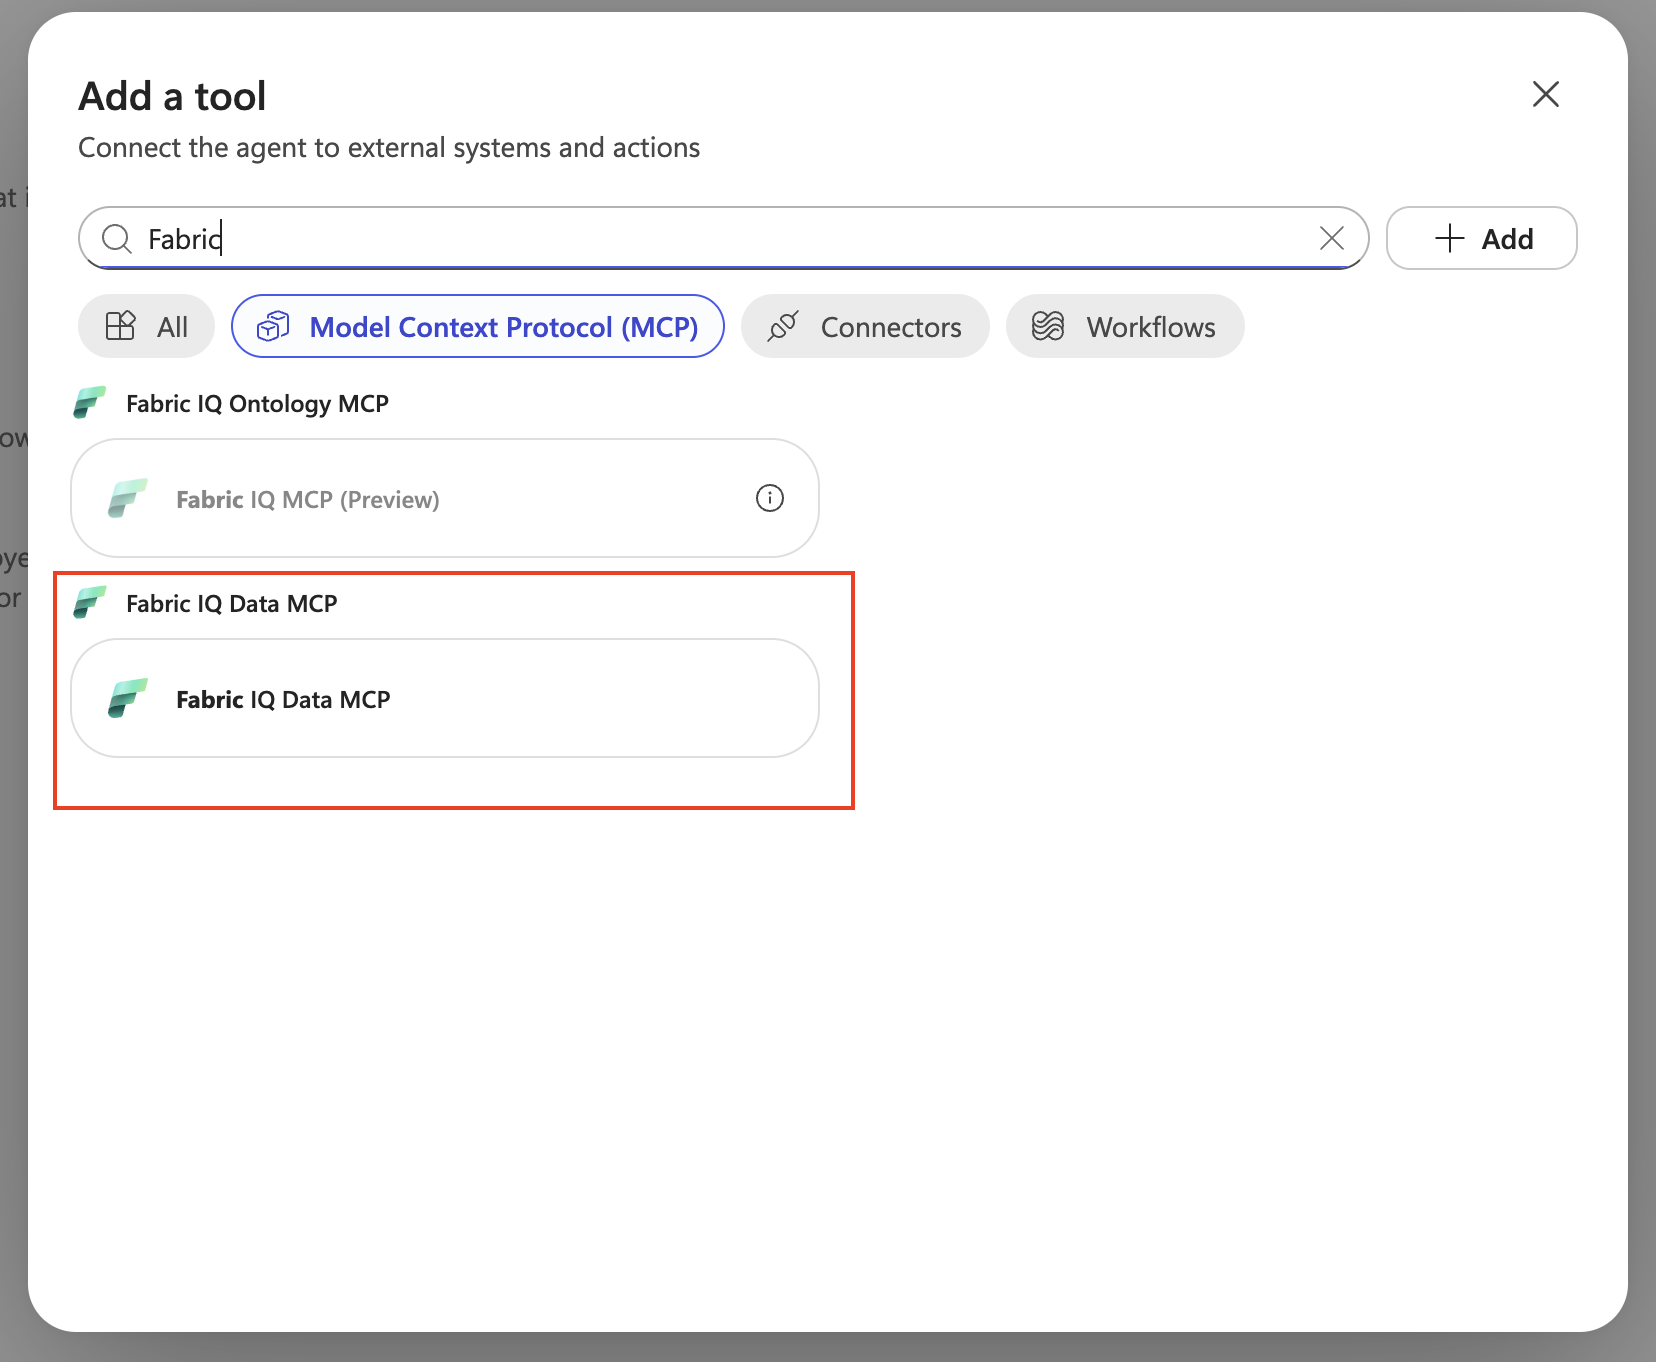
In the search box, enter Fabric.
Select Fabric IQ Data MCP. This tool gives your agent access to the Fabric data agents that you can use.
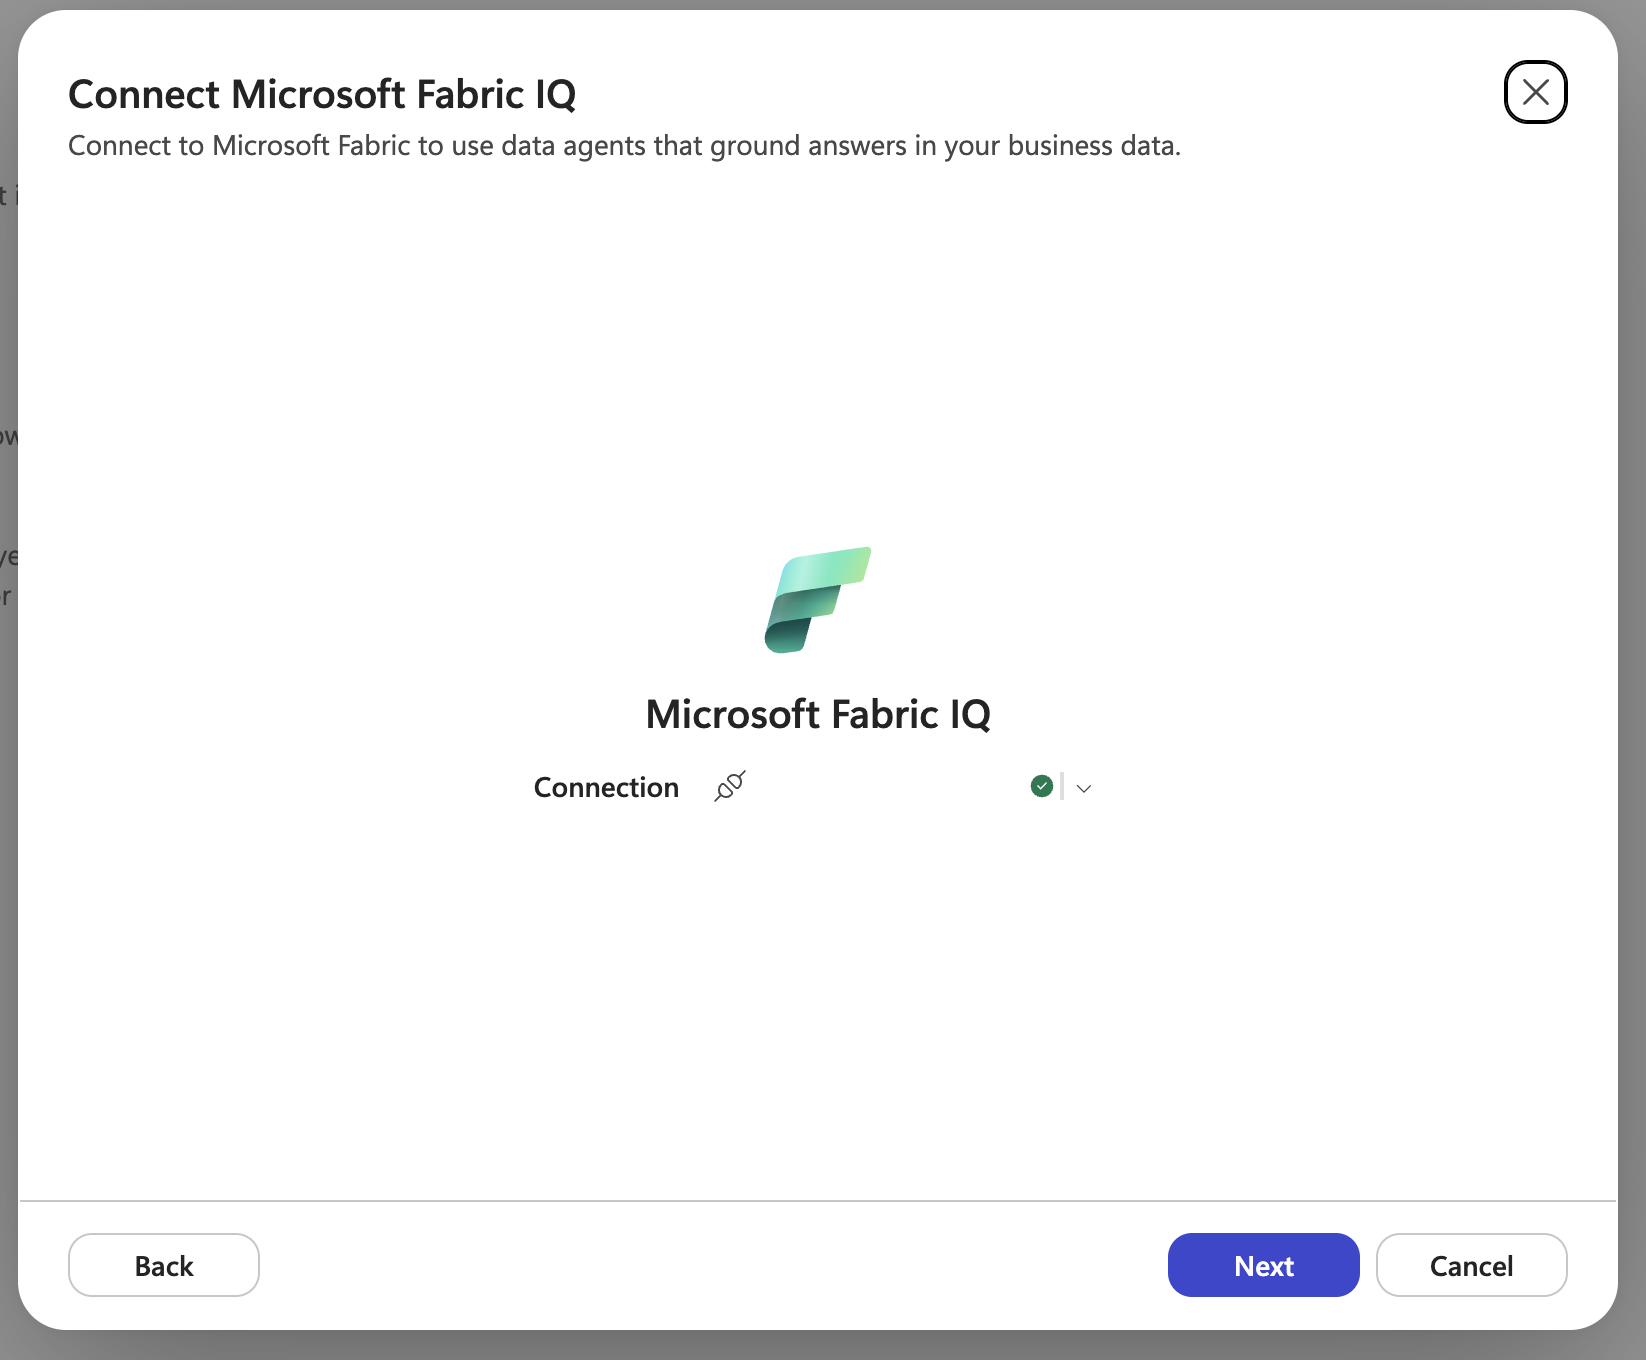
If you already have a connection, move to next step. Otherwise, create a new connection.
Step 3: Select a Fabric data agent
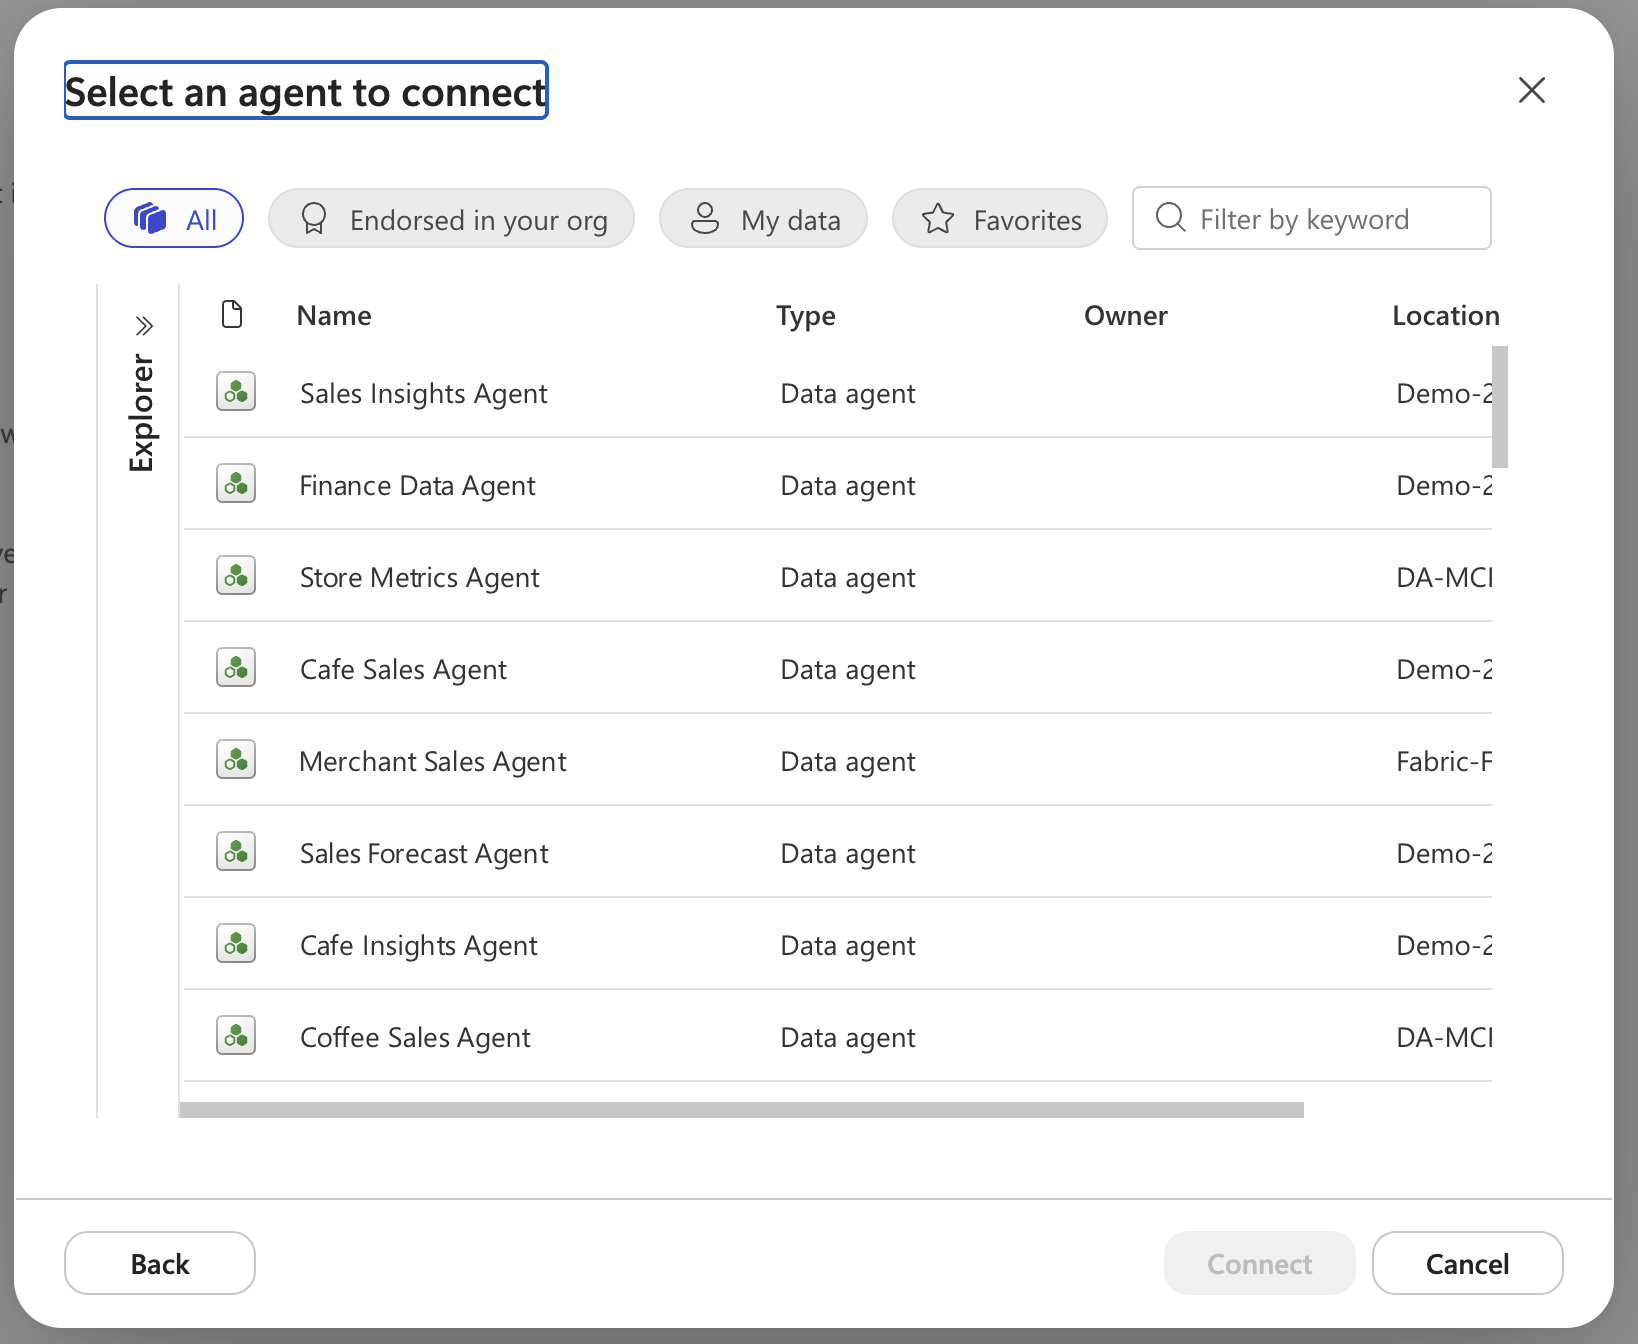
The OneLake catalog opens and lists the Fabric data agents that you have access to. Select the data agent that you want to add to your Copilot Studio agent.
Note
Only published Fabric data agents appear in this list. If a data agent isn't published, it isn't available in OneLake catalog.
Tip
If you don't see the data agent that you expect, check that:
- The data agent is published in Microsoft Fabric.
- You're signed in with an account that has access to the data agent.
- The data agent and Copilot Studio are in the same tenant.
- You have access to the workspace that contains the data agent.
Step 4: Add a description for the data agent
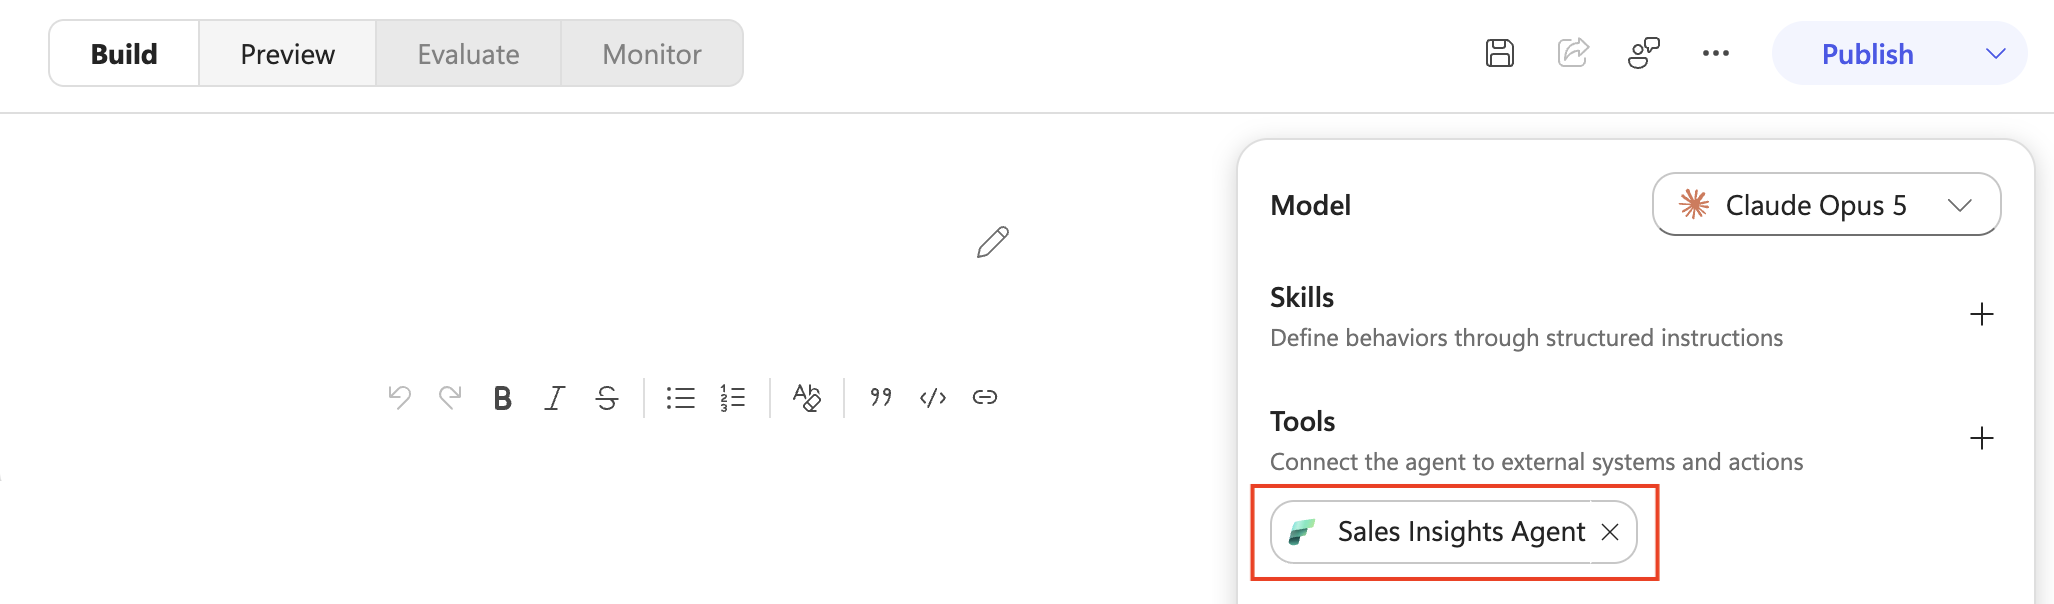
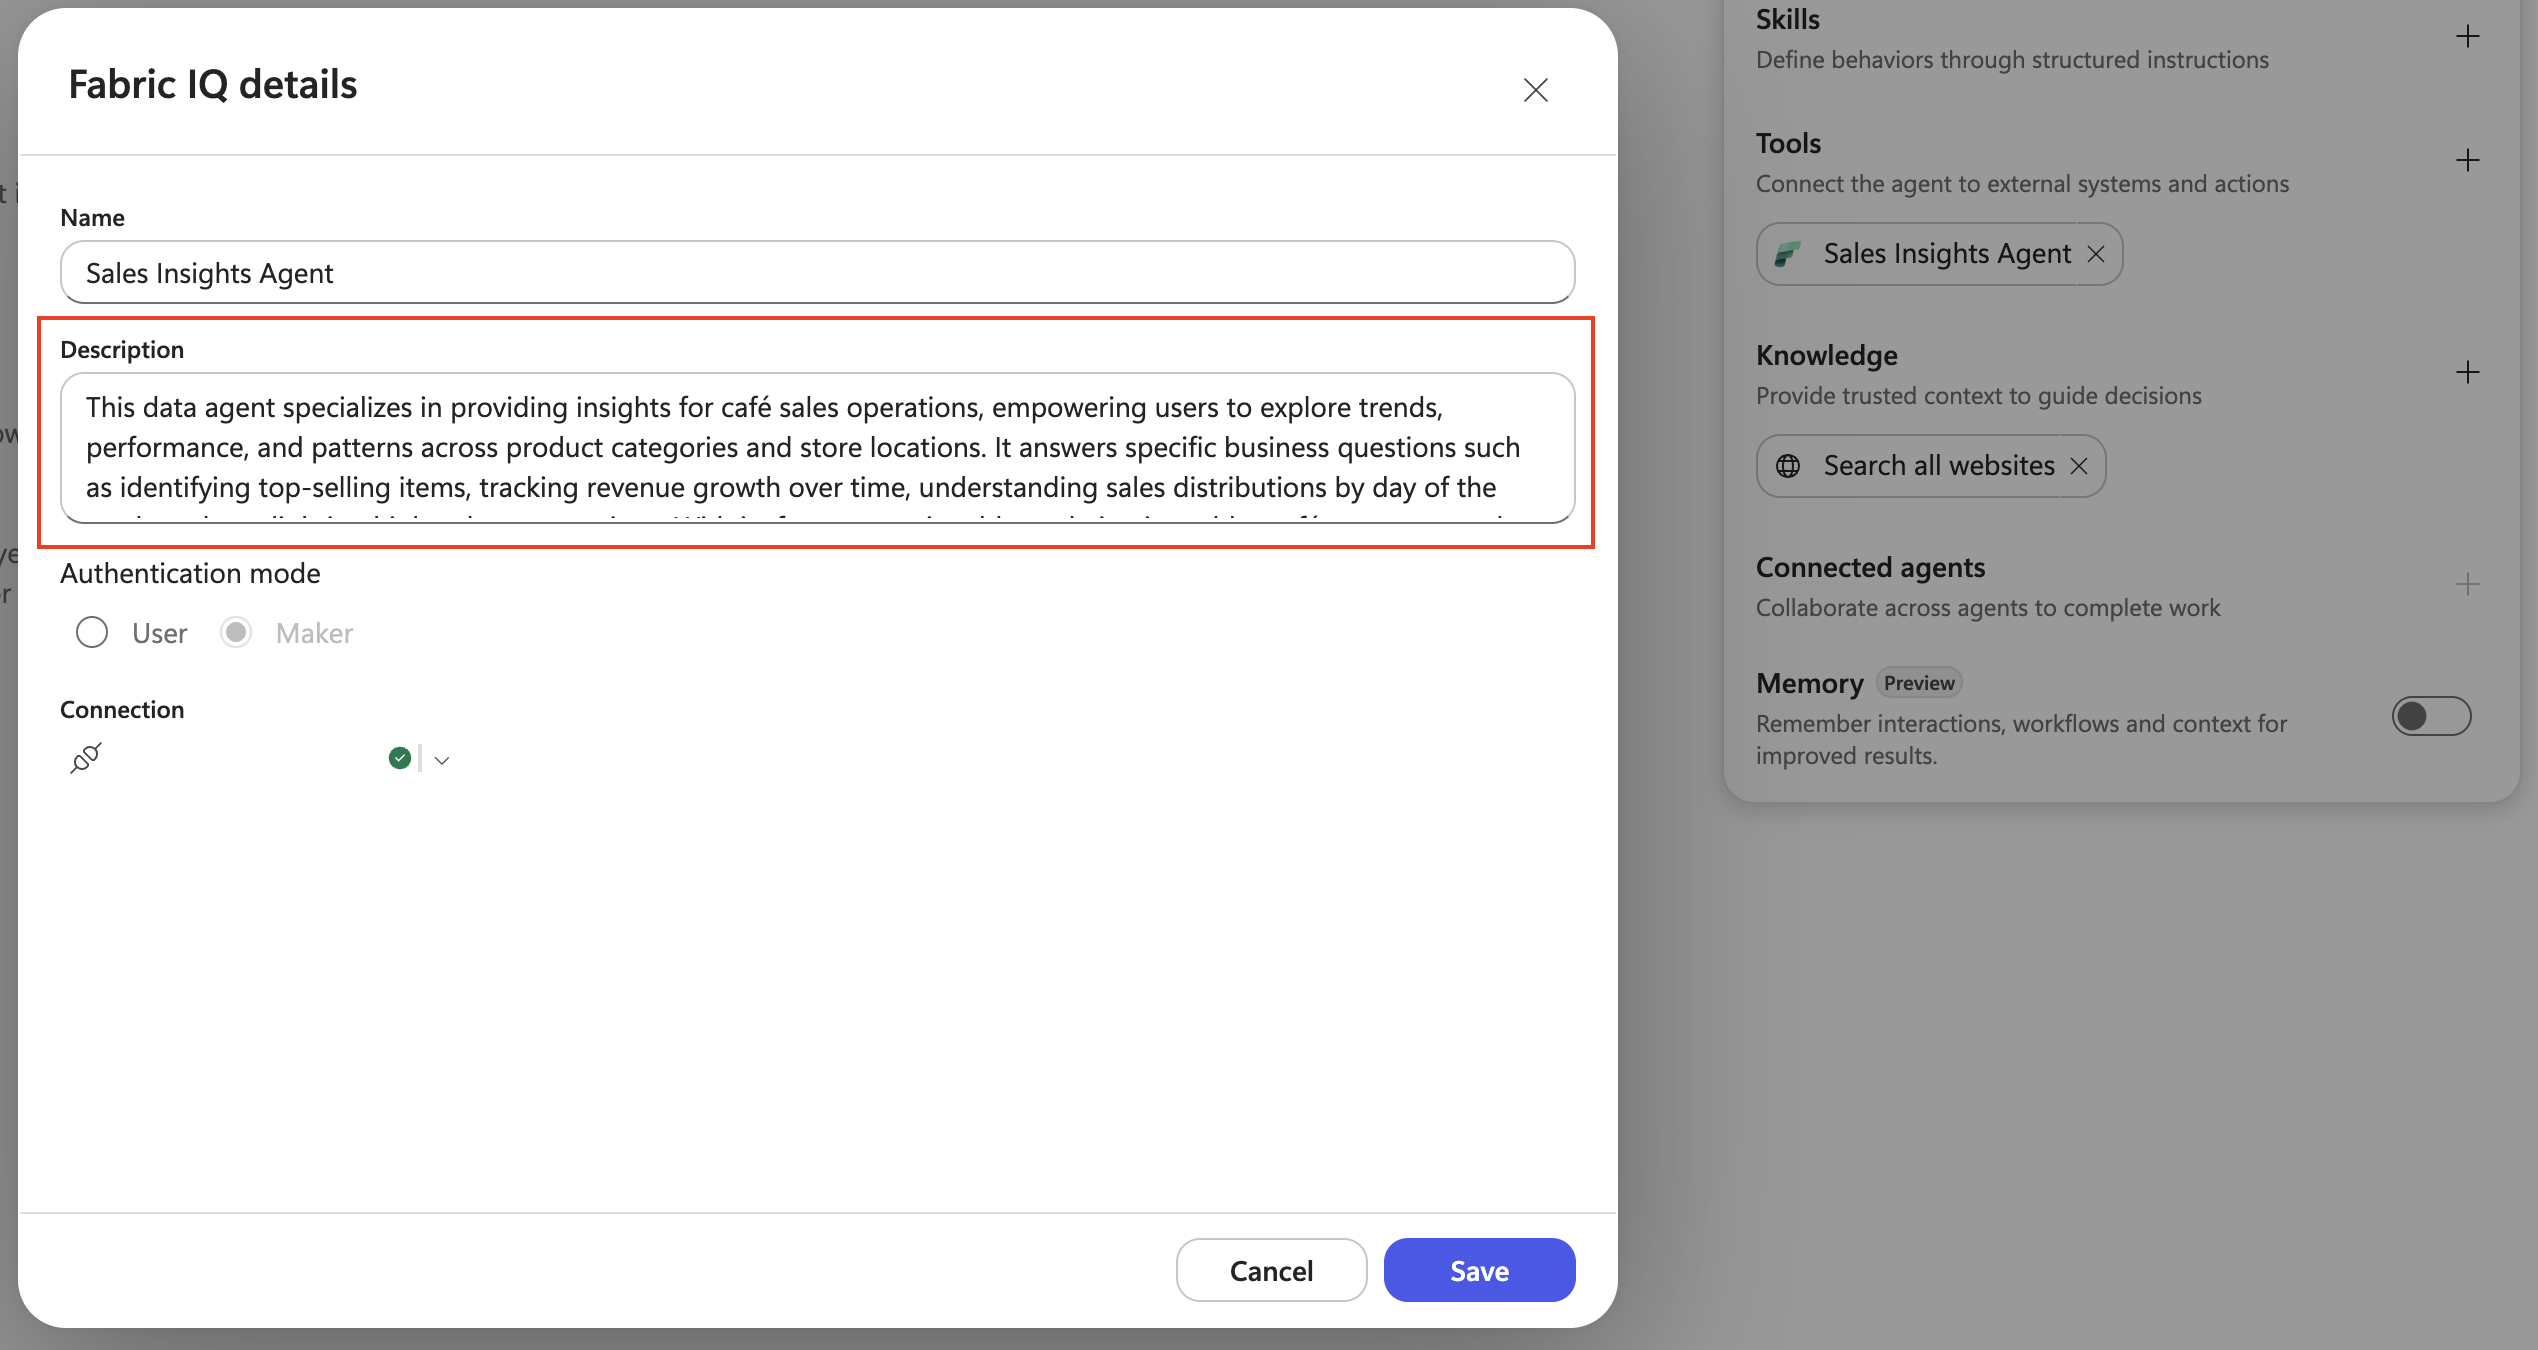
After you add the data agent, you can see that it is added to the tools for your Copilot Studio agent. Select the added Fabric data agent and write a detailed description of what it does.
Explain the questions the data agent can answer, the business area it covers, and the data behind it. The orchestrator uses this description to decide which tool to call, so a specific description leads to better routing. A short or vague description makes it harder for the orchestrator to pick the right data agent, especially when your agent has several tools.
Step 5: Select the authentication mode
Choose which credentials the Copilot Studio agent uses when it calls the Fabric data agent.
| Authentication mode | Credentials used | What to consider |
|---|---|---|
| User | The credentials of the person who chats with the Copilot Studio agent. | Each user must have access to the Fabric data agent and to its underlying data sources. Users who don't have access don't get answers from the data agent. |
| Maker | The credentials of the person who set up the Copilot Studio agent. | Users don't need their own access to the Fabric data agent or its data sources. Everyone who uses the agent sees data through the maker's access. |

Note
To add another Fabric data agent, repeat Step 3 through Step 5. Write a description and select an authentication mode for each data agent that you add.
Step 6: Add instructions to your agent
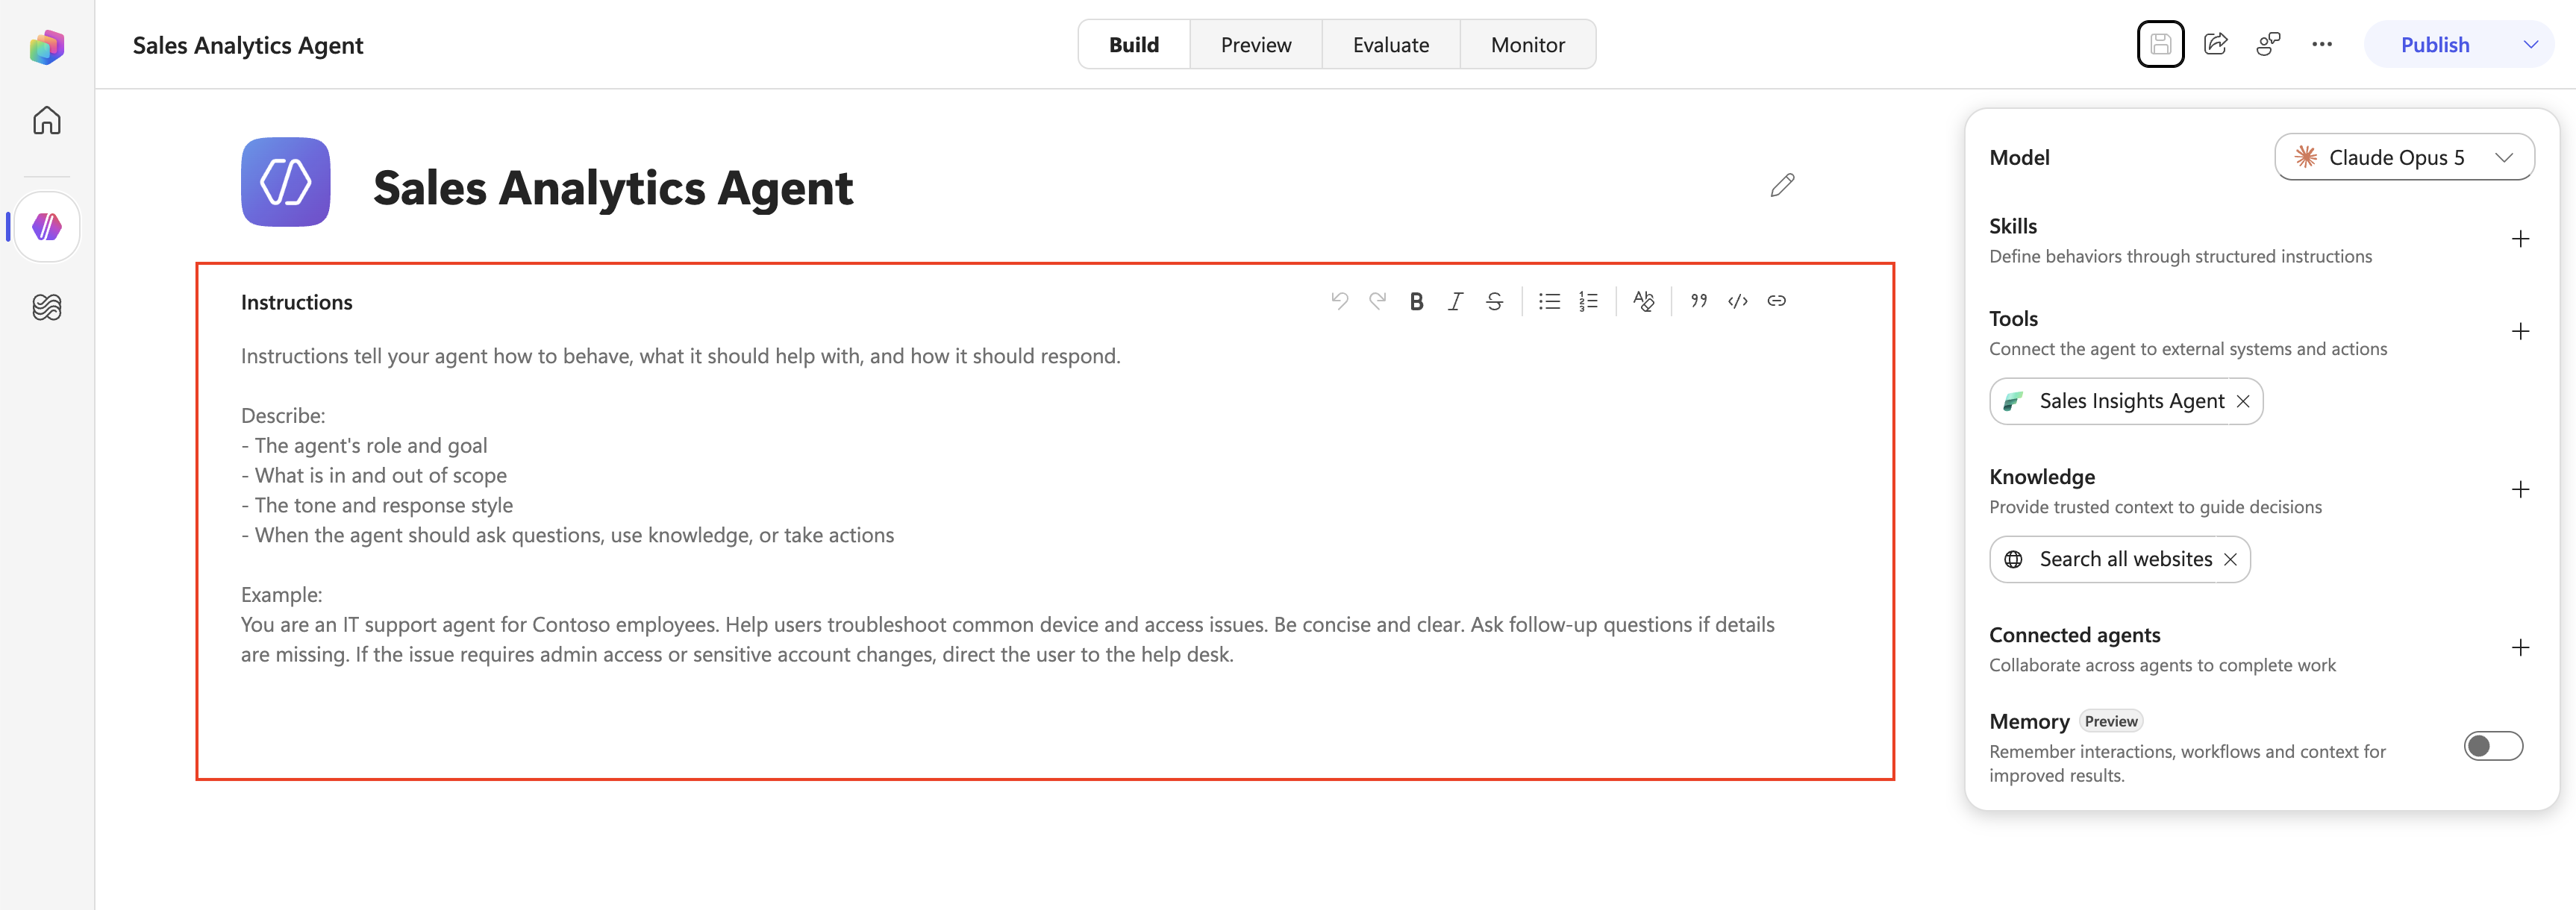
Instructions tell the Copilot Studio agent how to behave. Use them to describe the agent's role, the tone of its answers, and when it should use each of its tools.
For example, you can state which Fabric data agent to use for which kind of question, or tell the agent to ask a follow-up question when a request is unclear.
Step 7: Save your agent
Select Save.
Important
You must save your agent before you test or publish it. If you don't save, the tools, descriptions, authentication modes, and instructions that you configured aren't applied.
Step 8: Test your agent
Go to the Preview tab and ask questions that the Fabric data agent should answer. Use this tab to confirm that the agent calls the right data agent and returns the answers you expect.
If the agent doesn't call the Fabric data agent, review the description you wrote in Step 4 and the instructions you wrote in Step 6, then save and test again.

Step 9: Evaluate your agent
Go to the Evaluate tab to check the quality of your agent's answers across a set of questions, instead of testing one question at a time. Use it before you publish, and again after you make changes.

Step 10: Publish your agent
When the agent works as expected, publish it and turn on the channel where people use it:
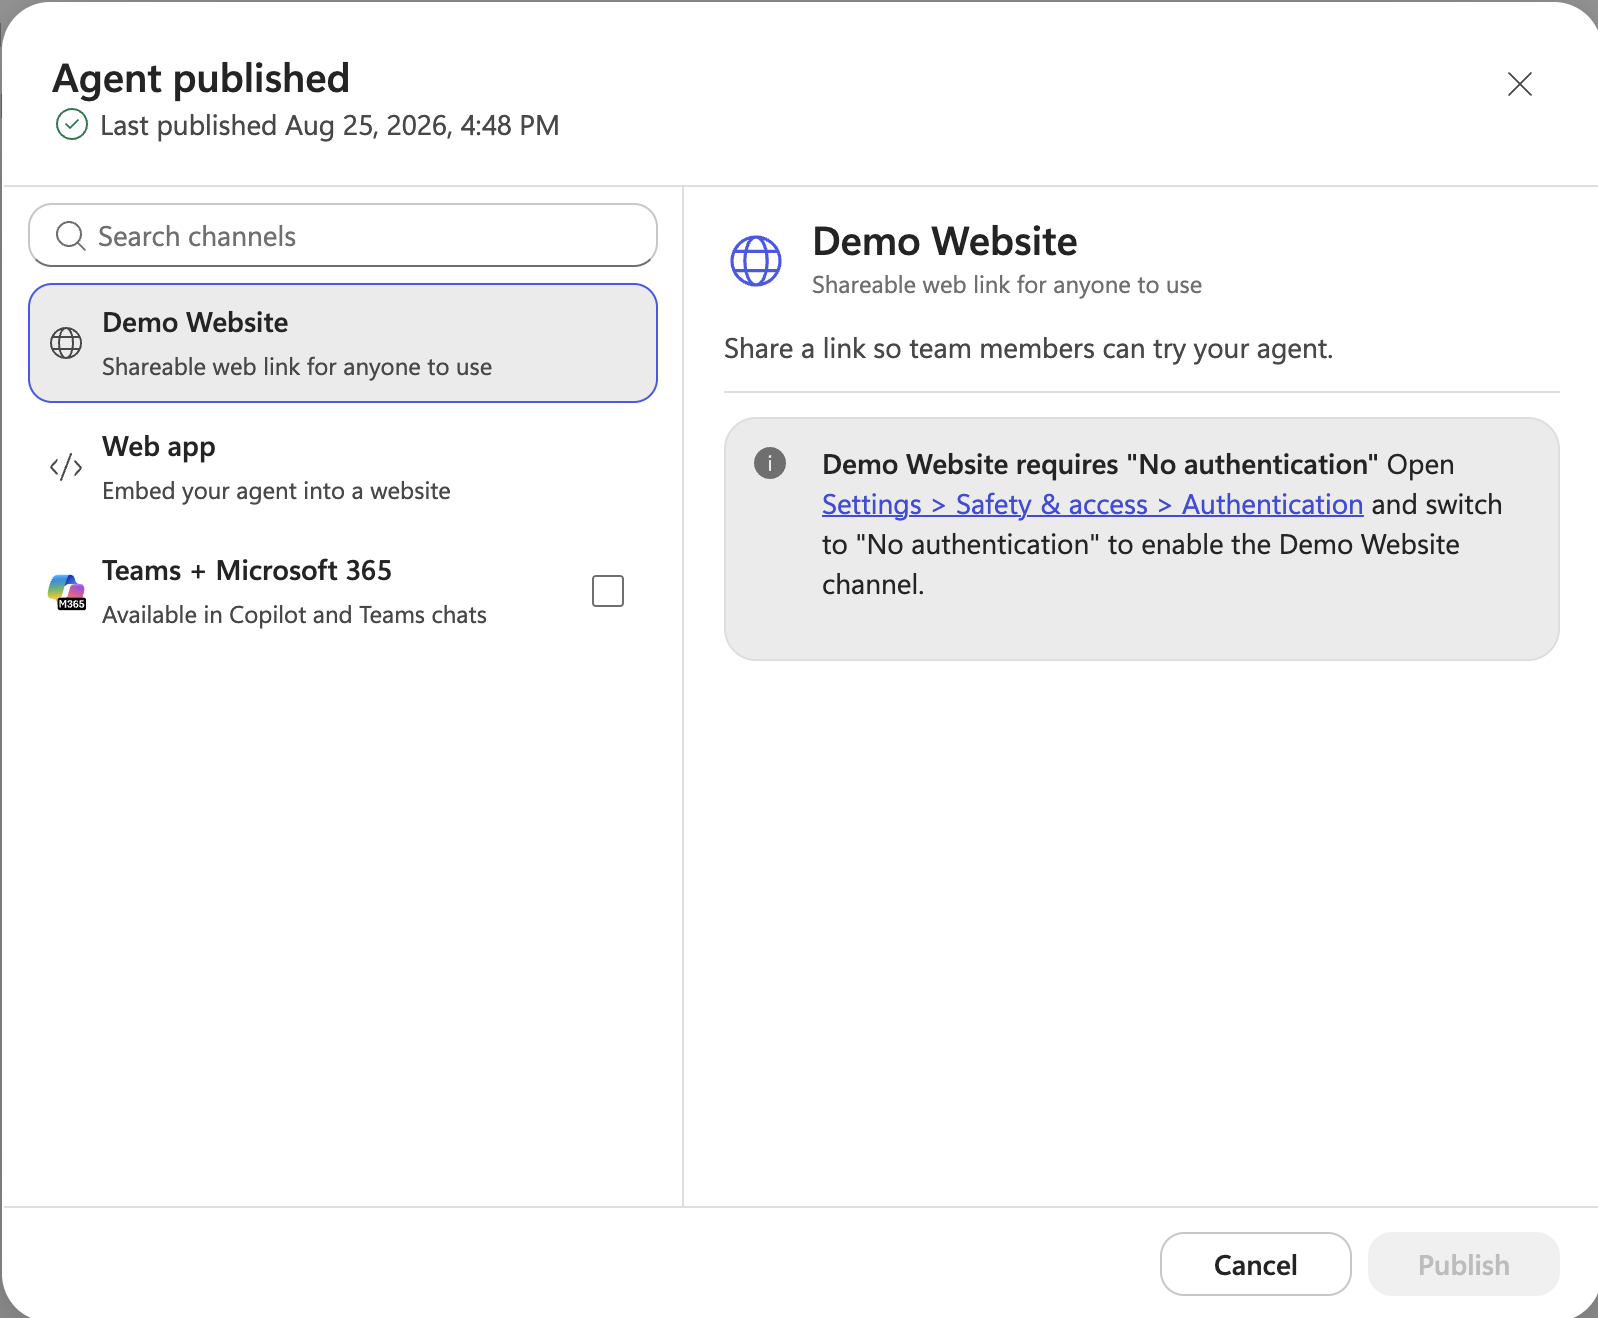
Select Publish. The Agent published dialog opens and lists the available channels.
Select the channel you want, such as Teams + Microsoft 365. The details for that channel open on the right.
Select the checkbox next to the channel to turn it on.
To make the agent available in Microsoft 365 Copilot, go to Turn on Microsoft 365 and select Make agent available in Microsoft 365 Copilot.
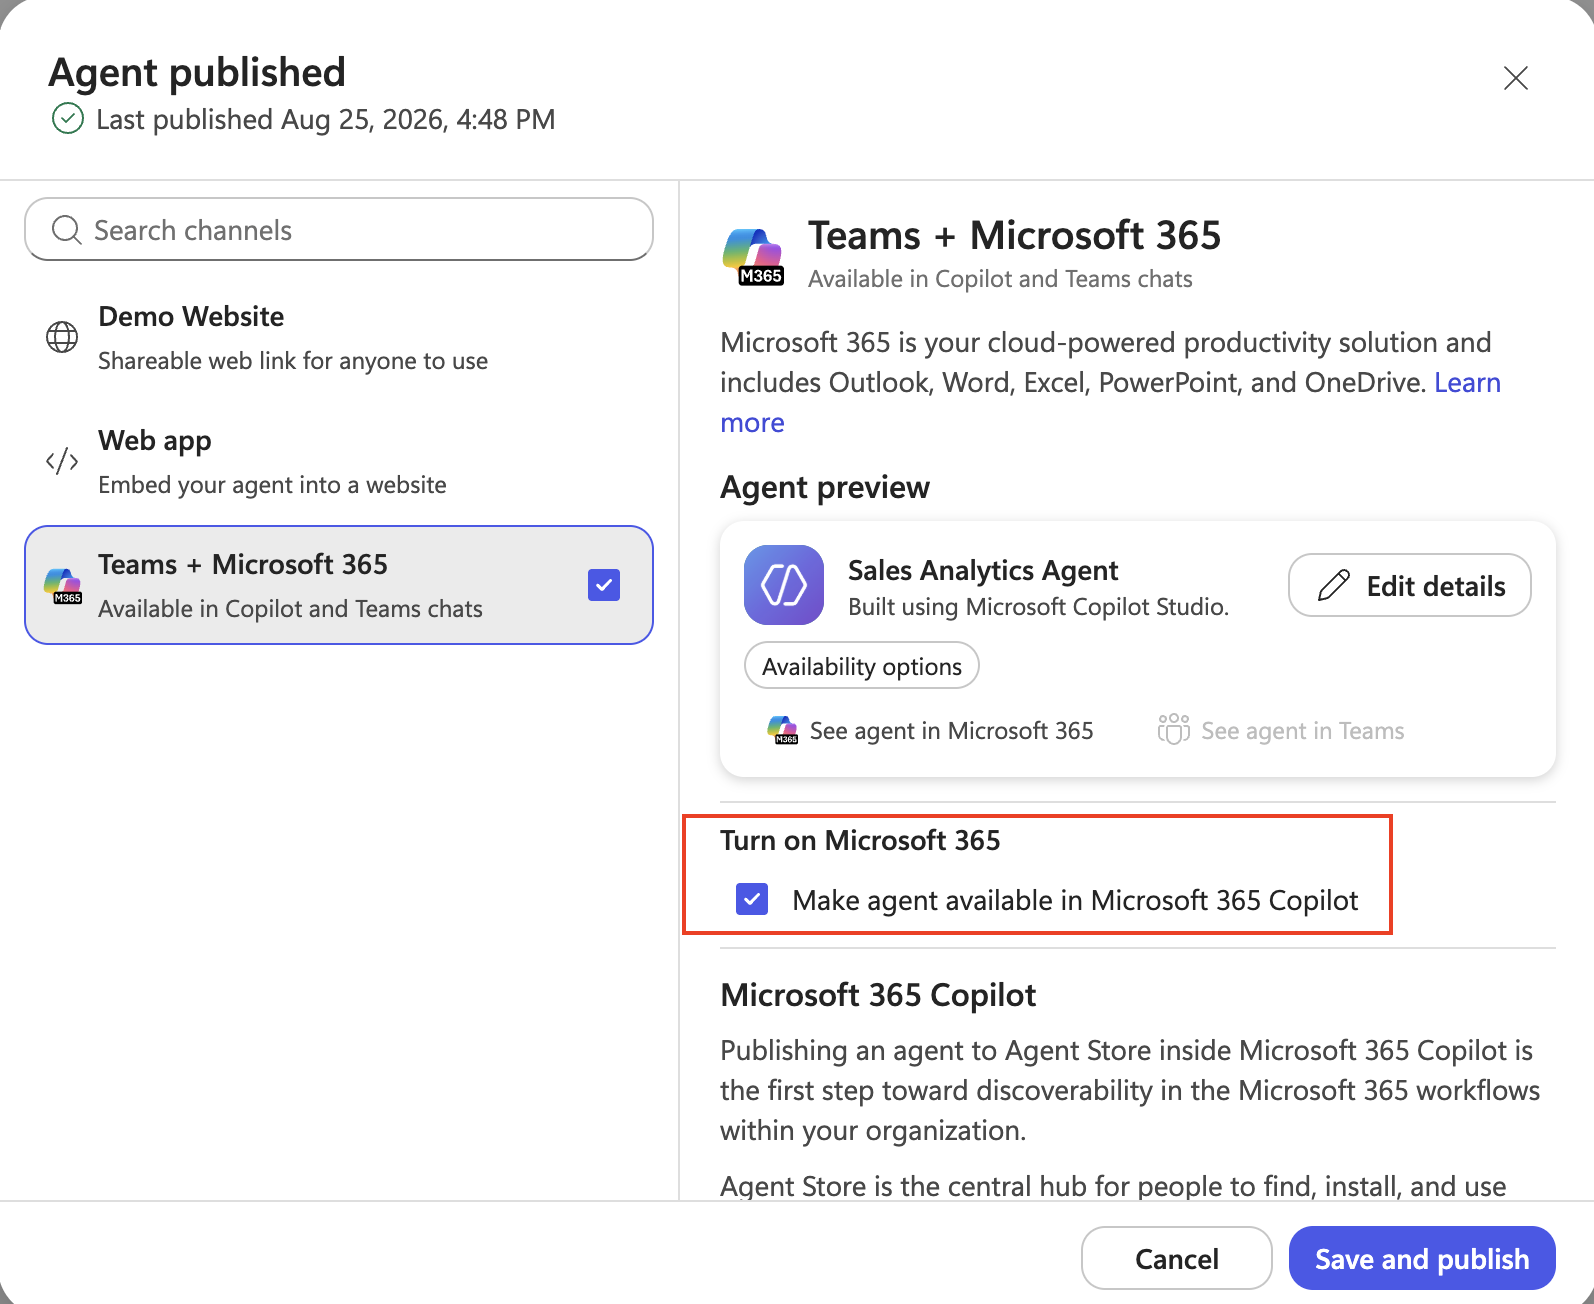
Select Save and publish.
Step 11: Use your agent in the channel
After you publish the agent, open it from the Agent preview card in the channel details:
- For Microsoft 365 Copilot, select See agent in Microsoft 365.
- For Microsoft Teams, select See agent in Teams.
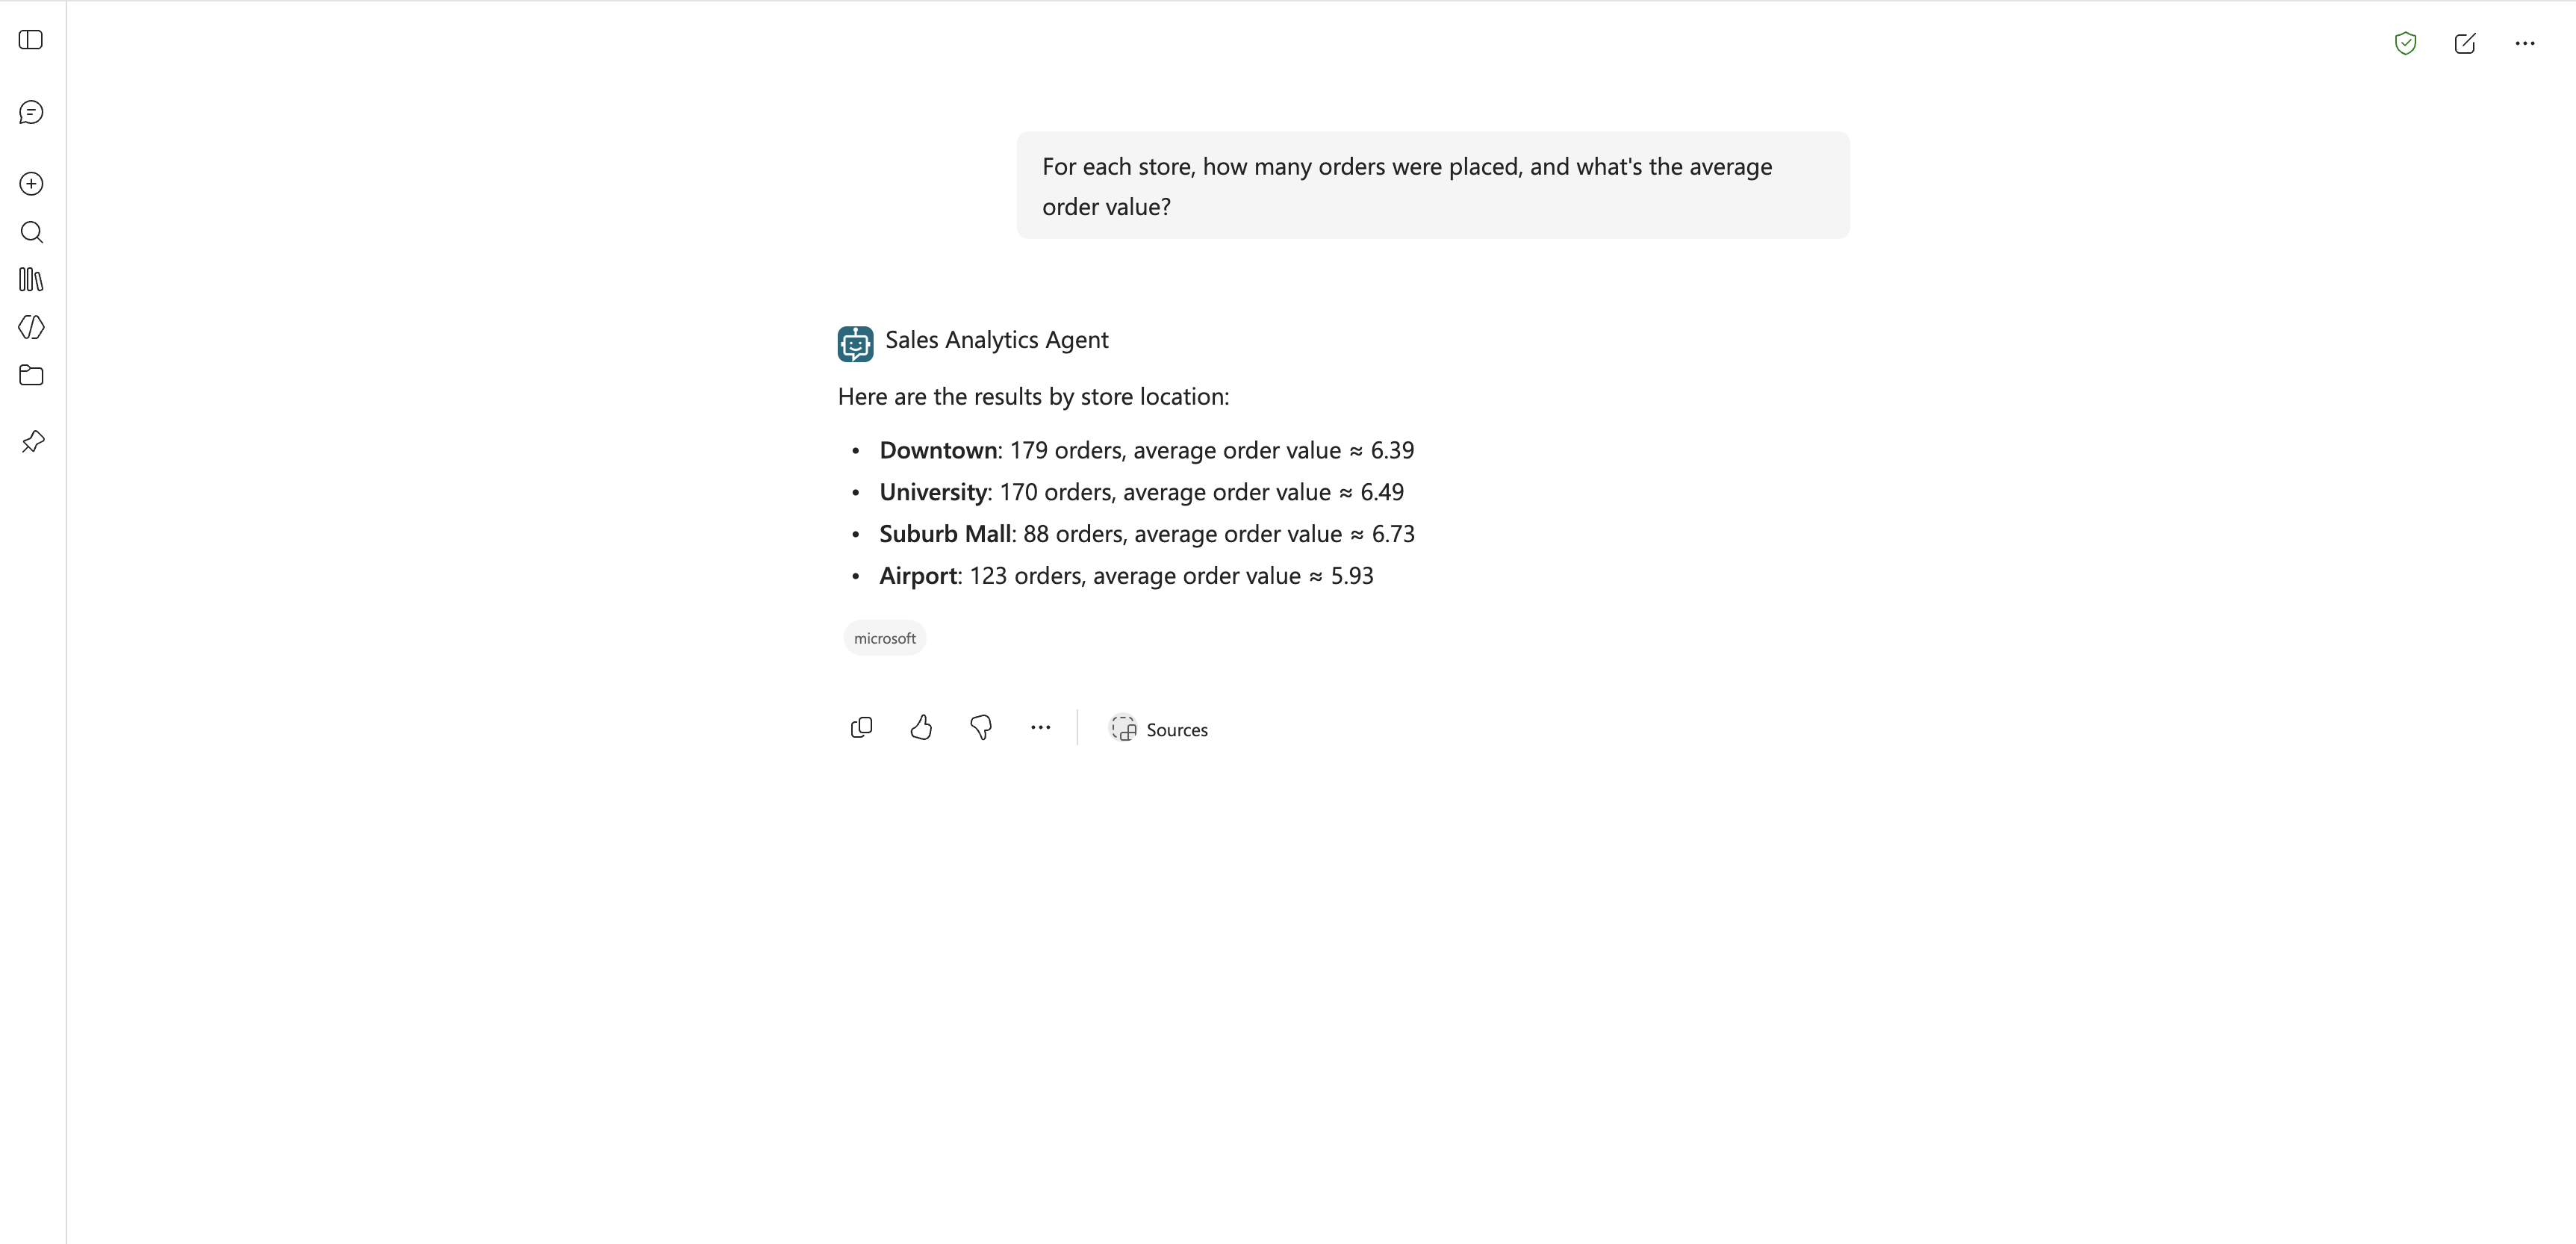
Ask your questions in the channel. For example, a user can ask how many orders each store placed and what the average order value was, and get an answer from the Fabric data agent without leaving the conversation.
Note
If you share your agent with others and you selected User as the authentication mode, each person needs at least read access to the Fabric data agent and access to its underlying data sources.