Note
Access to this page requires authorization. You can try signing in or changing directories.
Access to this page requires authorization. You can try changing directories.
Applies to: ✅ Warehouse in Microsoft Fabric
The Fabric Migration Assistant is a migration experience that you can use to copy dedicated SQL pools in Azure Synapse Analytics, databases in SQL Server, and databases from other SQL Database Engine platforms seamlessly into Fabric Data Warehouse.
This guide walks you through the steps to migrate from an Azure Synapse Analytics dedicated SQL pool to Fabric warehouse by using a DACPAC file.
Tip
For more information on the Migration Assistant's features and capabilities, see Fabric Migration Assistant for Data Warehouse.
For more information on strategy and planning your migration, see Migration planning: Azure Synapse Analytics dedicated SQL pools to Fabric Data Warehouse.
Prerequisites
Before you begin, make sure you have the following items ready:
- A Fabric workspace with an active capacity or trial capacity.
- Create a workspace or select an existing workspace you want to migrate into. The Migration Assistant creates a new warehouse for you.
- DACPAC file extracted from Azure Synapse Analytics dedicated SQL pool. A DACPAC (data-tier application package) file is built from SQL database projects and contains the metadata of database objects, including the schema of tables, views, stored procedures, functions, and more.
- To create a DAC in Visual Studio 2022 with SQL Server Data Tools, see Extract a Data-tier Application (DAC) from an Azure Synapse dedicated SQL pool in Visual Studio 2022.
- You can also use SDK-style database projects with VS Code or the SqlPackage command-line utility.
To use the AI-assisted migration features of the Migration Assistant to fix migration problems, you need to activate Copilot:
- Your administrator needs to enable the tenant switch before you start using Copilot. For more information, see Copilot tenant settings.
- Your F2 or P1 capacity needs to be in one of the regions listed in Fabric region availability.
- If your tenant or capacity is outside the US or France, Copilot is disabled by default unless your Fabric tenant admin enables the Data sent to Azure OpenAI can be processed outside your capacity's geographic region, compliance boundary, or national cloud instance tenant setting in the Fabric Admin portal.
- Copilot in Microsoft Fabric isn't supported on trial SKUs. Only paid SKUs (F2 or higher, or P1 or higher) are supported at this time.
- For more information, see Overview of Copilot in Fabric and Power BI.
Copy metadata
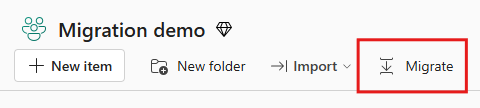
In your Fabric workspace, select the Migrate button on the item action deck.
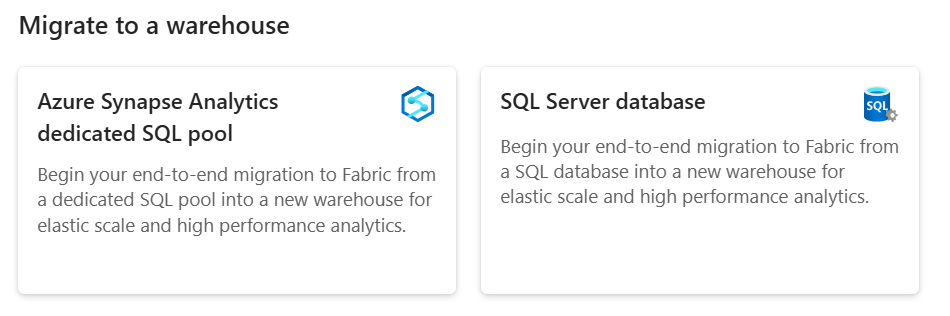
In the Migrate to Fabric source menu, under Migrate to a warehouse, select the source system tile.
- If you're migrating from an Azure Synapse Analytics dedicated SQL pool, select the Azure Synapse Analytics dedicated SQL pool tile.
- If you're migrating from any other T-SQL database, such as a database in SQL Server, Azure SQL Database, or Azure SQL Managed Instance, select the SQL Server database tile.
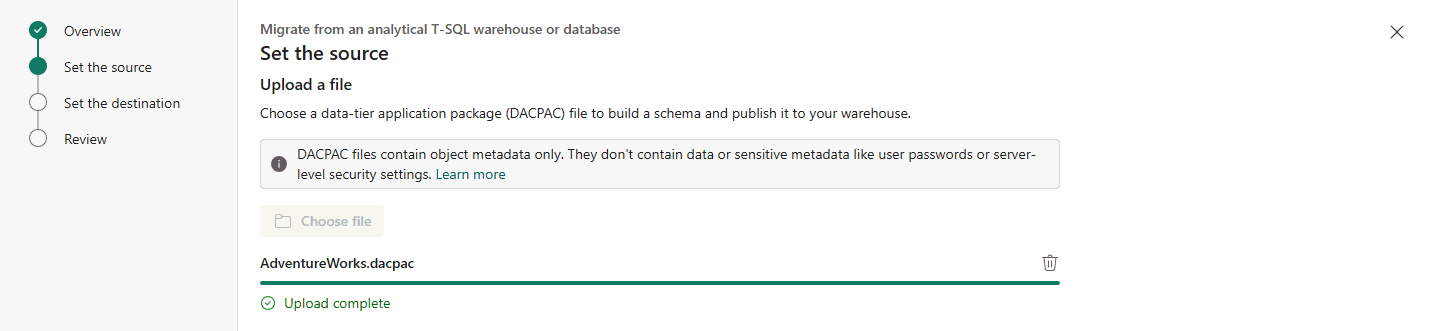
On the Choose your method page, select Upload a file with the source metadata and select Next.
Select Choose file and upload the DACPAC file of your source data warehouse. When the upload finishes, select Next.
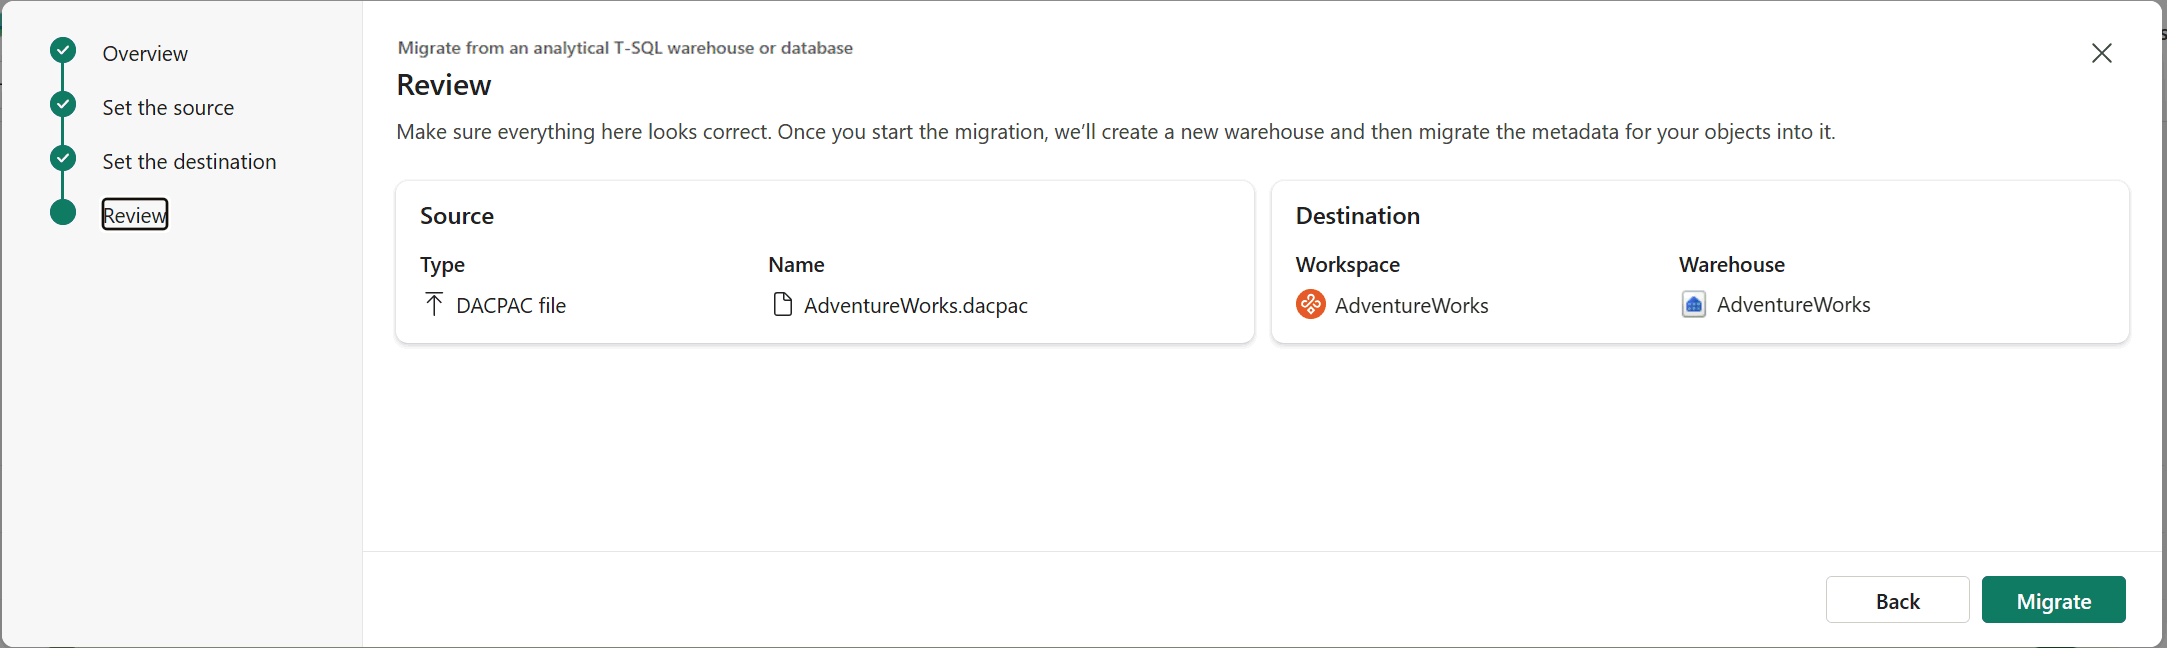
In the Set the destination page, enter the name of the new Fabric workspace and new warehouse item you want to migrate into. Select Next.
Review your inputs and select Migrate. The Migration Assistant creates a new warehouse item and starts the metadata migration.
Note
When you use the Migration Assistant, the new warehouse has case insensitive collation, regardless of the default warehouse collation setting.
During this step, the Migration Assistant translates T-SQL metadata to supported T-SQL syntax in Fabric Data Warehouse. After the metadata migration finishes, the Migration Assistant opens. You can access the Migration Assistant at any time by using the Migration button in the Home tab of the warehouse ribbon.
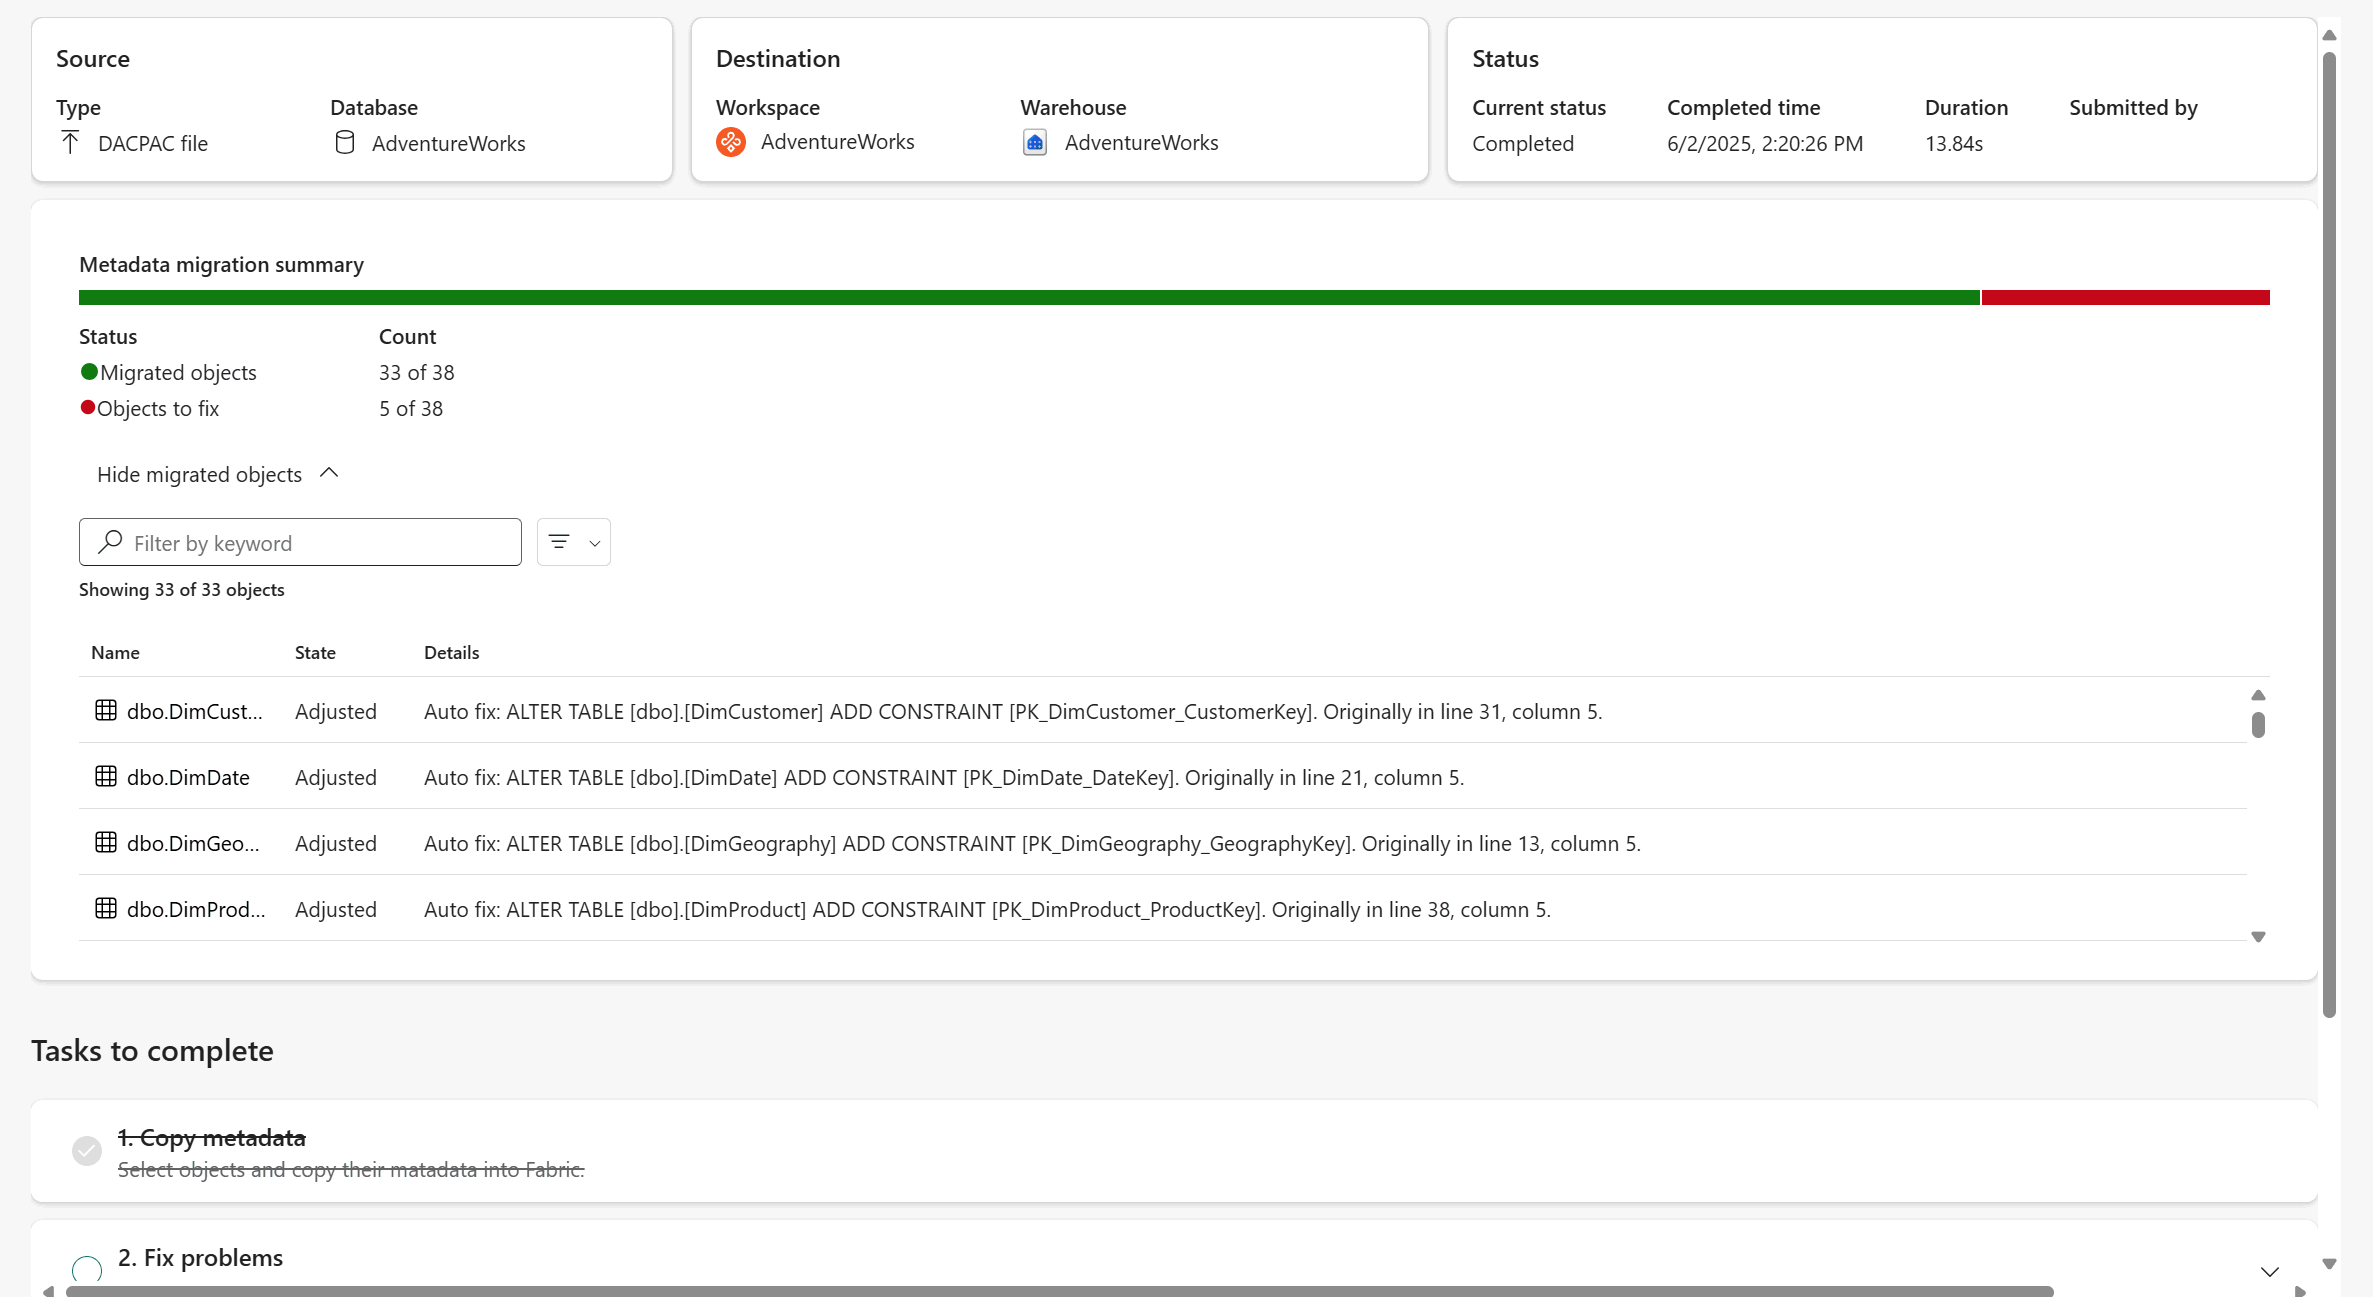
Review the metadata migration summary in the Migration Assistant. You see the count of migrated objects and the objects that need to be fixed before they can be migrated.
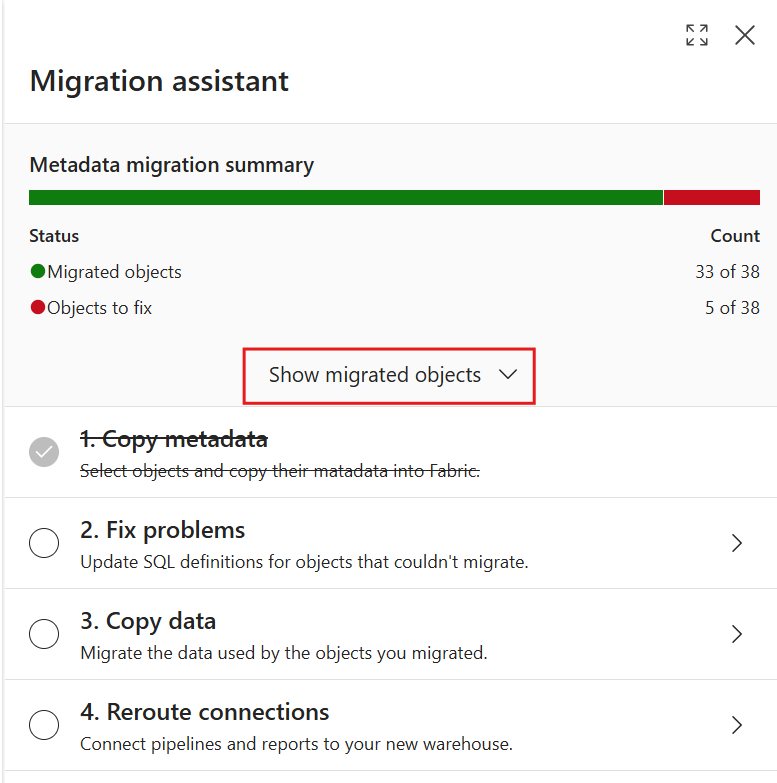
Select Show migrated objects to expand the section and see a list of objects that you successfully migrated to your Fabric warehouse.

The State column indicates if the Migration Assistant adjusted the object's metadata during the translation to Fabric Data Warehouse. For example, you might see that certain column datatypes or T-SQL language constructs are automatically converted to the ones that are supported in Fabric. The Details column shows the information about the adjustments that the portal made to the objects.
Select any object to see the adjustments that the Migration Assistant made during migration.
Open the metadata migration summary in full screen view for better readability. Apply filters to view specific object types.
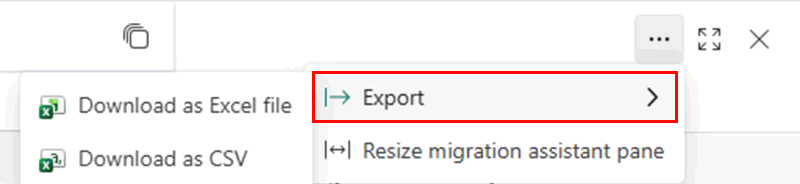
Optionally, select the Export menu to download a migration summary as an Excel file or a CSV.
- The downloaded Excel file is a fully structured workbook with two worksheets: Migrated Objects and Objects To Fix. It's MIP-compliant and aligned with your organization's sensitivity labels.
- The CSV is lightweight and tool-friendly.
Each exported file provides a structured, comprehensive view of your migration results, including:
Field name Description Sample values Object name Name of SQL object Object type SQL object types Table, view, stored procedure, function State Translation state Adjusted: Fabric Data Warehouse compatible updates are applied
Not adjusted: No change in the original scriptDetails List of adjustments applied or error messages Type of error Type of translation error Translation message, Translation error, Translation apply error


Fix problems by using Migration Assistant
Some database object metadata might fail to migrate. Commonly, this failure occurs because the Migration Assistant couldn't translate the T-SQL metadata into those that are supported in a Fabric warehouse or the translated code failed to apply to T-SQL.
Fix these scripts by using the Migration Assistant.
Select the Fix problems step in the Migration Assistant to see the scripts that failed to migrate.
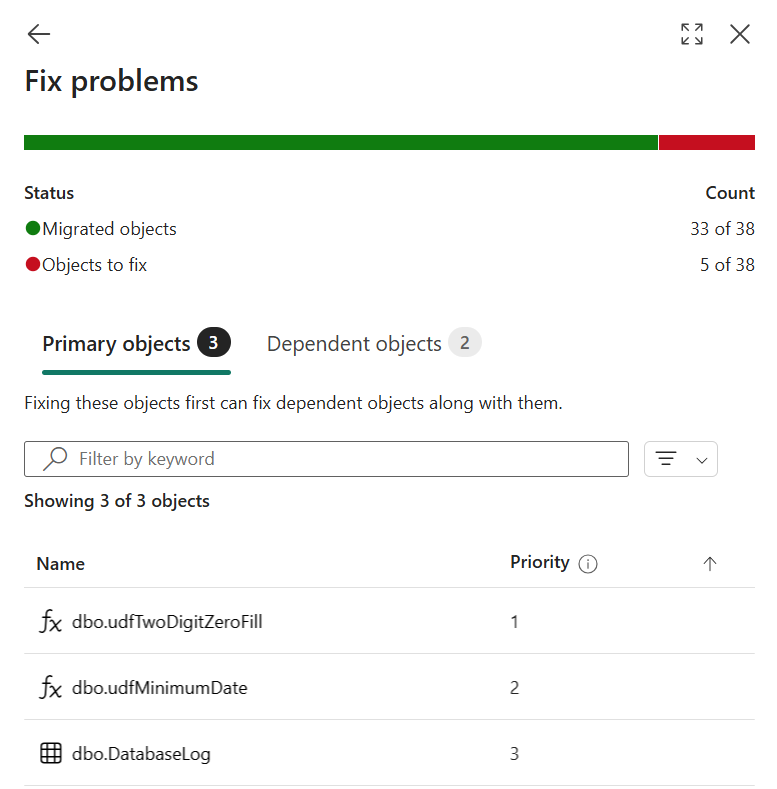
Select a database object that failed to migrate. A new query opens under the Shared queries in the Explorer. This new query shows the metadata definition and the adjustments that were made to it as automatic comments added to the T-SQL code.
Review the comments in the beginning of the script to see the adjustments that were made to the script.
Review and fix the broken scripts by using the error information and documentation.
To use Copilot for AI-powered assistance in fixing the errors, select Fix query errors in the Suggested action section. Copilot updates the script with suggestions. Mistakes can happen as Copilot uses AI, so verify code suggestions and make any adjustments you need.
Select Run to validate and create the object.
The next script to fix opens.
Continue to fix the rest of the scripts. You can choose to skip fixing scripts that you don't need during this step.
When all desired metadata is ready for migration, select the back button in the Fix problems pane to return the top-level view of the Migration Assistant. Check the 2. Fix problems step in the Migration Assistant.
Copy data by using Migration Assistant
Copy data helps with migrating data used by the objects you migrate. You can use a Fabric Data Factory copy job to do it manually, or follow these steps for the copy job integration in the Migration Assistant.
Select the Copy data step in the Migration Assistant.
Select Use a copy job button.
Enter a name for the new job, and then select Create.
On Connect to data source page, enter Connection credentials for the source Azure Synapse Analytics (SQL DW) dedicated SQL pool. Select Next.
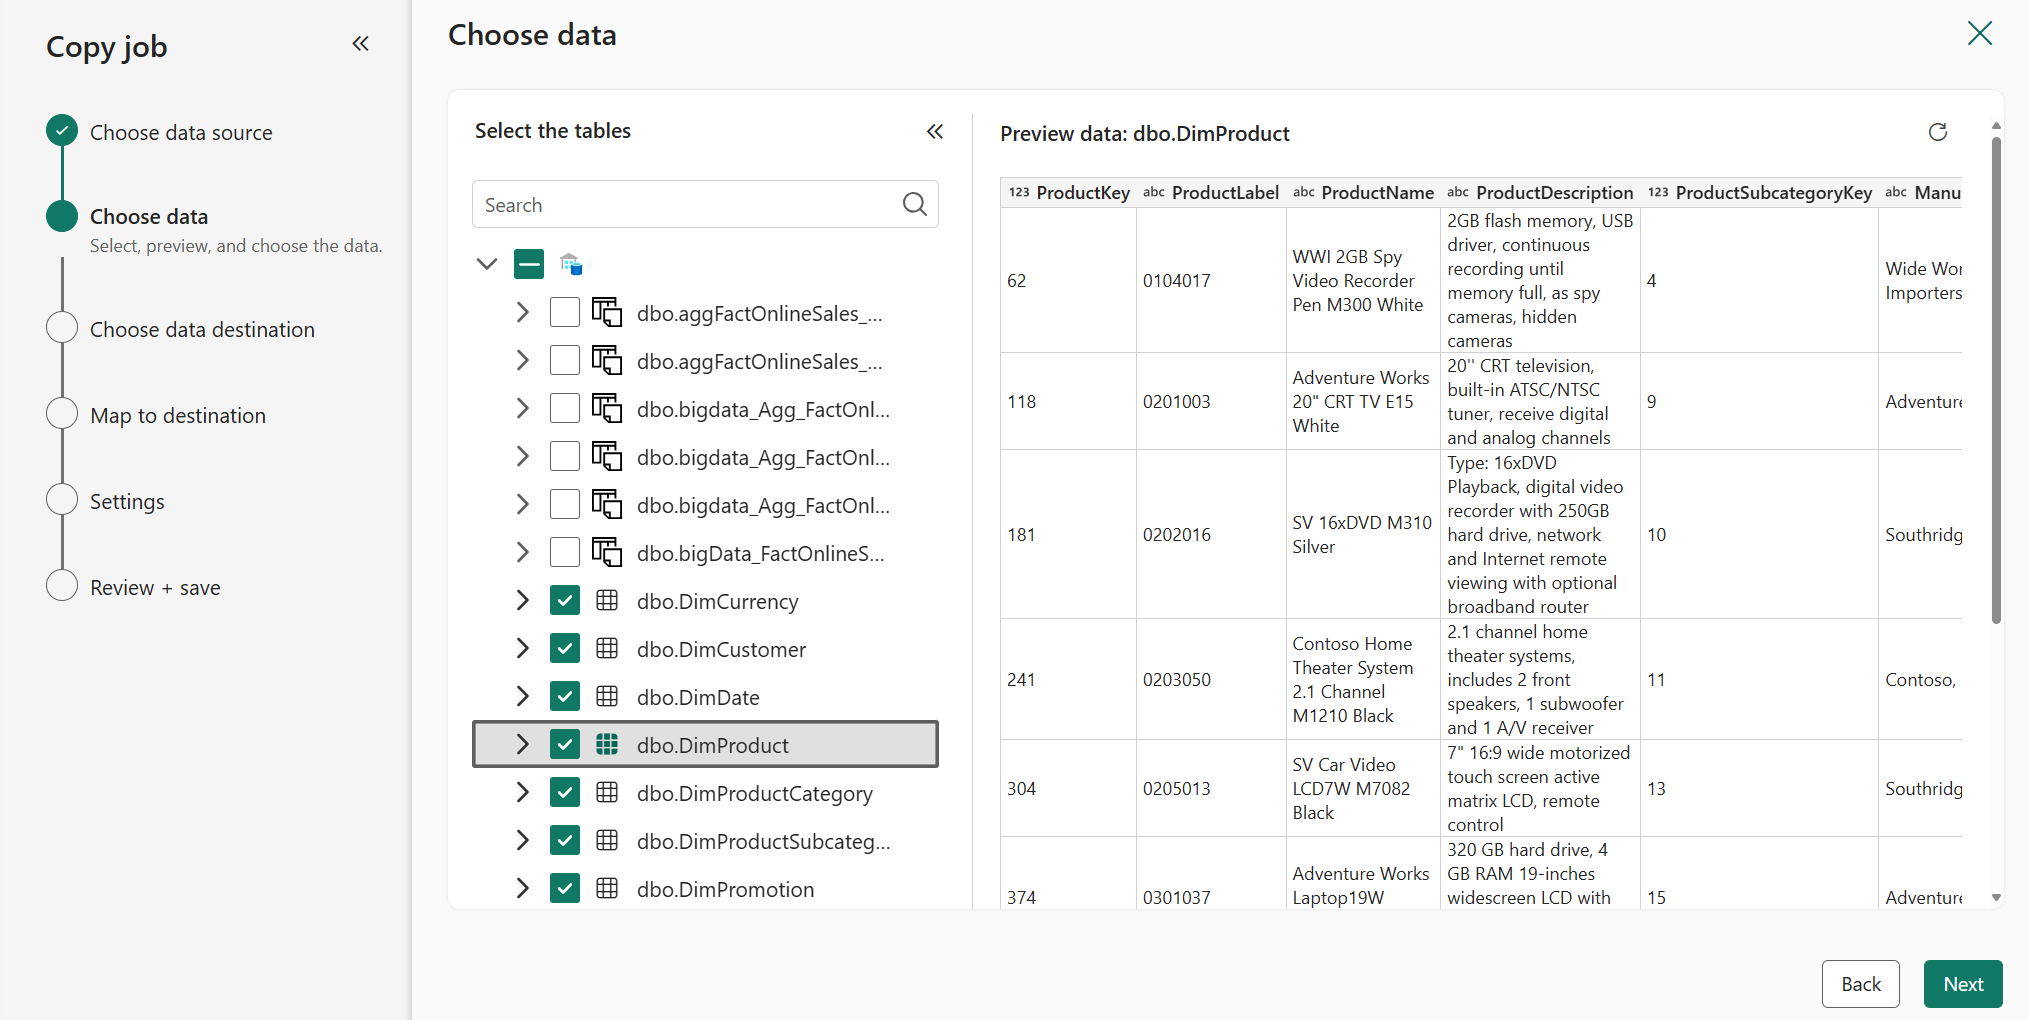
In the Choose data page, select the tables you want to migrate. The object metadata should already exist in the target warehouse. Select Next.
In the Choose data destination page, choose your new Fabric warehouse item from the OneLake catalog. Select Next.
In the Map to destination page, configure each table's column mappings. Select Next.
In the Copy job mode page, choose the copy mode. Choose a one-time full data copy (recommended for migration), or a continuous incremental copying. Select Next.
Review the job summary. Select Save + Run.
When the copy job finishes, check the 3. Copy data step in the Migration Assistant. Select the back button at the top to return to the top-level view of the Migration Assistant.

Reroute connections
In the final step, reconnect the data loading and reporting platforms so that their connections point to your new Fabric warehouse.
Identify connections on your existing source warehouse.
- For example, in Azure Synapse Analytics dedicated SQL pools, you can find session information including source application, who is connected, where the connection is coming from, and if it's using Microsoft Entra or SQL authentication:
SELECT DISTINCT CASE
         WHEN len(tt) = 0
             THEN app_name
         ELSE tt
         END AS application_name
     ,login_name
     ,ip_address
FROM (
     SELECT DISTINCT app_name
         ,substring(client_id, 0, CHARINDEX(':', ISNULL(client_id, '0.0.0.0:123'))) AS ip_address
         ,login_name
         ,isnull(substring(app_name, 0, CHARINDEX('-', ISNULL(app_name, '-'))), 'h') AS tt
     FROM sys.dm_pdw_exec_sessions
     ) AS a;
Update the connections to your reporting platforms to point to your Fabric warehouse.
Test the Fabric warehouse with some reporting before rerouting. Perform comparison and data validation tests in your reporting platforms.
Update the connections for data loading (ETL/ELT) platforms to point to your Fabric warehouse.
- For Power BI/Fabric pipelines:
- Use the List Connections REST API to find connections to your old data source, the Azure Synapse Analytics dedicated SQL pool.
- Update the connections to the new warehouse by using the Manage Connections and Gateways page in Settings.
- For Power BI/Fabric pipelines:
When you finish, check the Reroute connections step in the Migration Assistant.
Congratulations! You're now ready to start using your new warehouse.
