Note
Access to this page requires authorization. You can try signing in or changing directories.
Access to this page requires authorization. You can try changing directories.
Use CI/CD (Continuous Integration and Continuous Deployment) to streamline the development and deployment of planning content across environments. Integrate planning artifacts into source control, validate changes, and deploy updates consistently from development to production while reducing manual effort and deployment errors.
Planning supports two key CI/CD capabilities: Git integration and deployment pipelines. These tools help manage planning items across development, test, and production environments by allowing individual items to be deployed, or multiple items to be deployed at once.
In addition, Planning supports using variables to dynamically manage semantic models, writeback destinations, and writeback connections across environments.
Configure Git integration
Planning integrates with source control at the workspace level. You can commit all planning items in a workspace to a Git branch and version multiple planning items through a single process. The workspace structure, including folders, is preserved in the Git repository. Fabric supports source control through GitHub and Azure DevOps. For more information, see Fabric Git Integration.
Open the Fabric workspace to integrate with a Git repository.
Go to Workspace Settings and select Git integration.
Select your source control provider: Azure DevOps or GitHub.
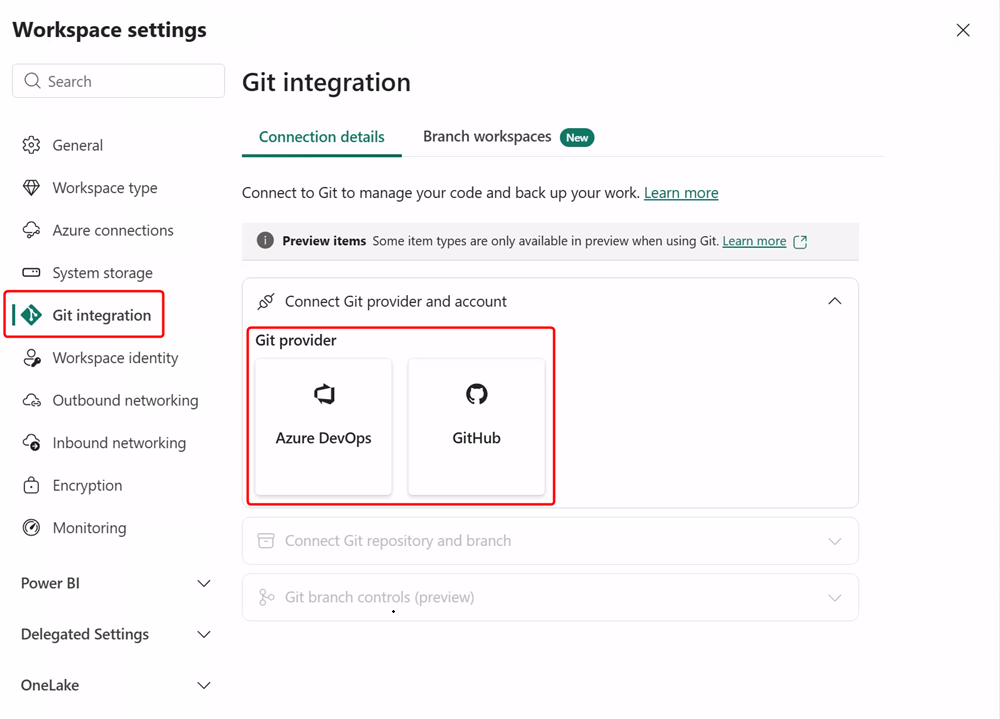
Enter the Azure DevOps or GitHub account and repository details. In this example, you choose GitHub.
Select Connect.
In the Connect Git repository and branch section, select an existing branch or create a new branch.
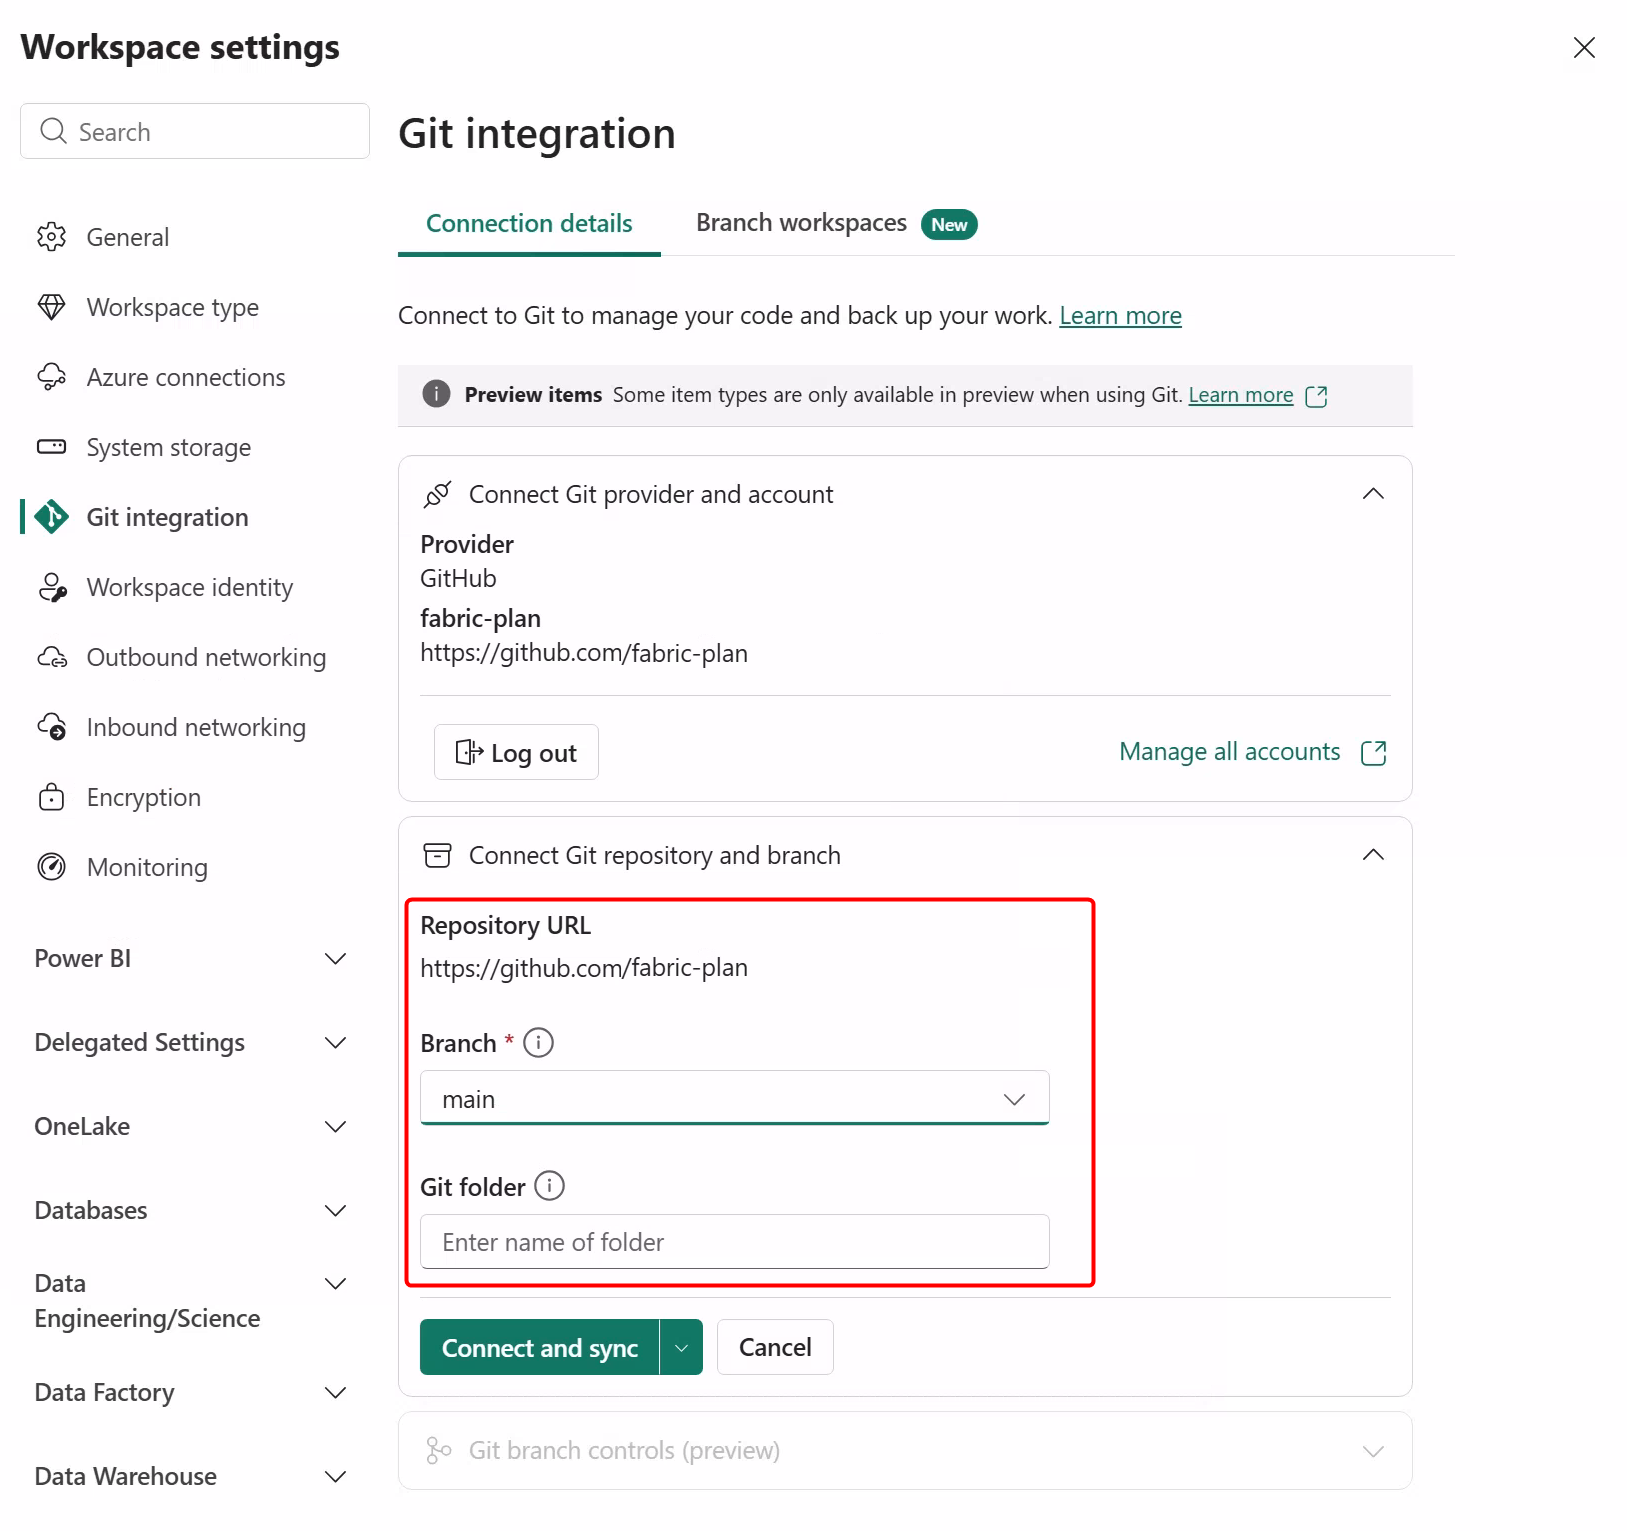
Select Connect and Sync.
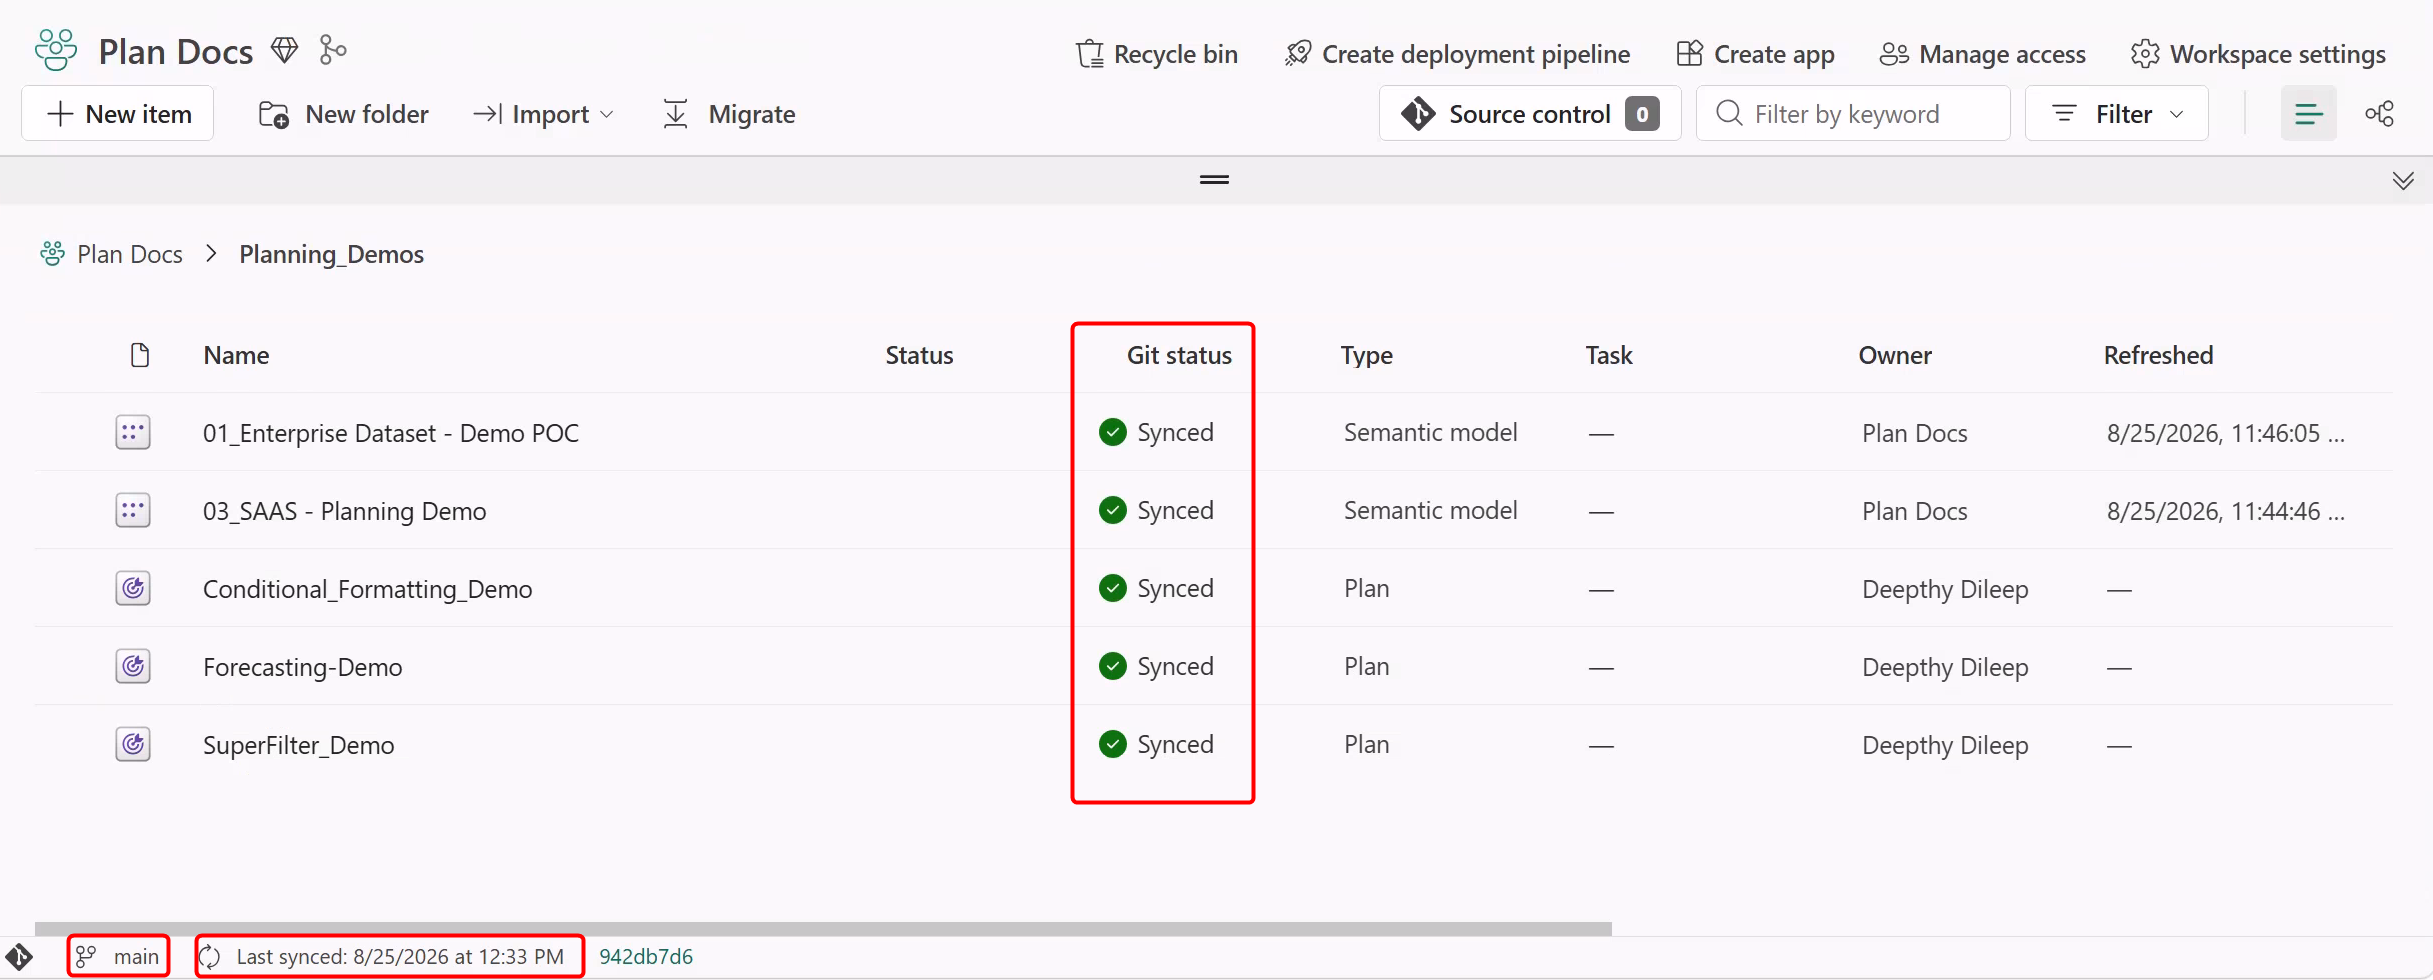
Fabric displays the branch, sync status for each item, and the time of the last sync.
Commit changes to the Git repository
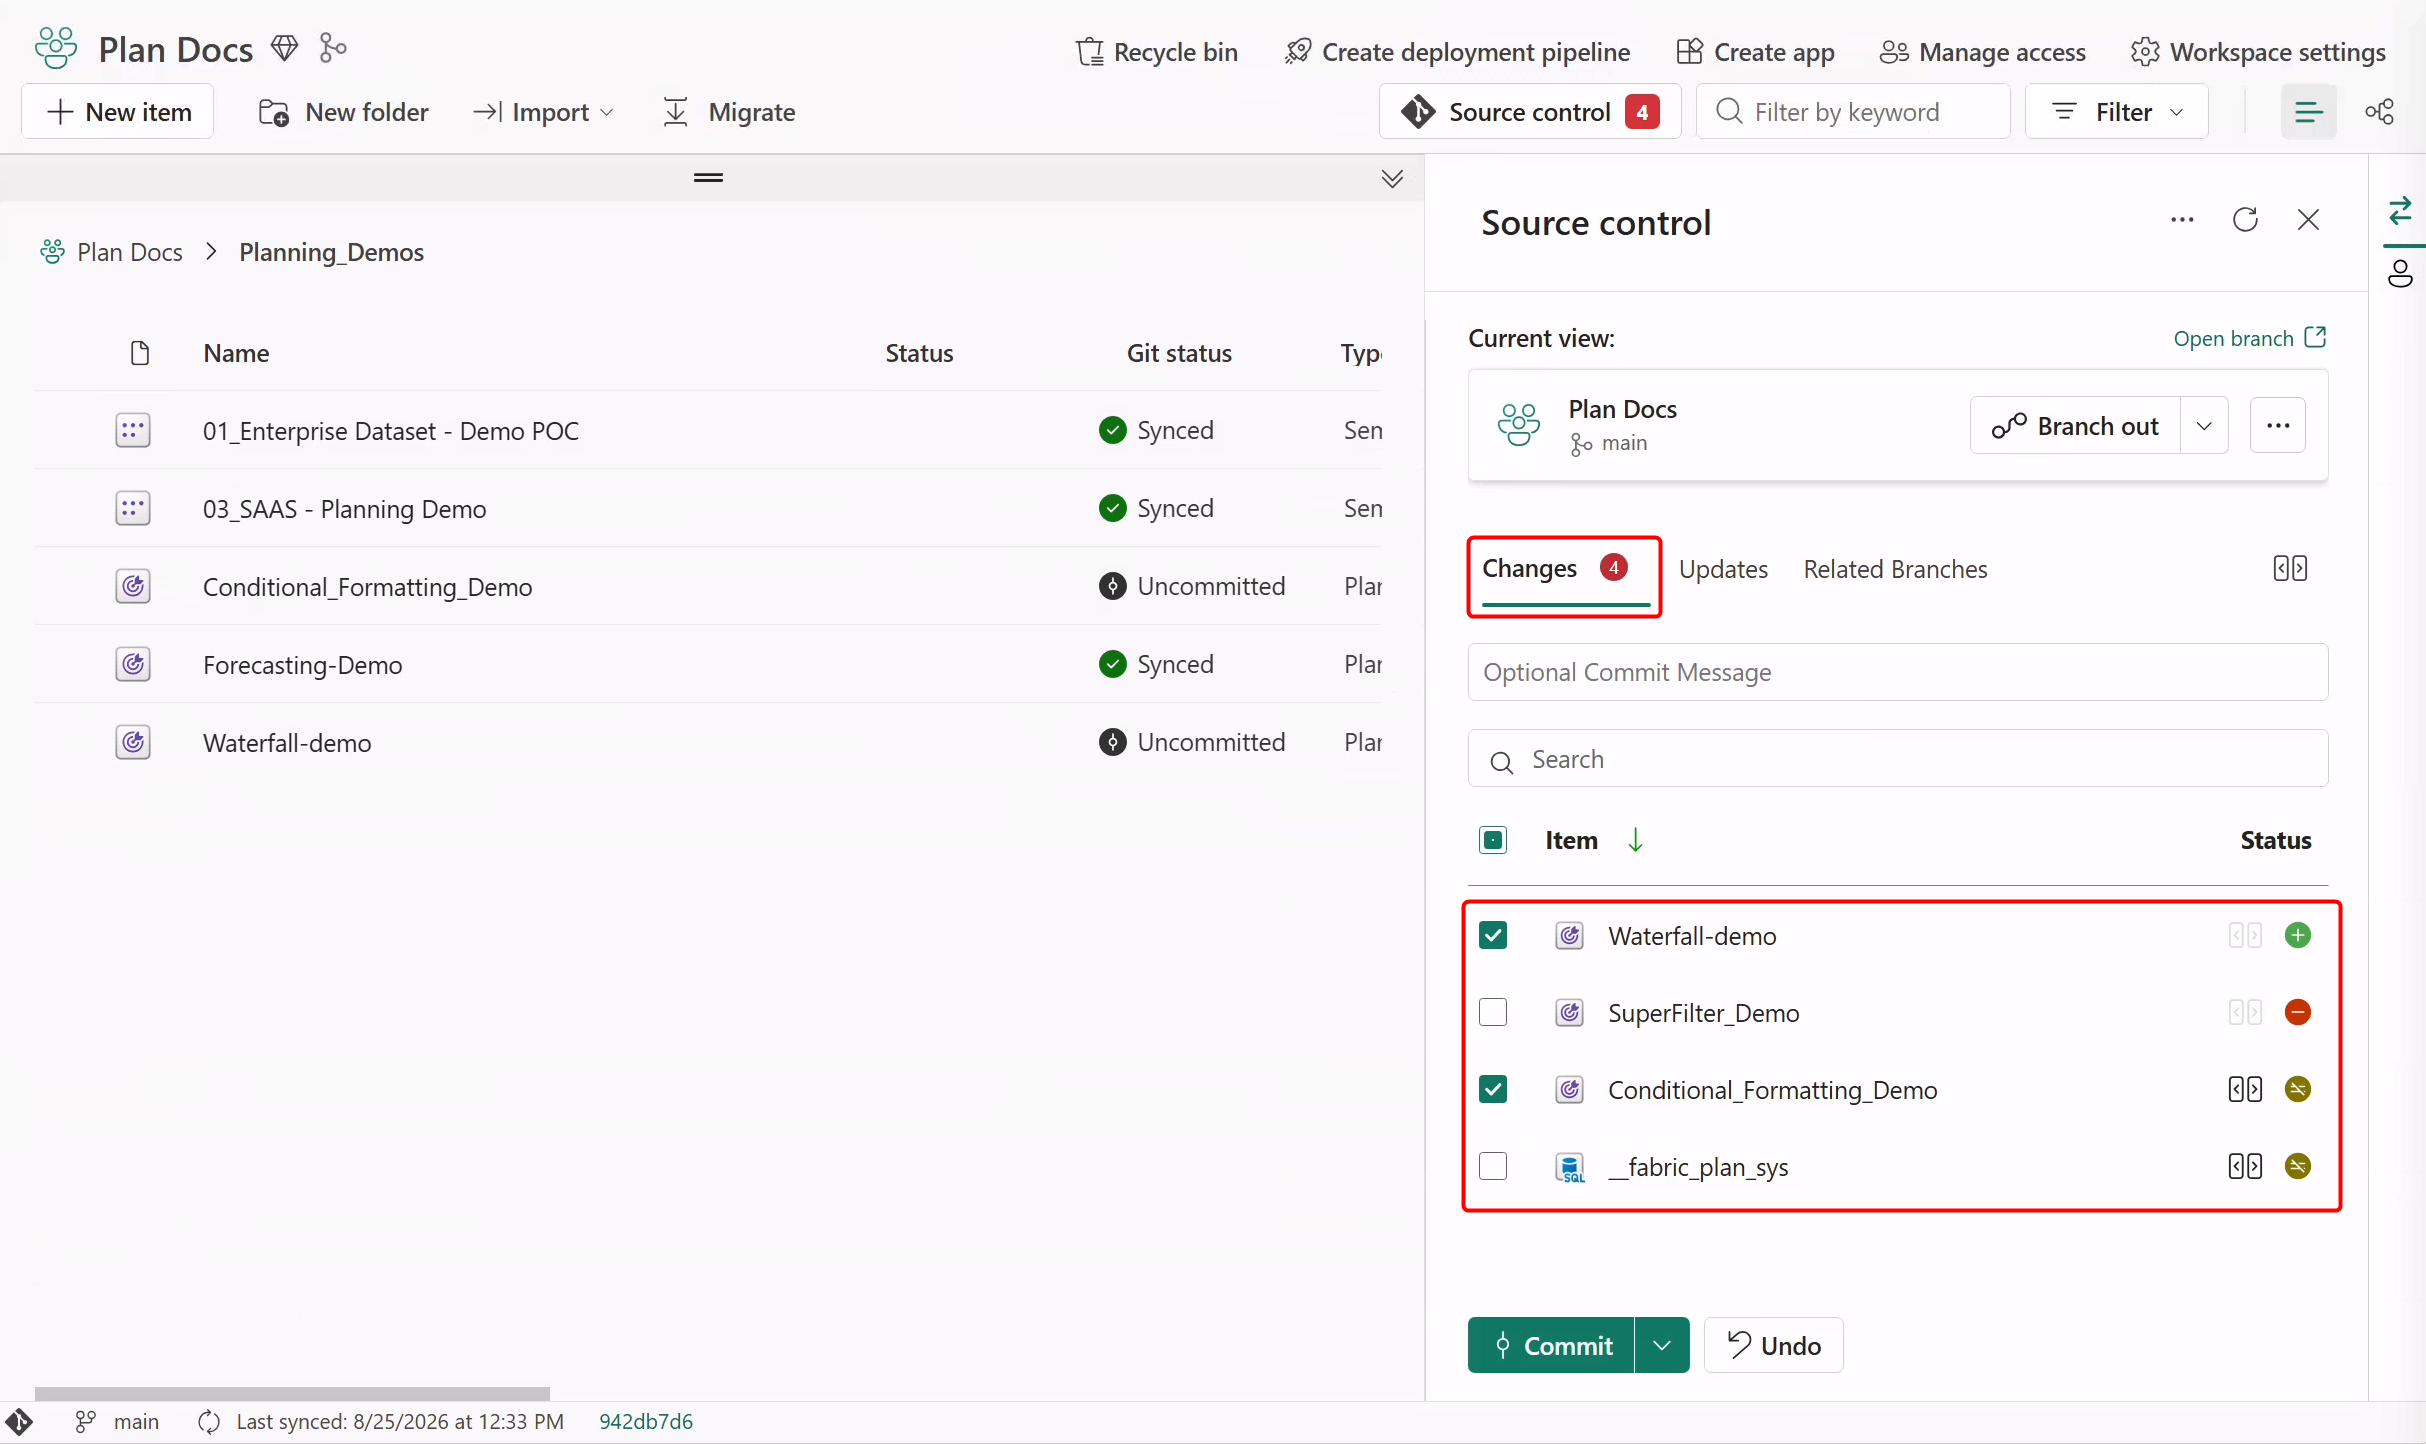
When you make changes to an existing plan, delete a plan, or create a new plan, you must commit those changes to the Git repository linked to the workspace. The status of modified items changes to Uncommitted.
Select the Source control option.
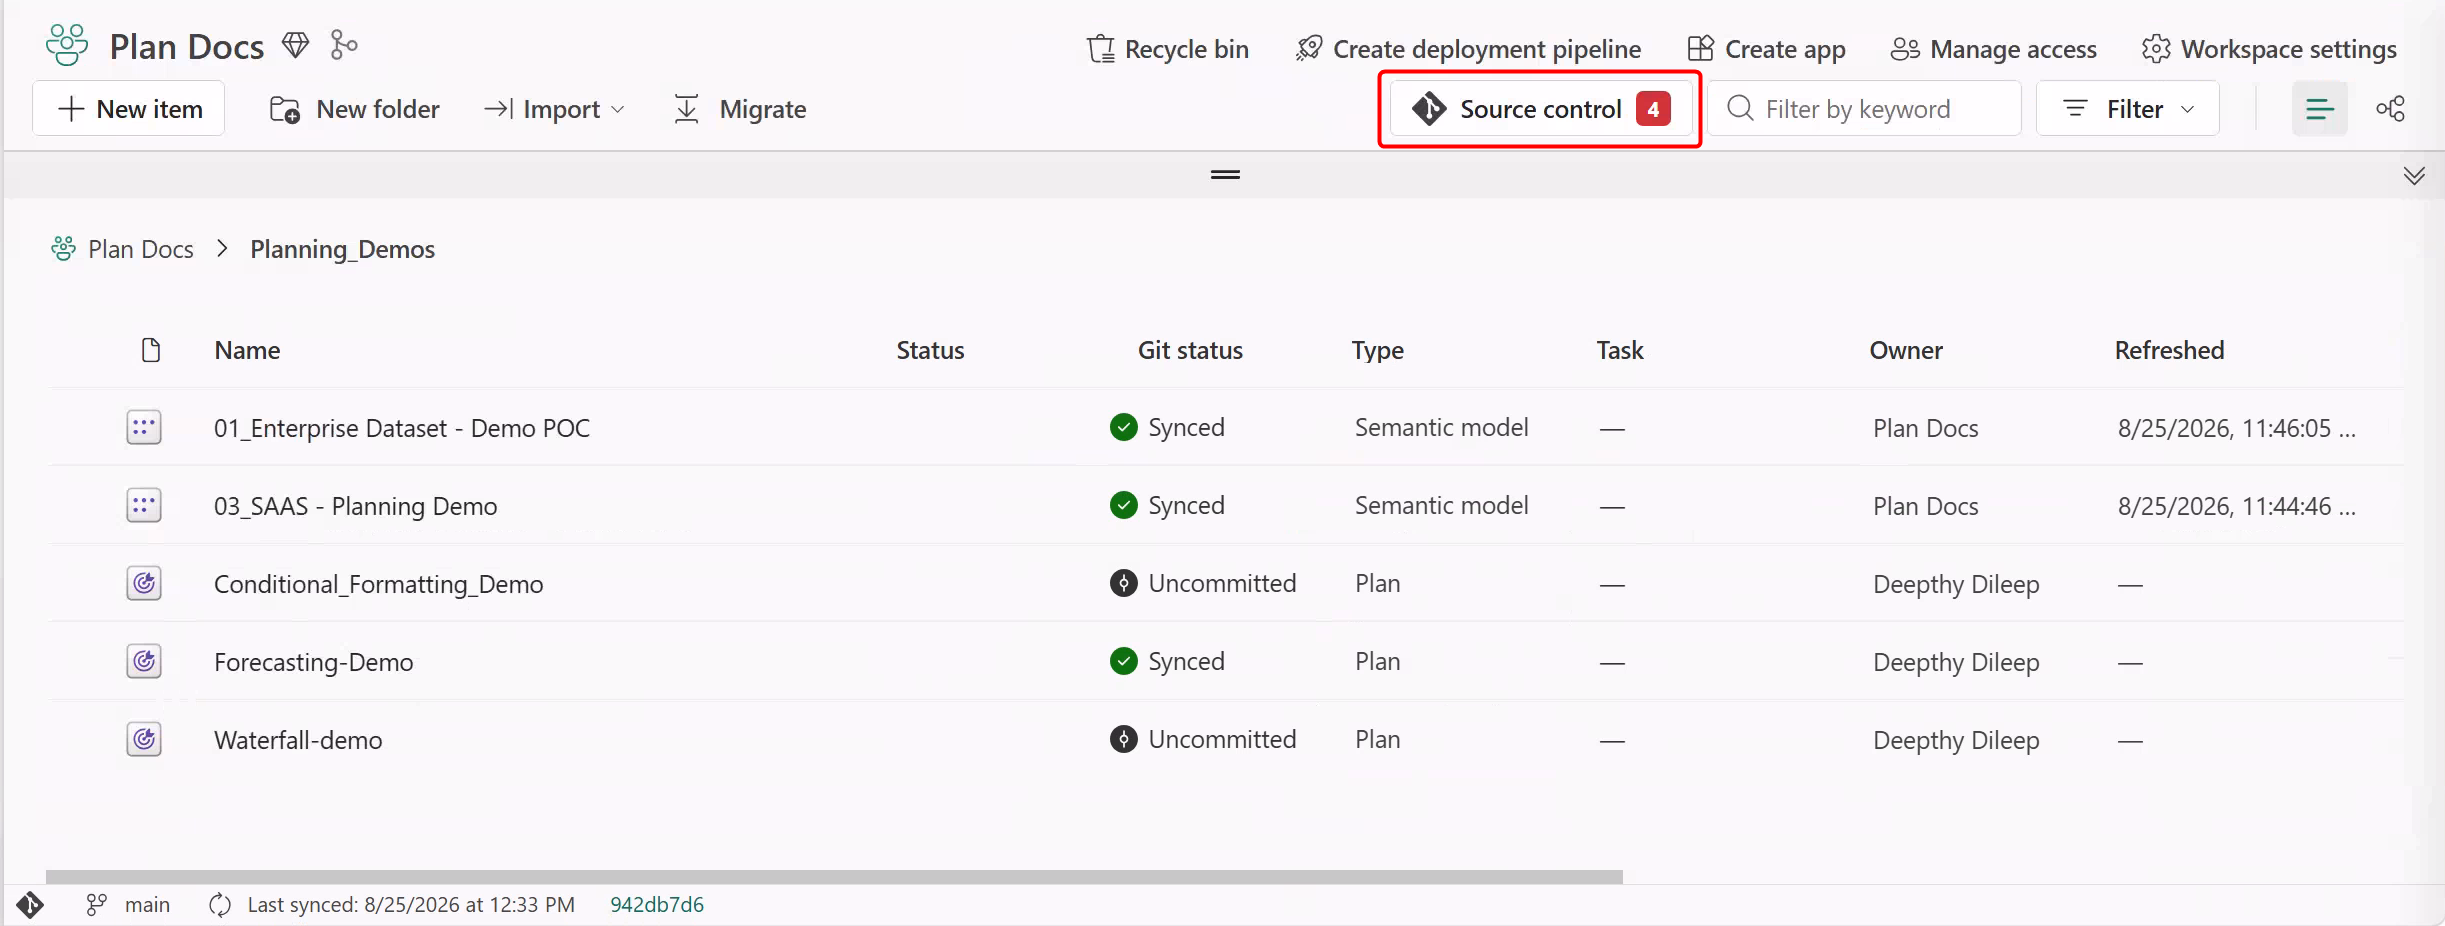
Select the Changes tab from the Source control side pane. This tab displays all the items you changed, with an icon indicating the status: New, Modified, Conflict, or Deleted.
Select the items to commit to the Git repository and add an optional commit message. Select Commit.
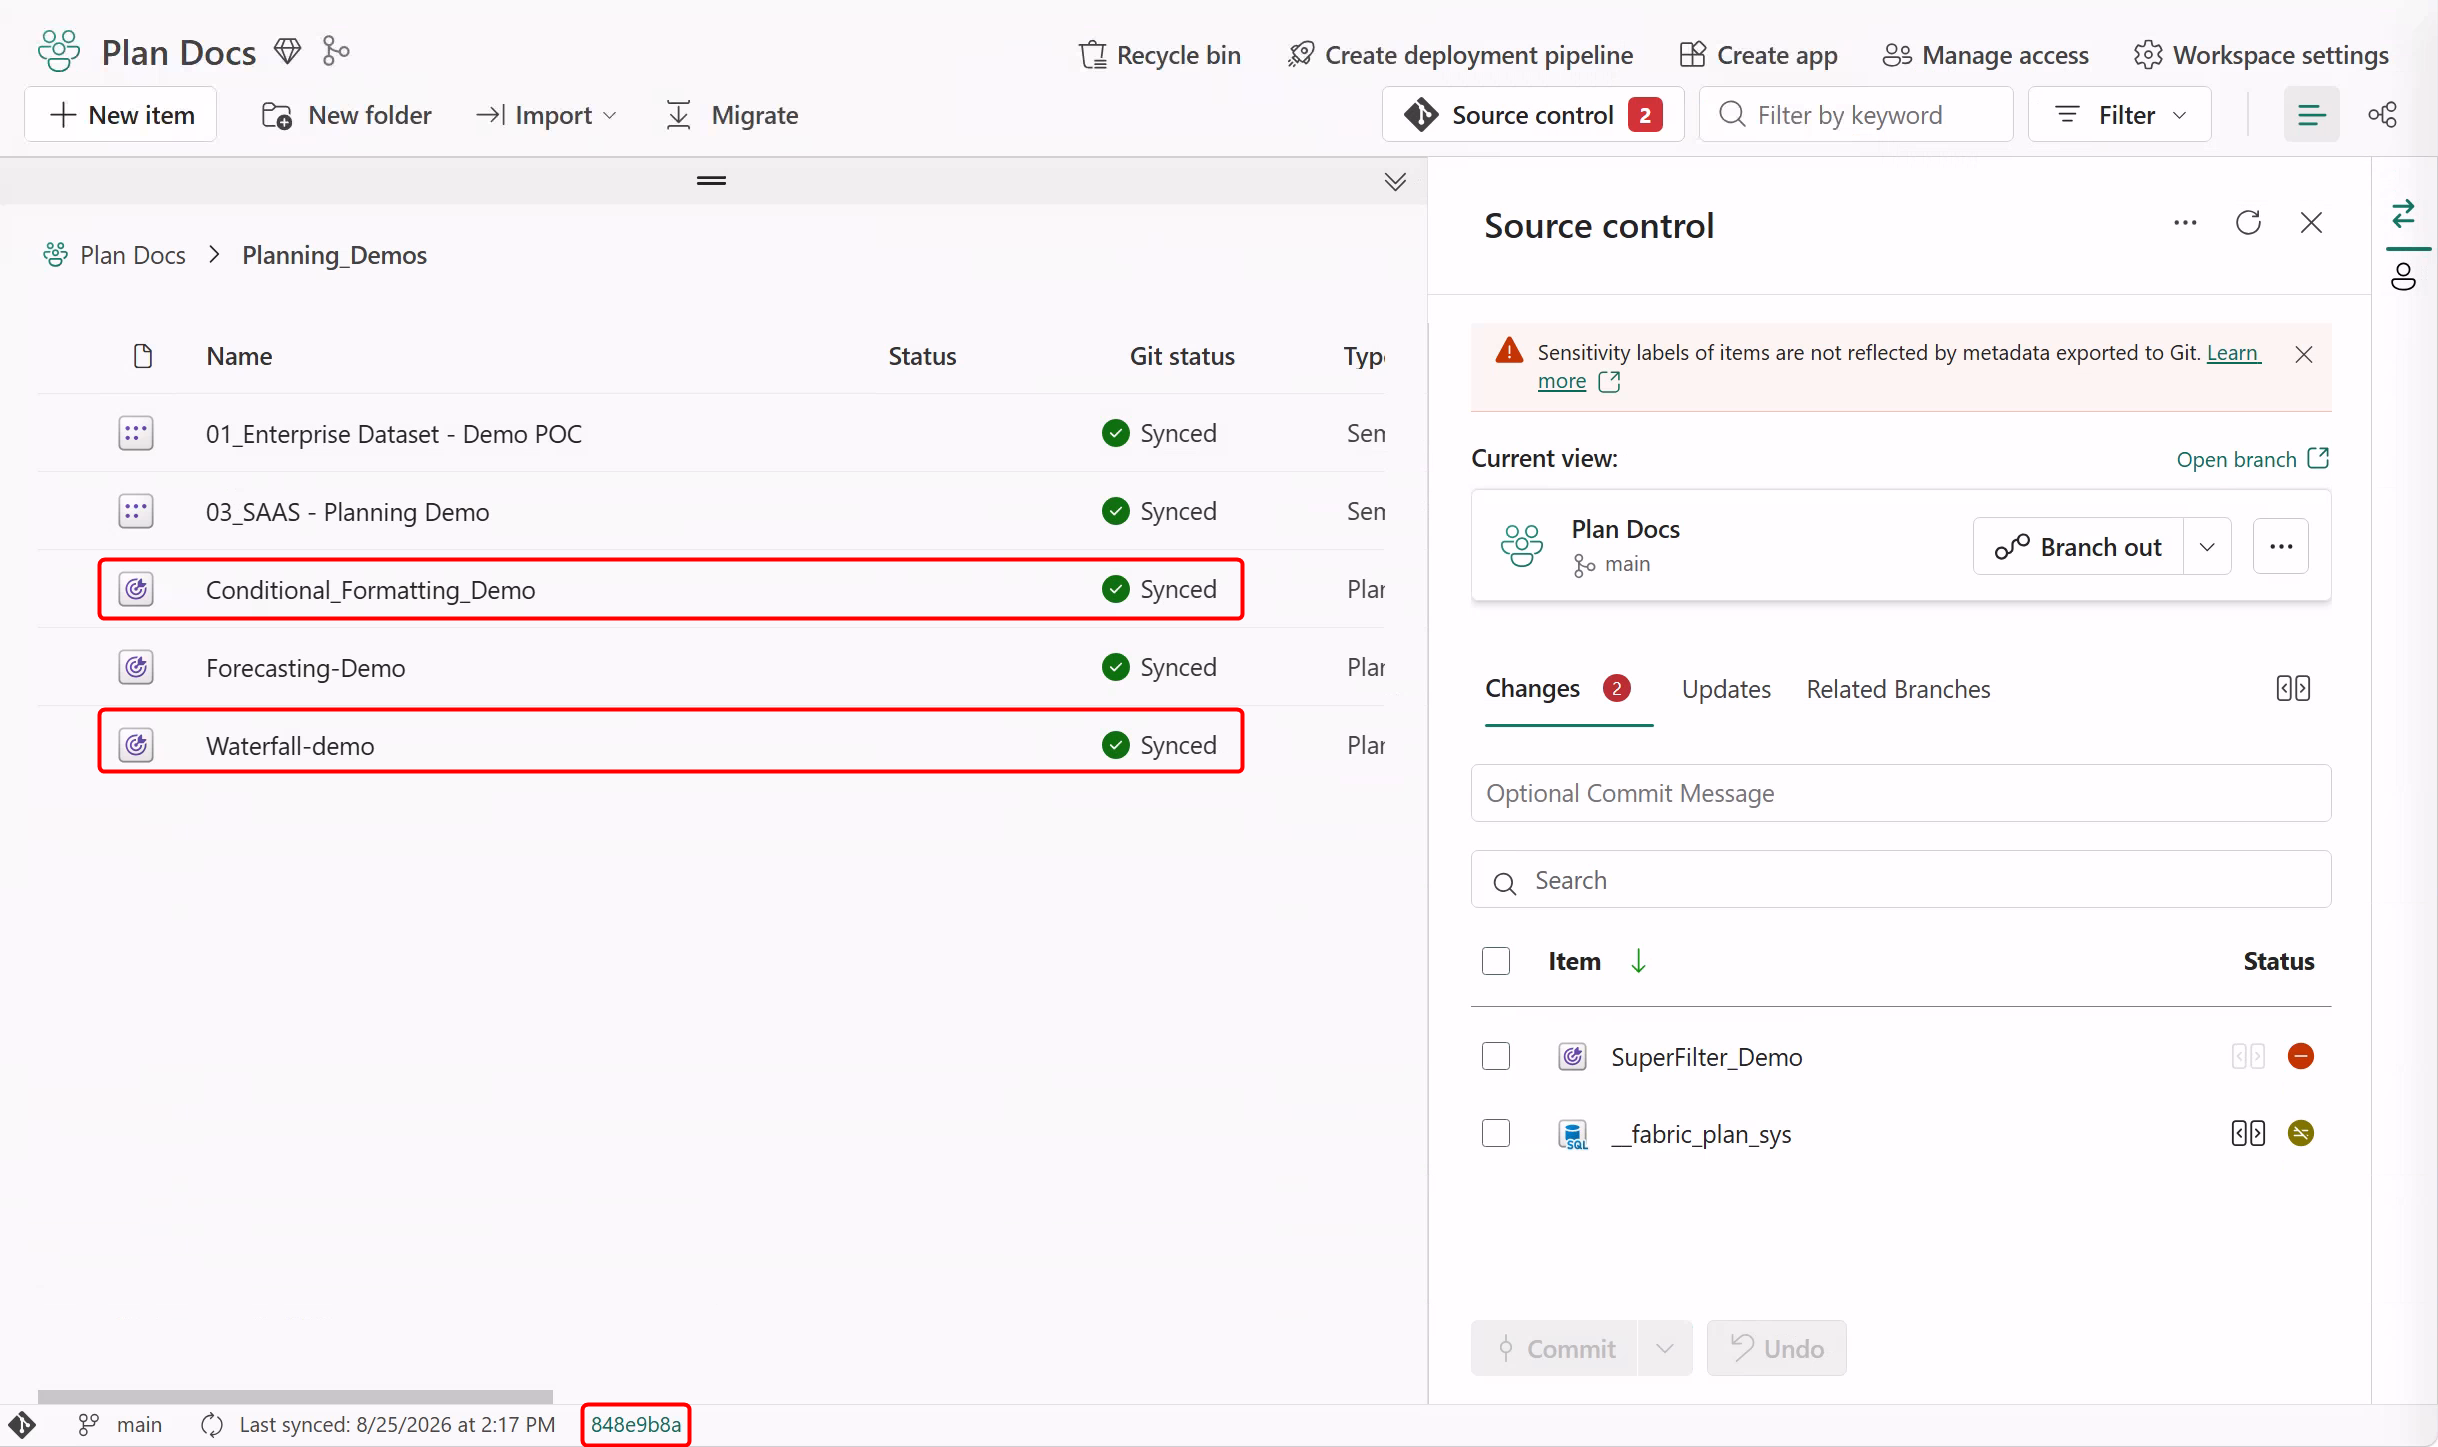
After the selected items are committed to the Git repository, Fabric removes them from the list. The item status changes to Synced, and the status bar displays the latest commit.
Deploy planning items to other workspaces
Create a deployment pipeline to promote plan items from development to test and production workspaces. To learn more about deployment pipelines in Fabric, see Introduction to deployment pipelines.
Fabric's lineage view helps you track item dependencies. When the plan and semantic model reside in the same workspace and deployment pipeline, deploy the semantic model to the target workspace at least once, either before or together with the plan. This step establishes the connection to the semantic model in the target workspace. For semantic models in other workspaces, follow the stand-alone or separate-pipeline scenarios in the next section.
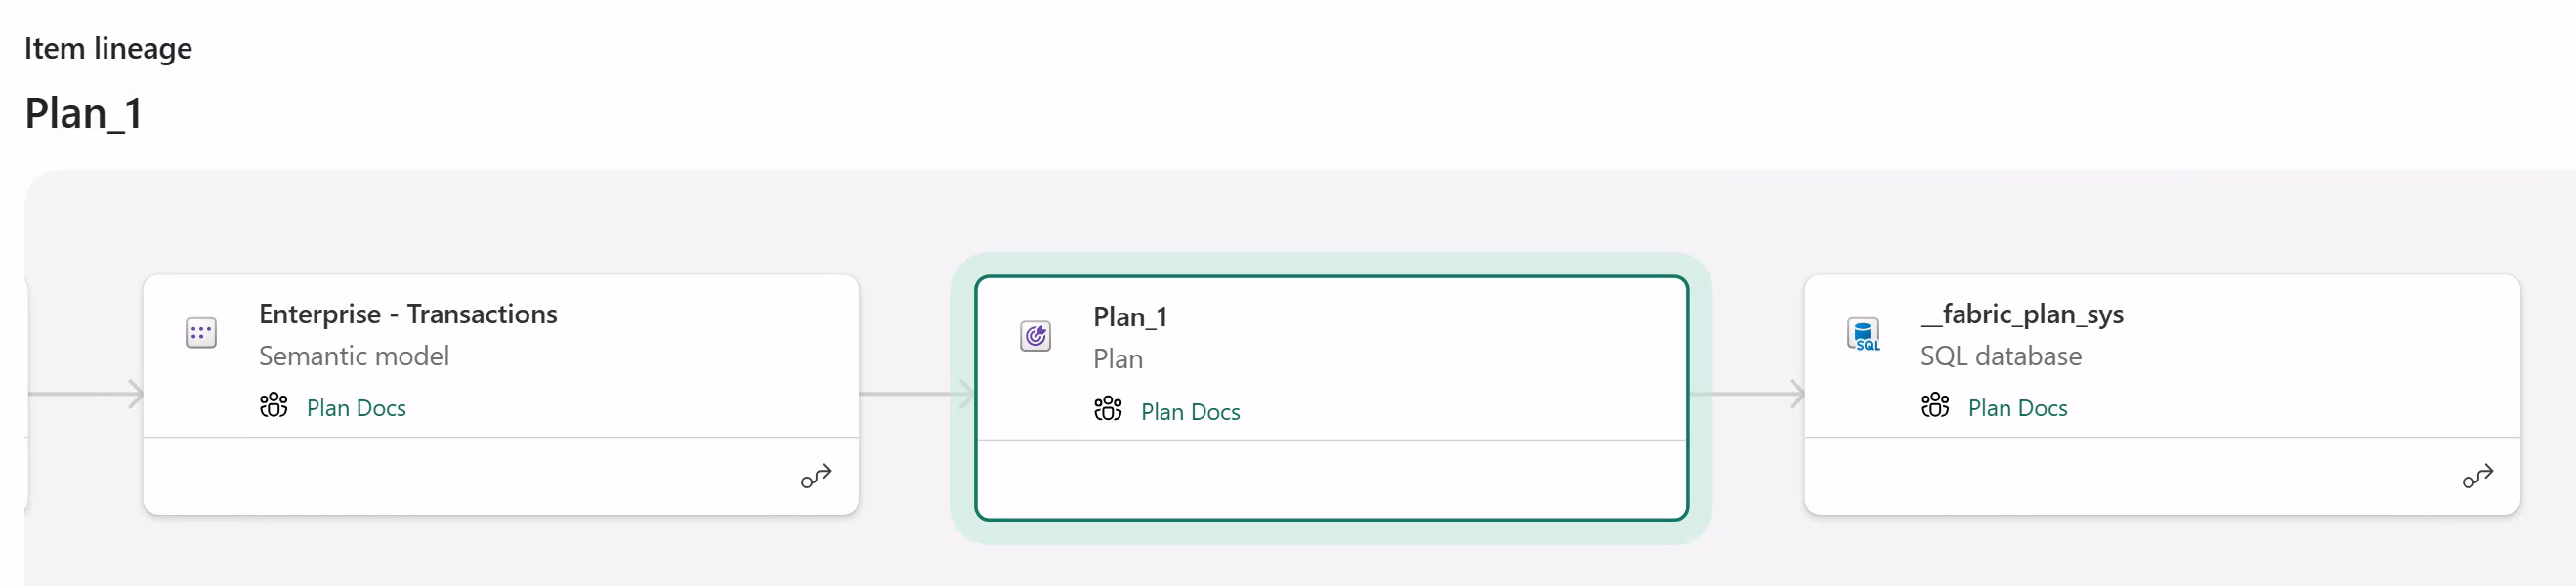
The following steps describe how to deploy a plan when the plan and semantic model reside in the same workspace and are part of the same deployment pipeline.
Commit your plan and semantic model to the Azure DevOps or GitHub repository connected to the workspace.
Create a new deployment pipeline, define the pipeline stages, and assign the designated workspaces to each stage.
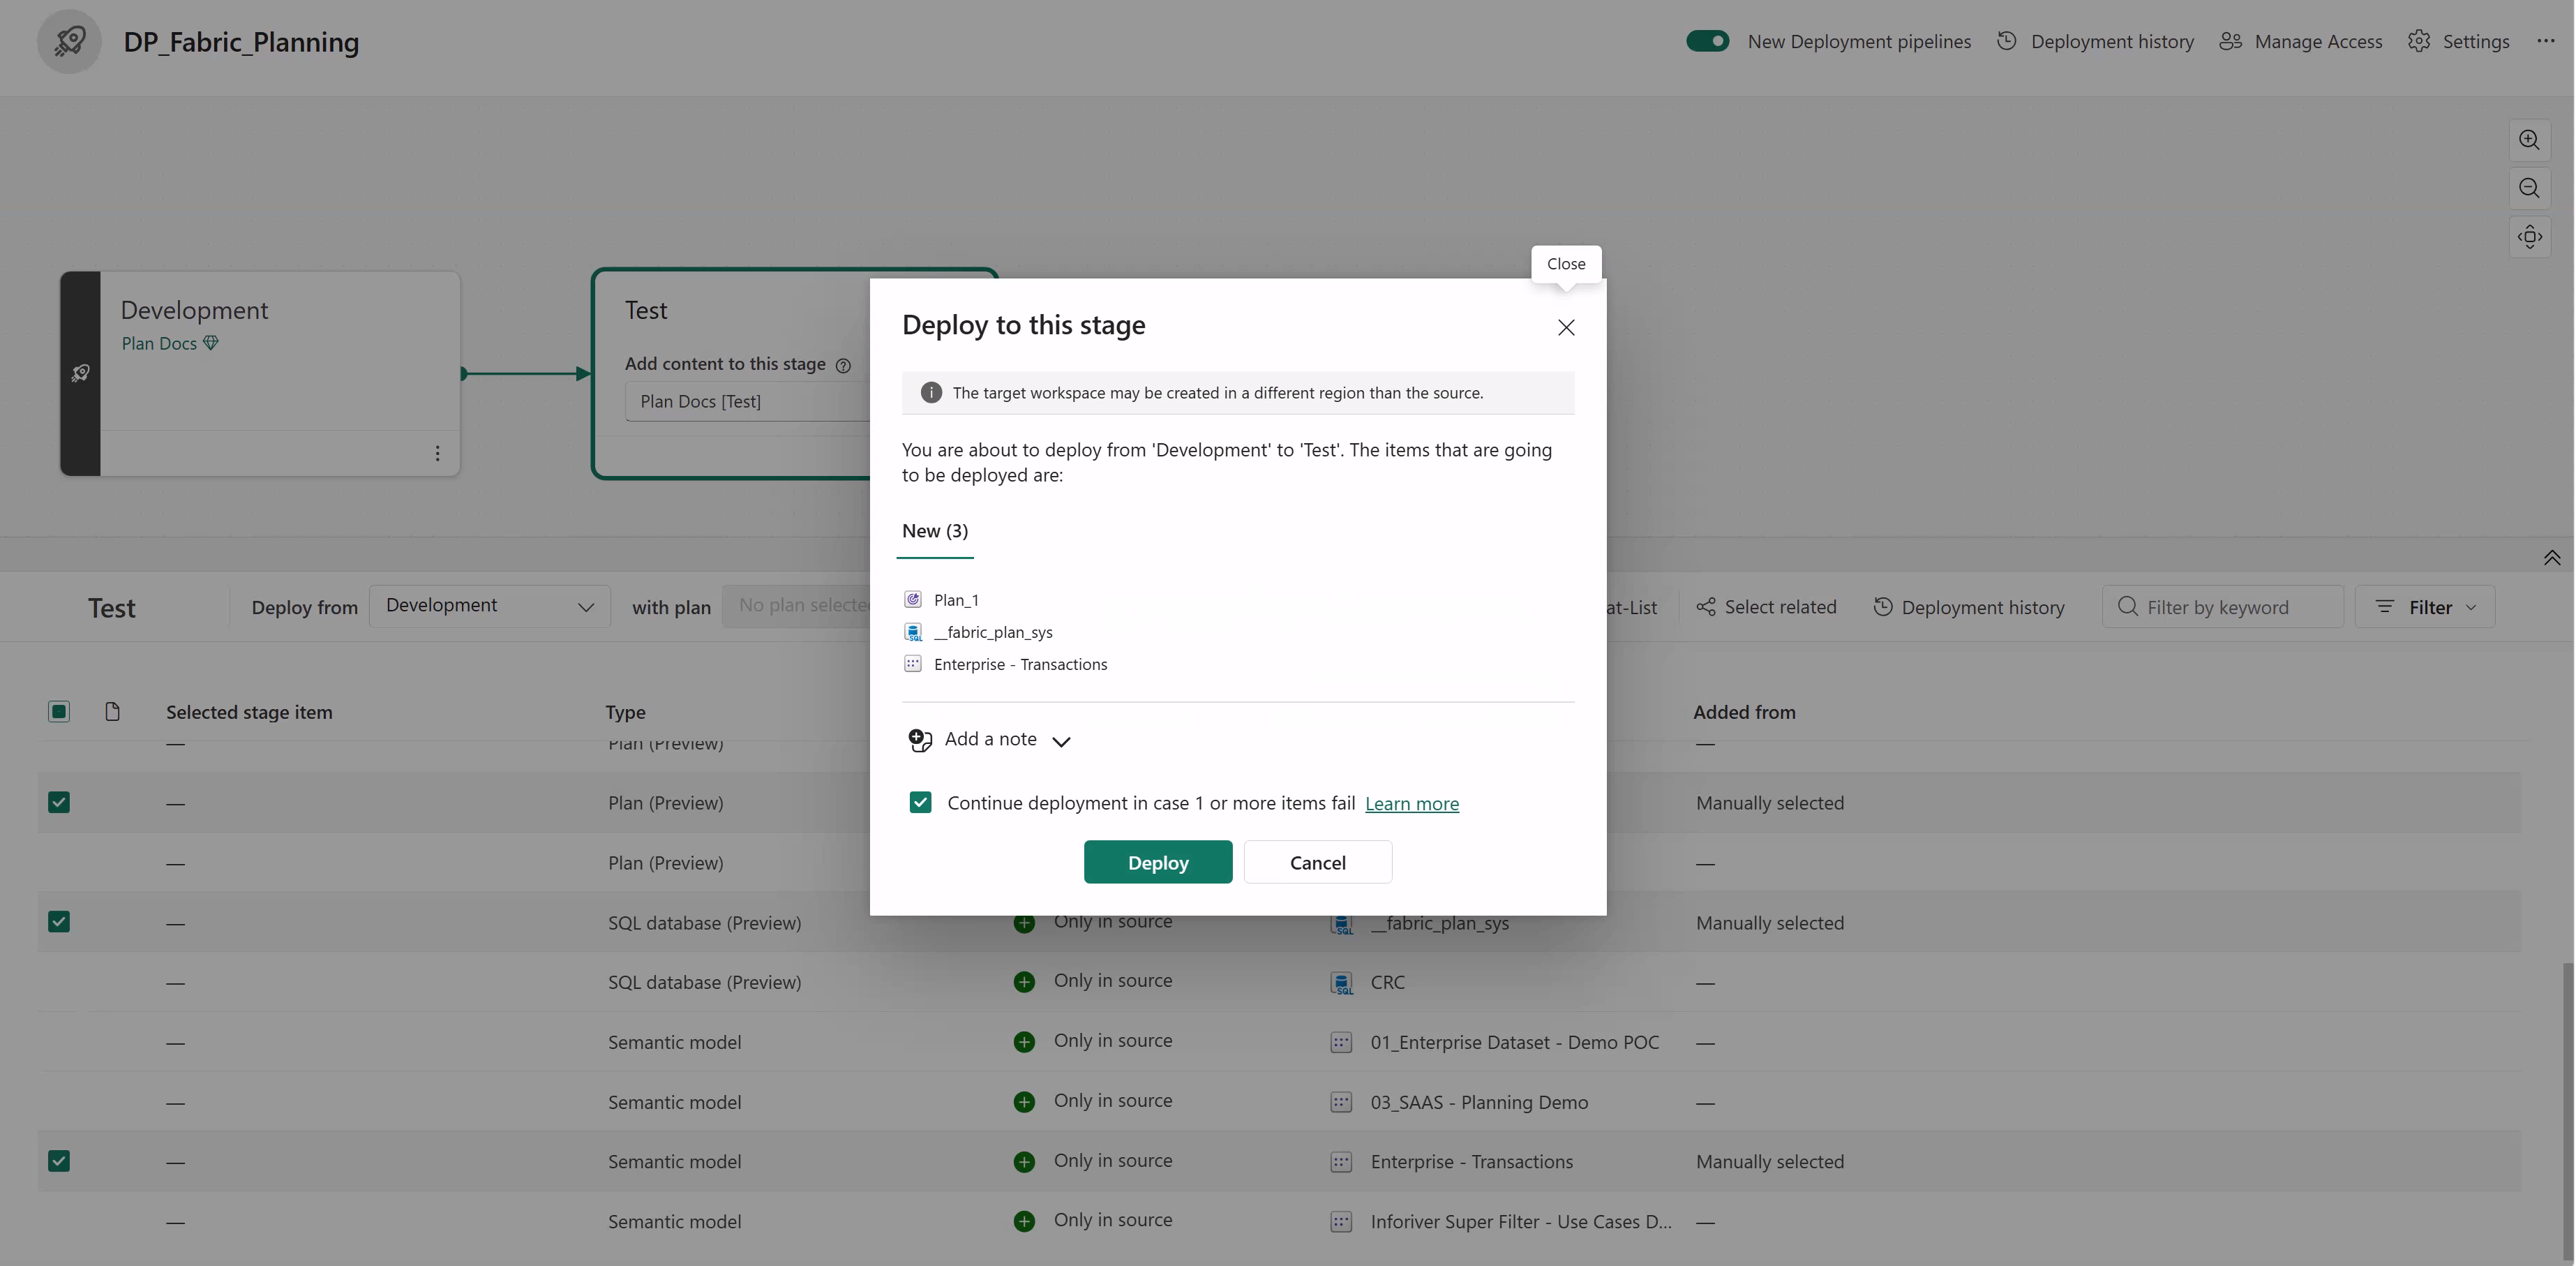
Select the target stage, such as Test or Production, to deploy your planning item. Deploy from is automatically set to the previous stage in the pipeline (For example, Development when deploying to Test). Select the plan, the Fabric SQL app DB, and the related semantic model to deploy to the next stage.
Note
- The __fabric_plan_sys SQL database stores metadata for data inputs, comments, writeback destinations, user access, and more. Deploy it once during your first deployment. It doesn't need to be redeployed in subsequent updates.
- To deploy your plan, the semantic model used in the plan must already exist in the target stage or be selected for deployment along with the planning item.
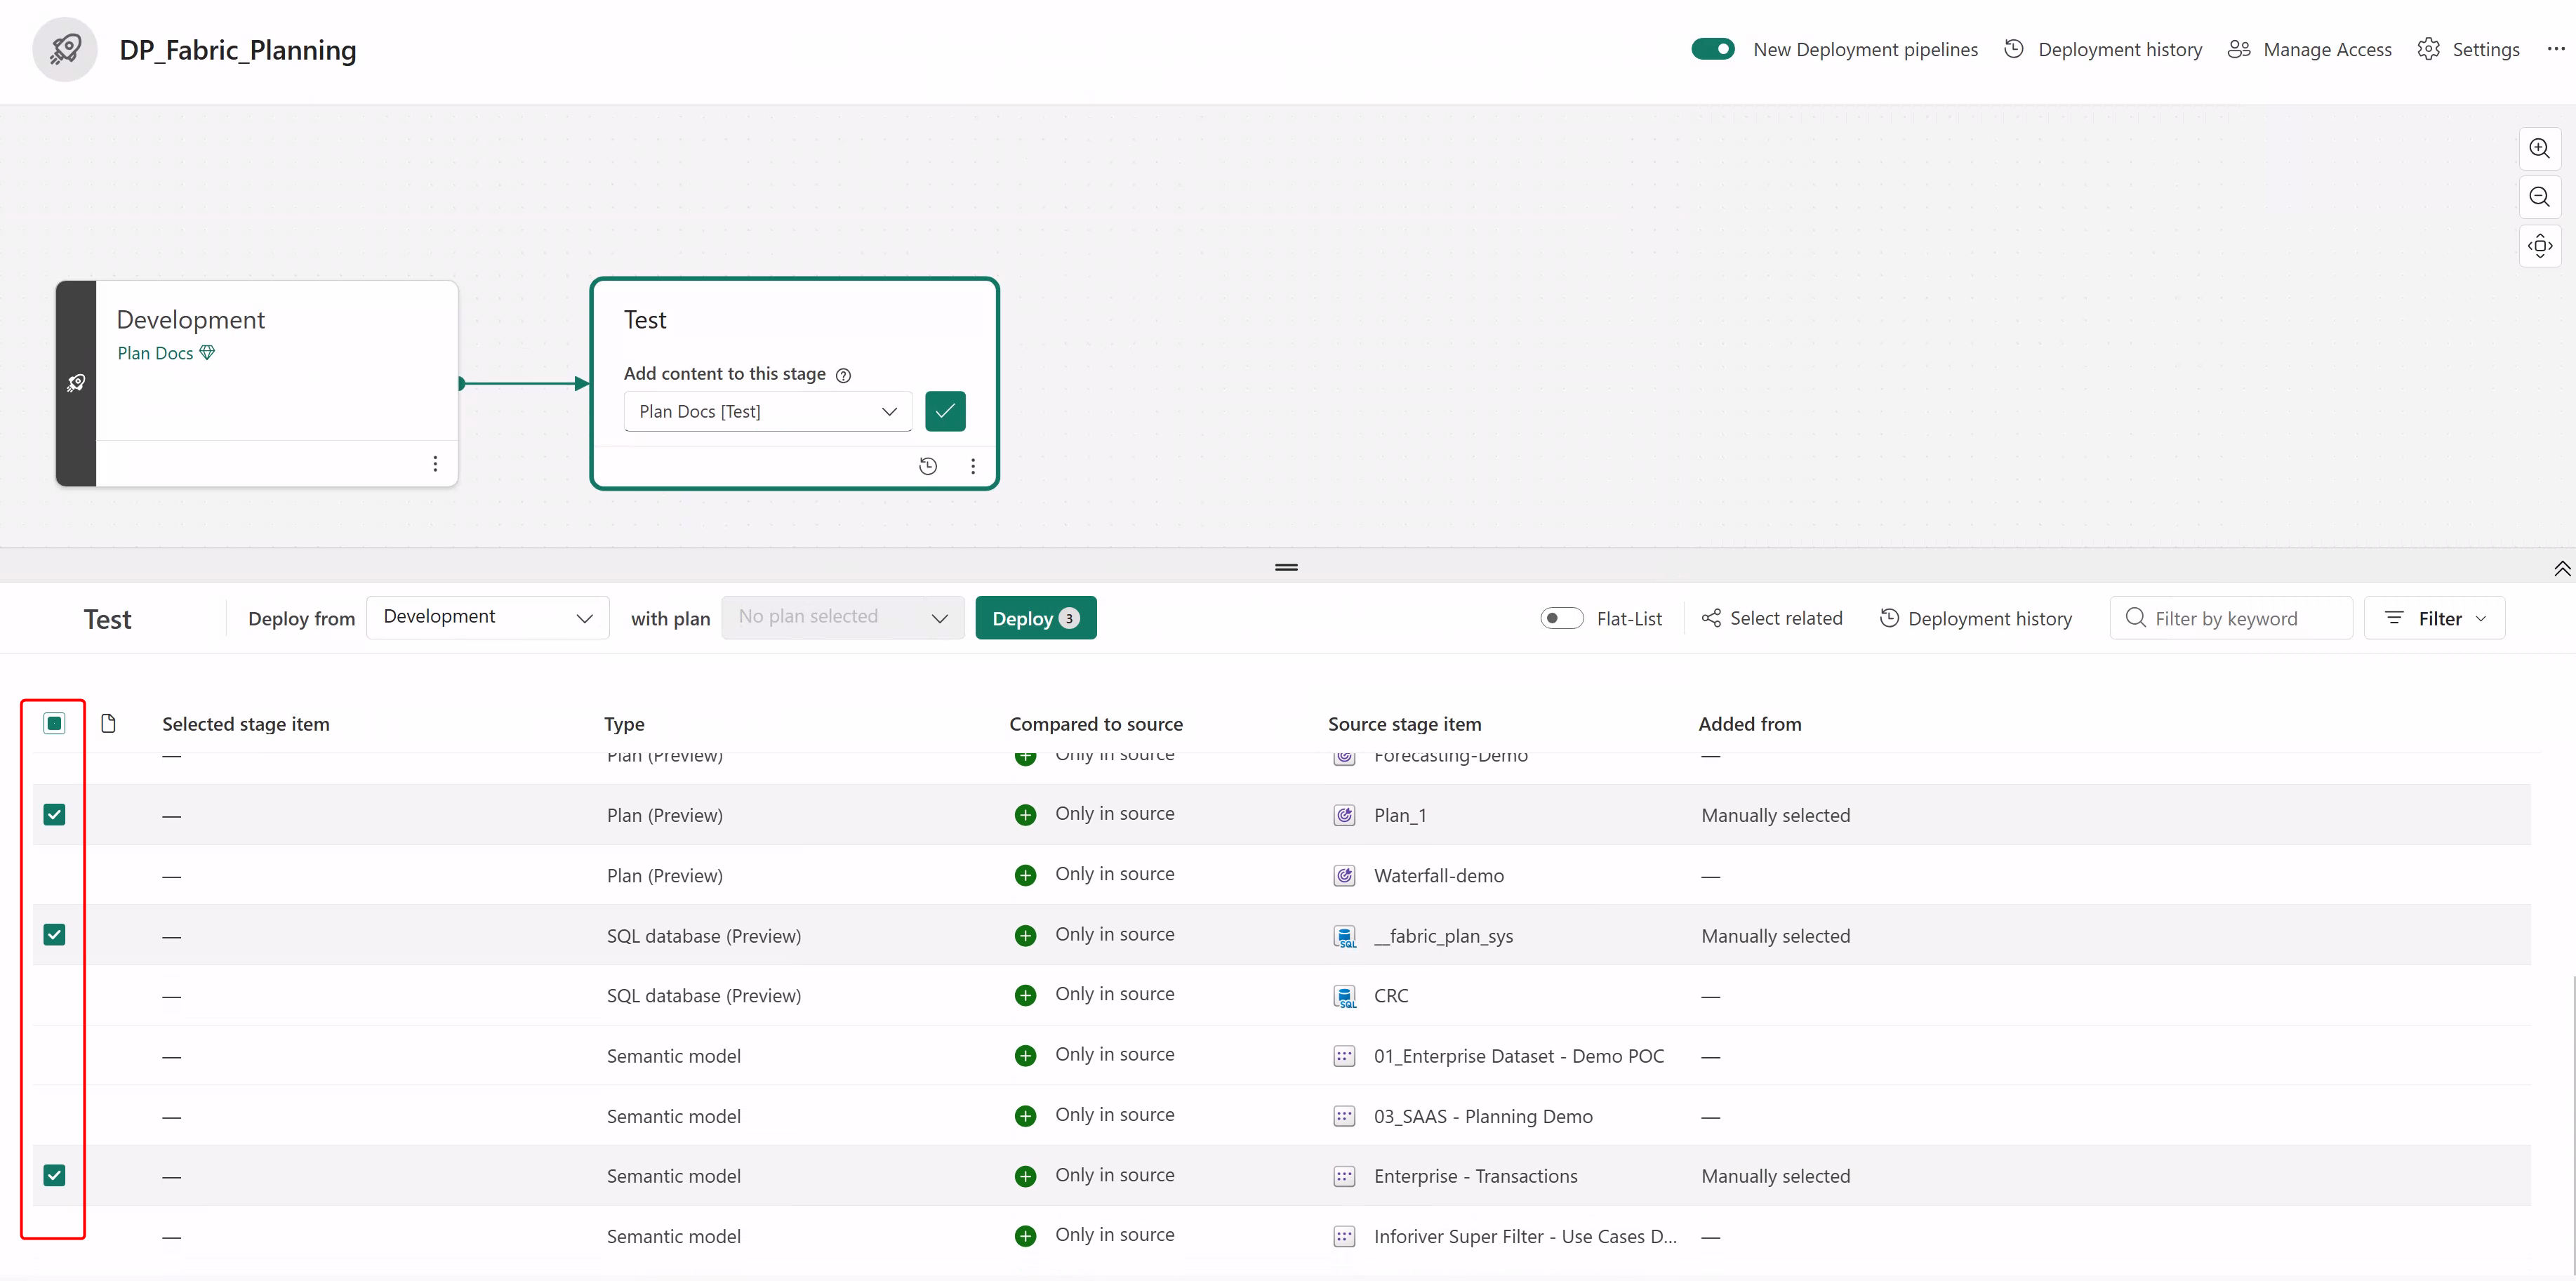
Select Deploy and verify the source and target stages and the items selected for deployment. Verify that the deployment is successful from the Deployment history pane.
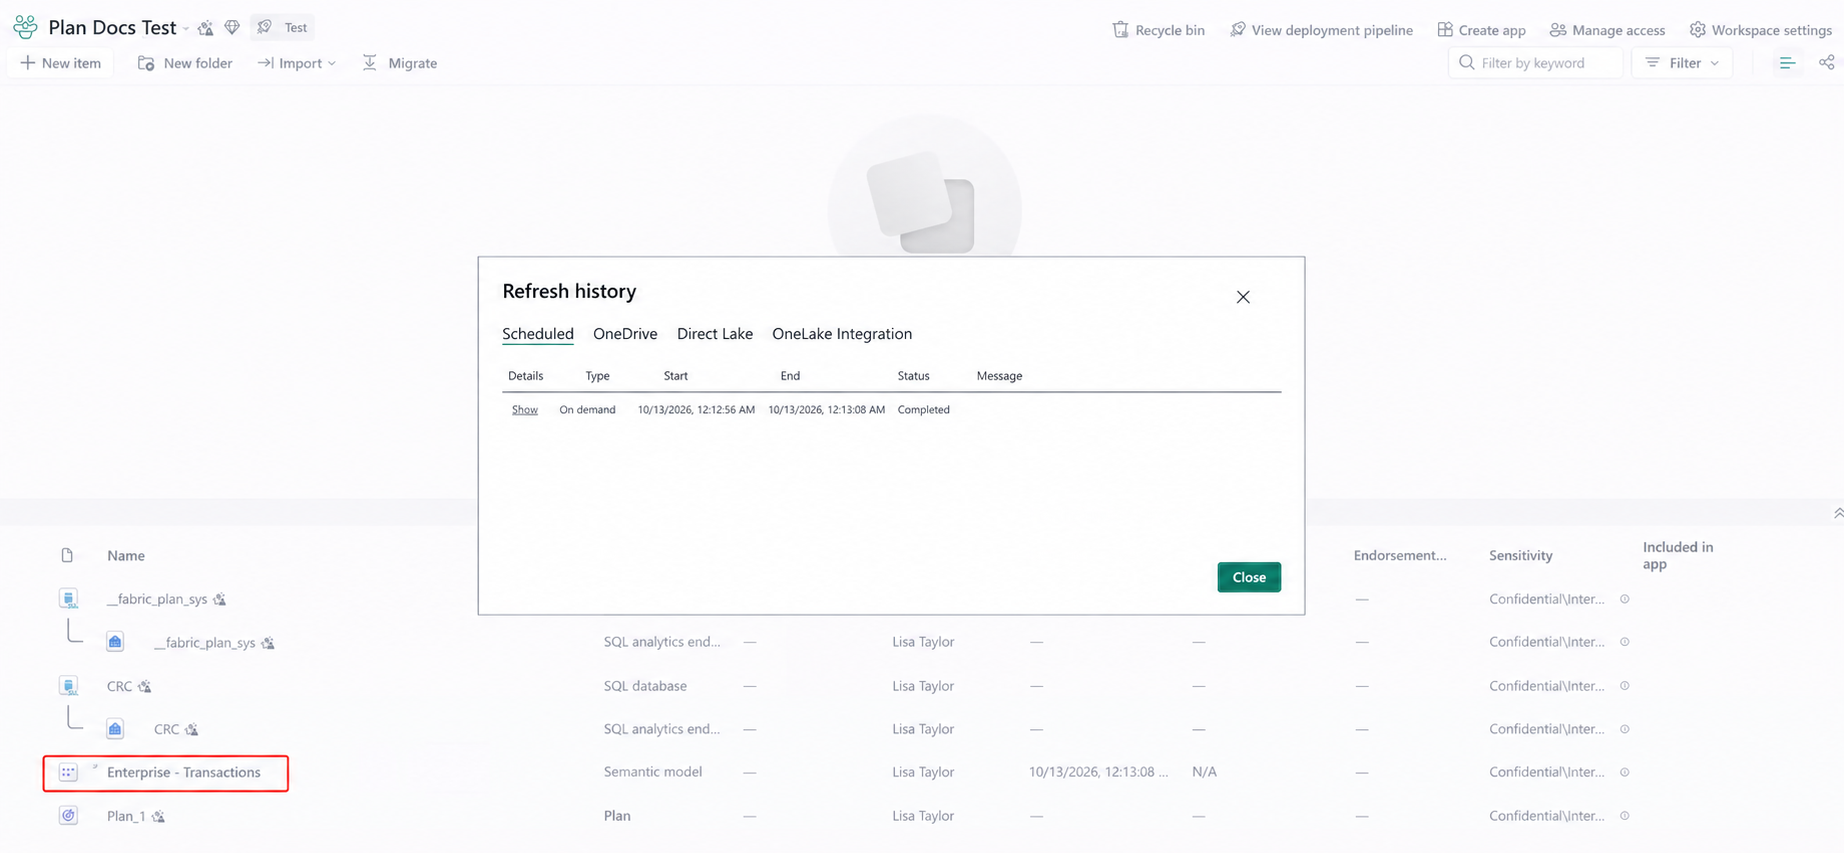
Open the target workspace and refresh the semantic model.
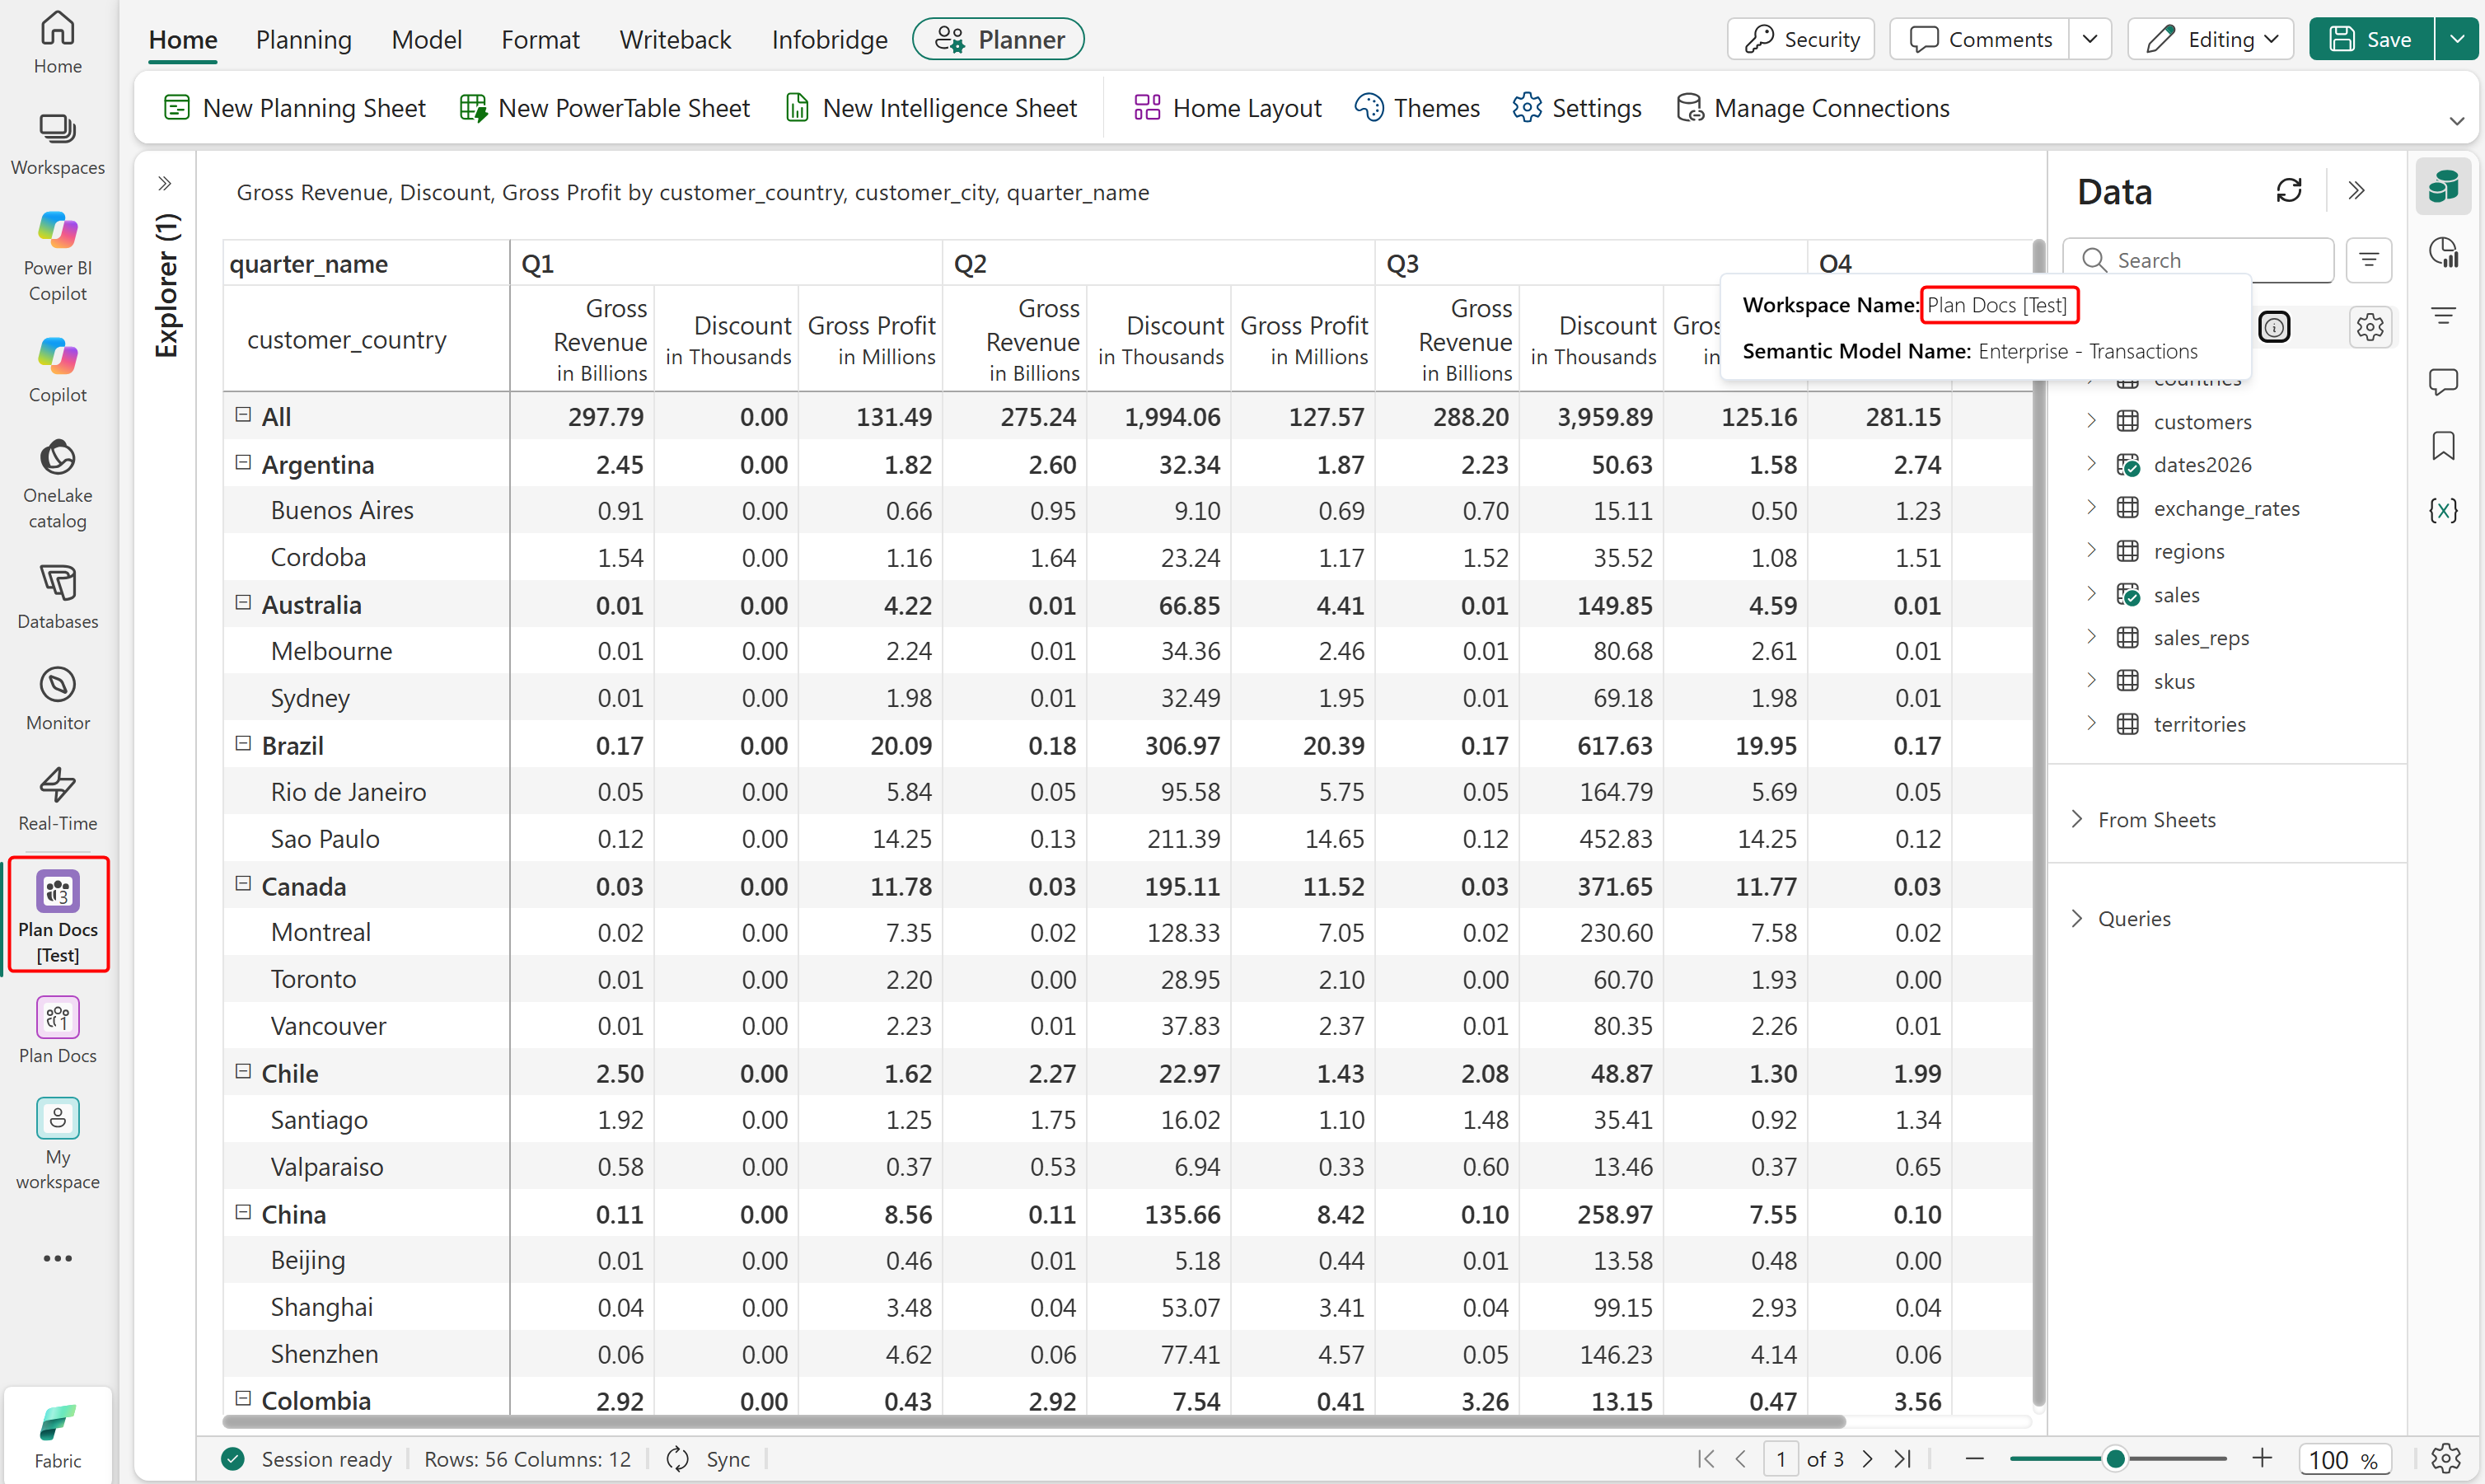
Open the plan in the target workspace. Fabric automatically retains the semantic model connection and loads the data.
Deploy planning items with stand-alone semantic models
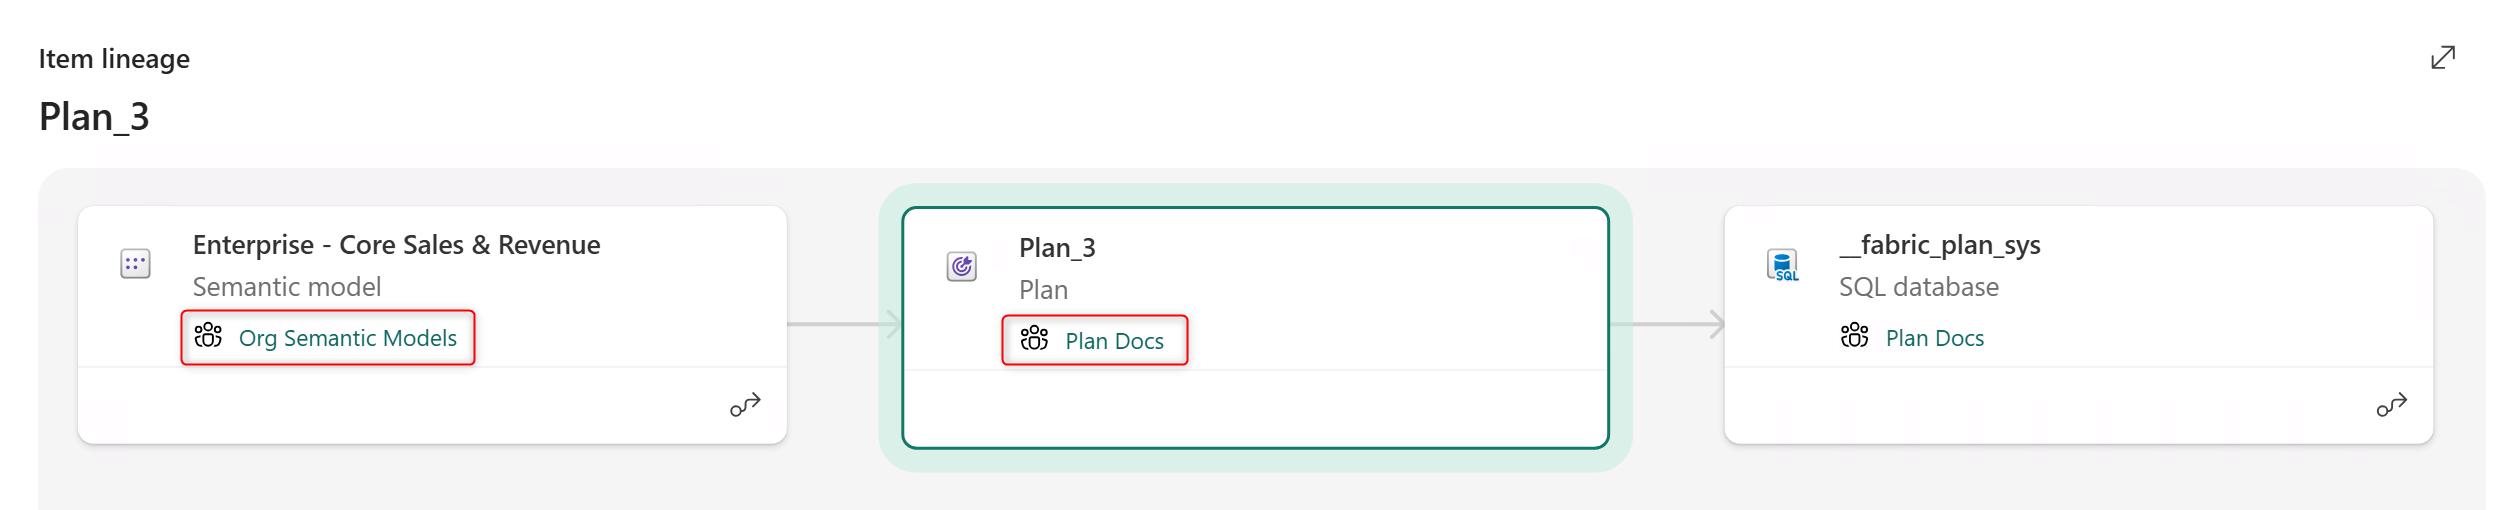
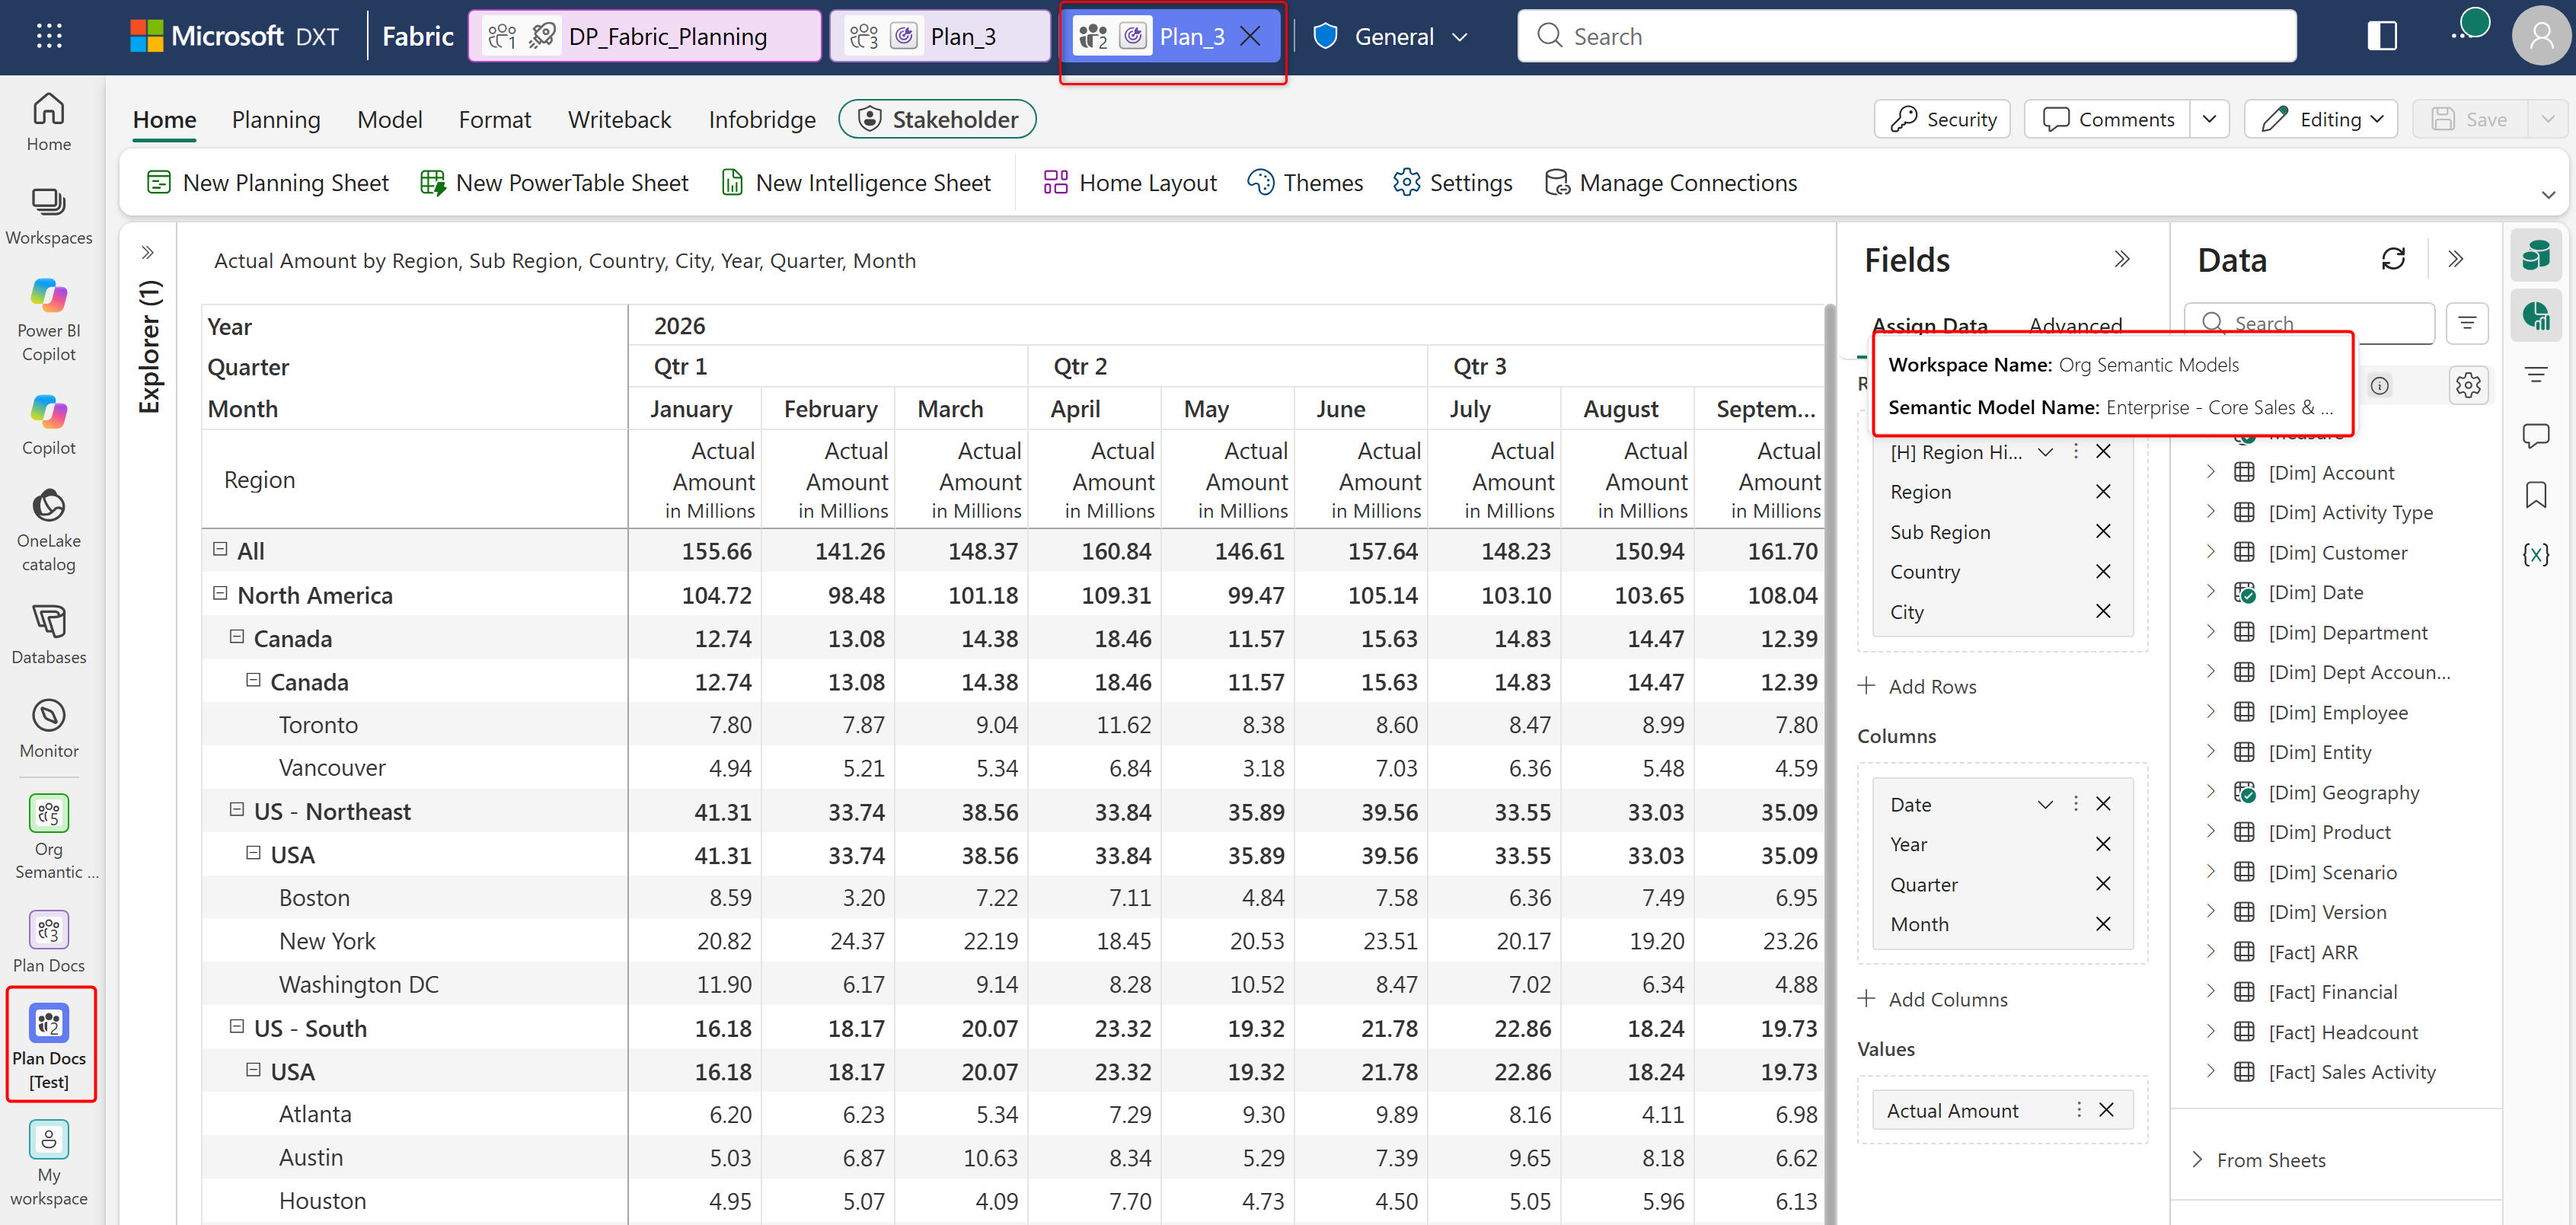
If your semantic model resides in a separate workspace outside any deployment pipeline, you only need to deploy the plan from your source workspace to the target workspace. Fabric automatically preserves the connection to the stand-alone semantic model in the target workspace.
Commit your plan to the Azure DevOps or GitHub repository connected to the workspace.
Open the deployment pipeline connected to the workspace. Select the plan and deploy it to the target workspace.
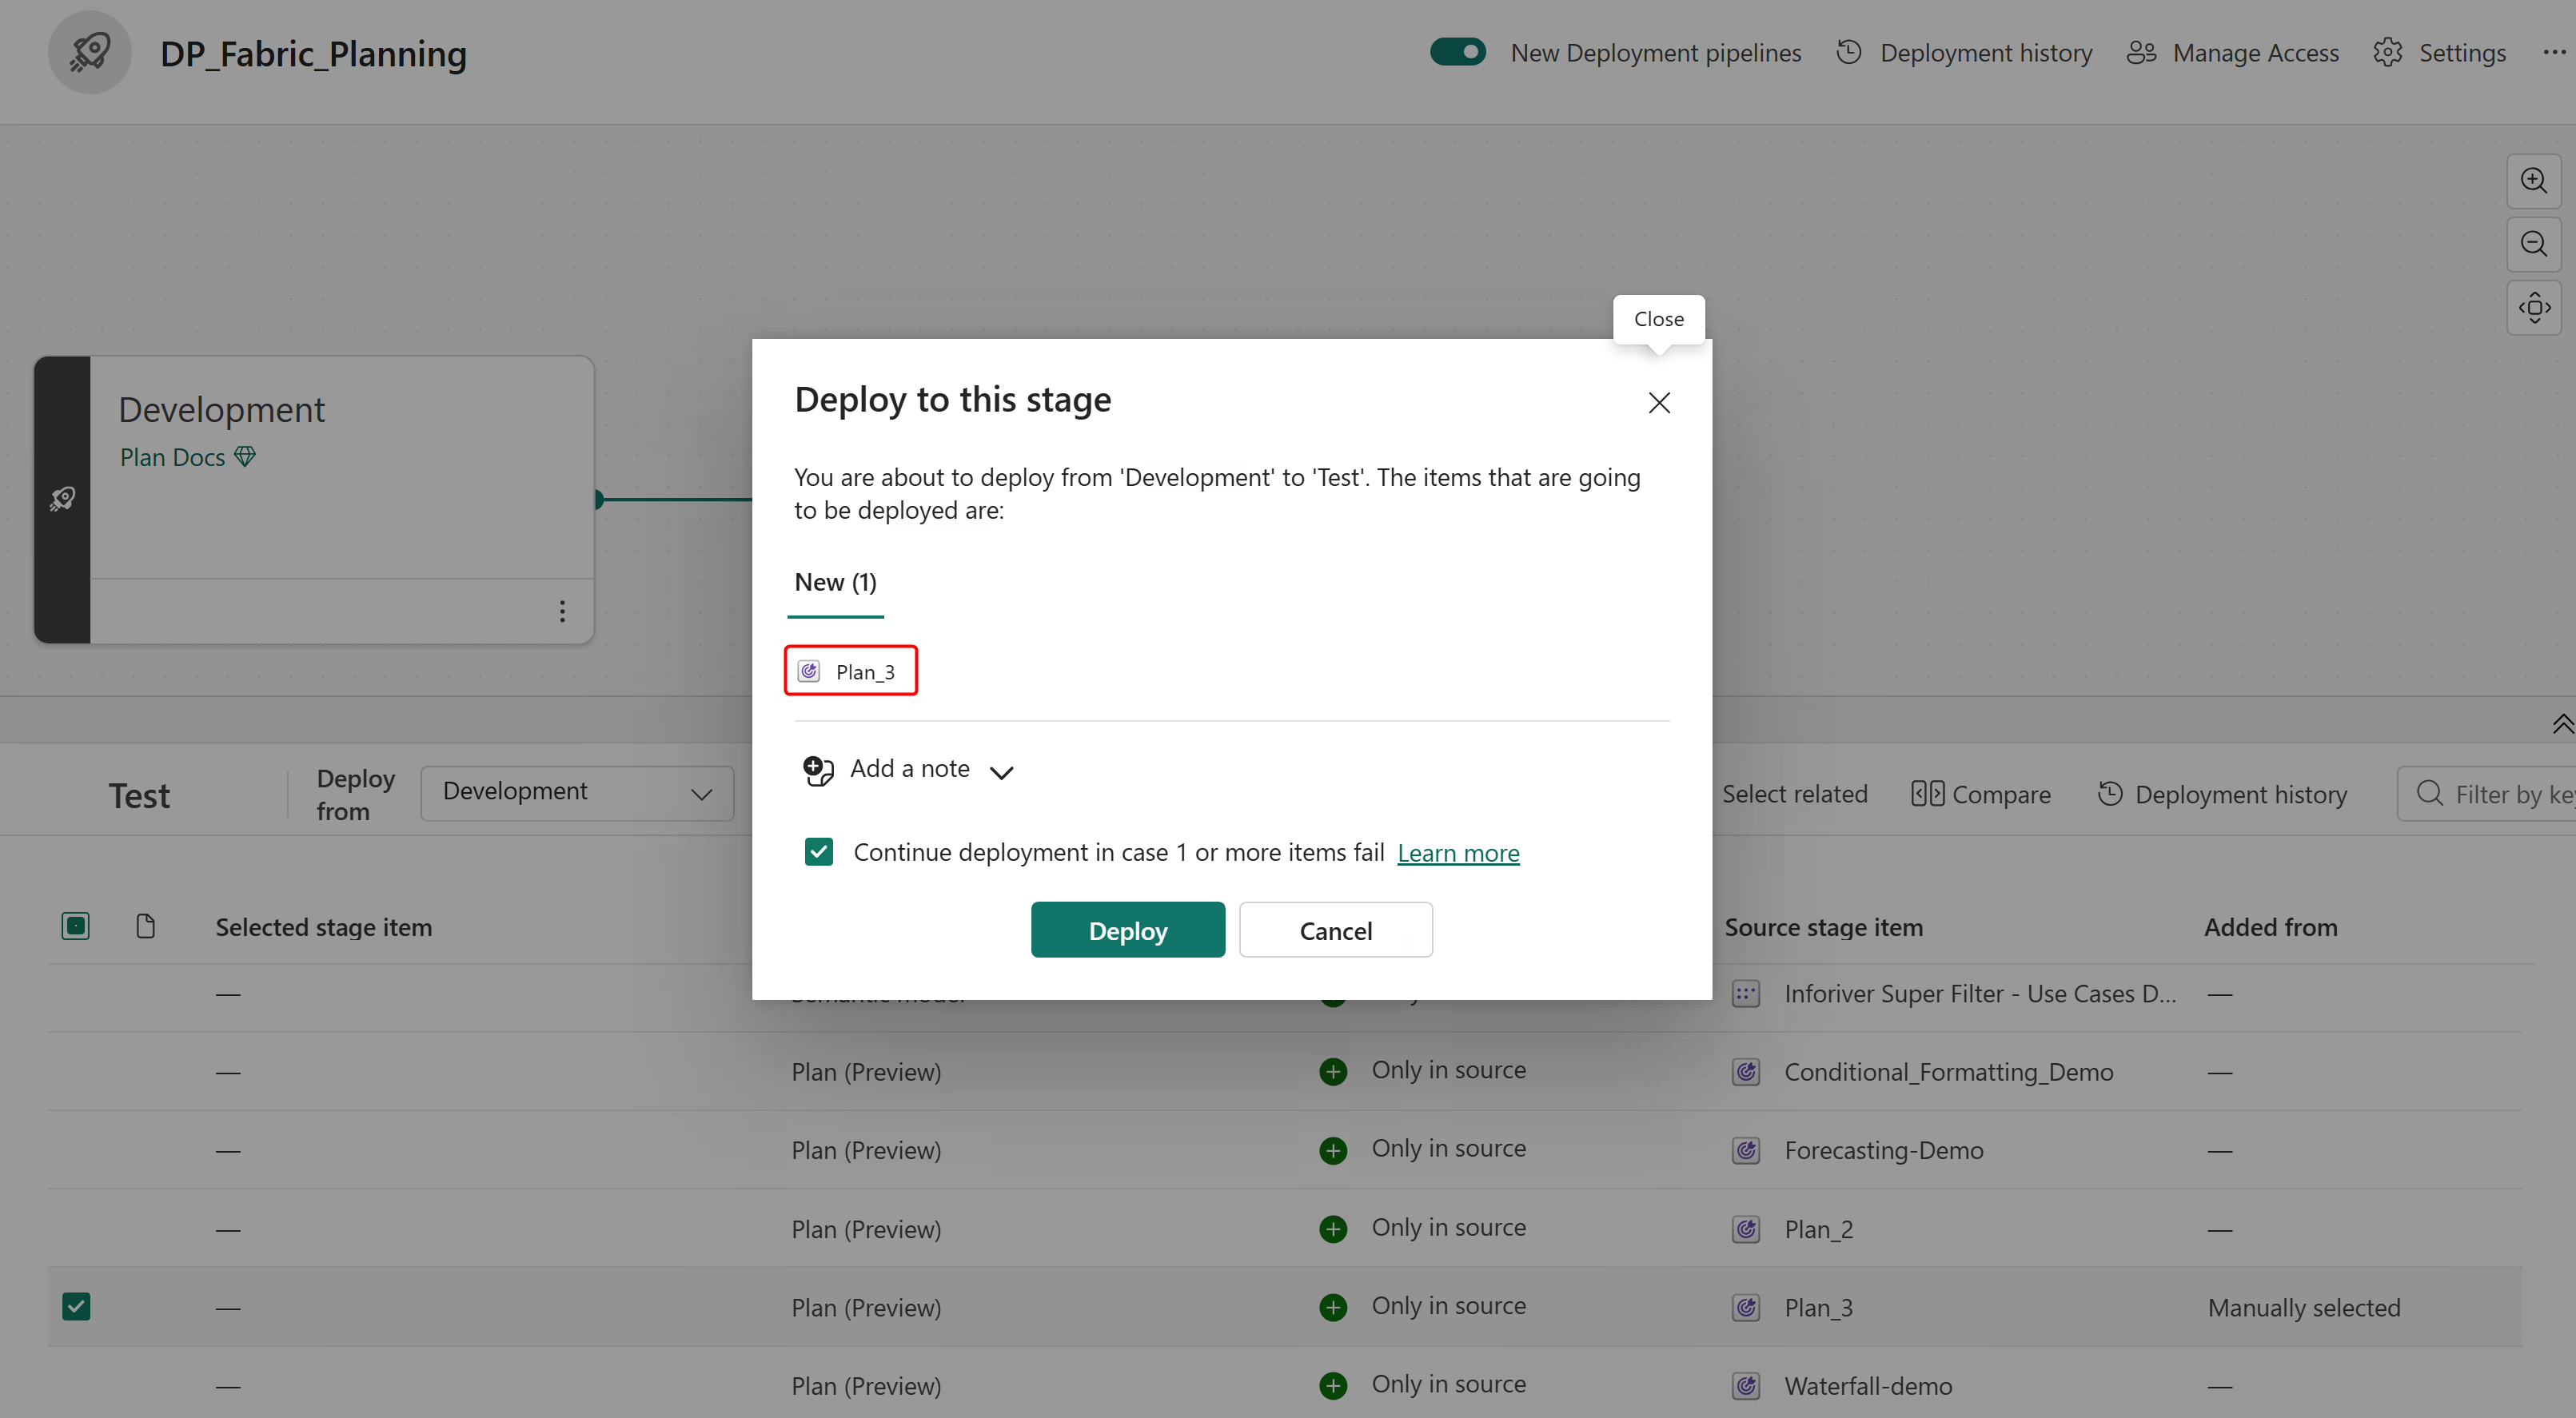
Once you deploy the plan to the target workspace, Fabric automatically connects it to the semantic model in the stand-alone workspace and loads the data.
Deploy planning items by using models from a different deployment pipeline
If your semantic model and plan are part of different pipelines, deploy them individually. For automatic binding, both pipelines must have the same number of stages, and the source plan and semantic model must occupy stages at the same numeric position; matching stage names alone isn't sufficient. First deploy the semantic model to the corresponding target stage in its own deployment pipeline, then deploy the plan. For more information, see Autobinding across workspaces.
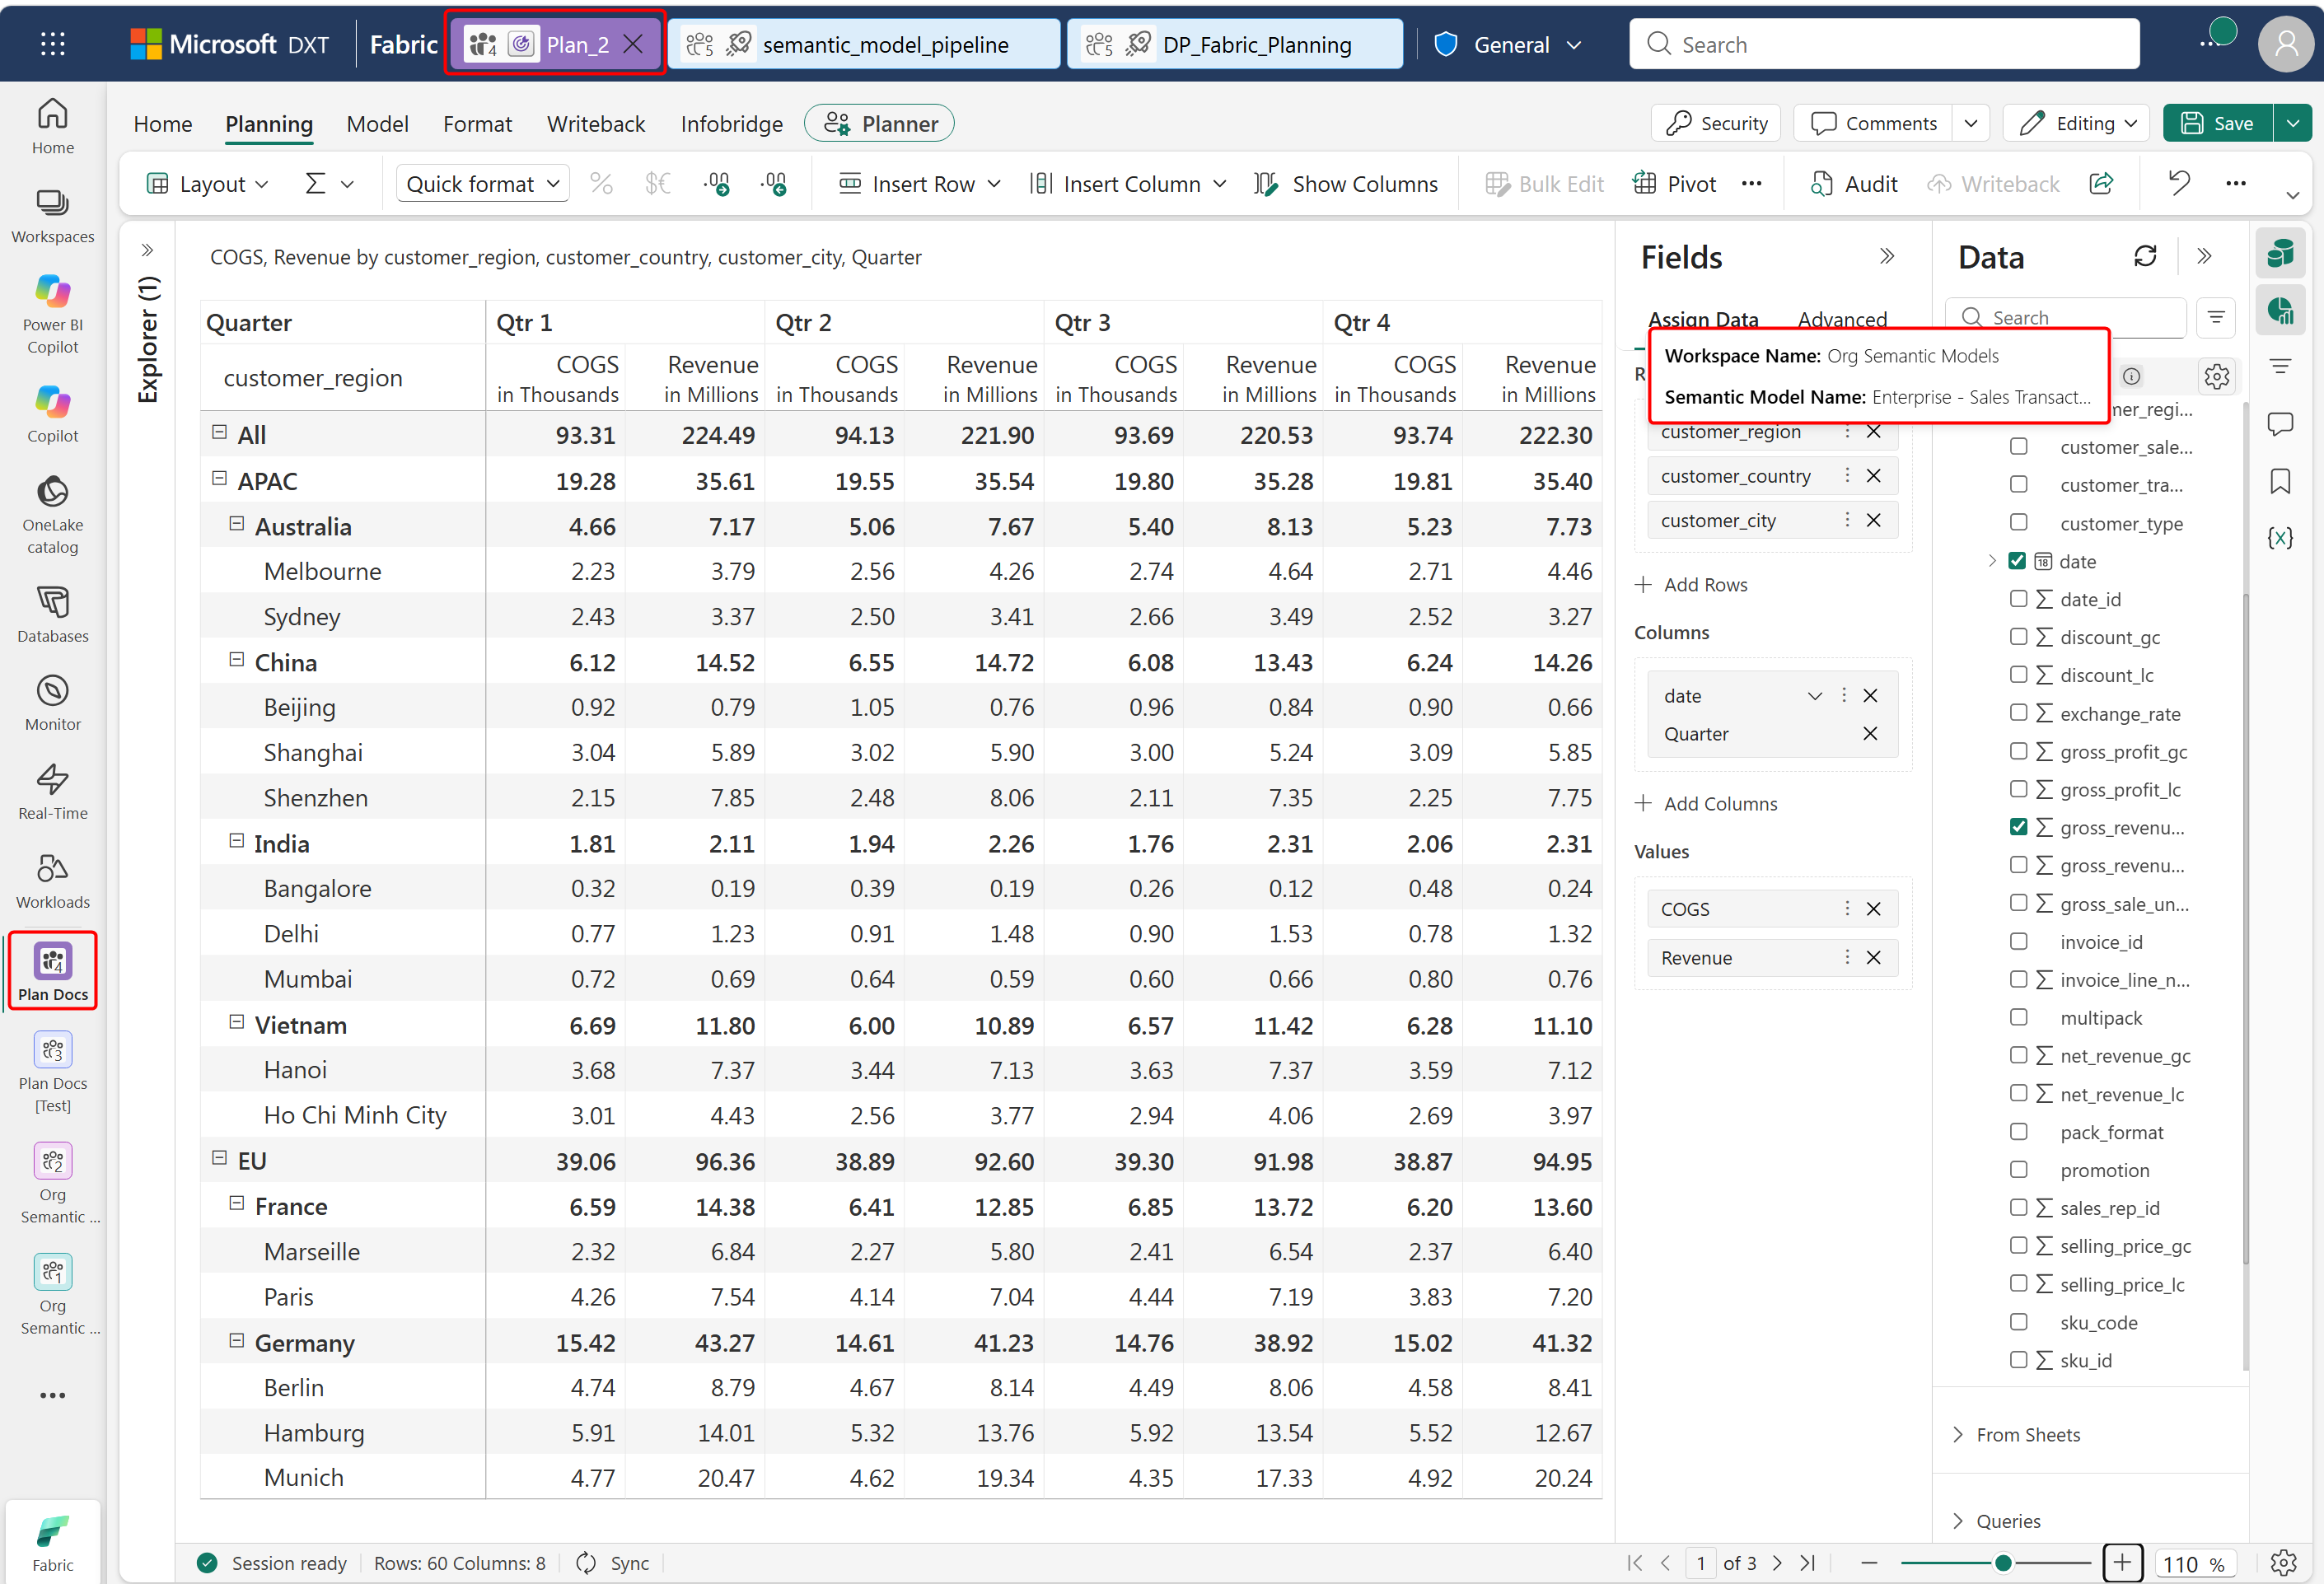
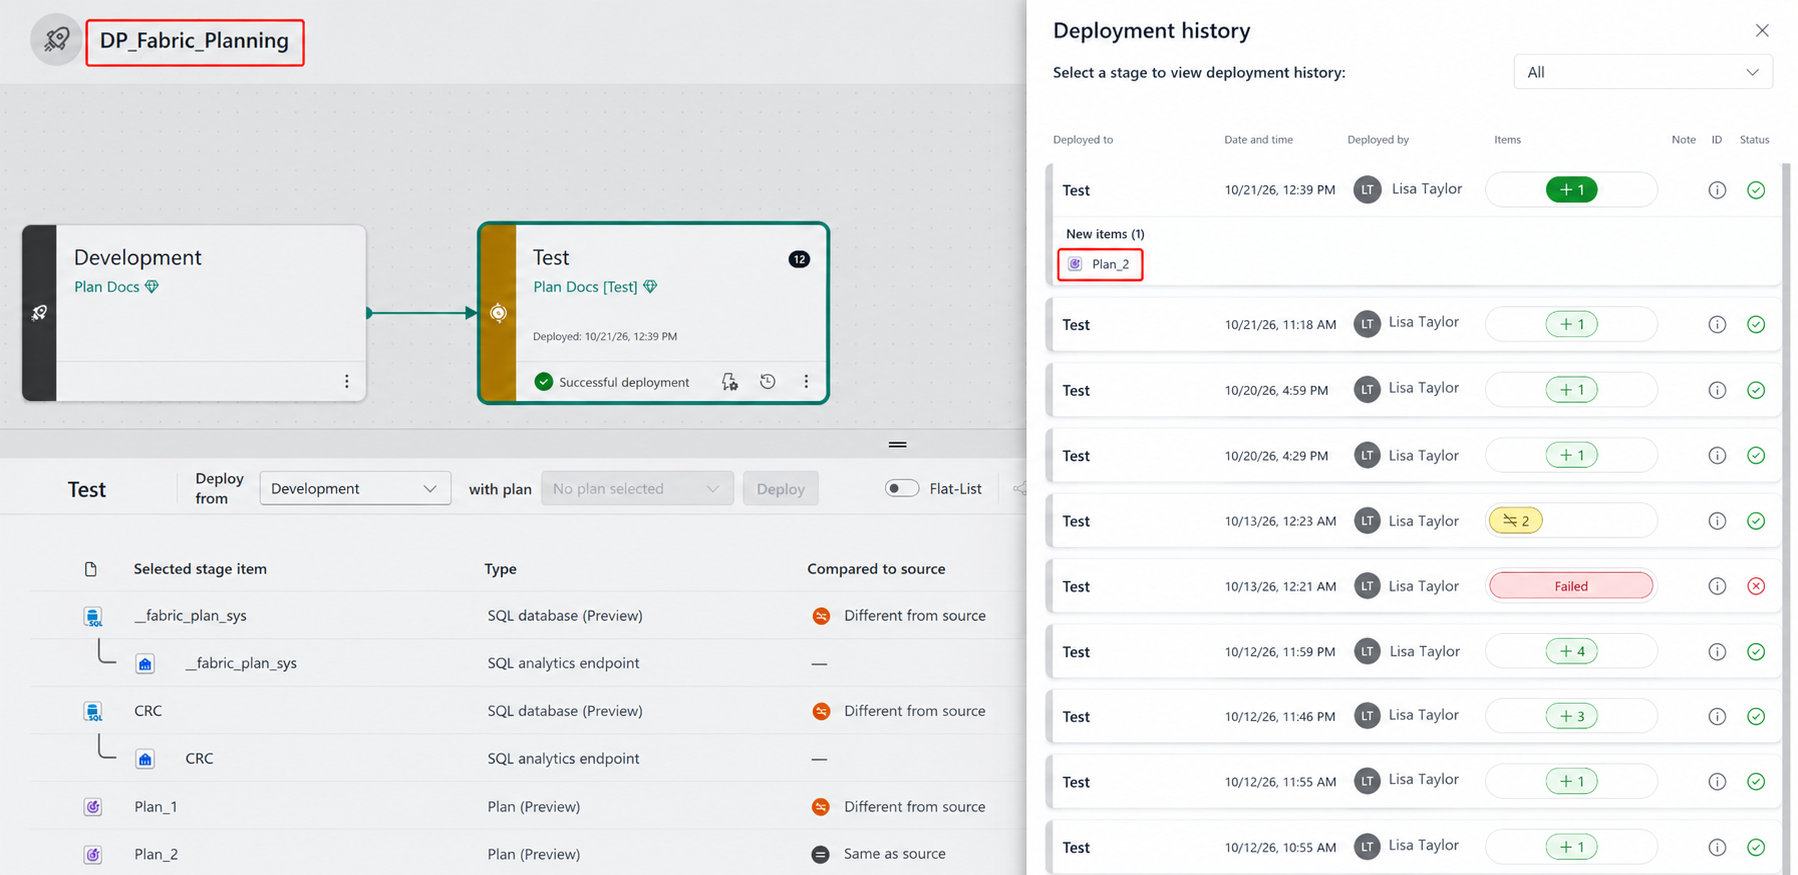
To demonstrate this scenario, consider a planning item named Plan_2 created in the Plan Docs workspace.
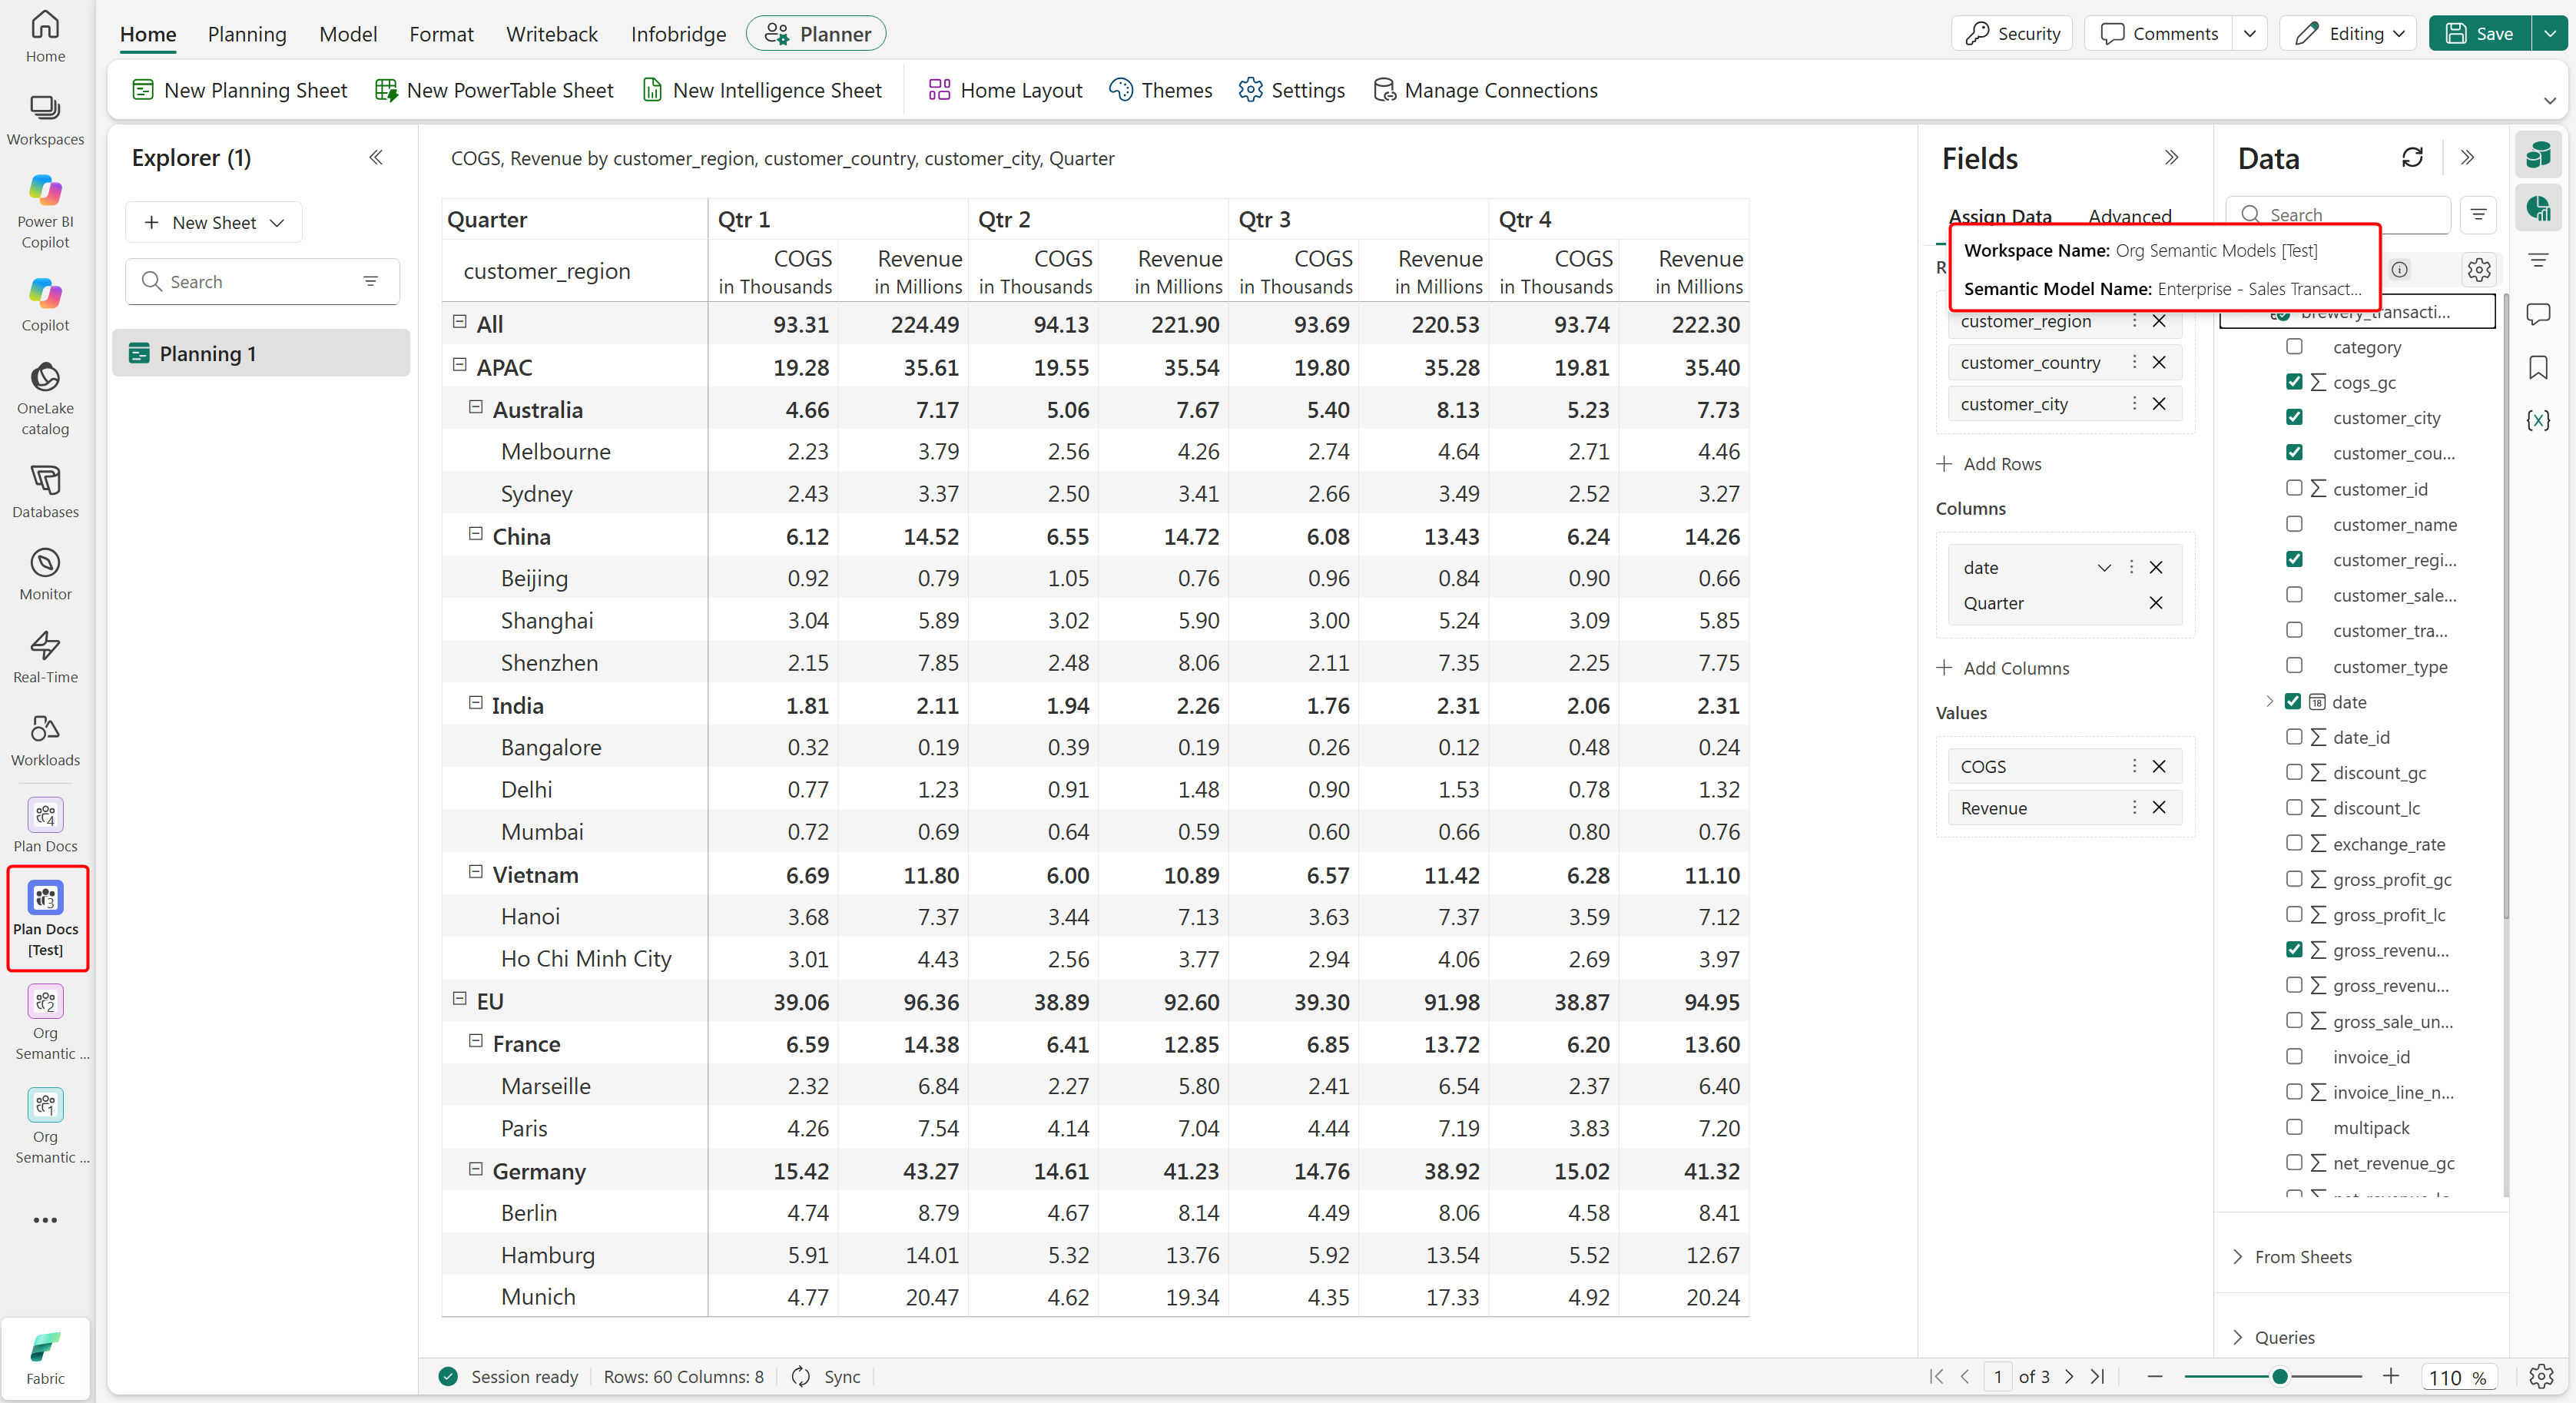
- Plan_2 connects to the Enterprise - Sales Transactions semantic model in the Org Semantic Models workspace.
- Plan_2 is part of the DP_Fabric_Planning deployment pipeline.
- The Org Semantic Models workspace is part of a different deployment pipeline - semantic_model_pipeline.
Commit the semantic model and plan to the Git repository connected to their respective workspaces.
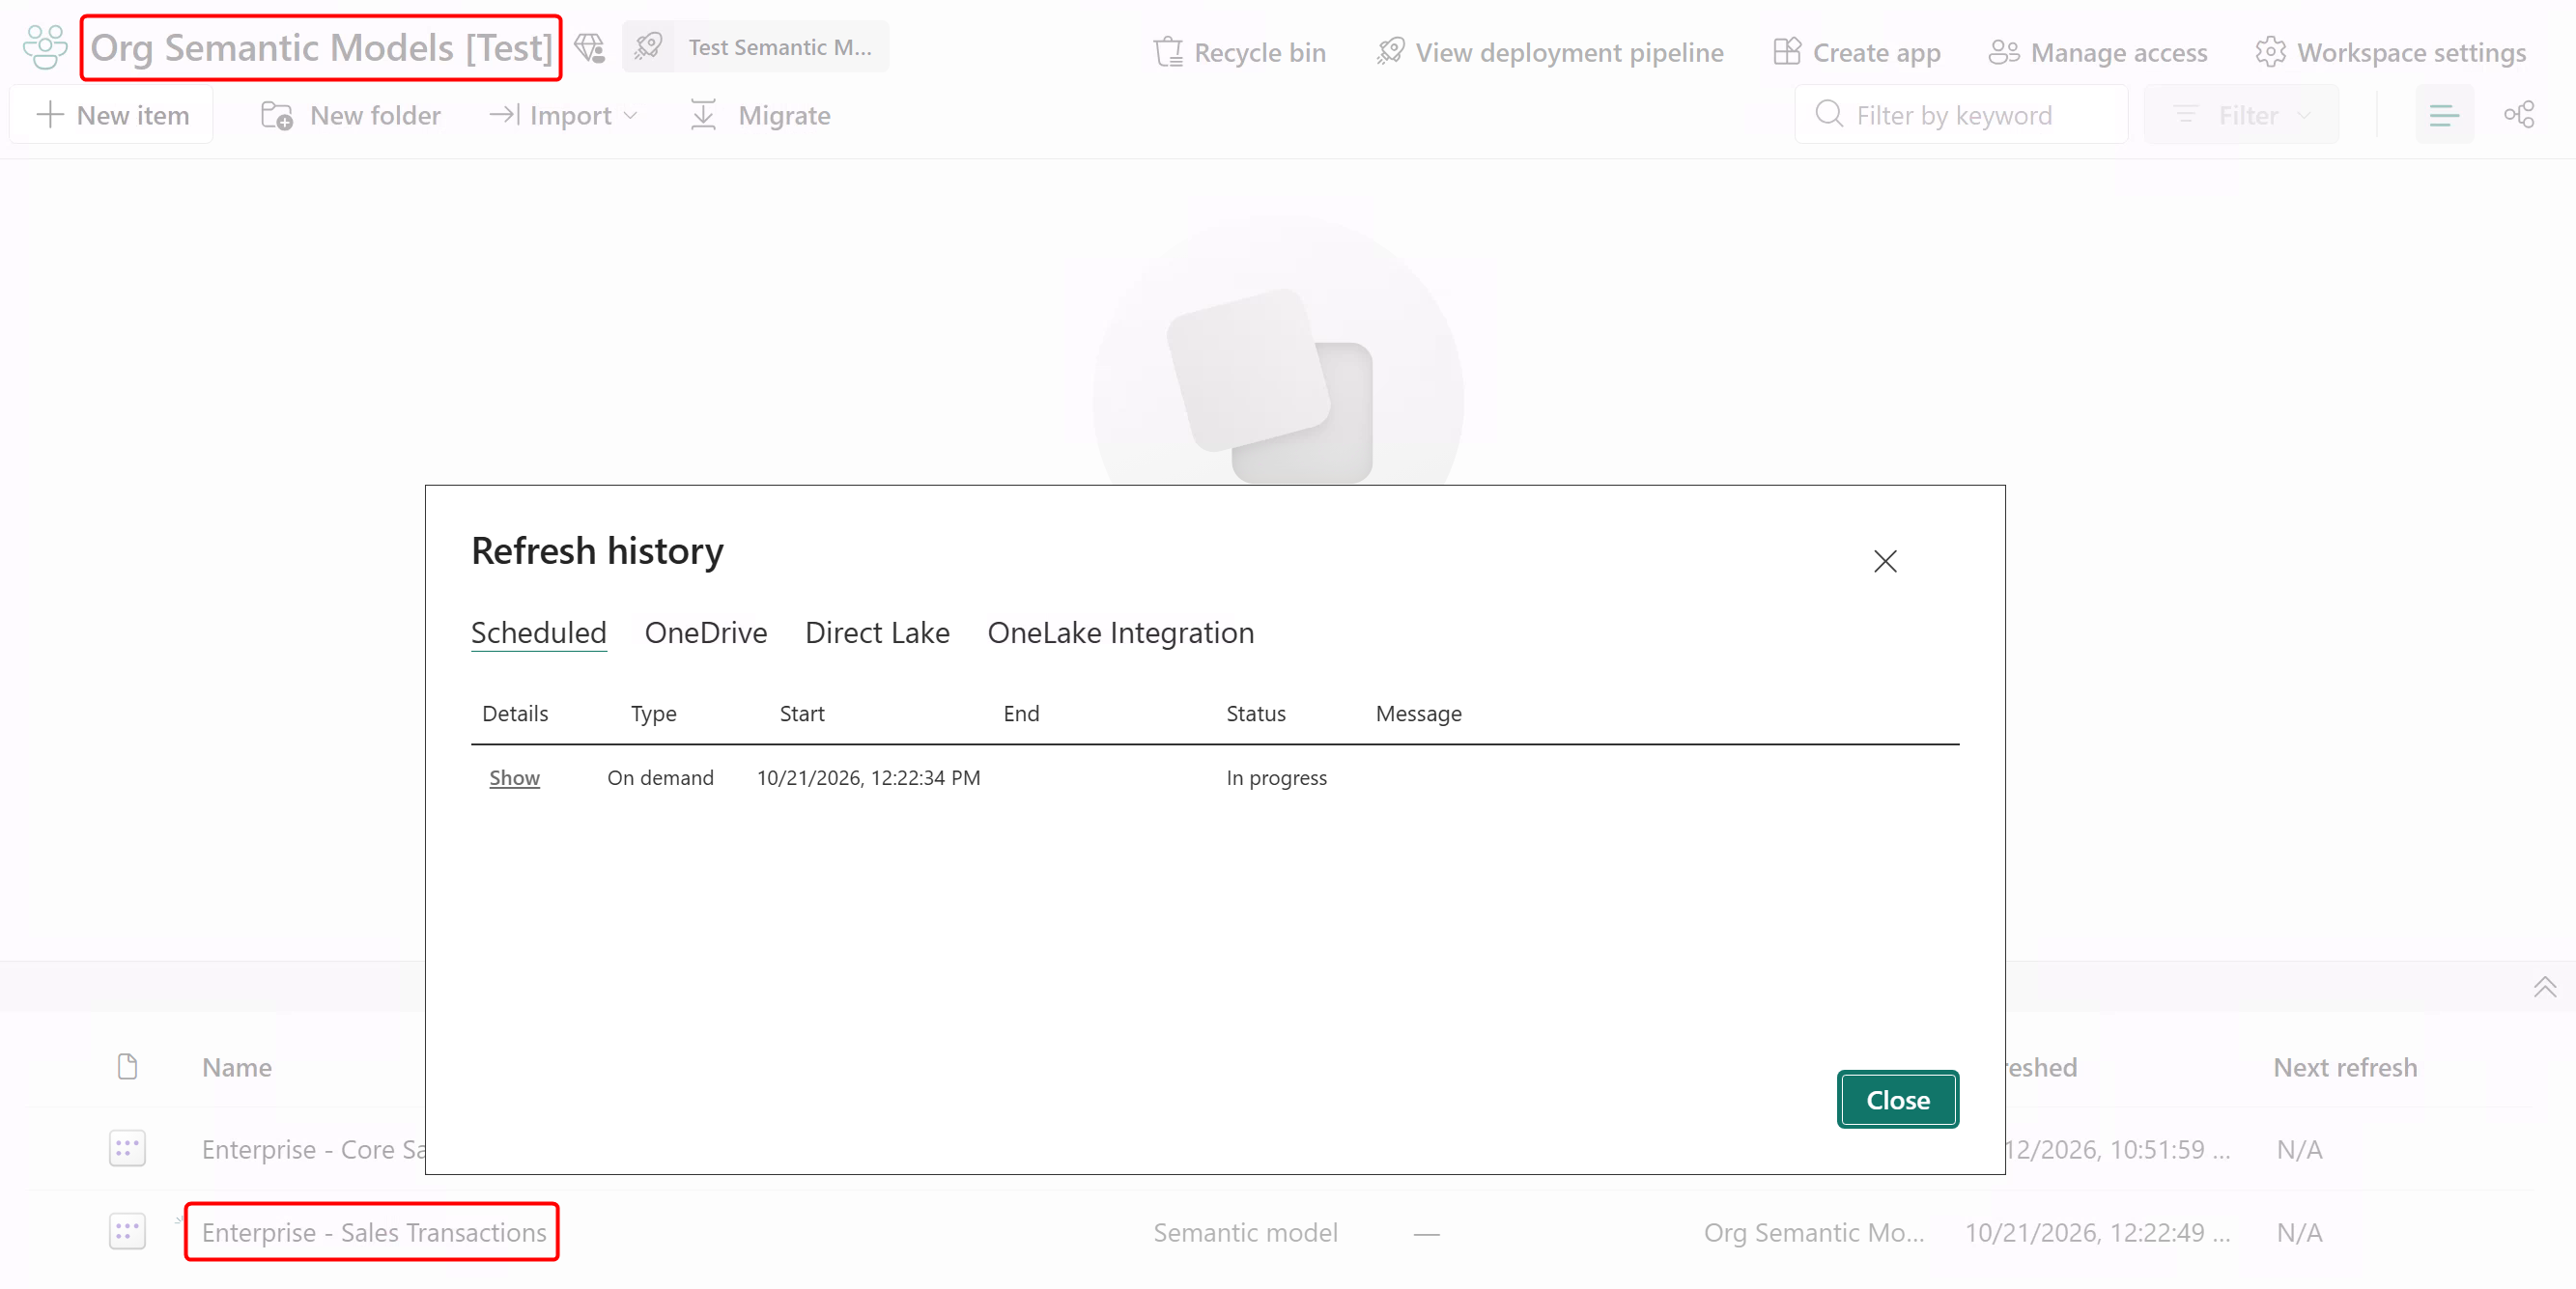
As the semantic model is in a different workspace and pipeline, use its own deployment pipeline to deploy it to the target stage.
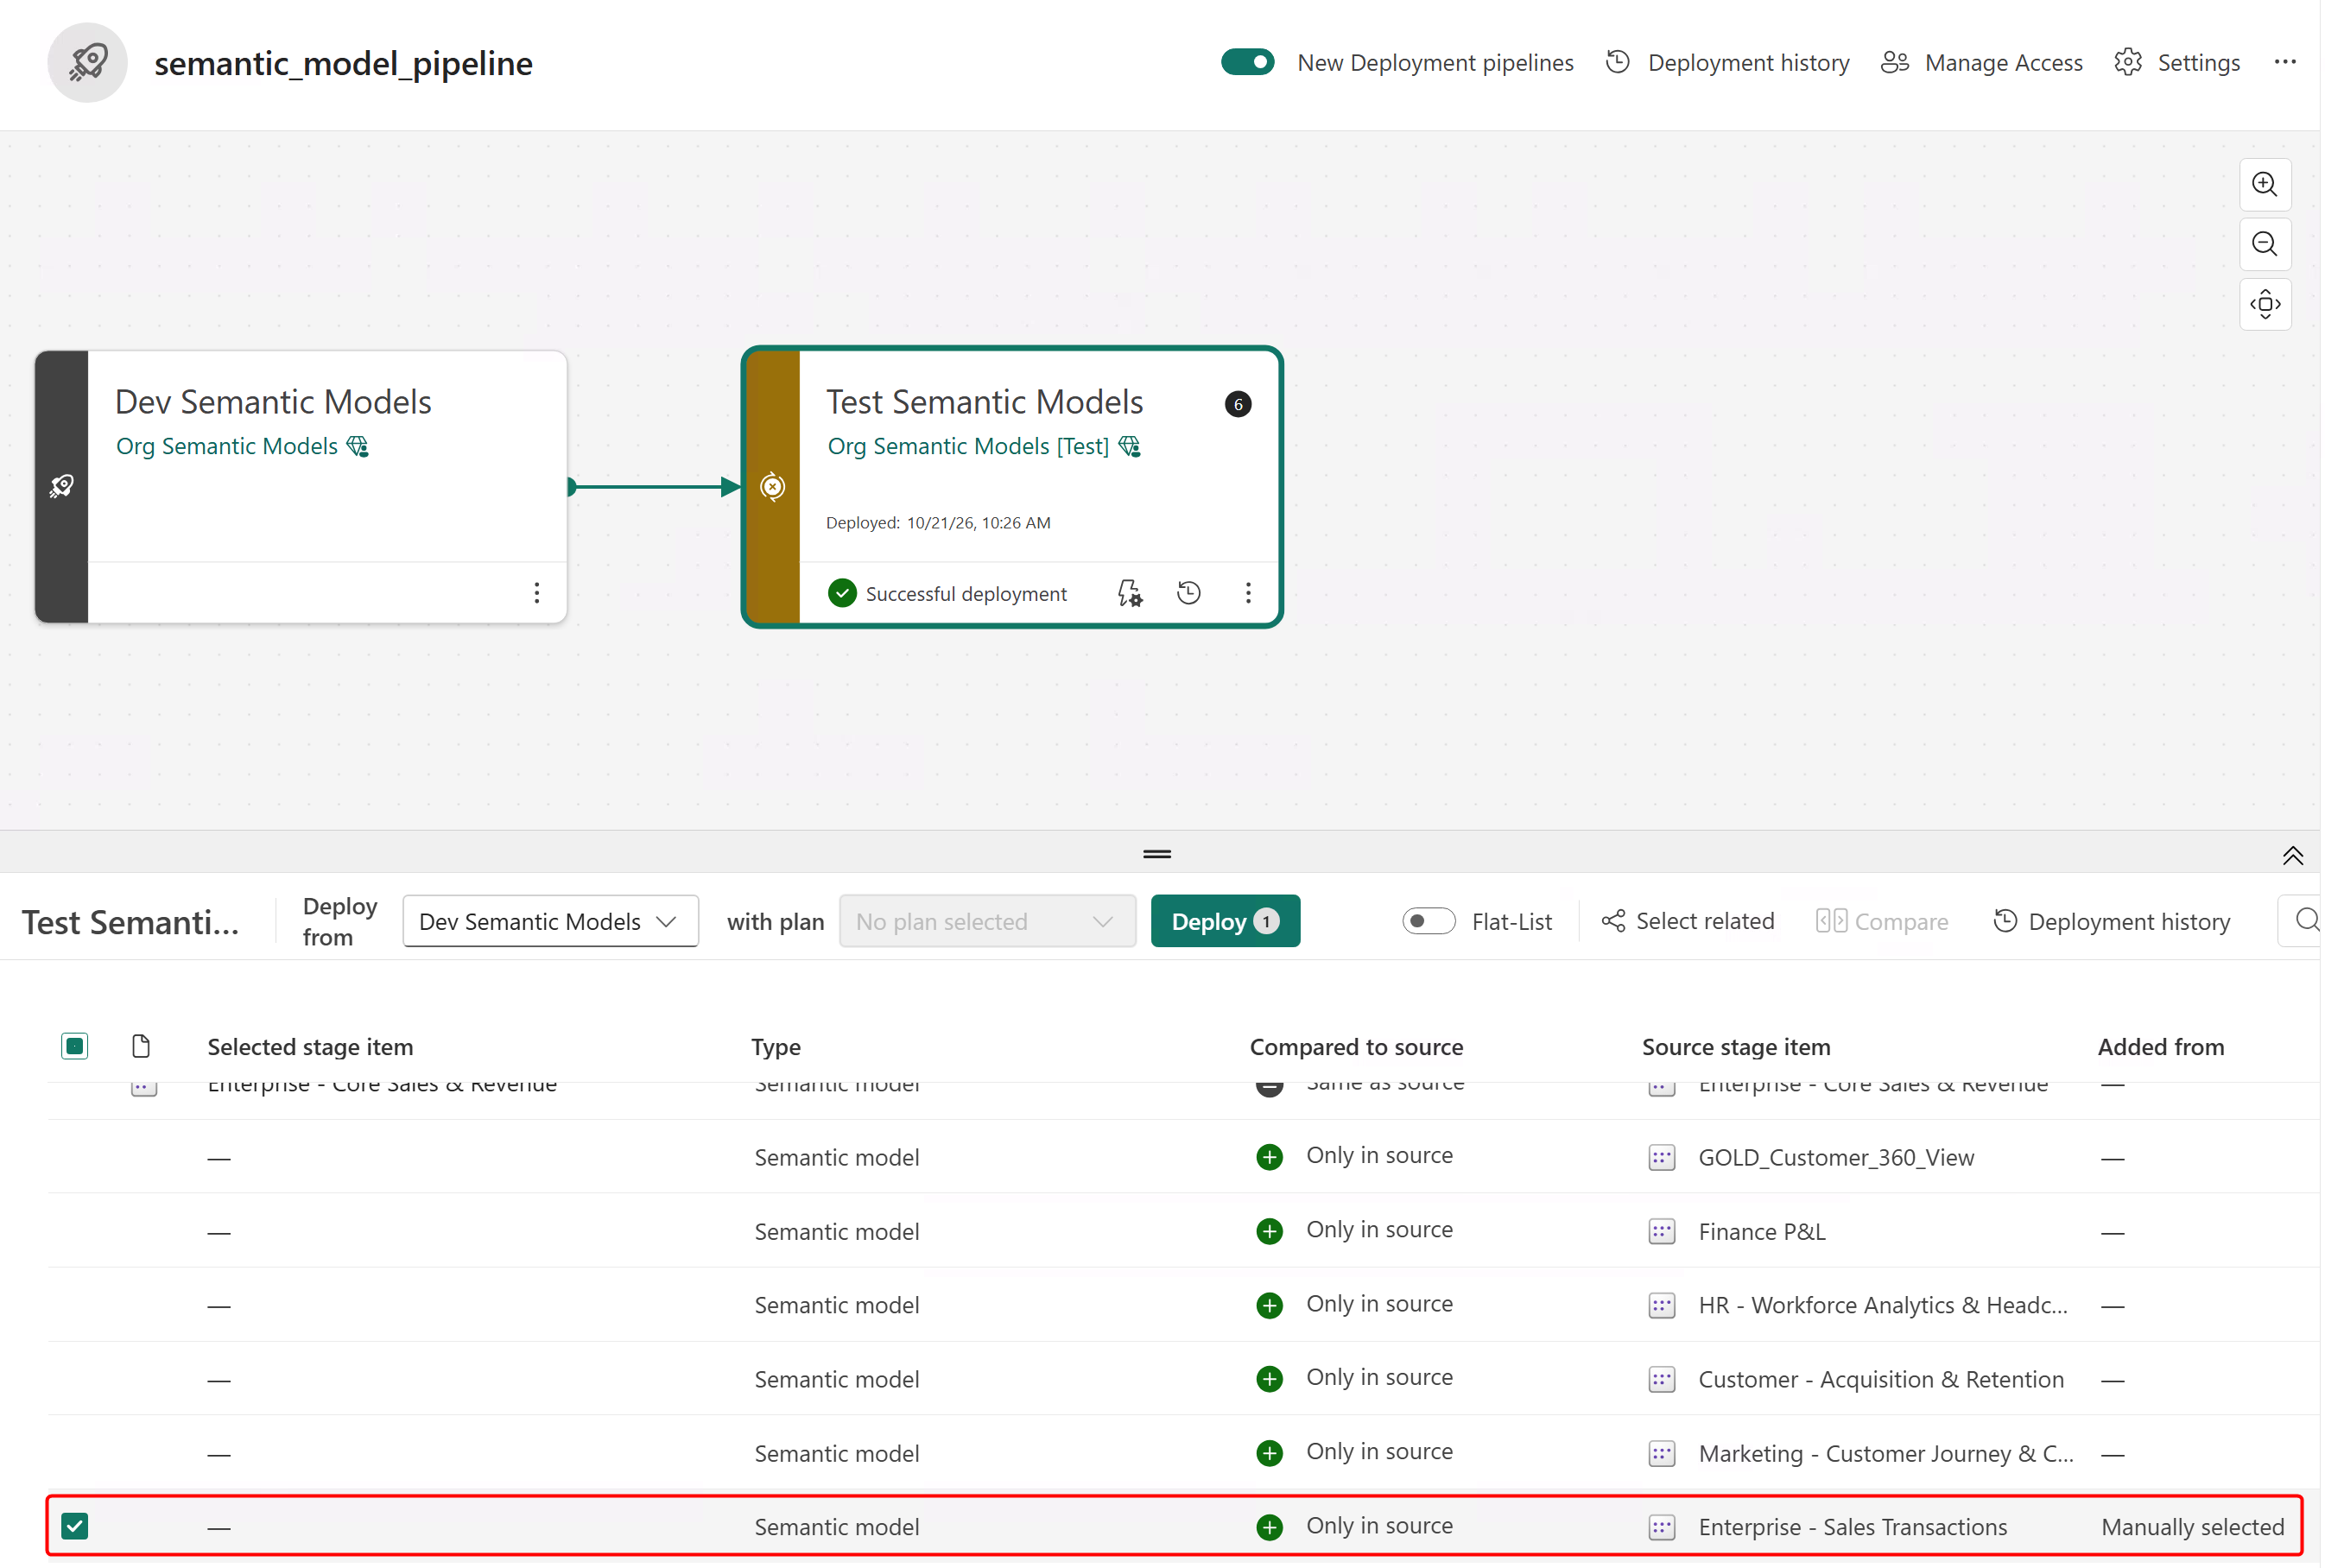
After the semantic model is successfully deployed, open the target workspace and refresh the semantic model.
Promote the plan to the next stage by using its dedicated deployment pipeline.
Open the plan in the target workspace. Although the semantic model is in a different workspace, the plan seamlessly connects to the semantic model and loads data.
Use variable libraries to connect to semantic models
Create variables to dynamically assign the semantic model the plan uses across different environments. To learn more about variable libraries, see Variable library overview.
For demonstration purposes, consider a deployment pipeline with three stages. In the dev and test stages, the plan connects to the same semantic model. In the prod workspace, the plan connects to another semantic model.
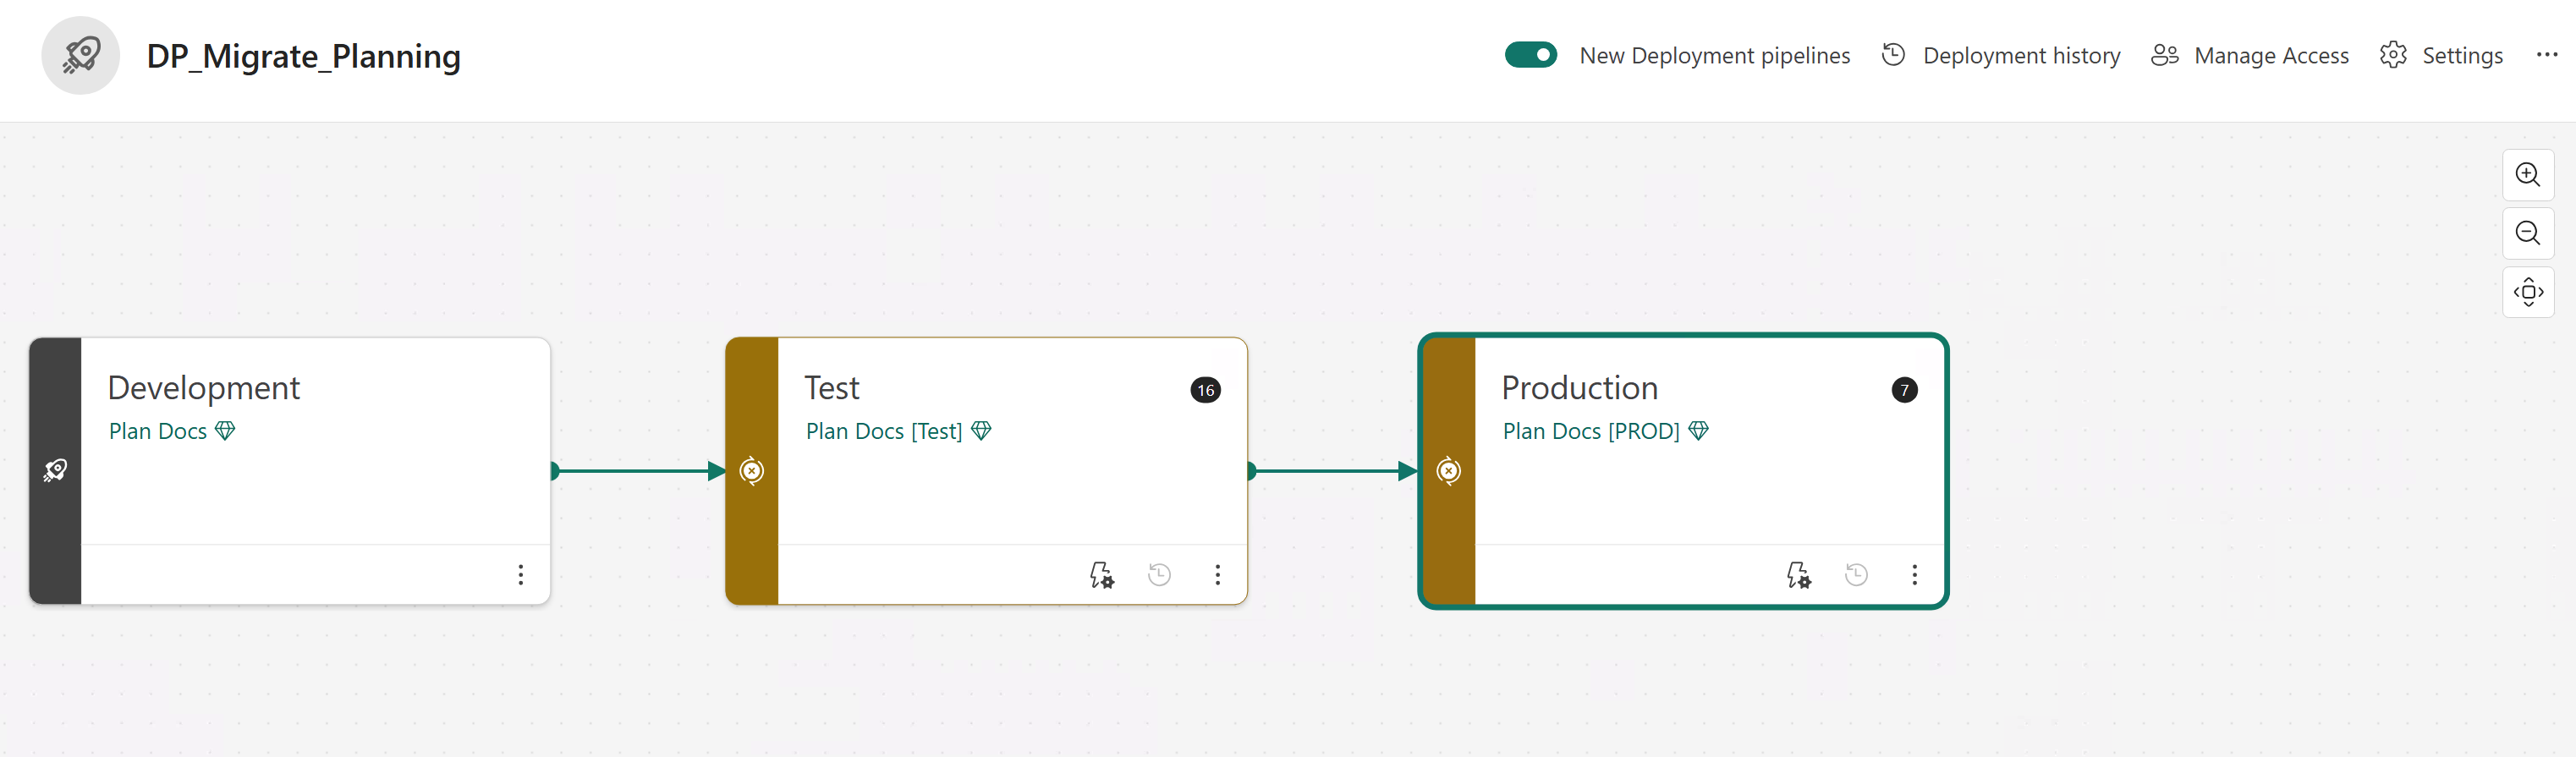
Create a variable library in the workspace assigned to the first stage of the deployment pipeline. In this example, the Plan Docs workspace.
Add a new variable and set the type to Item reference. Select the semantic model from the development (first pipeline stage) workspace as the Default value set.
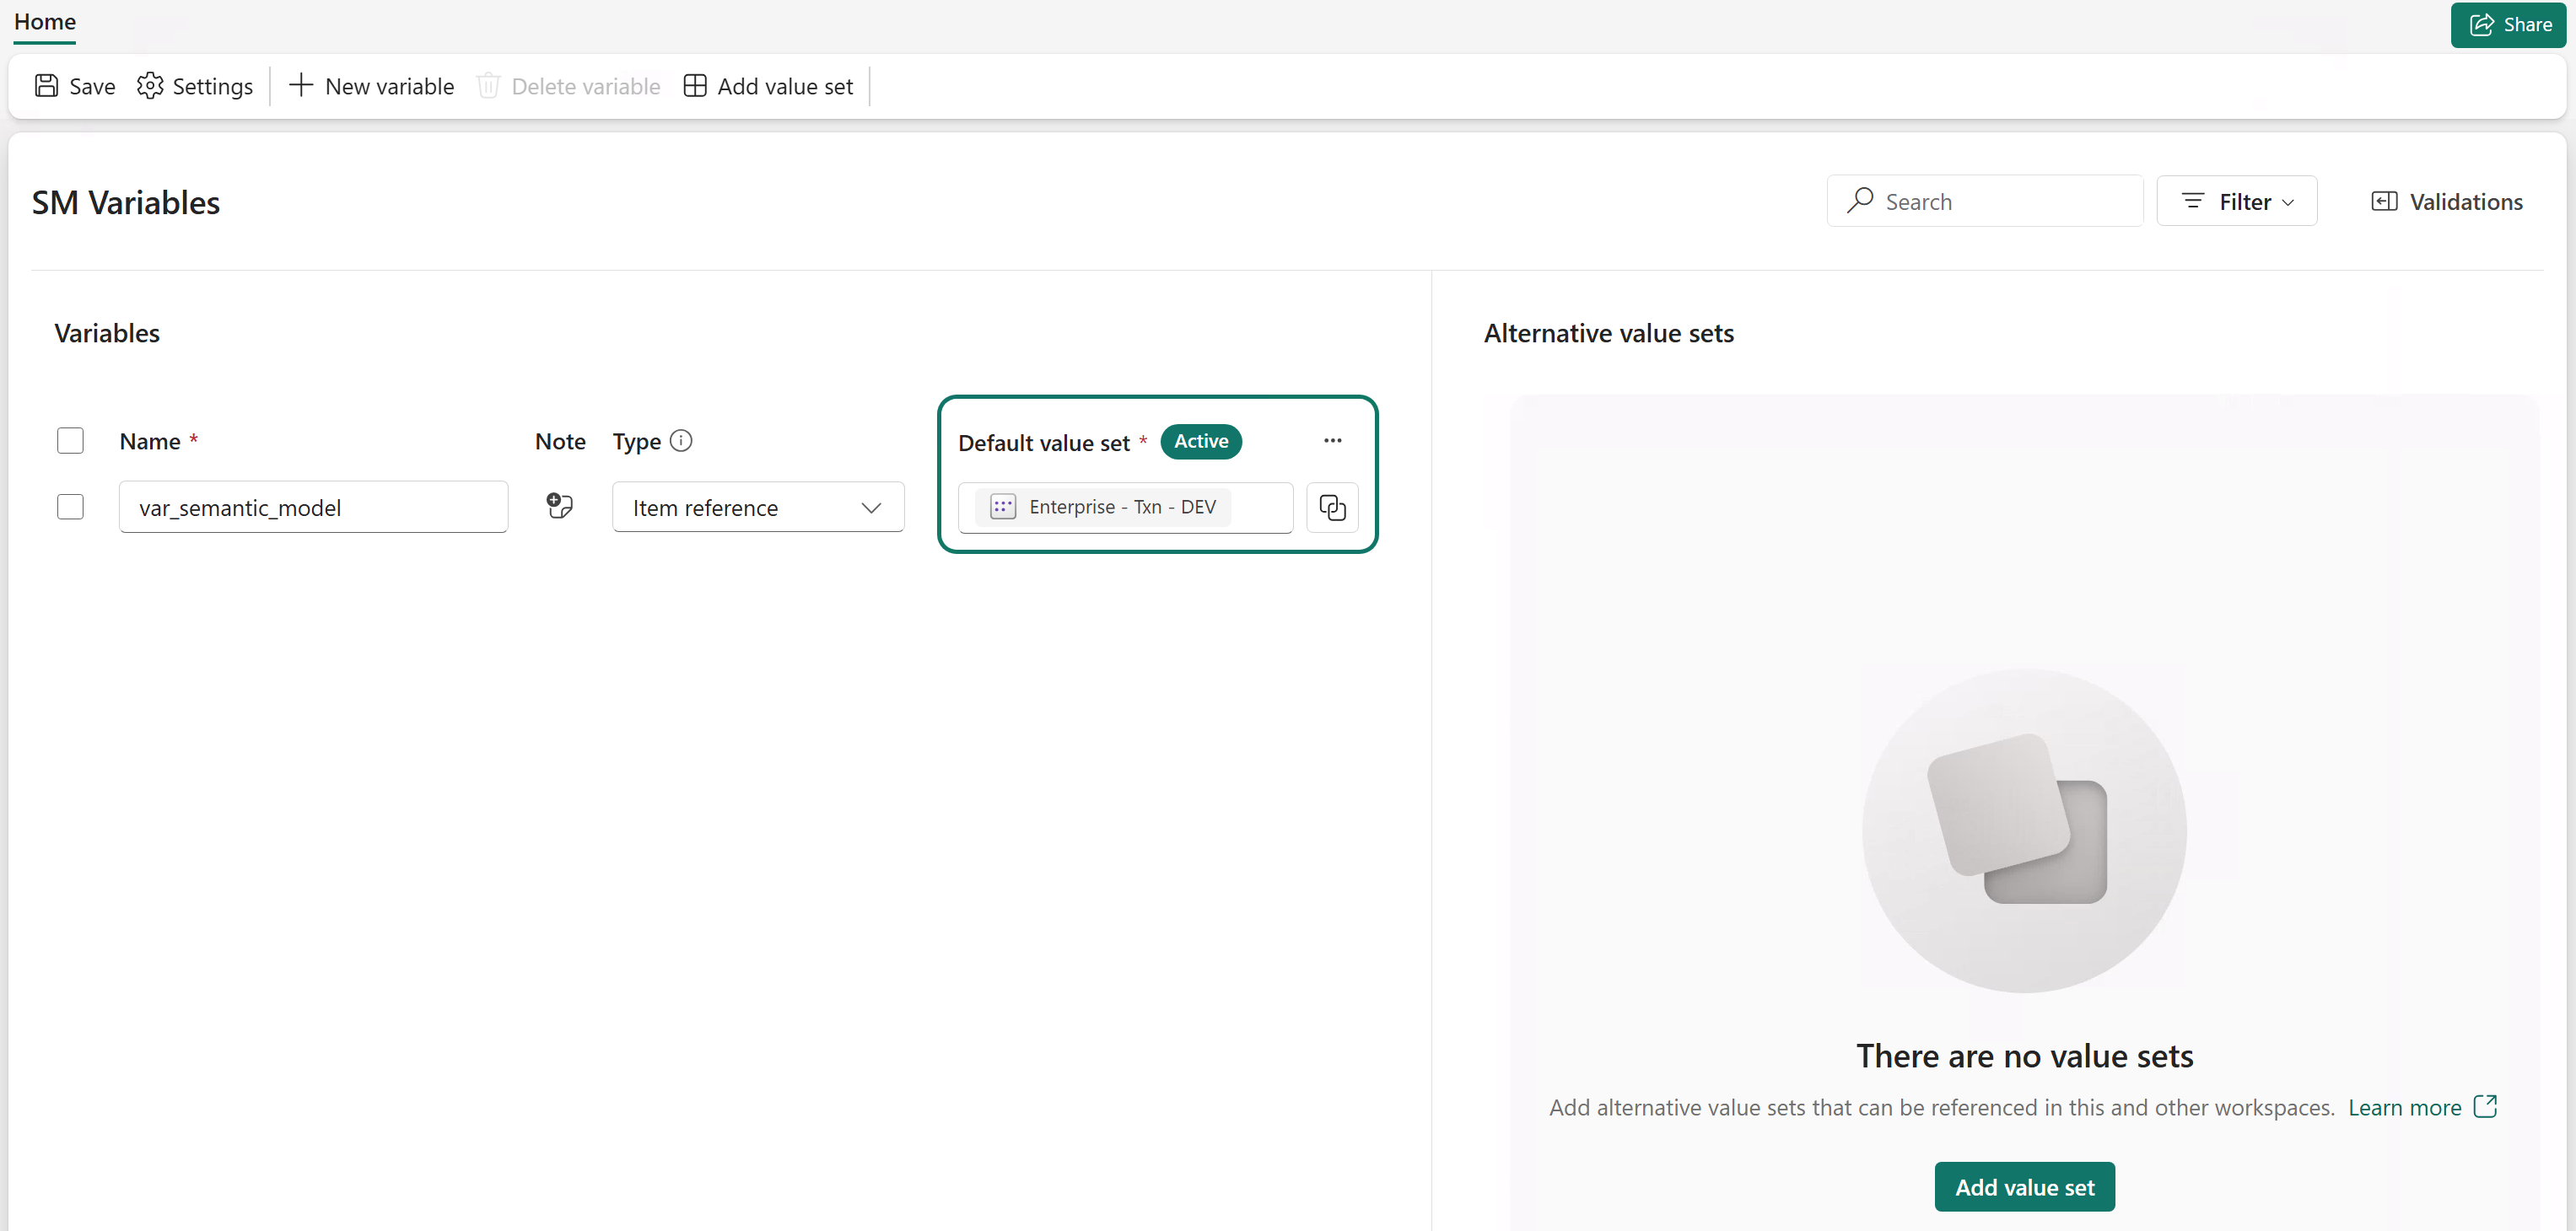
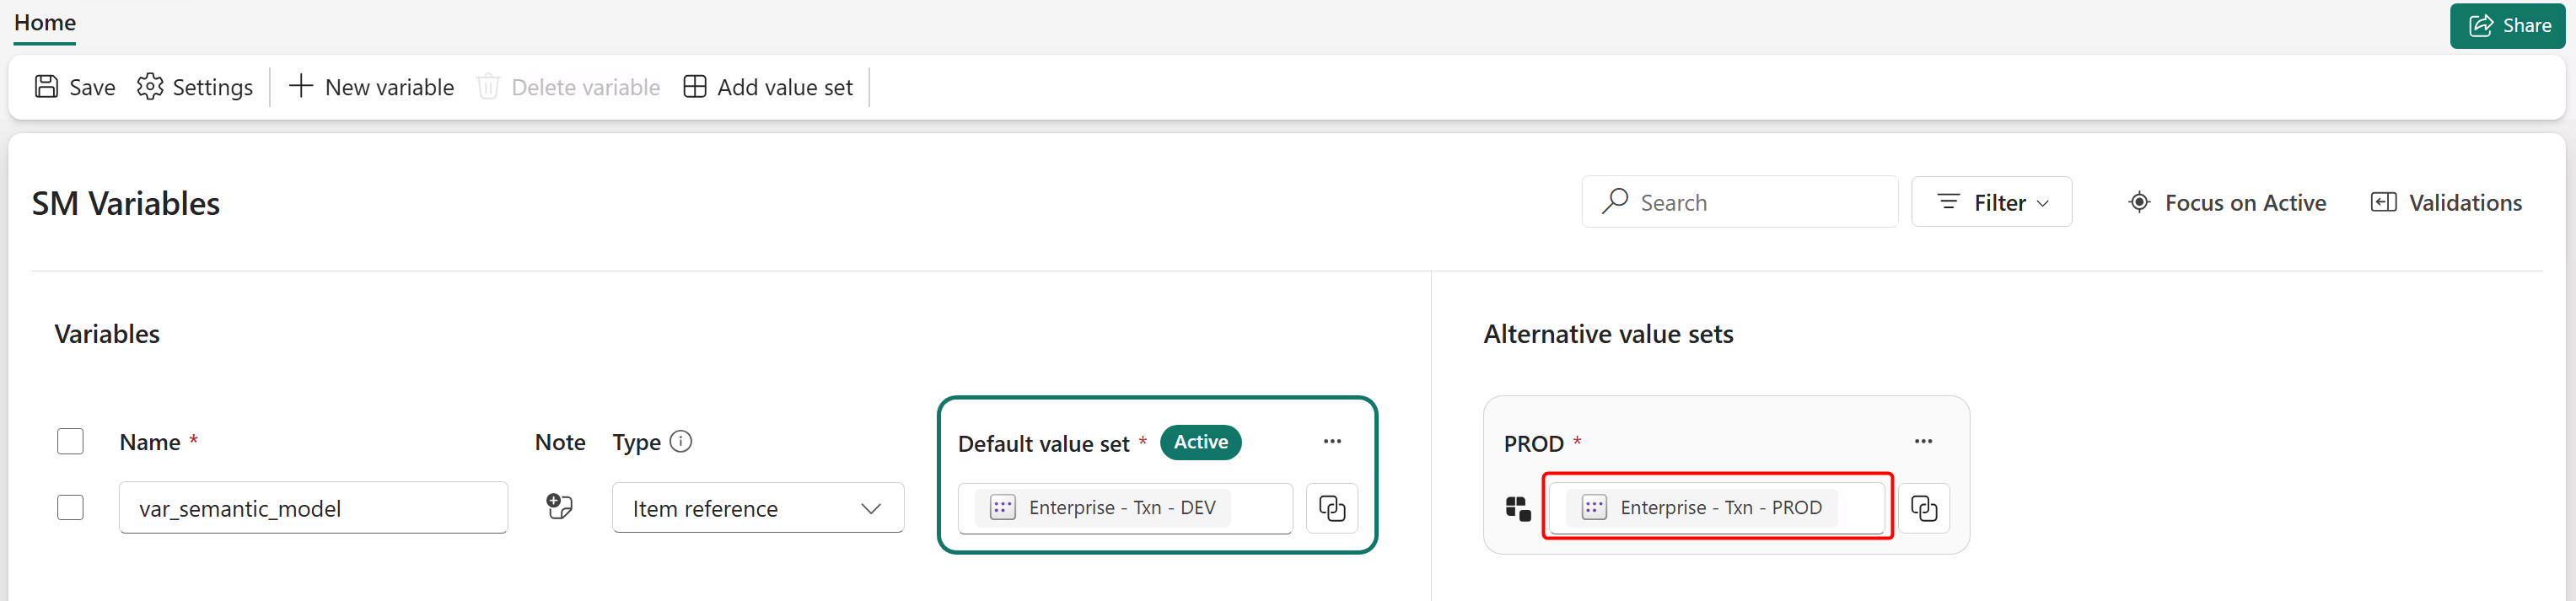
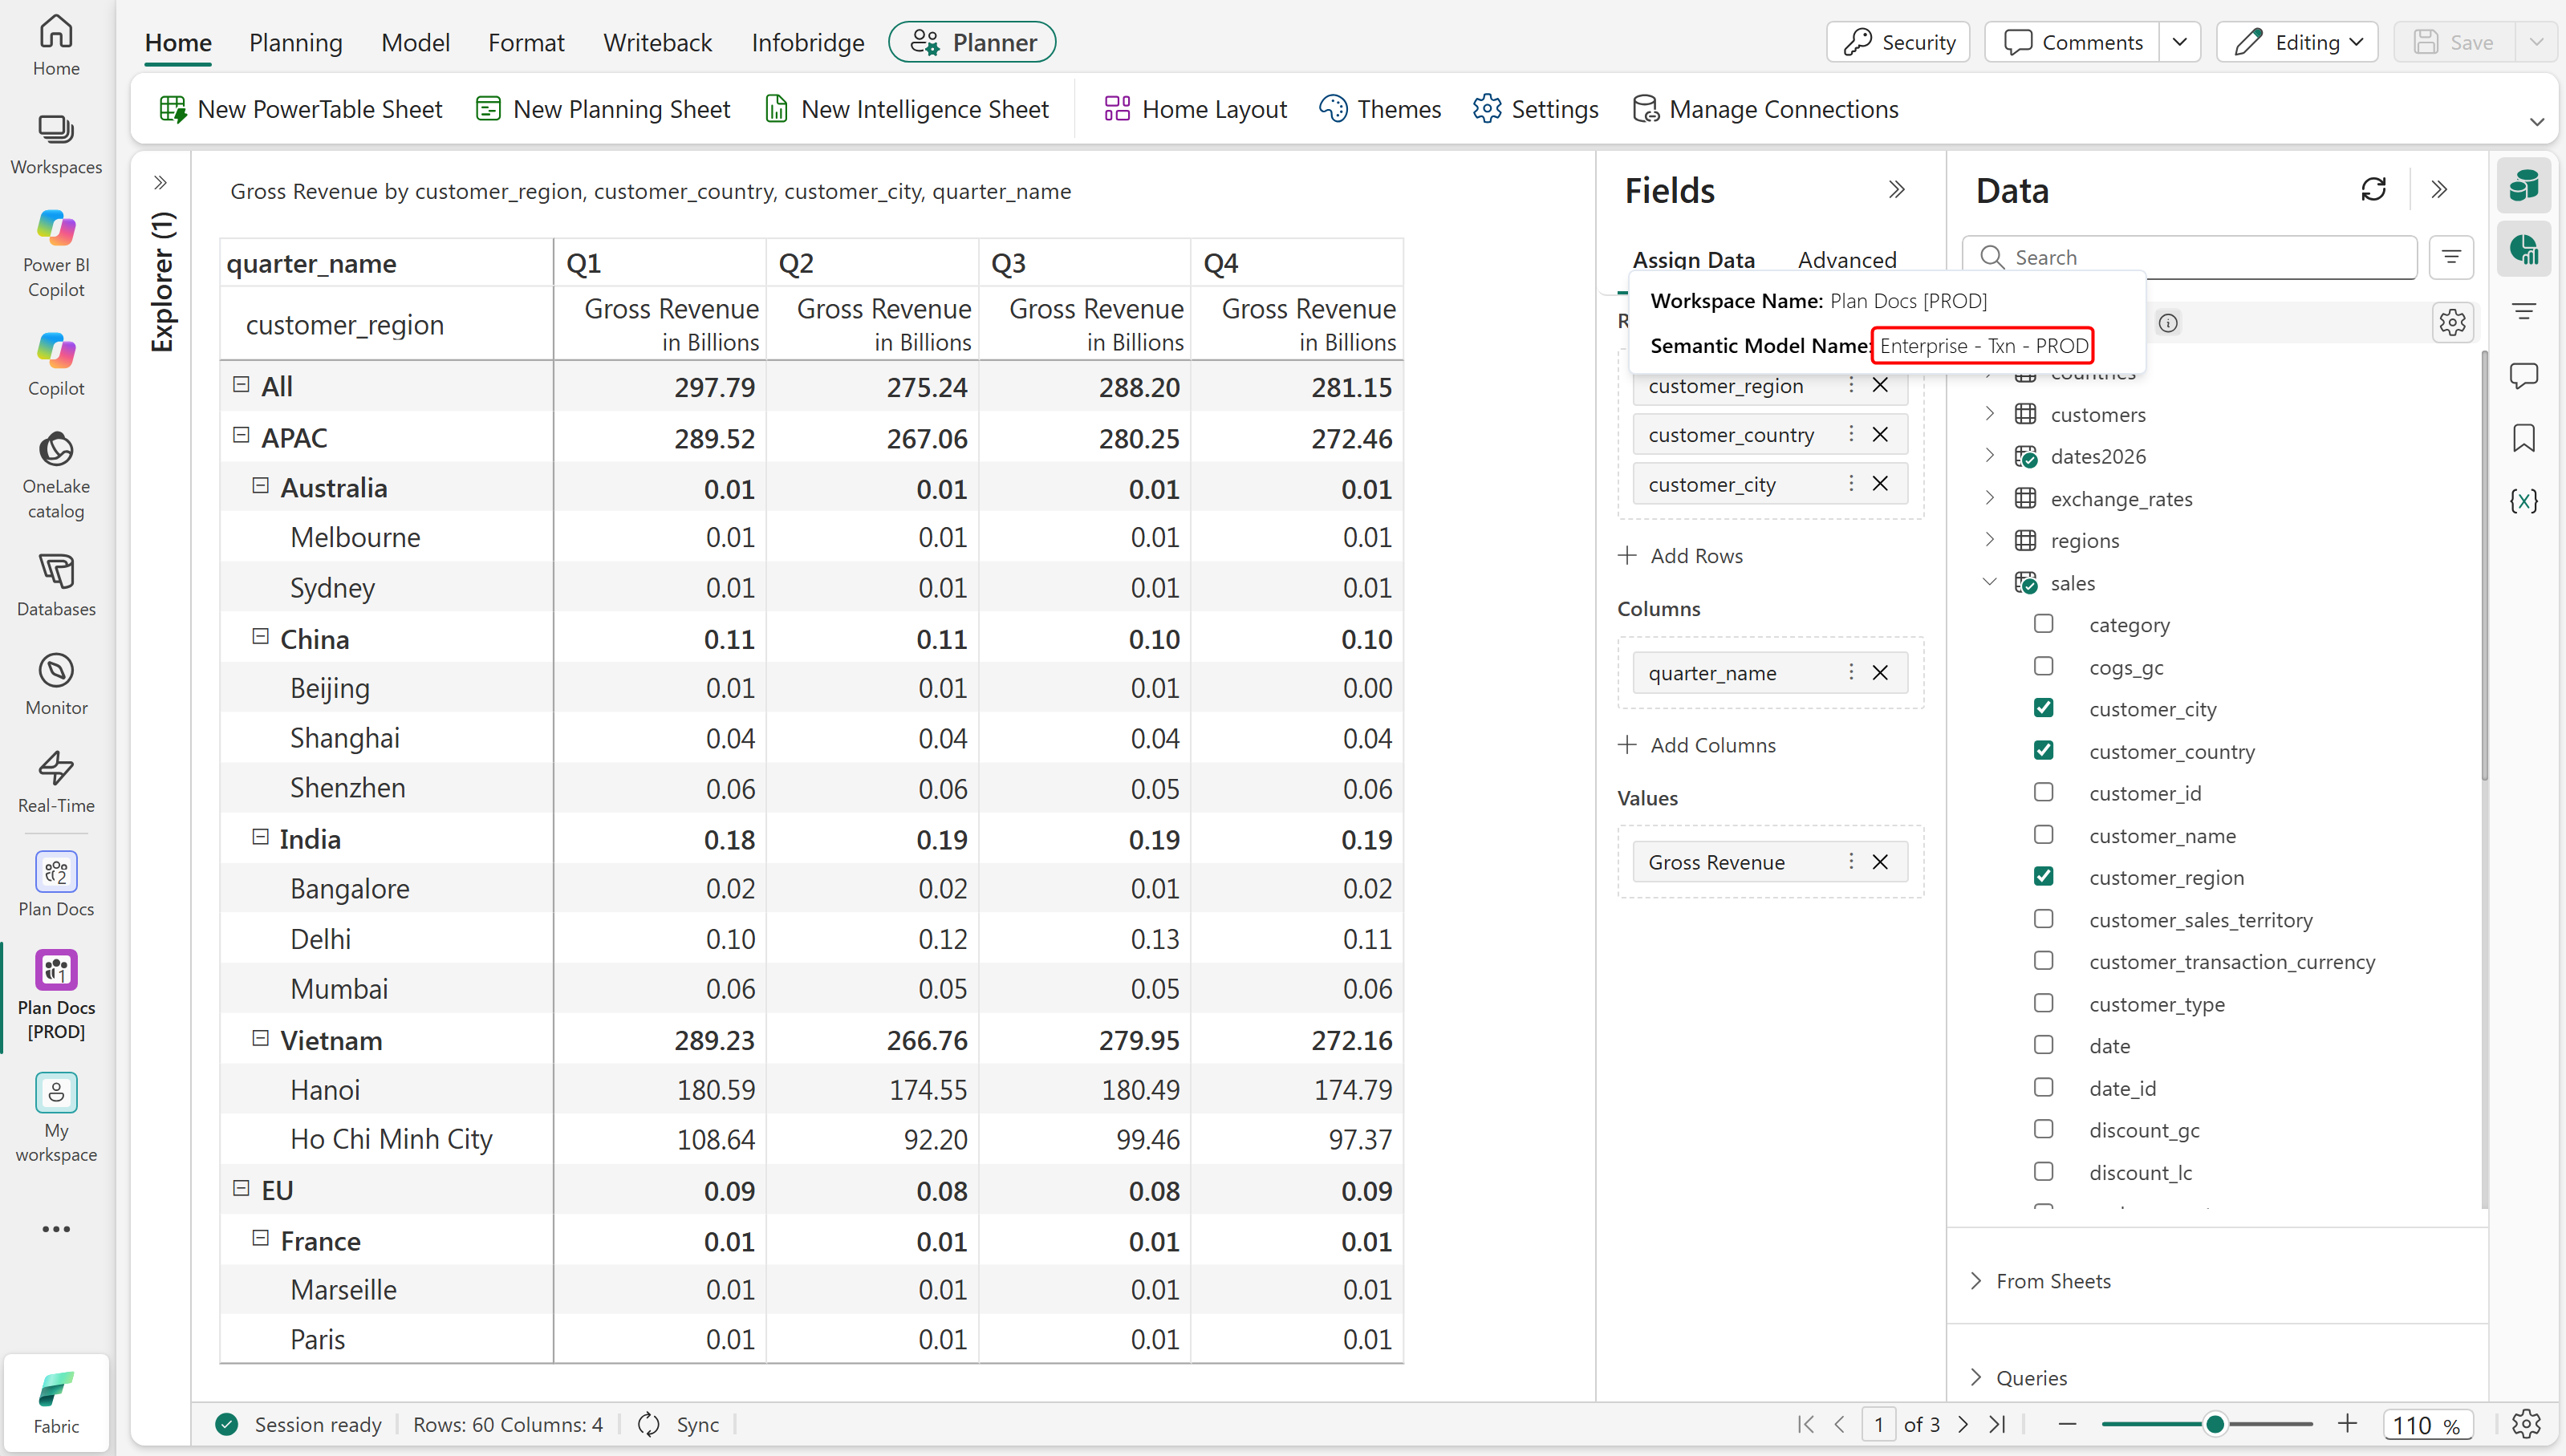
Select Add value set, then select the semantic model for the target stage (for example, UAT or production). In this example, you assign the Enterprise - Txn - PROD semantic model to the production environment. Repeat this step to configure different semantic models for additional stages as needed.
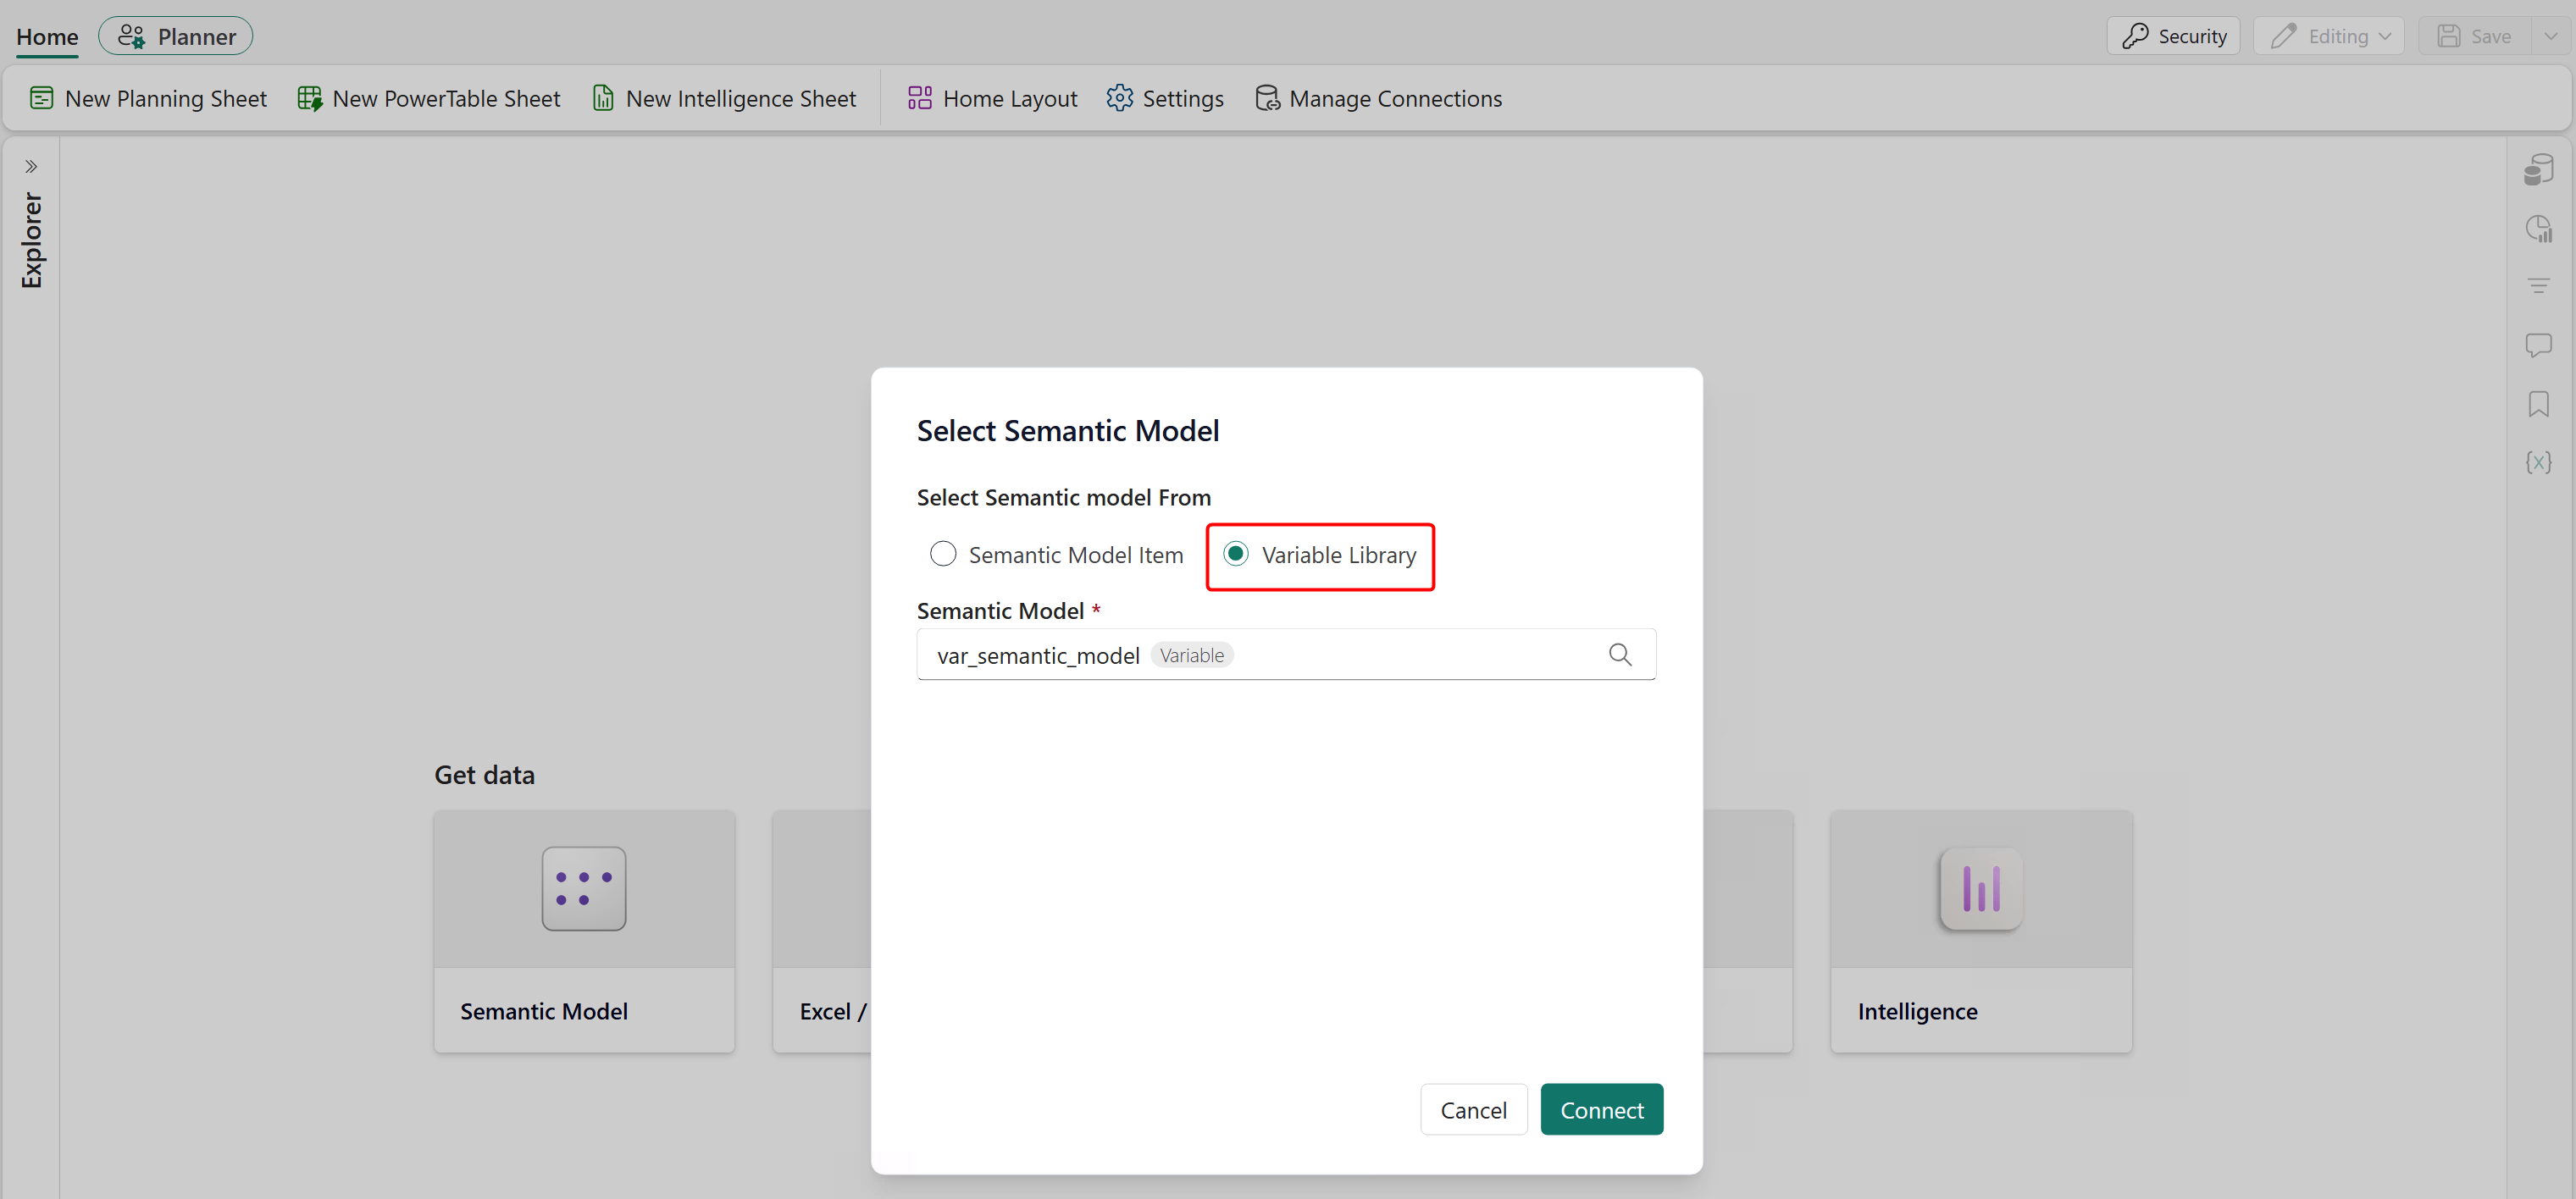
Create a new plan item and select the Variable Library option when you connect to the semantic model. Select the variable you configured in steps 2 and 3.
Commit the variable library and plan item to the configured Git repository.
Deploy the variable library to the next stage (test) in the pipeline.
In this example, you use the same semantic model in the test stage, so you don't need to update the variable library after migrating to test - it uses the same active set as development. Deploy the plan item after the variable library is successfully deployed.
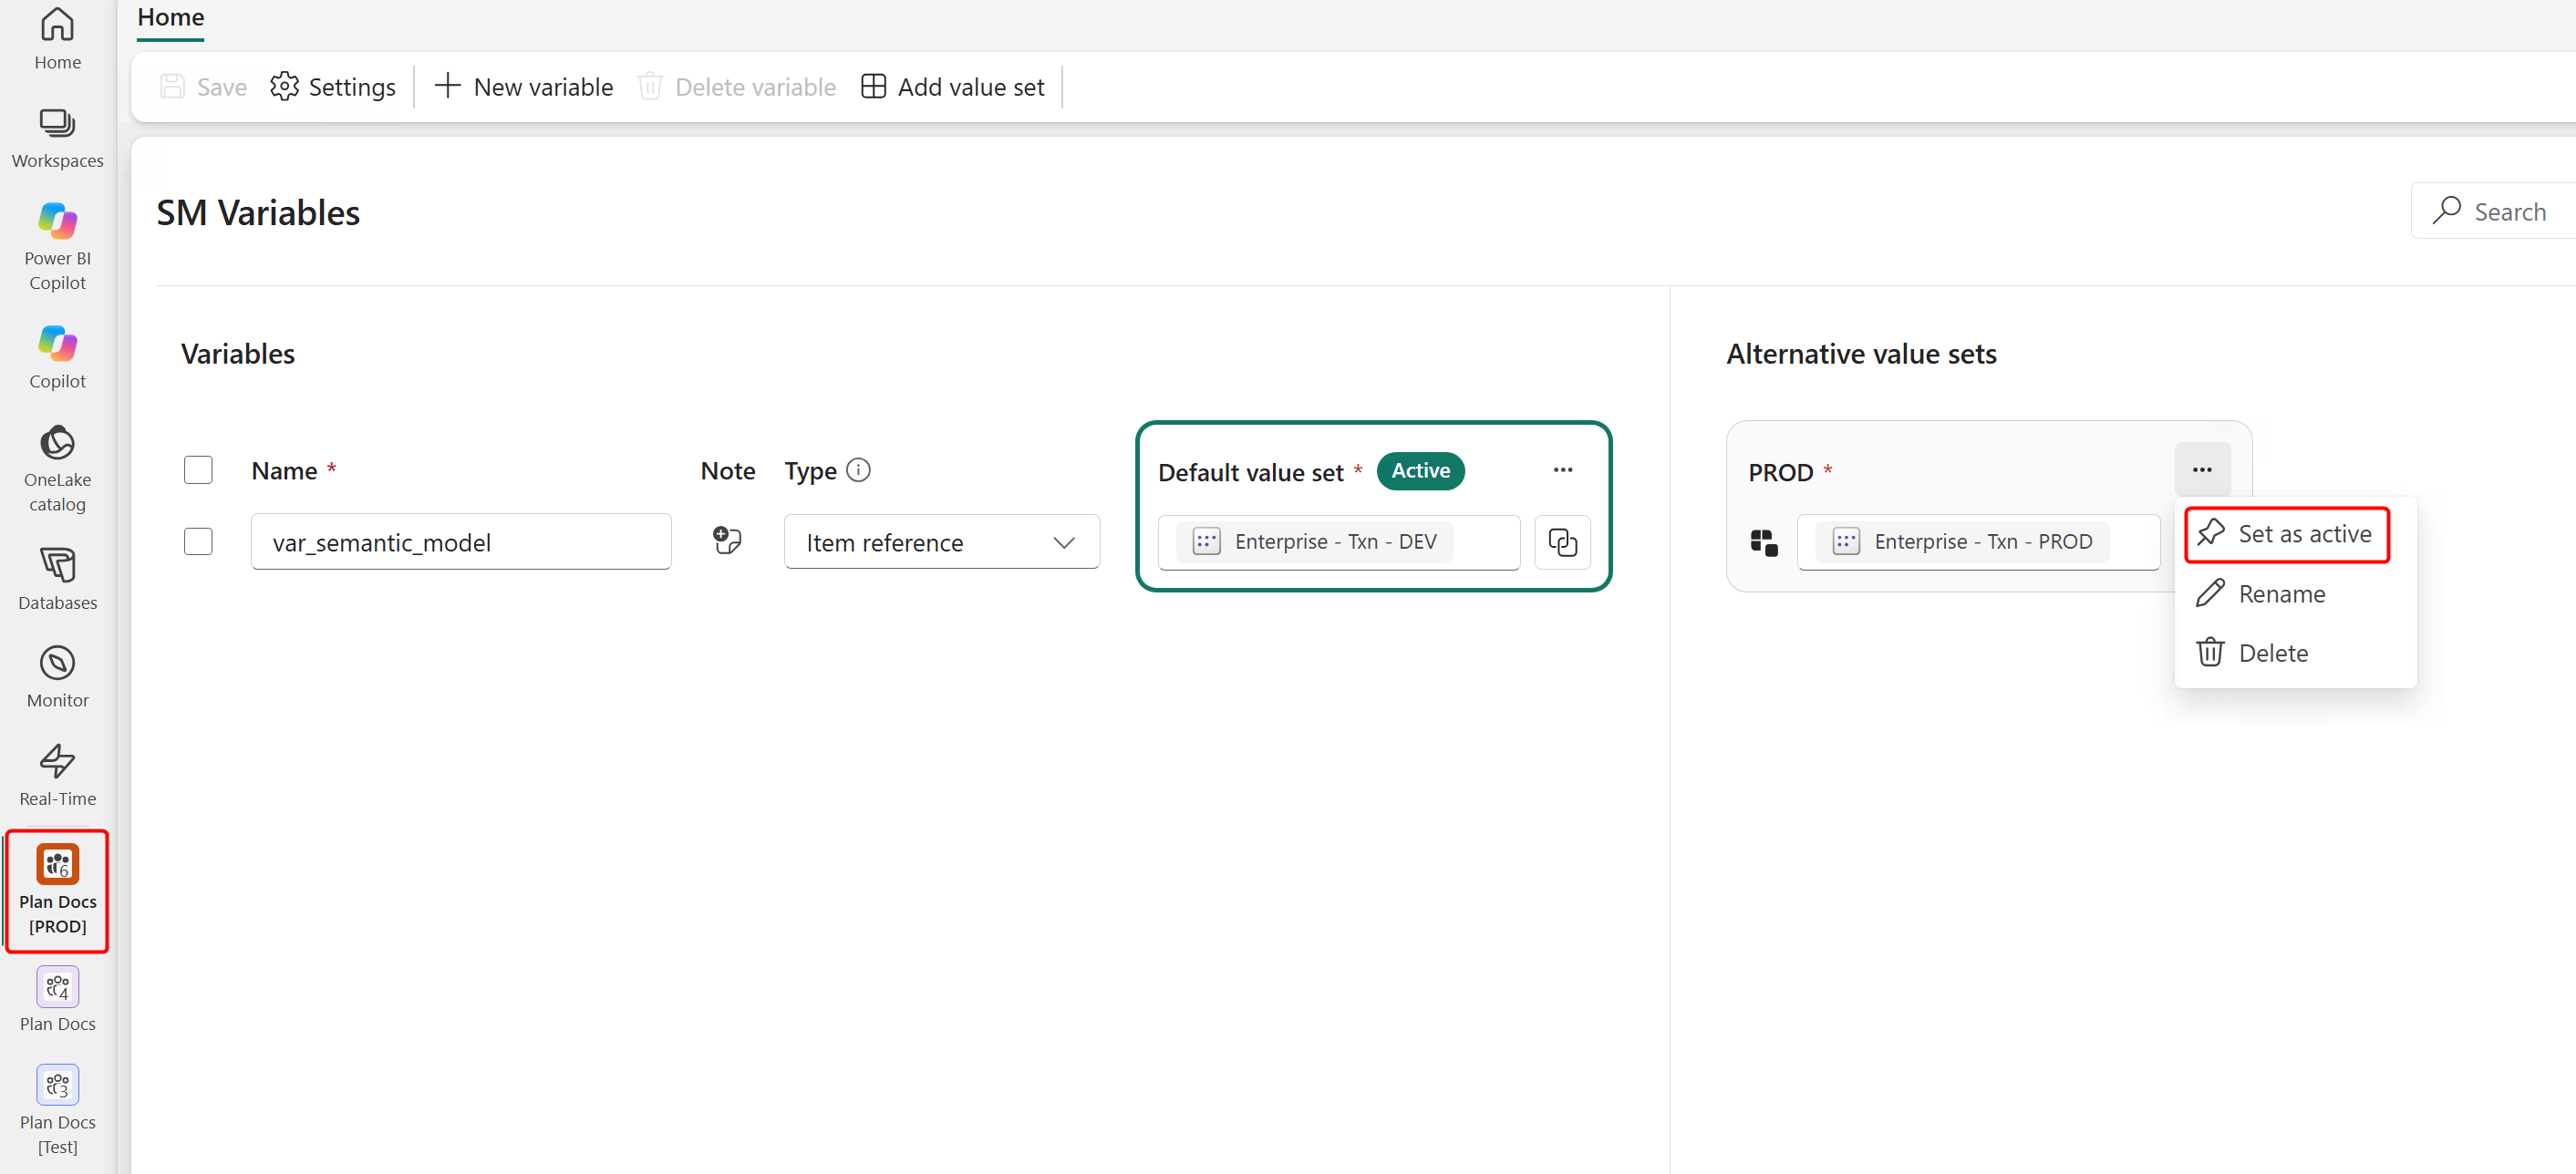
Deploy the variable library to the target stage (for example, production). If that stage requires a different semantic model, open the variable library in the target workspace (for example, Plan Docs [PROD]), set the target value set that contains the required values as active, and save your changes. In this example, you set the PROD value set to active.
Migrate the plan to the target environment.
Open the plan in the target (Plan Docs [PROD]) workspace. It automatically connects to the semantic model designated as the active set in the variable library.
Migrate writeback destinations
To migrate the Fabric SQL writeback destination database, see SQL database source control integration in Microsoft Fabric.
The deployment preserves the writeback destination configuration, but the generated target table name initially appears as a system-generated ID. You can manually rename the table and execute writeback.
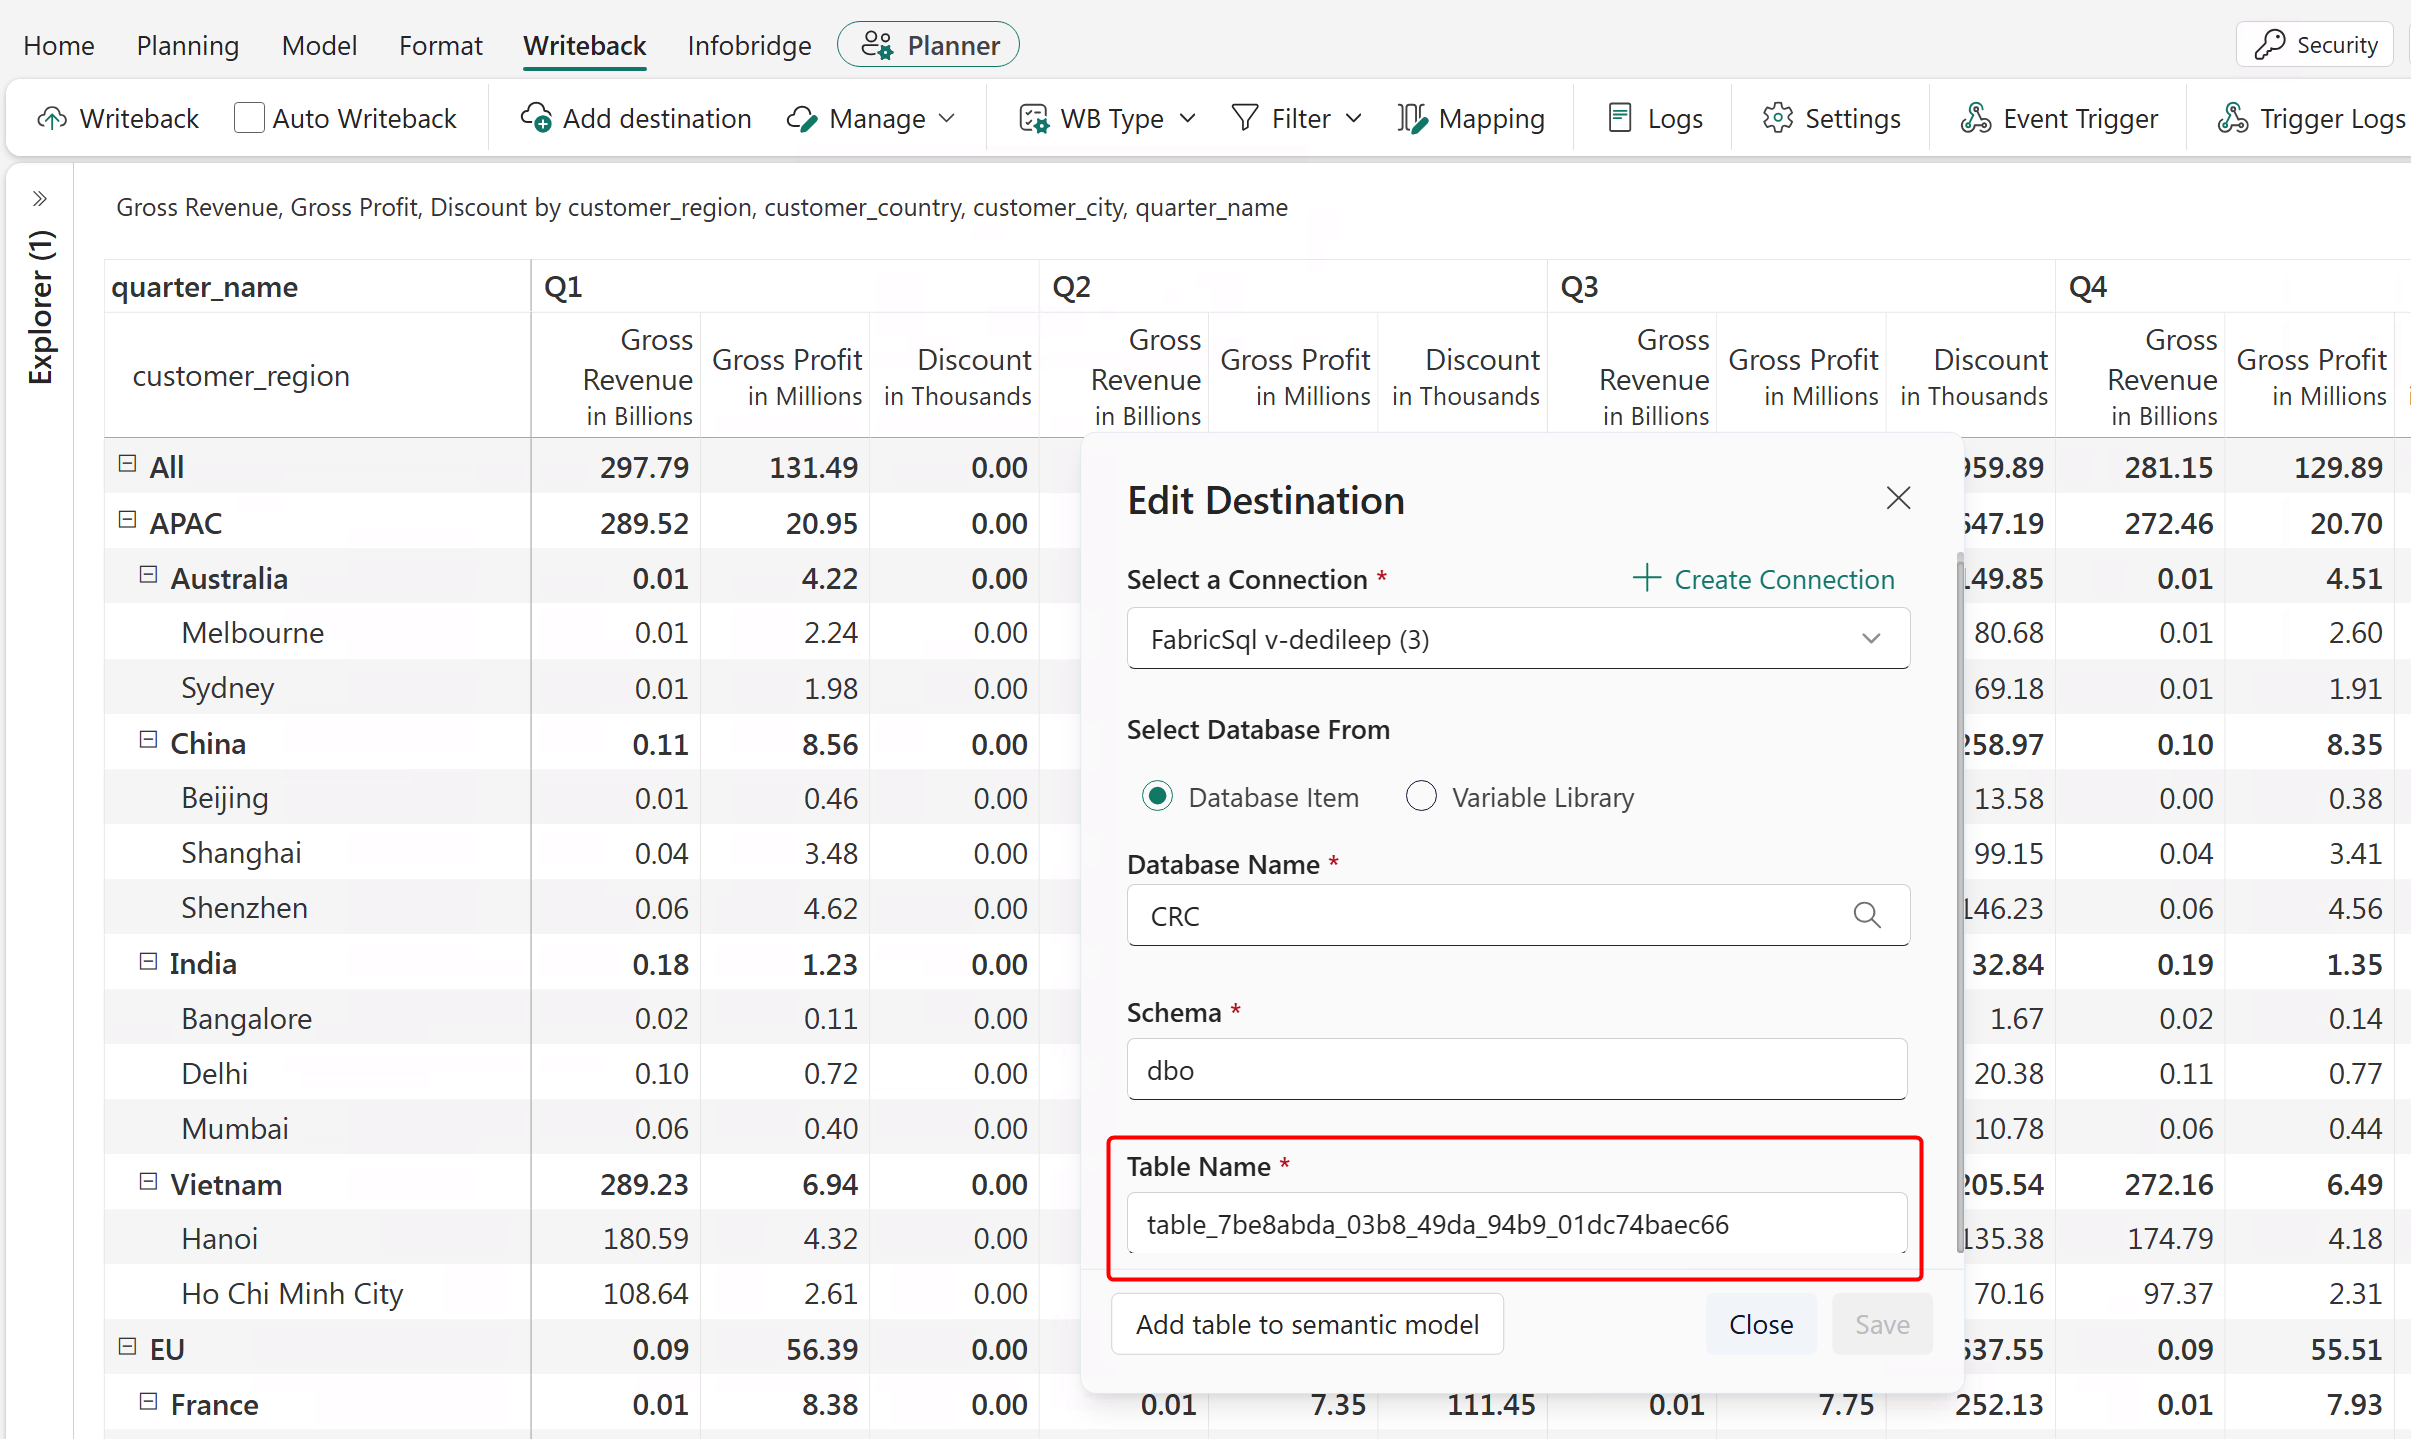
- Writeback logs: Execution logs from the source workspace don't transfer to the target workspace. Any writeback activity in the target workspace logs as a new, independent event.
- Auto-Writeback and baselining: If Auto-Writeback is enabled, the initial writeback attempt in the target workspace fails when you update cell values. This failure occurs because baseline data isn't established. To resolve this problem, perform a manual writeback in the target workspace first. Subsequent Auto-Writeback operations function normally.
Use variables for writeback destinations and connections
Using variables for writeback connections and SQL destinations simplifies environment management across CI/CD stages like Dev, Test, and Prod. Instead of manually reconfiguring database settings in each workspace after deployment, variables dynamically route data to the correct database based on the active set in the variable library.
In the variable library, create two variables:
- An Item Reference variable to store the writeback destination database.
- A Connection Reference variable to store the database connection.
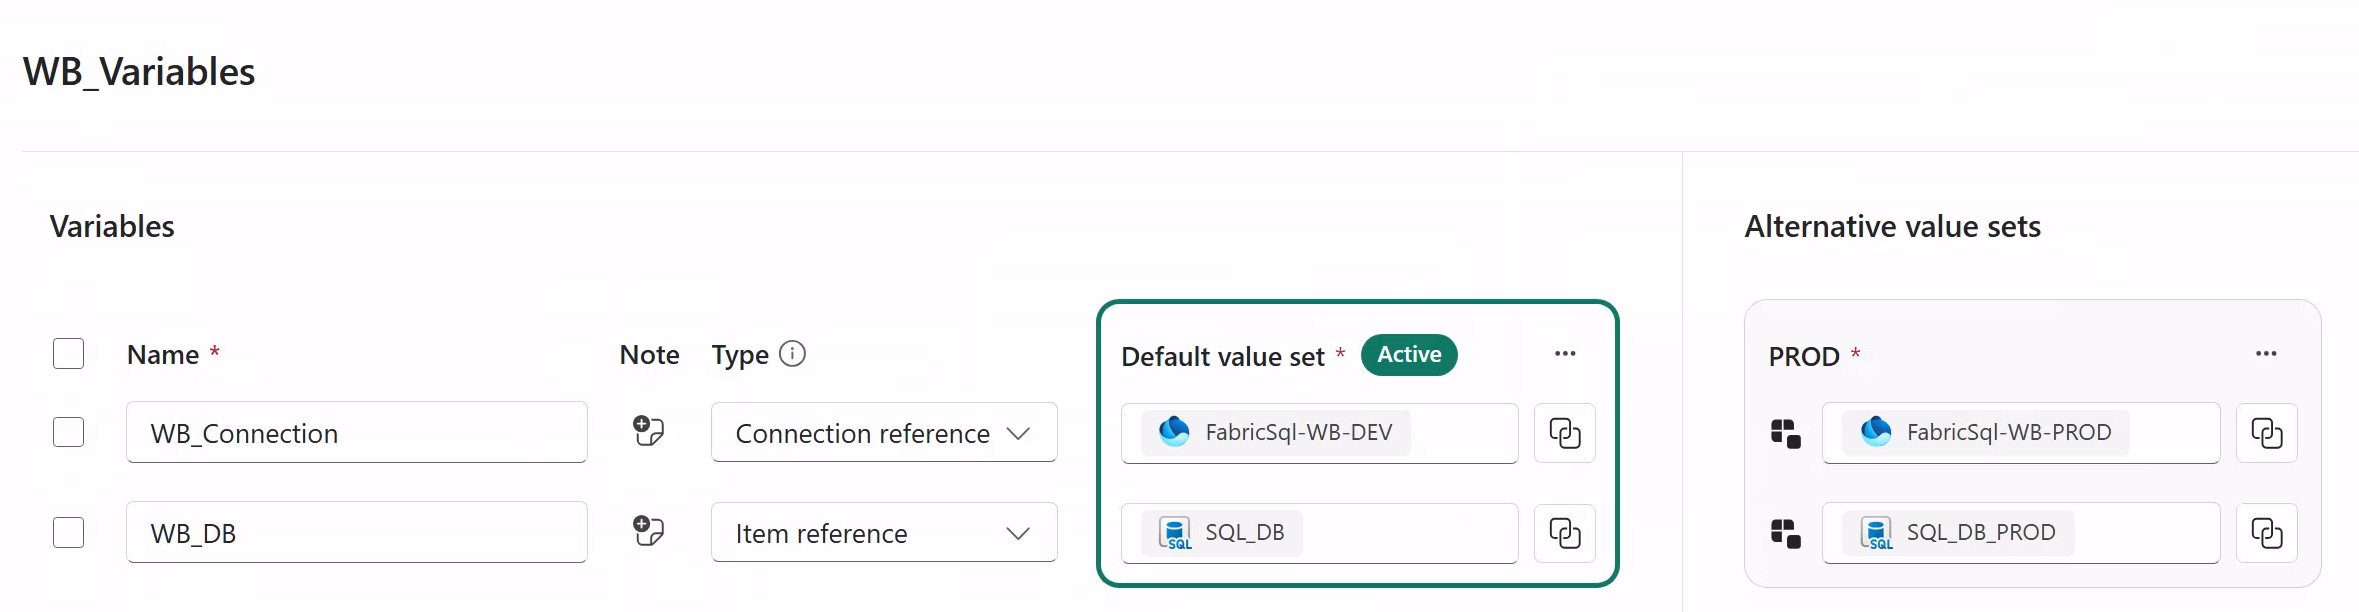
For each target stage, configure a value set with the writeback database item reference and connection reference for that environment.
Open your planning or sheet or matrix visual in an intelligence sheet and configure the writeback destination. In the connection dropdown, select Use Variable and select the connection reference variable created in the variable library.
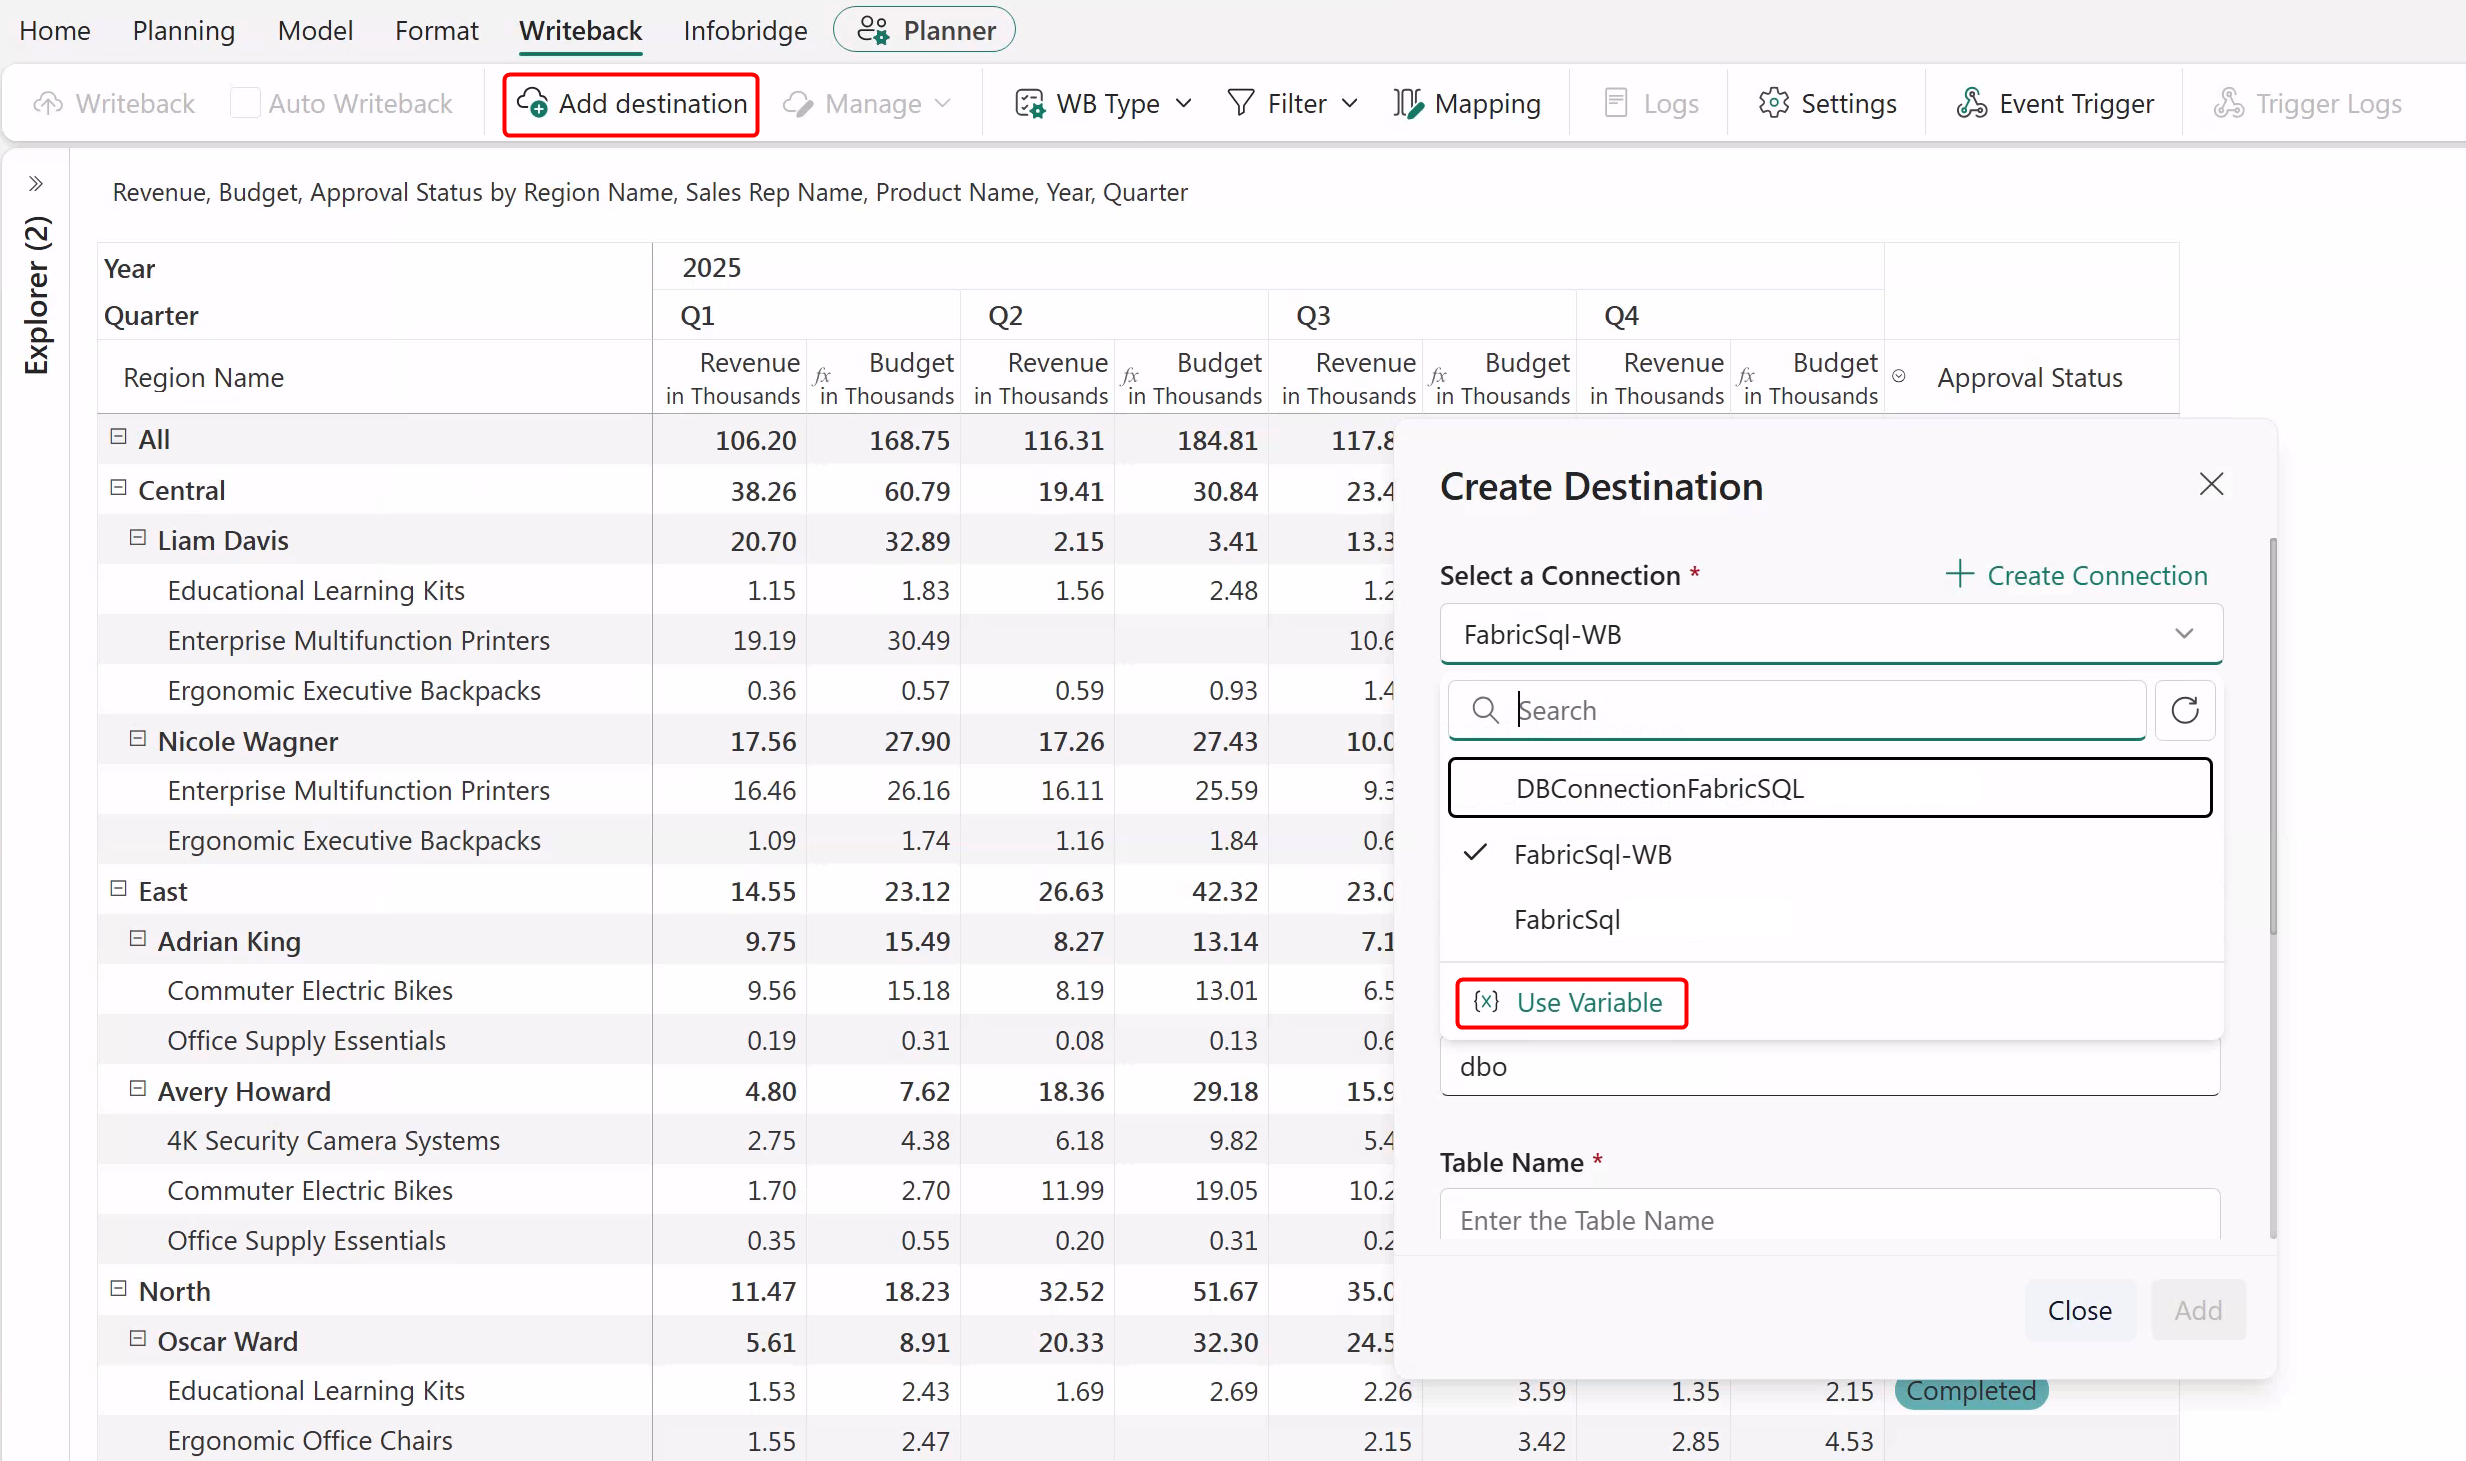
Set Select Database From to Variable Library, then select the database item reference variable created in the variable library.
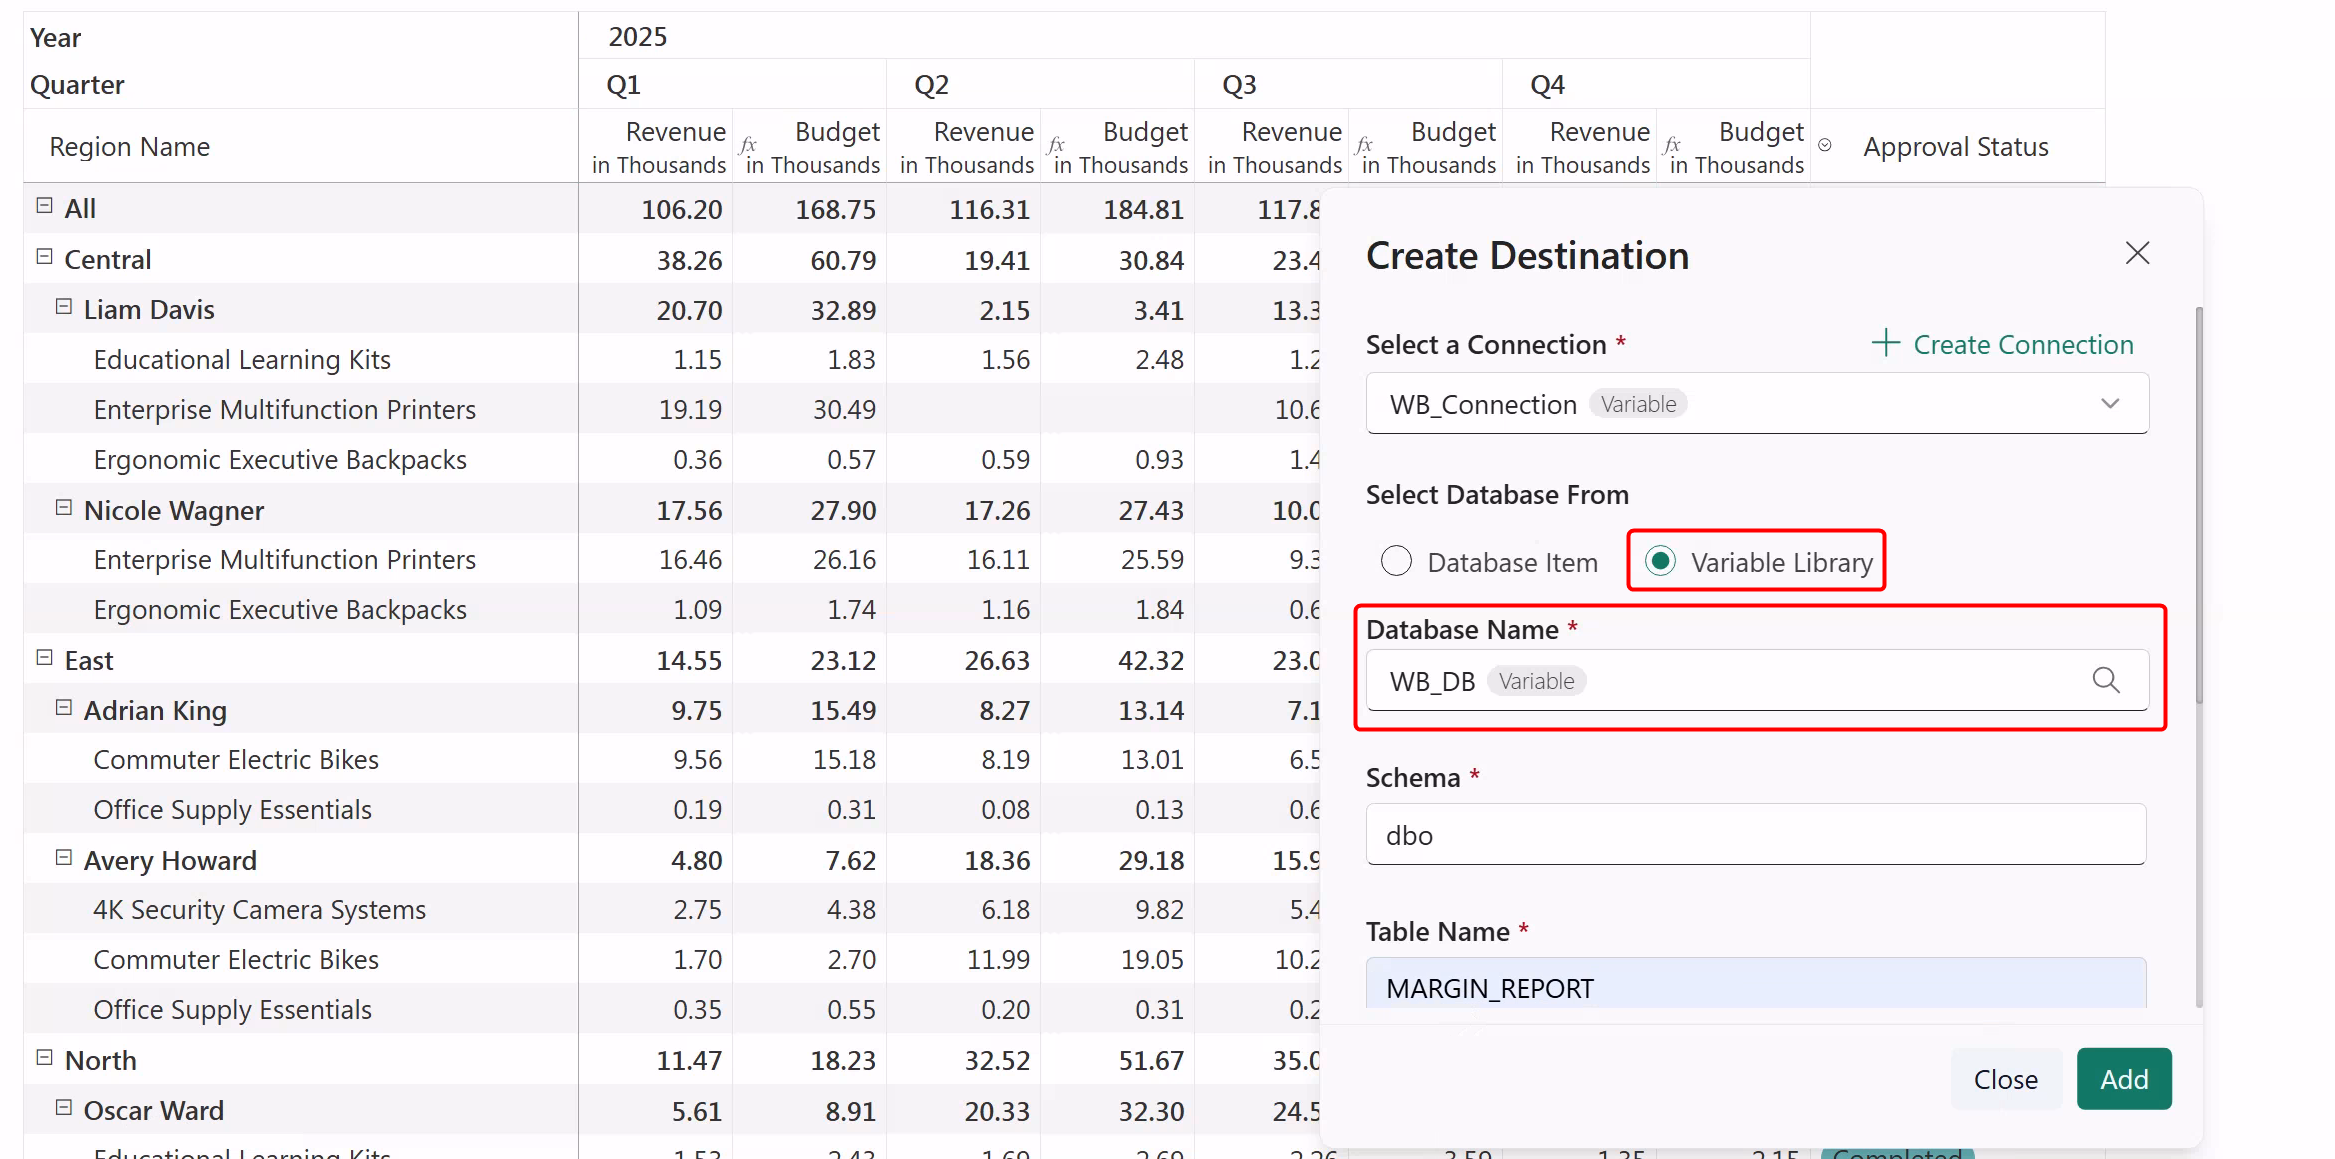
Deploy the variable library to the target stage. In the target workspace, select the required value set as active and save the library.
Deploy the plan to the target stage. Before executing writeback, verify that the active value set references the intended target database and connection. When you deploy the plan to other stages in the deployment pipeline, the writeback configuration automatically fetches from the active set for that stage in the variable library.
Related content
Get started with CI/CD in Fabric.
Create variable libraries.
Introduction to writeback in planning.