Note
Access to this page requires authorization. You can try signing in or changing directories.
Access to this page requires authorization. You can try changing directories.
This document provides information about automated org sync. The org sync process involves adding your employee data to LinkedIn Learning and the automatic updating or modifying of that data in your HR system. The focus of the workflow is how to automate the uploading of CSV files via HTTPS org sync.
What this Document Tells You
The following steps outline the process for org sync via HTTPS:

Note
Please feel free to take a few minutes to review how to add learner data to LinkedIn Learning via manual and automated methods.
Benefits
LinkedIn Learning customers benefit from our automated org sync via HTTPS in the following ways:
Save time - Org sync lets you spend less time on manual uploads to manage users and groups. This enhancement allows you to assign courses to custom groups and automatically revoke licenses when learners leave your organization.
Measure value - Org sync allows you to slice and dice reports based on employee attributes, and update attributes in real time. This functionality gives you enhanced abilities to tell your organization's ROI story to its stakeholders.
Drive engagement - Org sync gives you the power to drive engagement by sending you relevant content notifications and recommendations. You can notify colleagues when employees like, share, and complete courses and learning paths. You also can target learners by course relevance to department, team, or job title.
Prerequisites
To automate org sync in your organization, you need the following:
A HRIS system
Full LinkedIn Learning admin privileges
Accessing the Account Center
In the LinkedIn Learning Account Center, you can manage learner data, curate content, and gain learner progress insights.
Automating Employee Data Integration
Take a few minutes to review how to format your bulk CSV and license headers in LinkedIn Learning.
To automate employee data integration, take the following steps:
Upload your CSV over HTTPS
Get your authorization token.
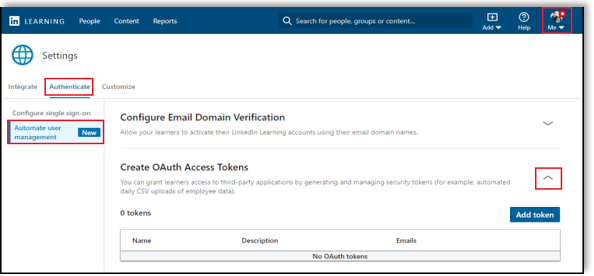
- After you log in, if you are not already in the Admin screen, select Go to Admin.

- From the left-hand navigation menu, select Automatic user management panel and expand Create OAuth Access Tokens.
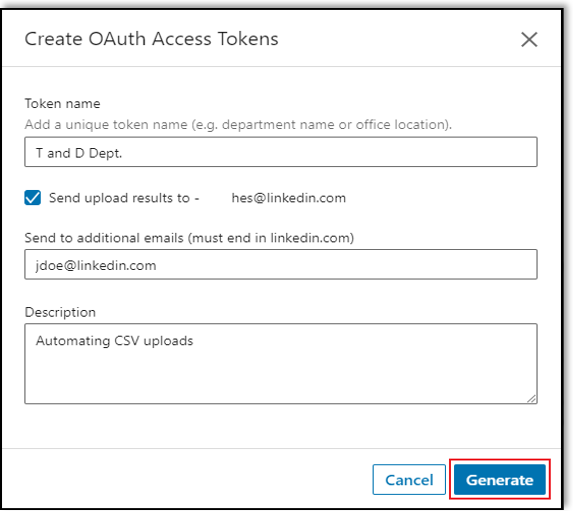
- Fill in each field and click Generate token. You should see your access token pop up in the Access Token field.
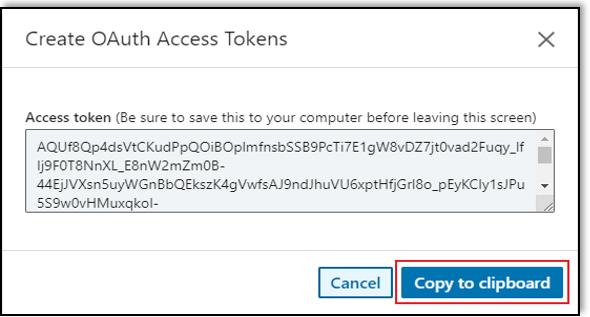
- Click Copy to clipboard and save your access token to your clipboard or computer before leaving the page. You will not be able to view this token again.
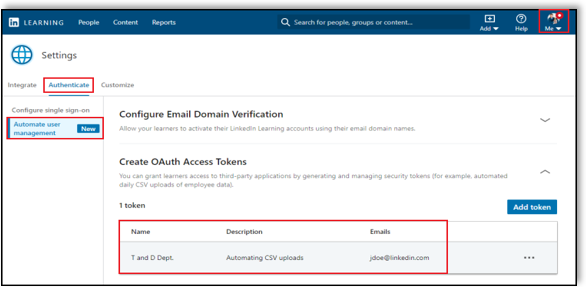
- View your configuration to ensure you have generated the token.
Upload your CSV file to LinkedIn servers.
There are two modes you can use to upload the file:
Automatic mode: Once you upload your CSV, it starts processing automatically and the results file will be emailed to you.
Manual mode: After you upload the file, you must manually trigger the processing. You can use this mode to track the file processing progress and retrieve the results programmatically.
Notes
<OAUTH_TOKEN>should always be replaced with the token generated from Step 1.</path/to/upload.csv>should always be replaced with the file path to your CSV file.Make sure your LinkedIn Learning CSV file follows the correct format.
Ensure values in brackets (<>), such as
<CSV_FILE_HASH>, <JOB_ID>, <OAUTH_TOKEN>, <RESULT_FILE_HASH>, and so on, are specific to your input and expected response.
Linux-Specific Instructions
Automatic Mode
Run this command:
curl -H 'Content-Type: multipart/form-data' -H
'Authorization: Bearer <OAUTH_TOKEN>' --form
'file=@</path/to/upload.csv>;type=text/csv' -X POST
"https://api.linkedin.com/media/upload?media_type=enterprise_csv_upload&auto_notify=true"
Expected response:
HTTP/1.1 201 Created

{

"location": "urn:li:media: <CSV_FILE_HASH>"
}
Manual Mode
Run this command:
curl -H 'Content-Type: multipart/form-data' -H
'Authorization: Bearer <OAUTH_TOKEN>' --form
'file=@</path/to/upload.csv>;type=text/csv' -X POST
"https://api.linkedin.com/media/upload?media_type=enterprise_csv_upload&auto_notify=false"
Expected response:
HTTP/1.1 201 Created

{

"location": "urn:li:media: <CSV_FILE_HASH>"
}
Process the file:
Copy the returned
<CSV_FILE_HASH>value to your clipboard.Start processing your file by running this command:
curl -H 'Authorization: Bearer <OAUTH_TOKEN>' -H
'Content-Type: application/json' -X POST
"https://api.linkedin.com/v2/enterpriseUploadJobs?action=processFile" --data'{"mediaUrn":"urn:li:media: <CSV_FILE_HASH>"} '
Note: Replace <CSV_FILE_HASH> with the urn:li:media: token you get in the response after running the curl command in the prior step.
Expected response:
HTTP/1.1 201 Created

{

"value": "<JOB_ID>"

}
Track the processing job (optional):
Copy the returned
<JOB_ID>value to your clipboard.Get updates to the job processing using this command:
curl -H 'Authorization: Bearer <OAUTH_TOKEN>' -X GET "<https://api.linkedin.com/v2/enterpriseUploadJobs/[JOB_ID>]"
Important
Replace <JOB_ID> with the value you get in the response after running the command in the prior step.
Expected response:
{
    "resultStats": {
        "updatedCount": 1,
        "deletedCount": 0,
        "warningCount": 0,
        "totalCount": 0,
        "errorCount": 0
} ,
    "created": 1466552257141,
    "sourceMedia": "urn:li:media:SRC_FILE_HASH",
    "messages": [...],
    "lastModified": 1466552257141,
    "Id": JOB_ID,
    "resultMedia": "urn:li:media: <RESULT_FILE_HASH>",
    "status": "DONE"
}
Windows PowerShell-Specific Instructions
Powershell Automatic Mode
- Define the following parameters:
$uri = "https://api.linkedin.com/media/upload?media_type=enterprise_csv_upload&auto_notify=true"
$AuthHeader = @{'Authorization' = 'Bearer  <Auth token> '}
$boundary = [System.Guid]::NewGuid().ToString()

$filePath = "<File path>"
$fileContent = [System.IO.File]::ReadAllText($filePath)
$LF="`r`n"
$bodyLines = -join @("------$boundary$LF",
"Content-Disposition: form-data; name=`"uploadedfile`"; filename=`"AccountCenterImport.csv`"$LF",
"Content-Type: text/csv$LF$LF",
$fileContent,
"------$boundary--$LF")
- Run the following command:
Invoke-RestMethod -Uri $uri -Method Post -ContentType "multipart/form-data;boundary= `"----$boundary`"" -Body $bodyLines -Headers $AuthHeader
Expected response:
`location urn:li:media: RESULT_FILE_HASH`
After you have uploaded your learners, view them at People > Learners.
Download resulting CSV file (Optional). If you checked that you would like an email sent when you generate an authorization token, take the following steps:
Check your email to get instructions on downloading the result CSV file. When the has processed the CSV job, it sends a result summary email to the primary email address and any others provided in step one.
Download result CSV file by running this command (Linux users):
curl -H 'Authorization: Bearer <OAUTH_TOKEN>' -X GET "https://api.linkedin.com/media/upload?media_type=enterprise_csv_upload&id=urn:li:media: <RESULT_FILE_HASH>" -o results.csv
Important
Replace the <RESULT_FILE_HASH> with the "resultMedia":"urn:li:media: token you get in the response after you run the curl command in the prior step.
Congratulations! You now can add learners to your LMS instance via HTTPS.
Support
Use the following resources if you need assistance adding employee data to LinkedIn Learning:
Supporting Documentation
LinkedIn’s Privacy and Data Security Policy
https://www.linkedin.com/legal/privacy-policy
LinkedIn Security Contacts
If you have any security questions or you would like to report a security issue, write to us at security@linkedin.com.