Note
Access to this page requires authorization. You can try signing in or changing directories.
Access to this page requires authorization. You can try changing directories.
Introduction
Microsoft MakeCode is a helpful tool to learn or teach beginners of all ages how to code with the added bonus of allowing you to use software to control hardware devices.
This tutorial teaches you how to use the Make Code platform to write a program that sends live data from the BBC micro:bit to Microsoft Excel using the Microsoft Data Streamer add-in.
The example program we use in this tutorial prints the micro:bit accelerometer data into Excel. You can modify and adapt the basic program to work with other micro:bit sensors or external sensors.
What you need for this project
Hardware
- micro:bit microcontroller
Note
Windows 8 and newer don't need an another driver. For first-time programming a micro:bit on Windows 7, you need to download the mbed drivers for your computer.
- microUSB to USB cable
Software
- Microsoft Excel Office 365
- Data Streamer Excel add-in enabled
- Data Streamer is free with all subscriptions to Office 365
Using the Make Code Blocks to Print Data to Serial
The serial port on your computer is how Microsoft Data Streamer gathers data from external devices. This section shows you how to use the Make Code blocks to print data to the serial port.
Plug in your micro:bit and go to the Make Code website.
Select the "micro:bit" option and create a new file. The MakeCode block interface opens.
Add the HackingSTEM Data Streamer extension.
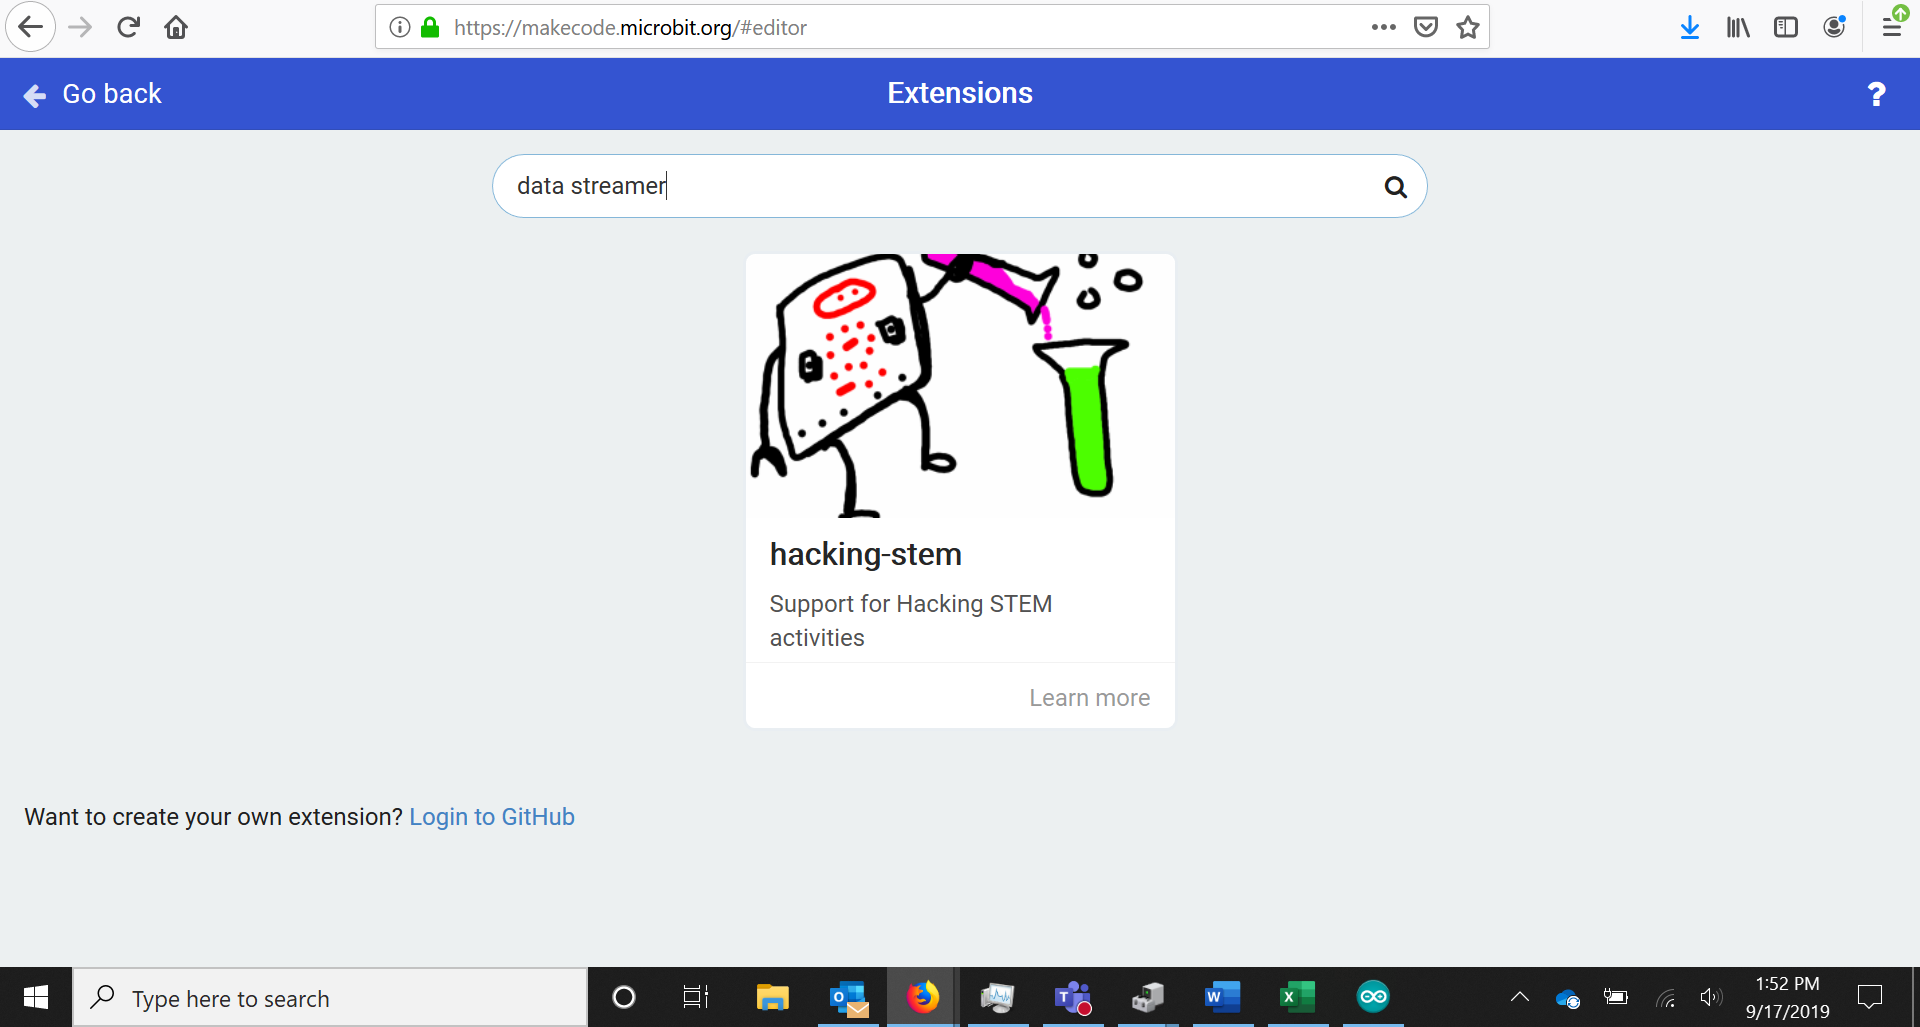
Go to Extensions, located at the bottom of the code blocks, and search for Data Streamer. Select the HackingSTEM Data Streamer add-in to enable it.
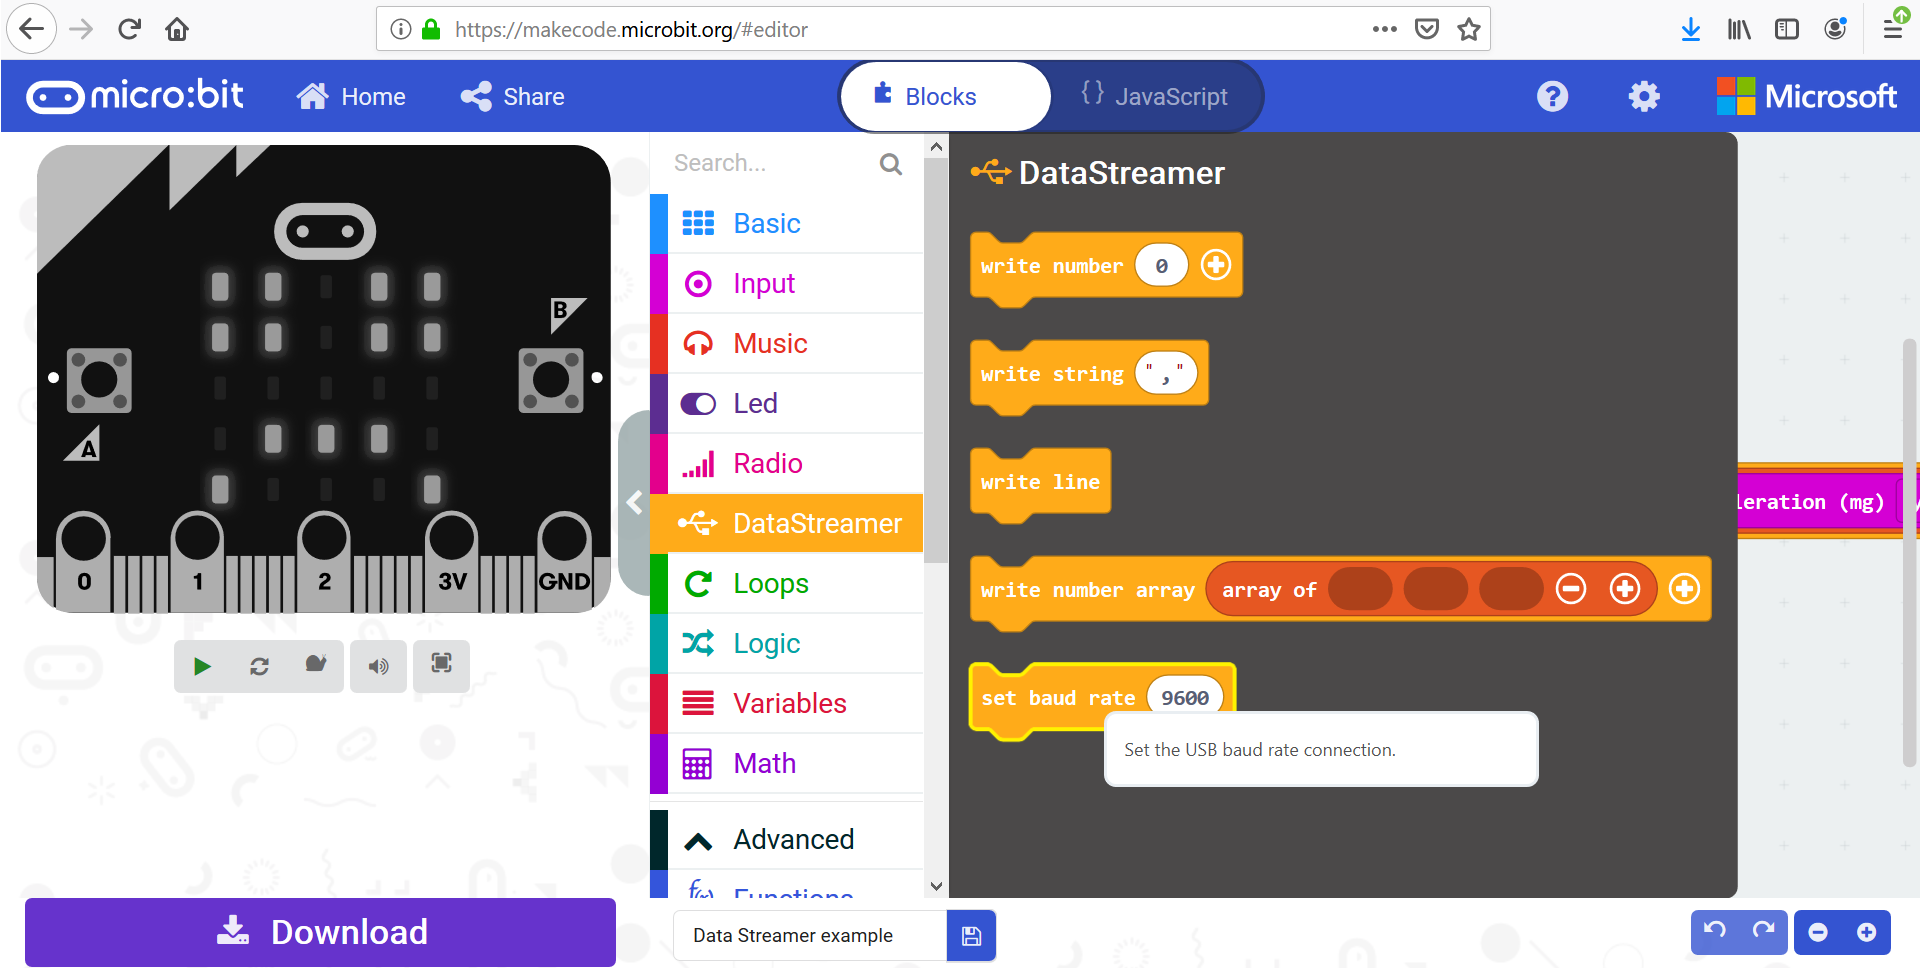
Back in the Block section of MakeCode, locate and open the yellow/orange Data Streamer blocks in the top section.
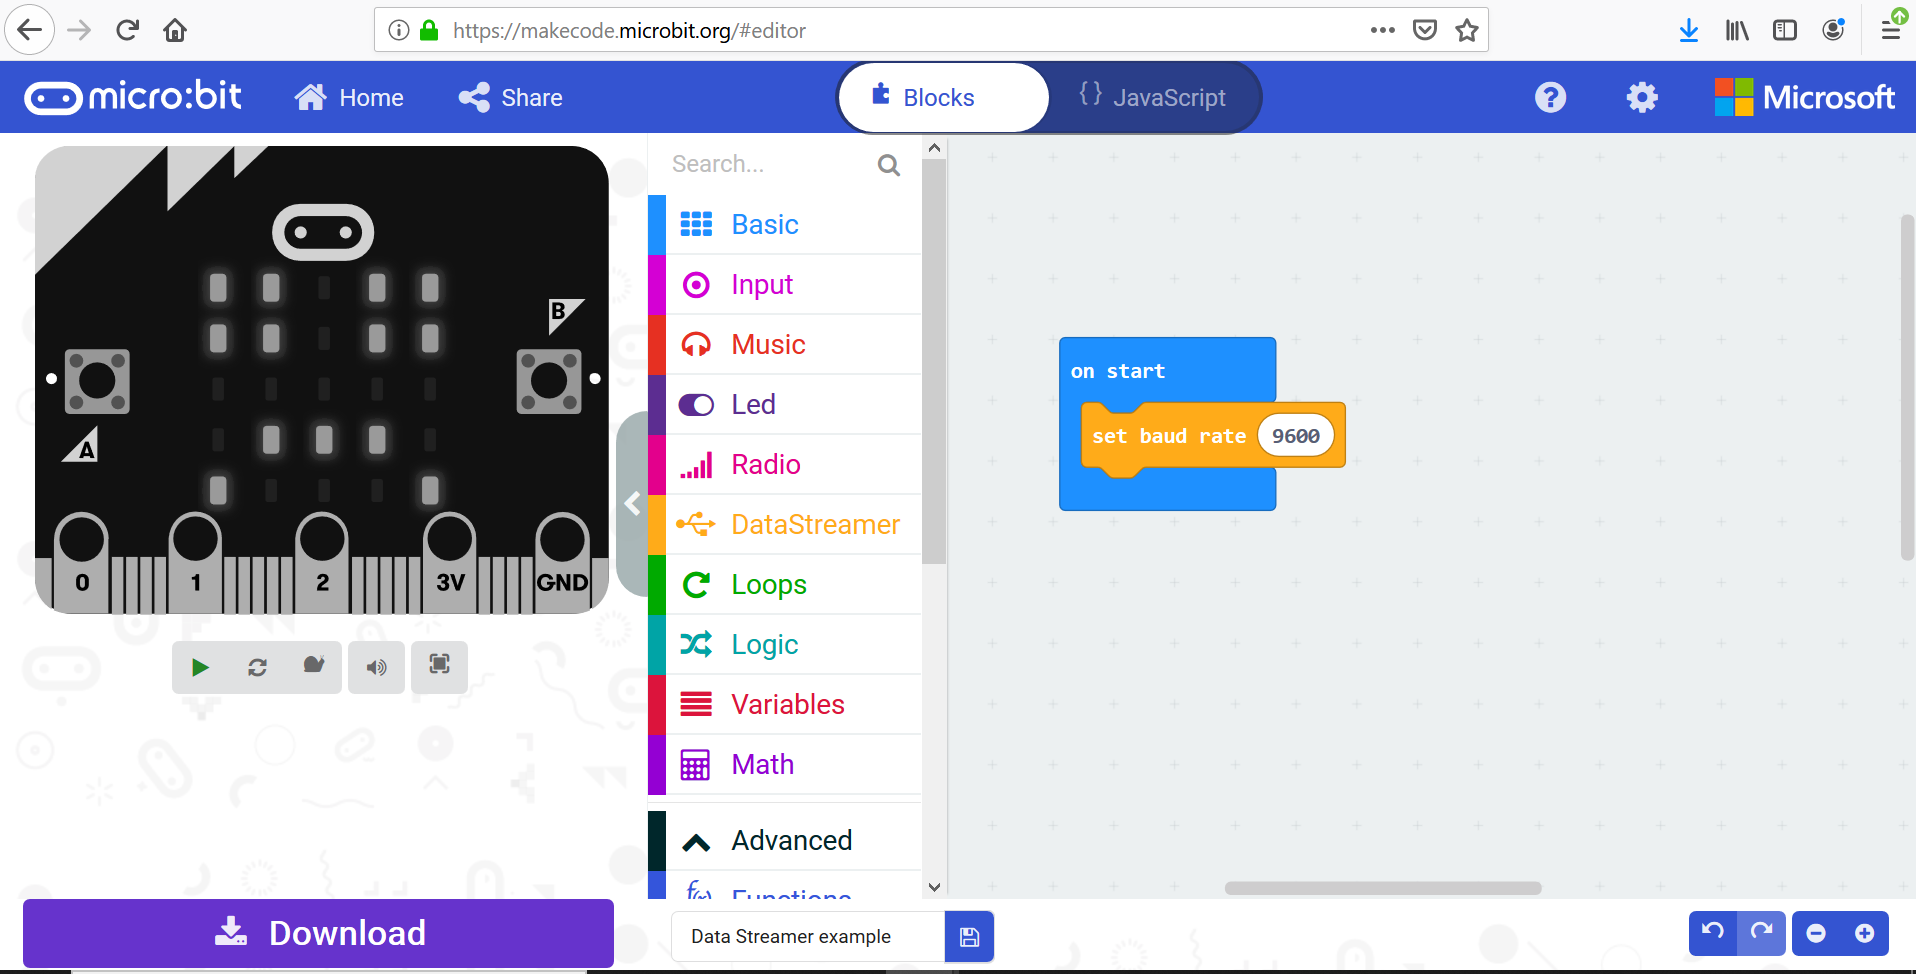
Set the Baud Rate by dragging the "Set Baud Rate" block into 'On Start'. Use the default setting (9600).
Note
Baud Rate is the speed at which the computer and the micro:bit communicate.
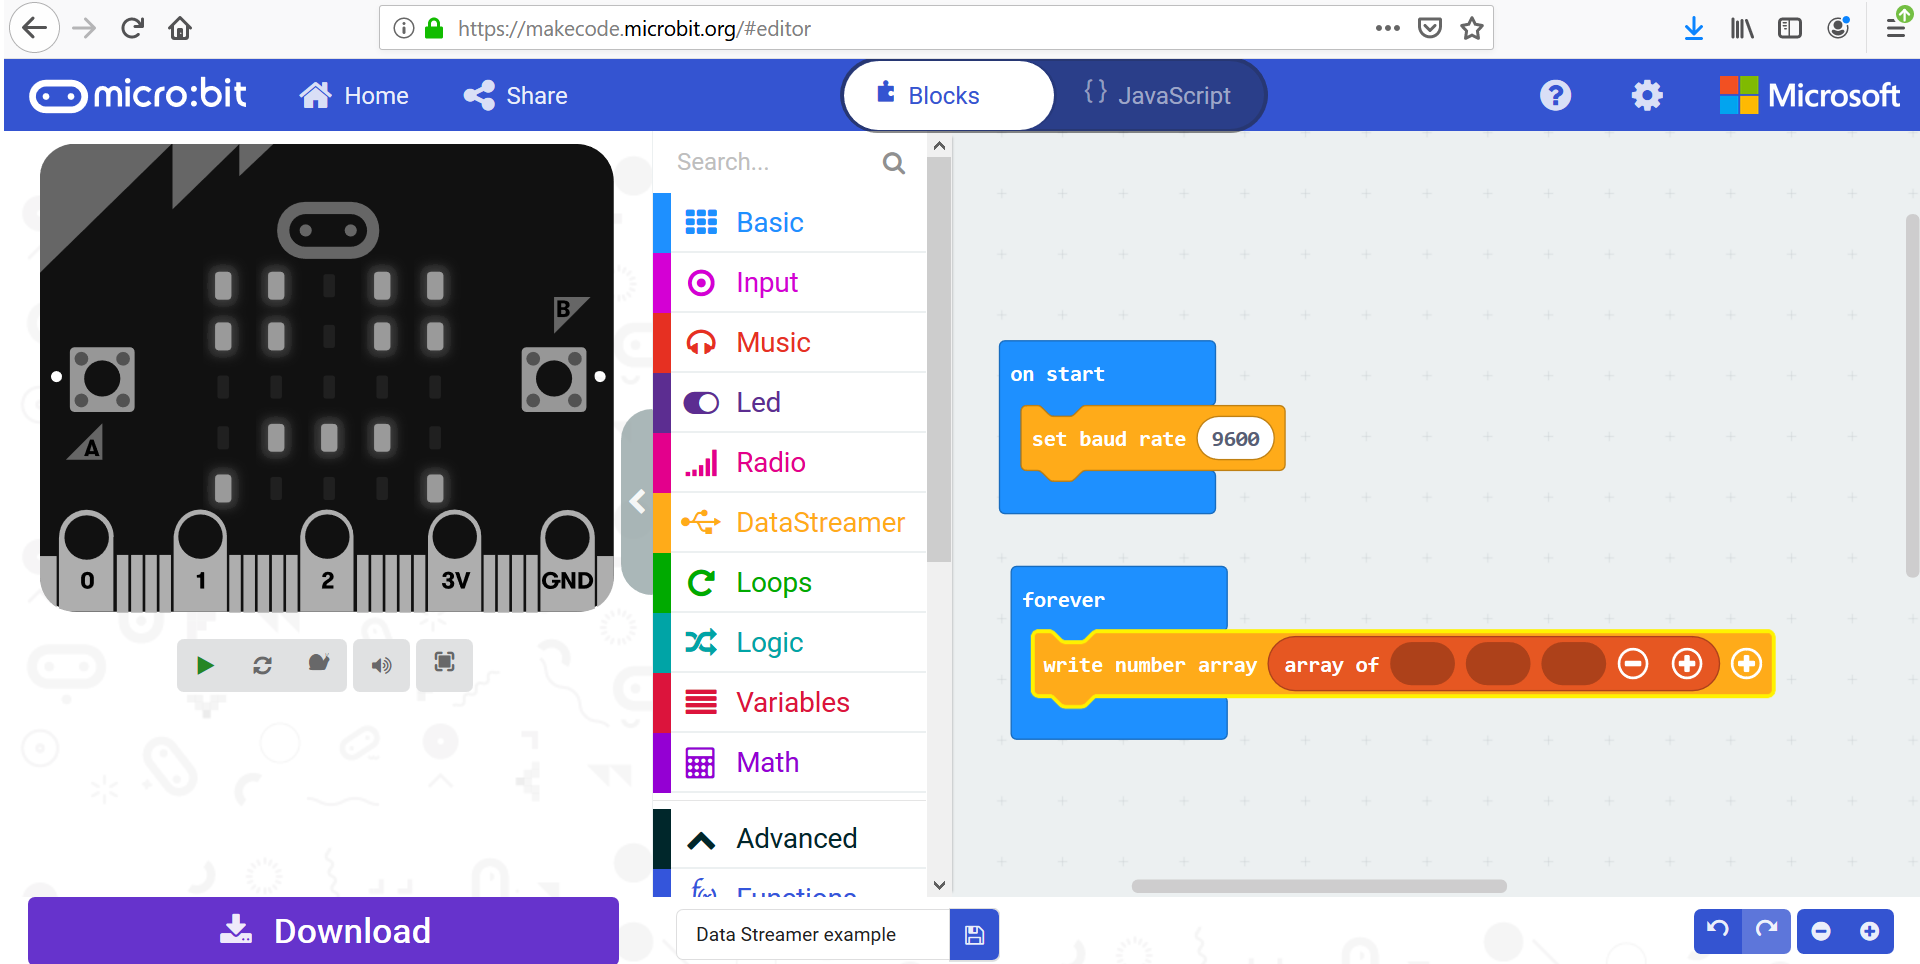
Next, print data to serial with the write number array block. Drag into the forever block.
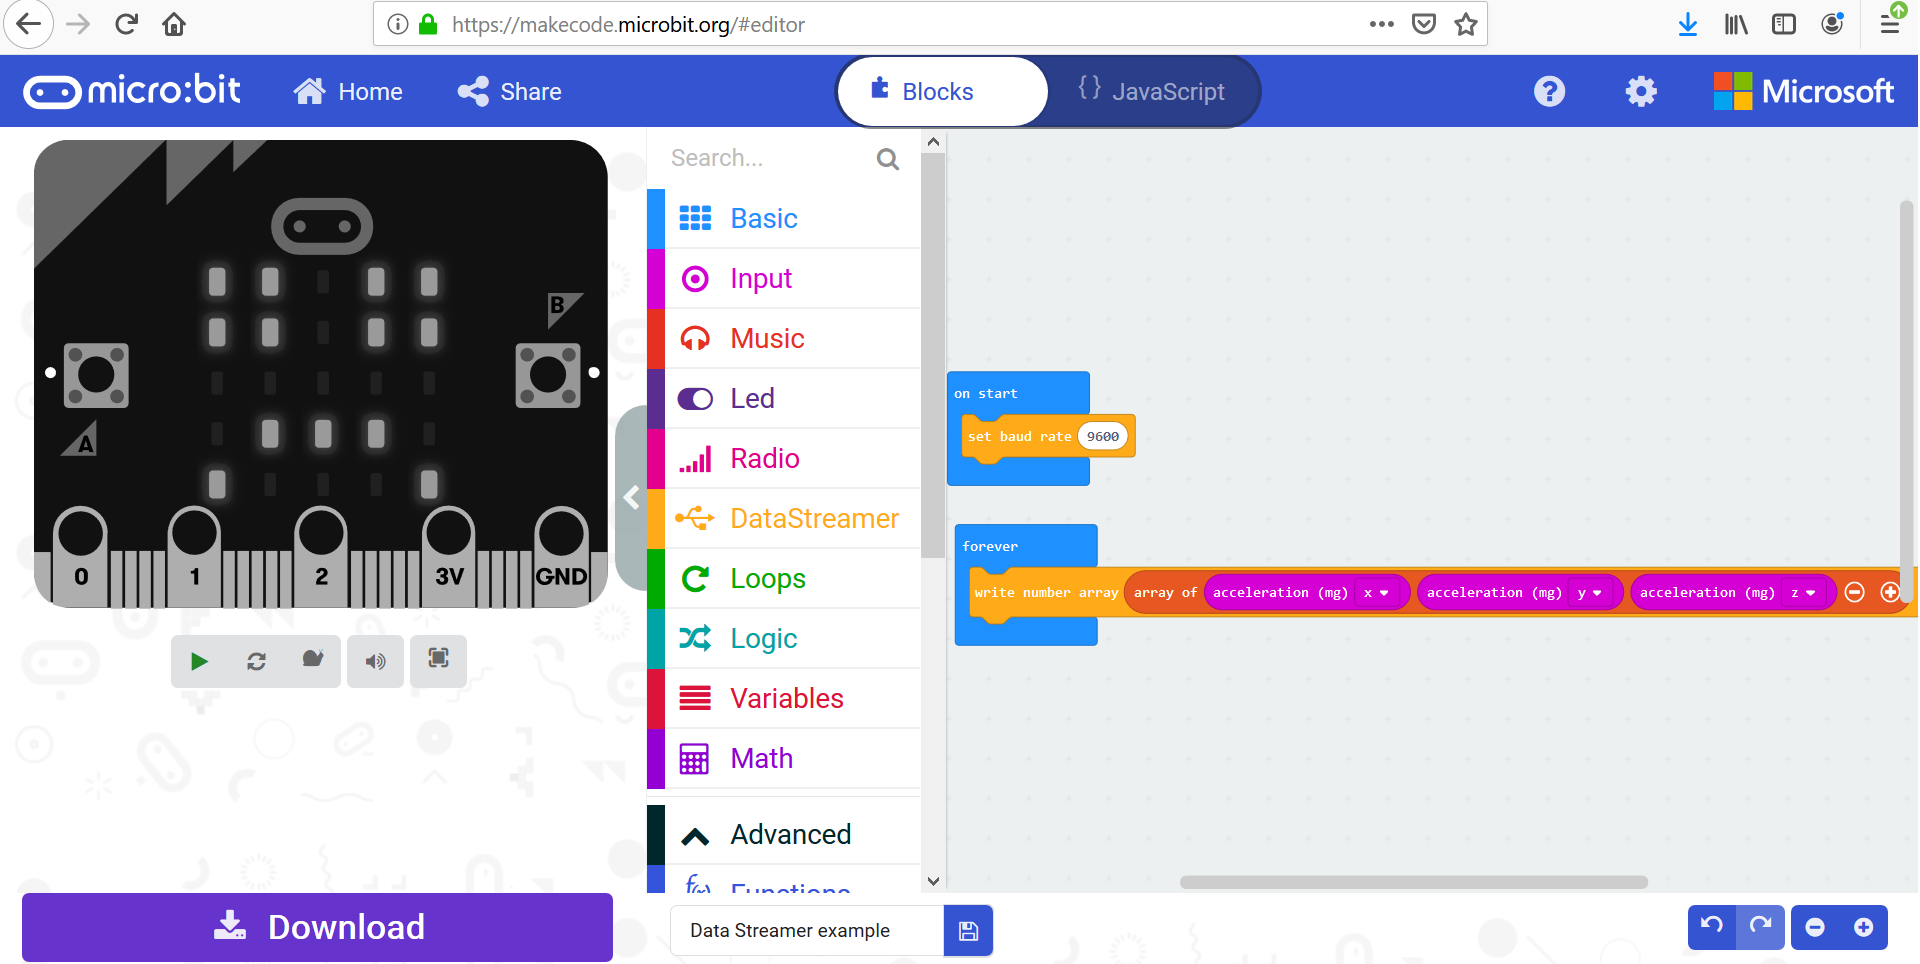
In the array of slots, insert the data you want to print to serial. For this example, we're printing the micro:bit accelerometer x, y, and z values.
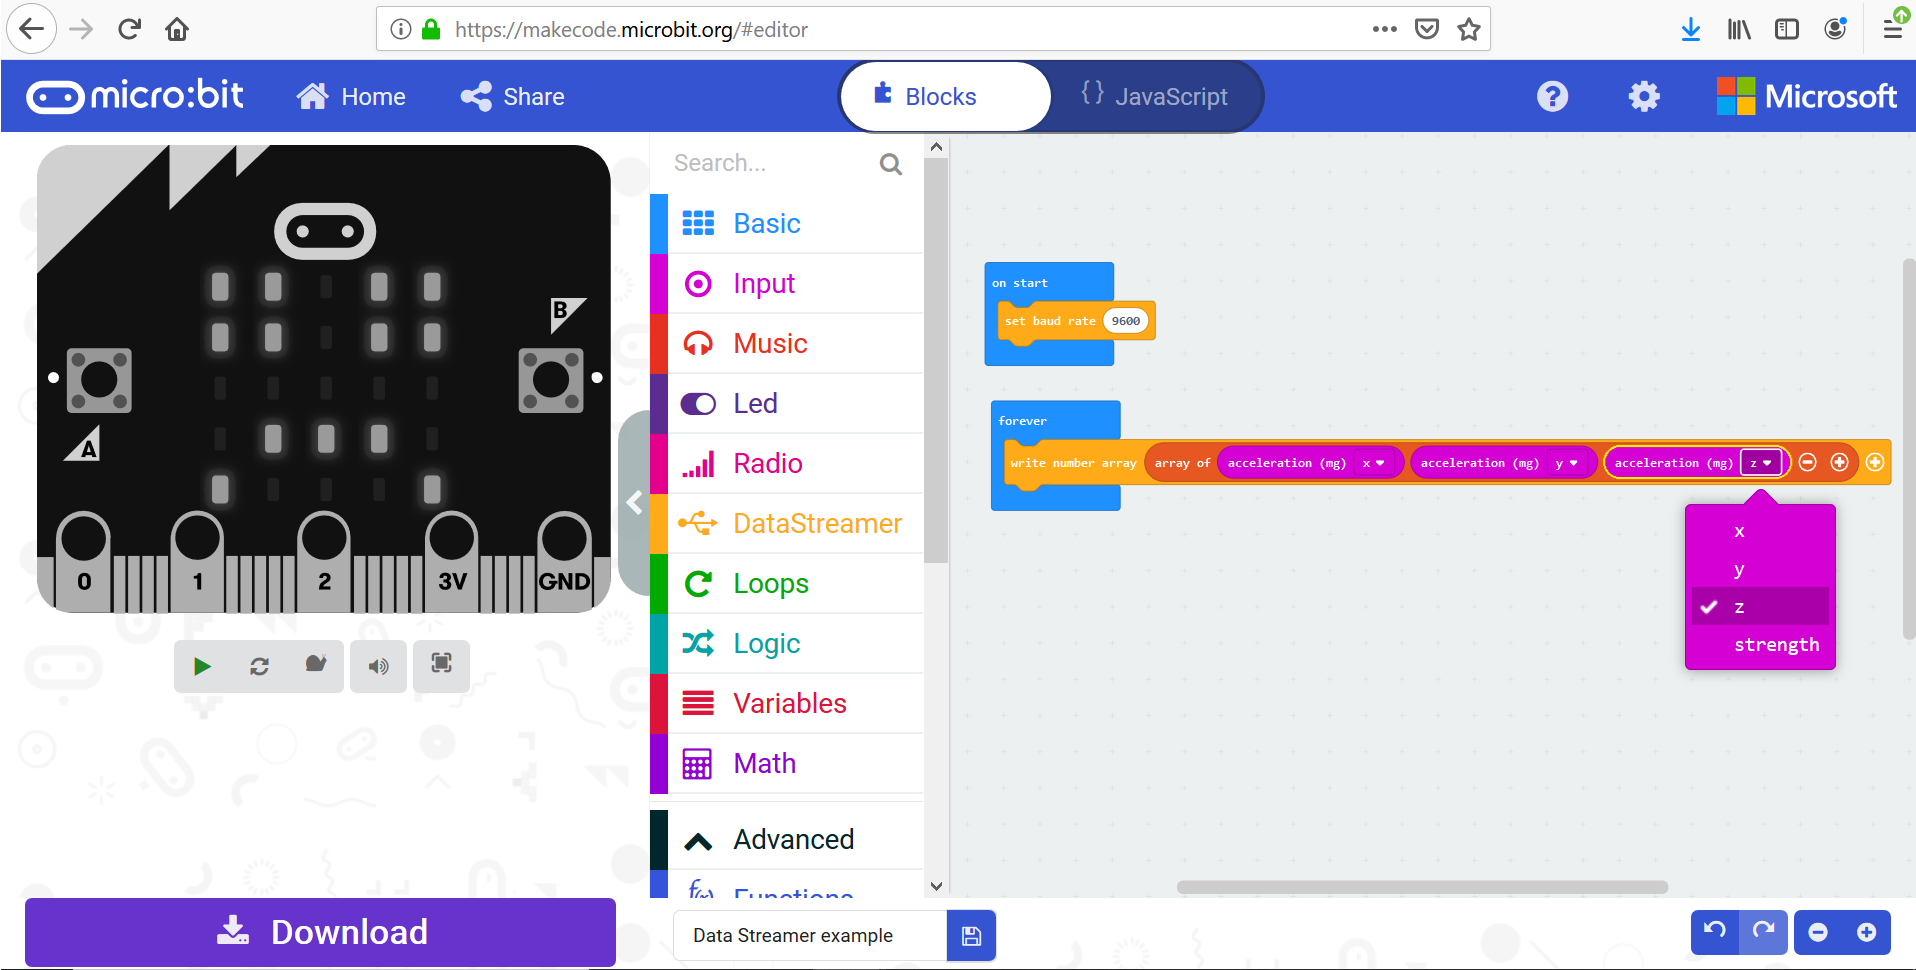
Accelerometer blocks are in the "Input" section. Remember to change the selected variable from "x" to y and z accordingly.
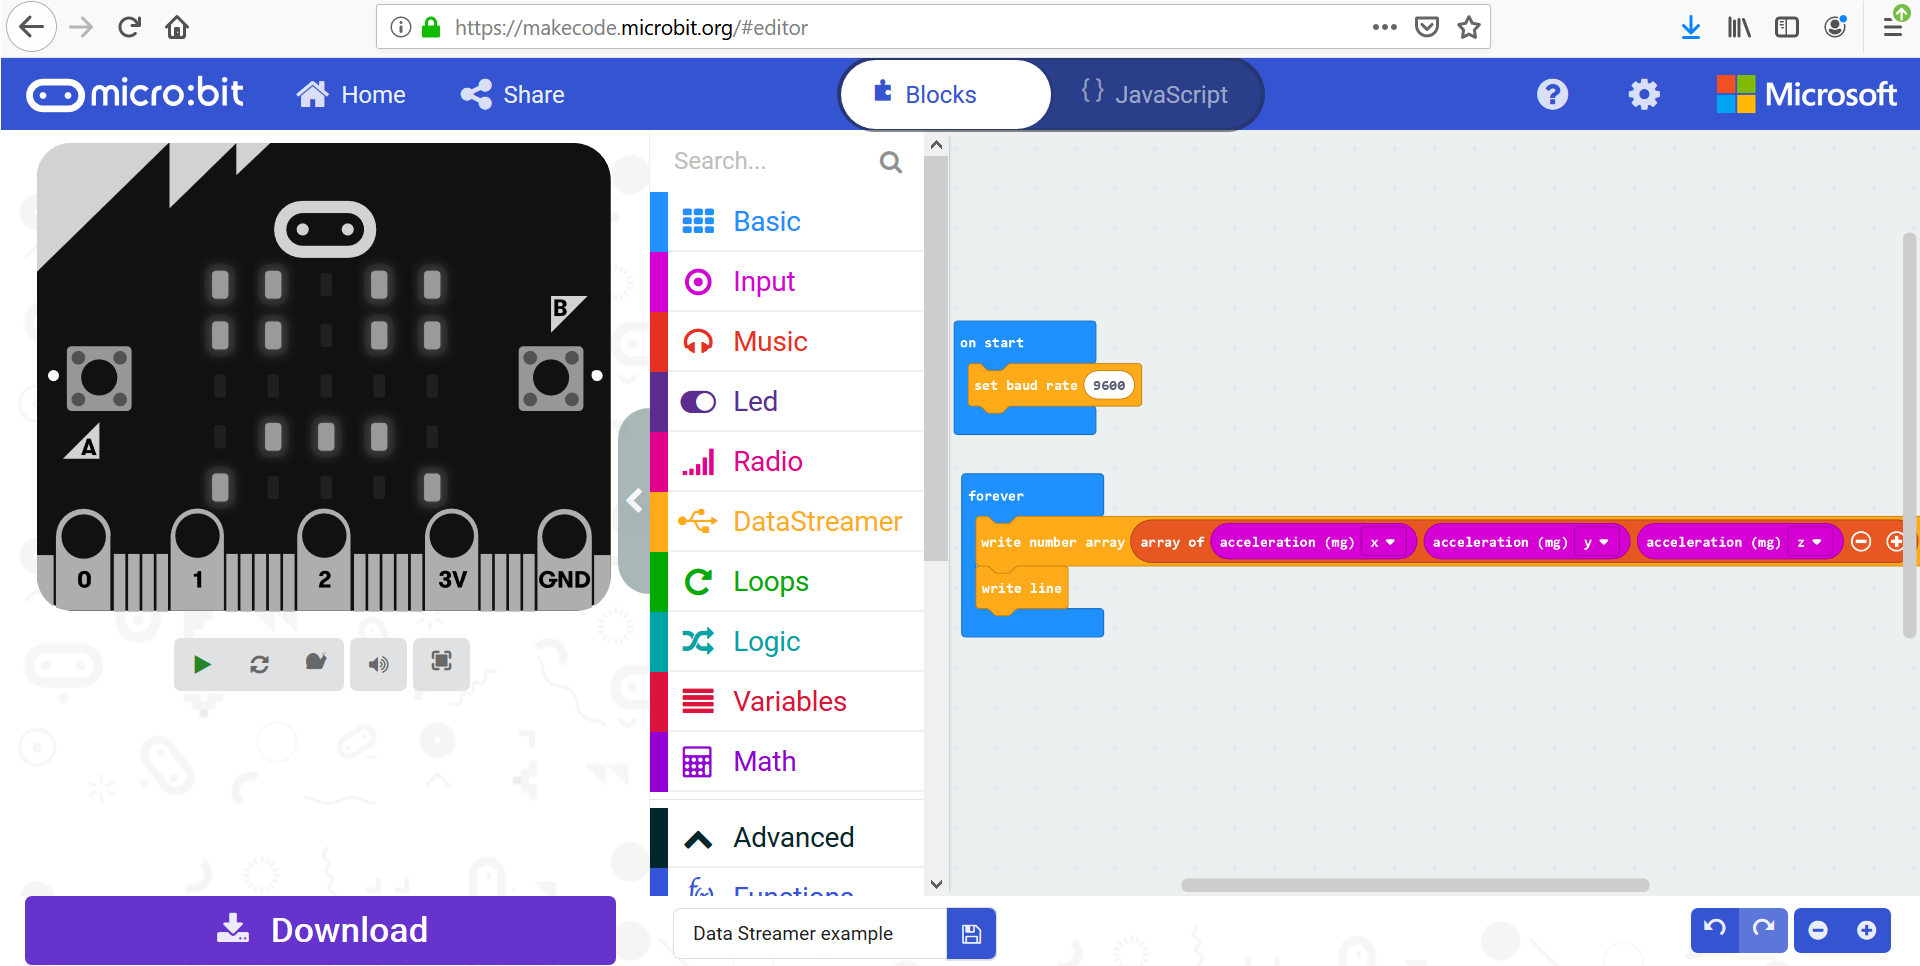
Print a new line after the array to denote the end of the data packet in Data Streamer by dragging the "write line" block from the Data Streamer section.
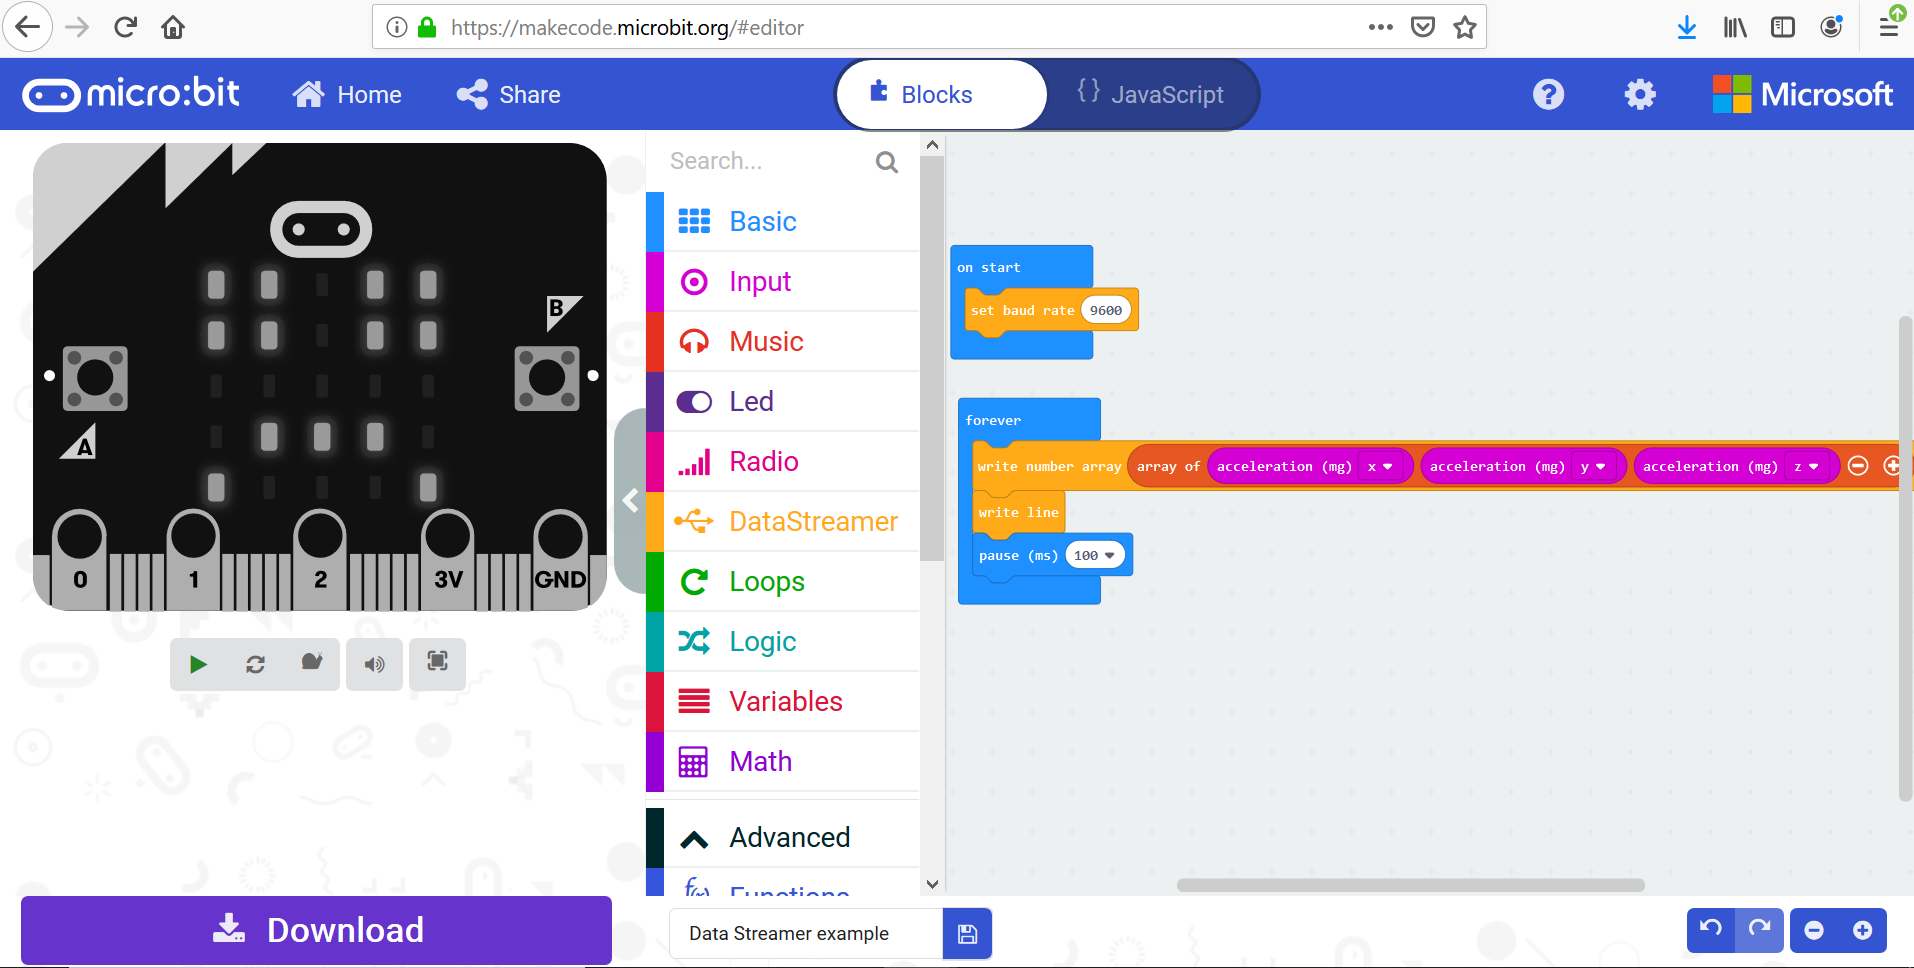
Optional: Add a pause to more easily see the data as it is printed.
Downloading Code onto the micro:bit
Once you've got the Make Code block program, you're ready to upload it to your micro:bit! You have two options.
Note
Option 1 is faster as it involves fewer steps. However, some computers might not permit you to download files directly onto the micro:bit, so you might need to use Option 2.
Option 1
Download and save the code file directly onto the micro:bit drive.
Option 2

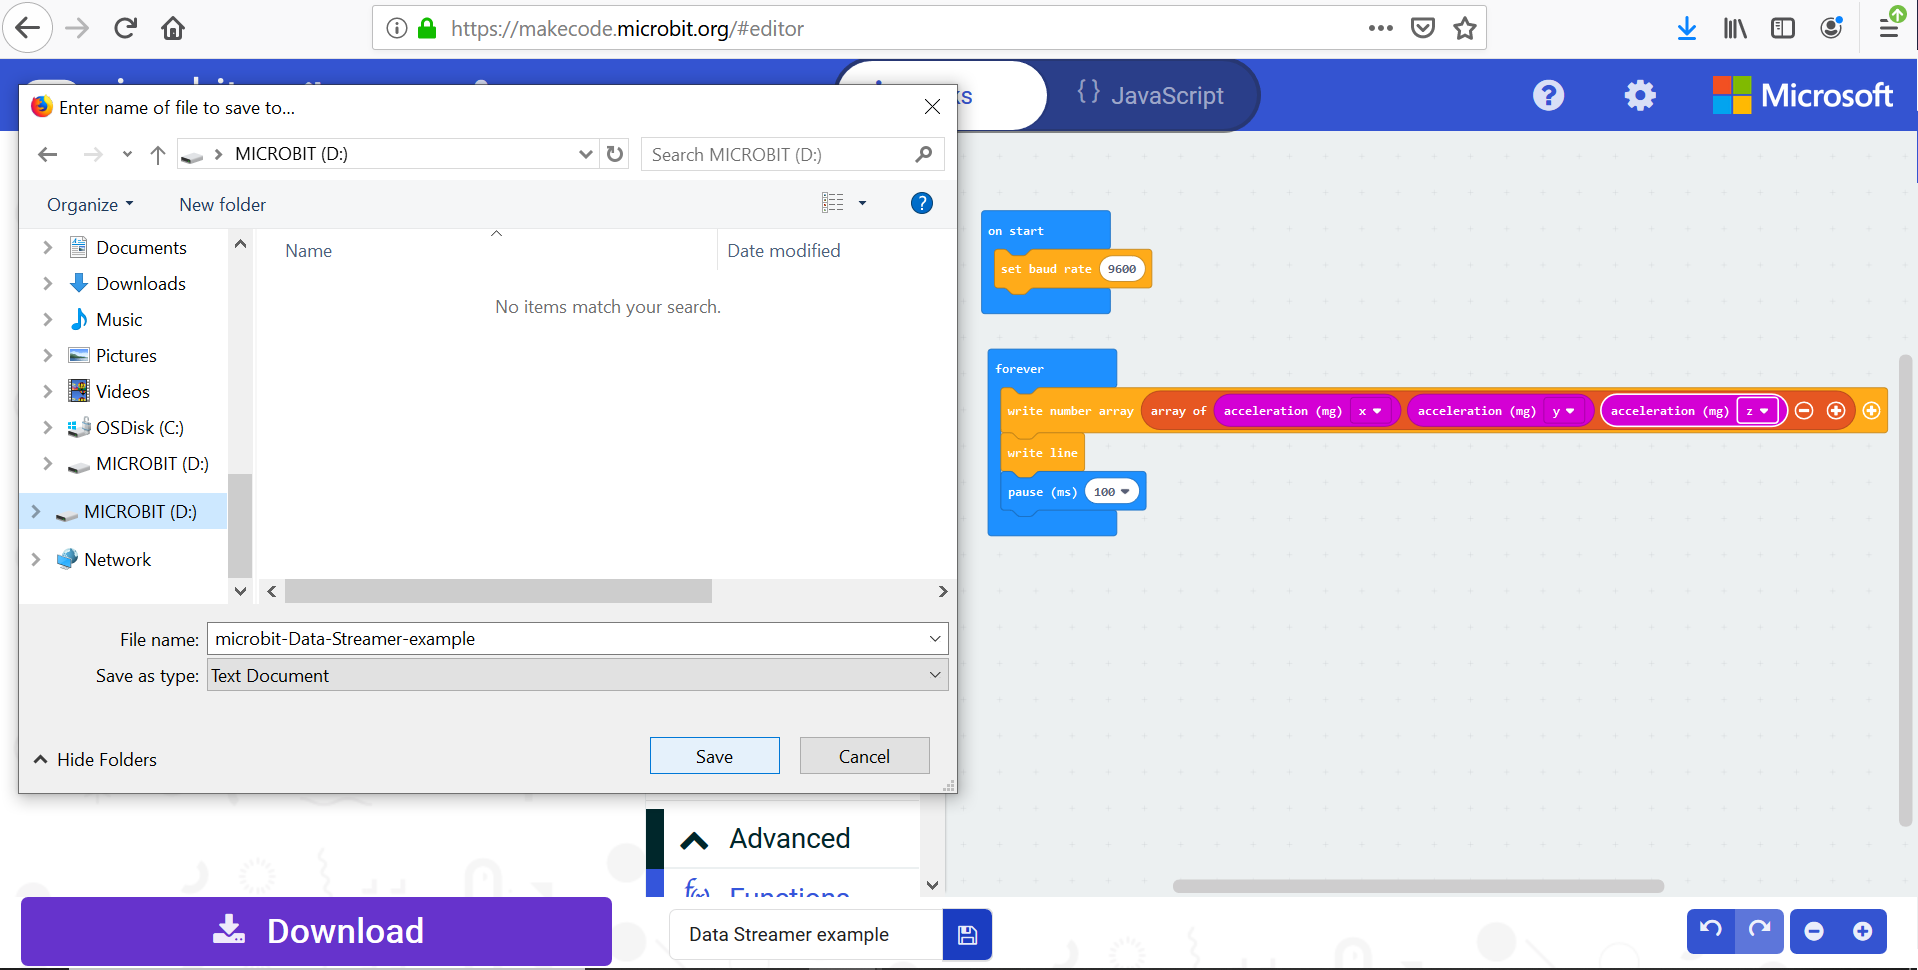
Download and save the code file into a folder on your computer.
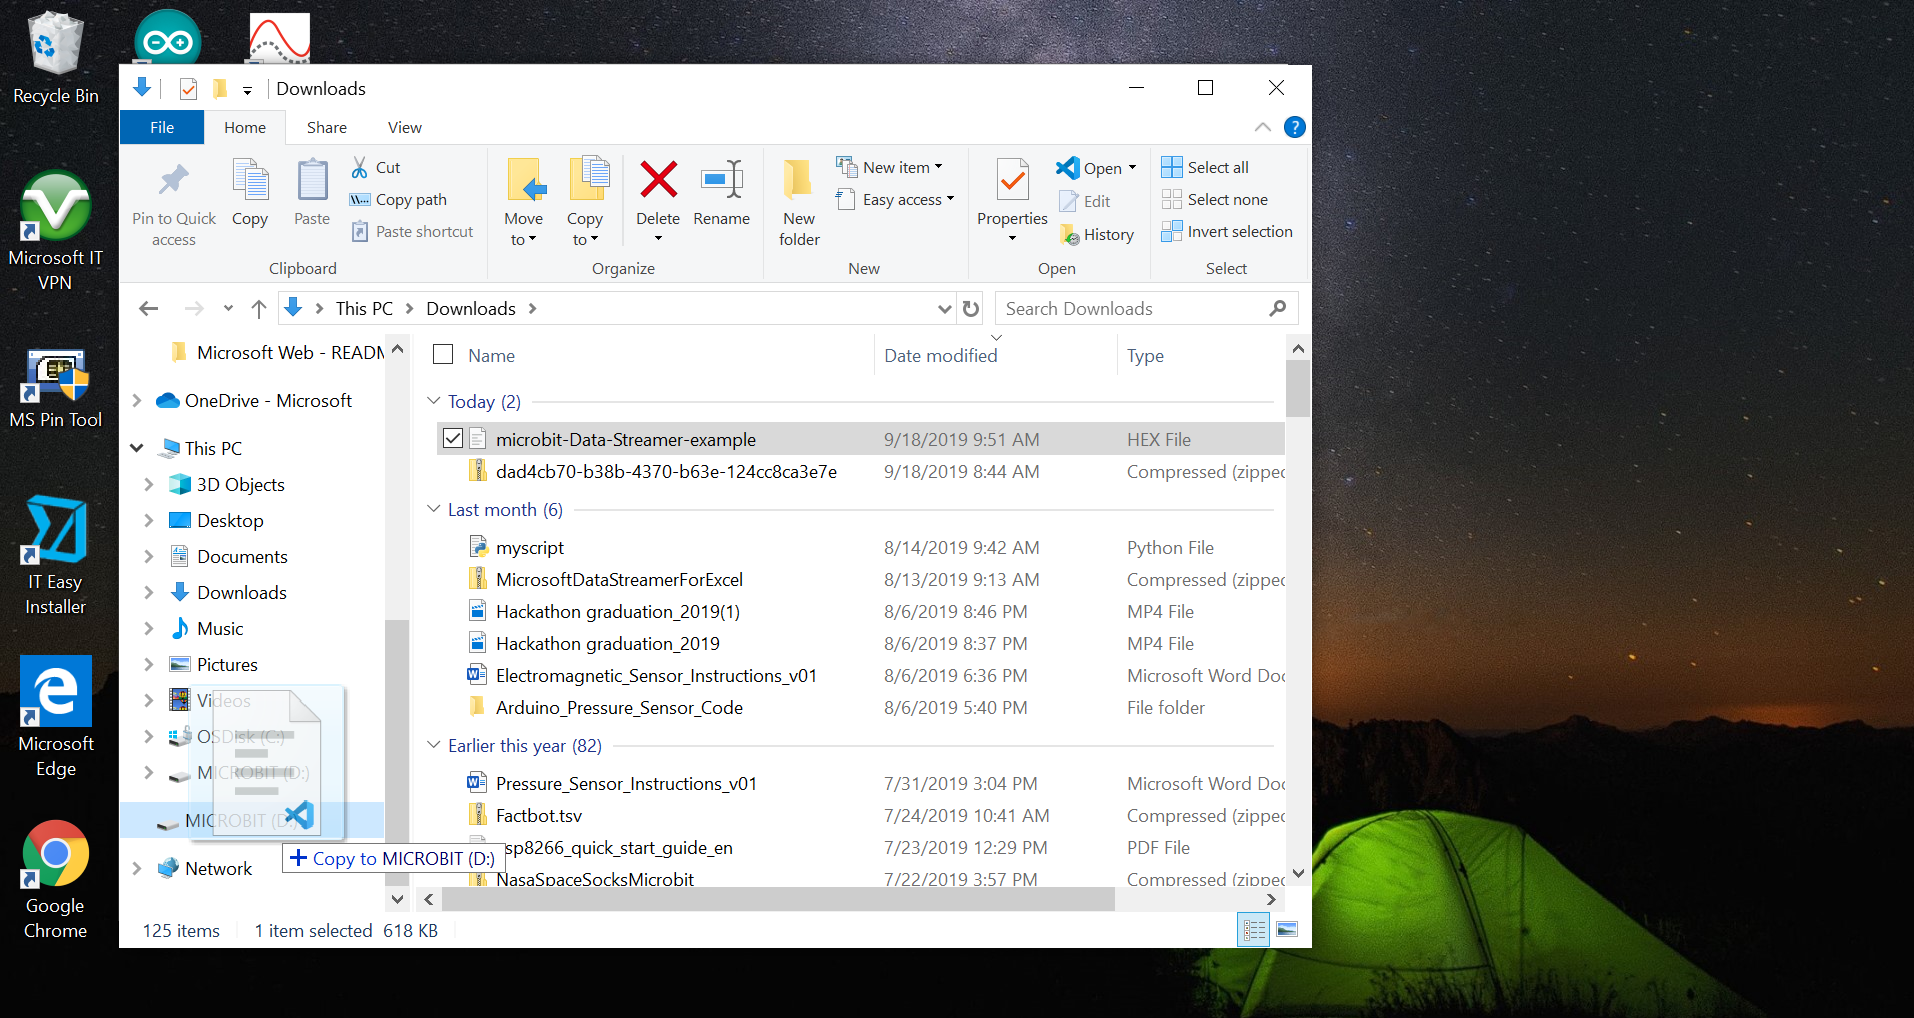
Open File Explorer, navigate to the folder in which you saved the code file, then drag the code file onto the micro:bit drive.
Using Data Streamer
You're ready to use Data Streamer! Open Excel and navigate to the Data Streamer tab.
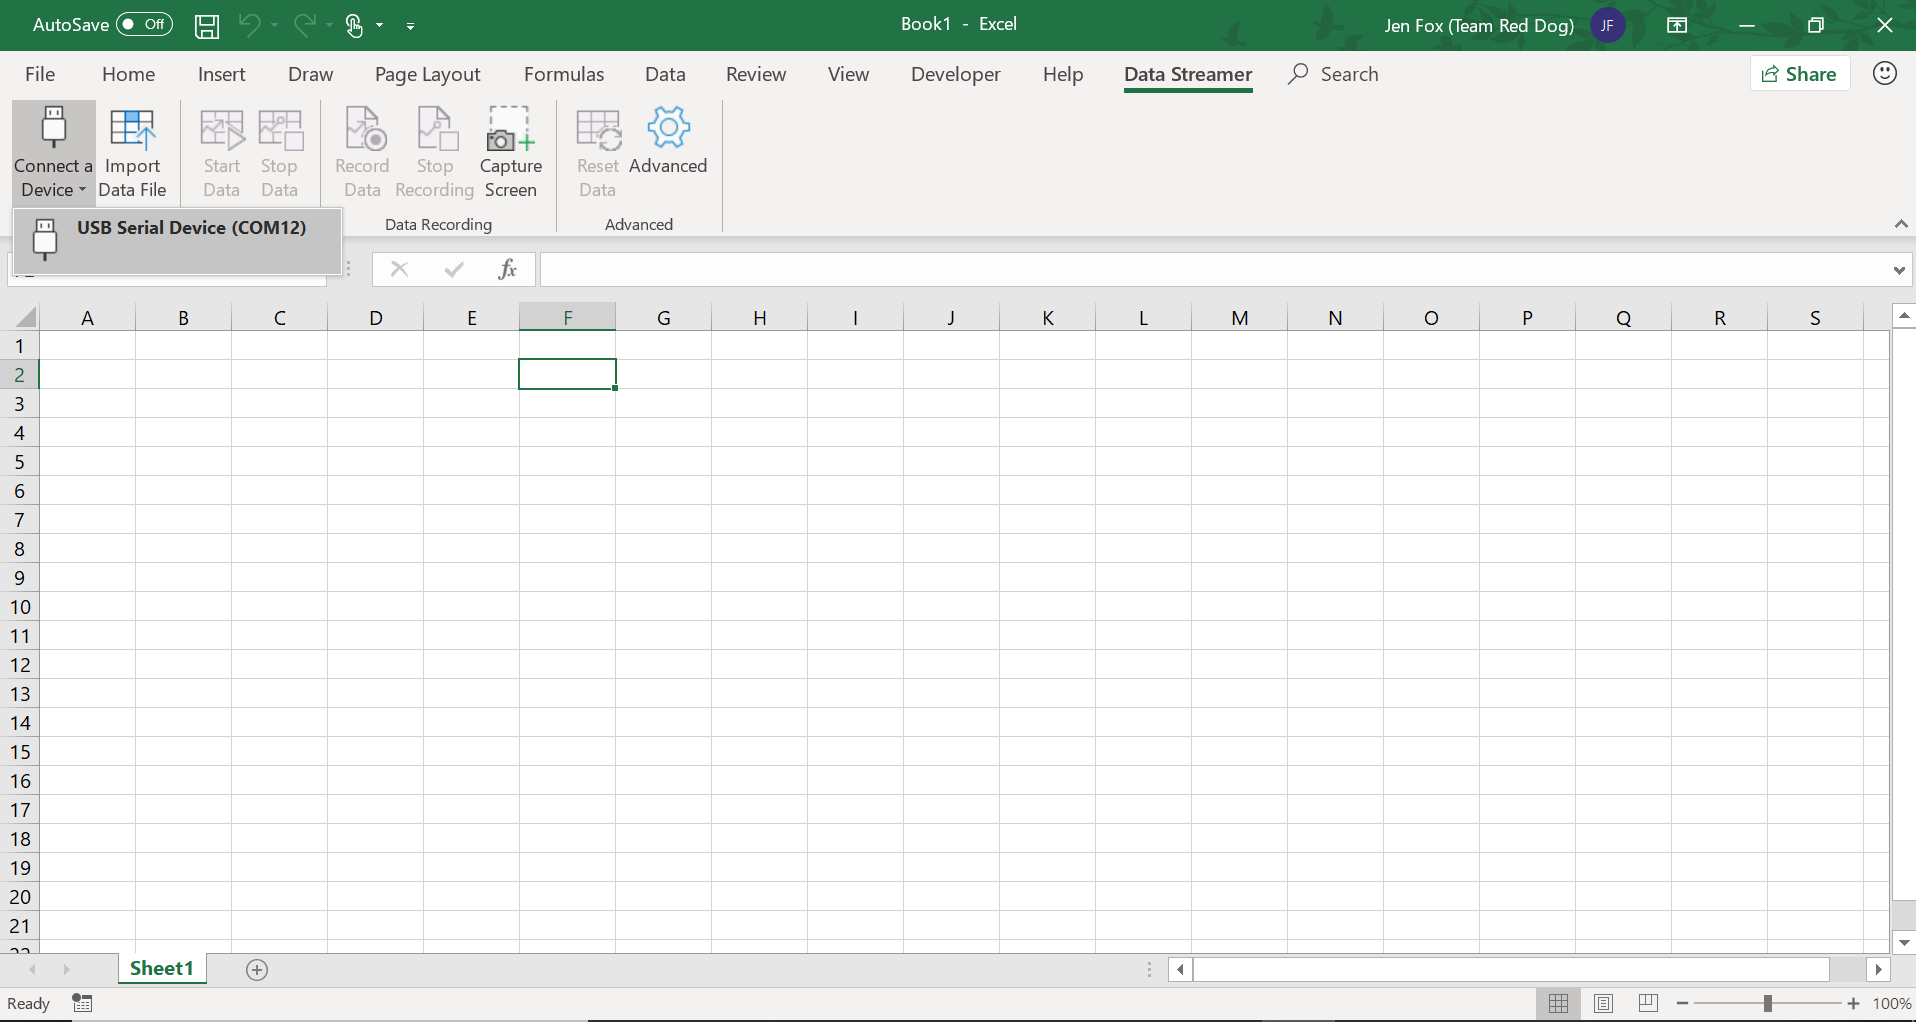
- Select "connect your device" to select the micro:bit USB device.
[!!NOTE] If you see more than one device listed, unplug your micro:bit and observe which one disappears, then reconnect and select that USB device.
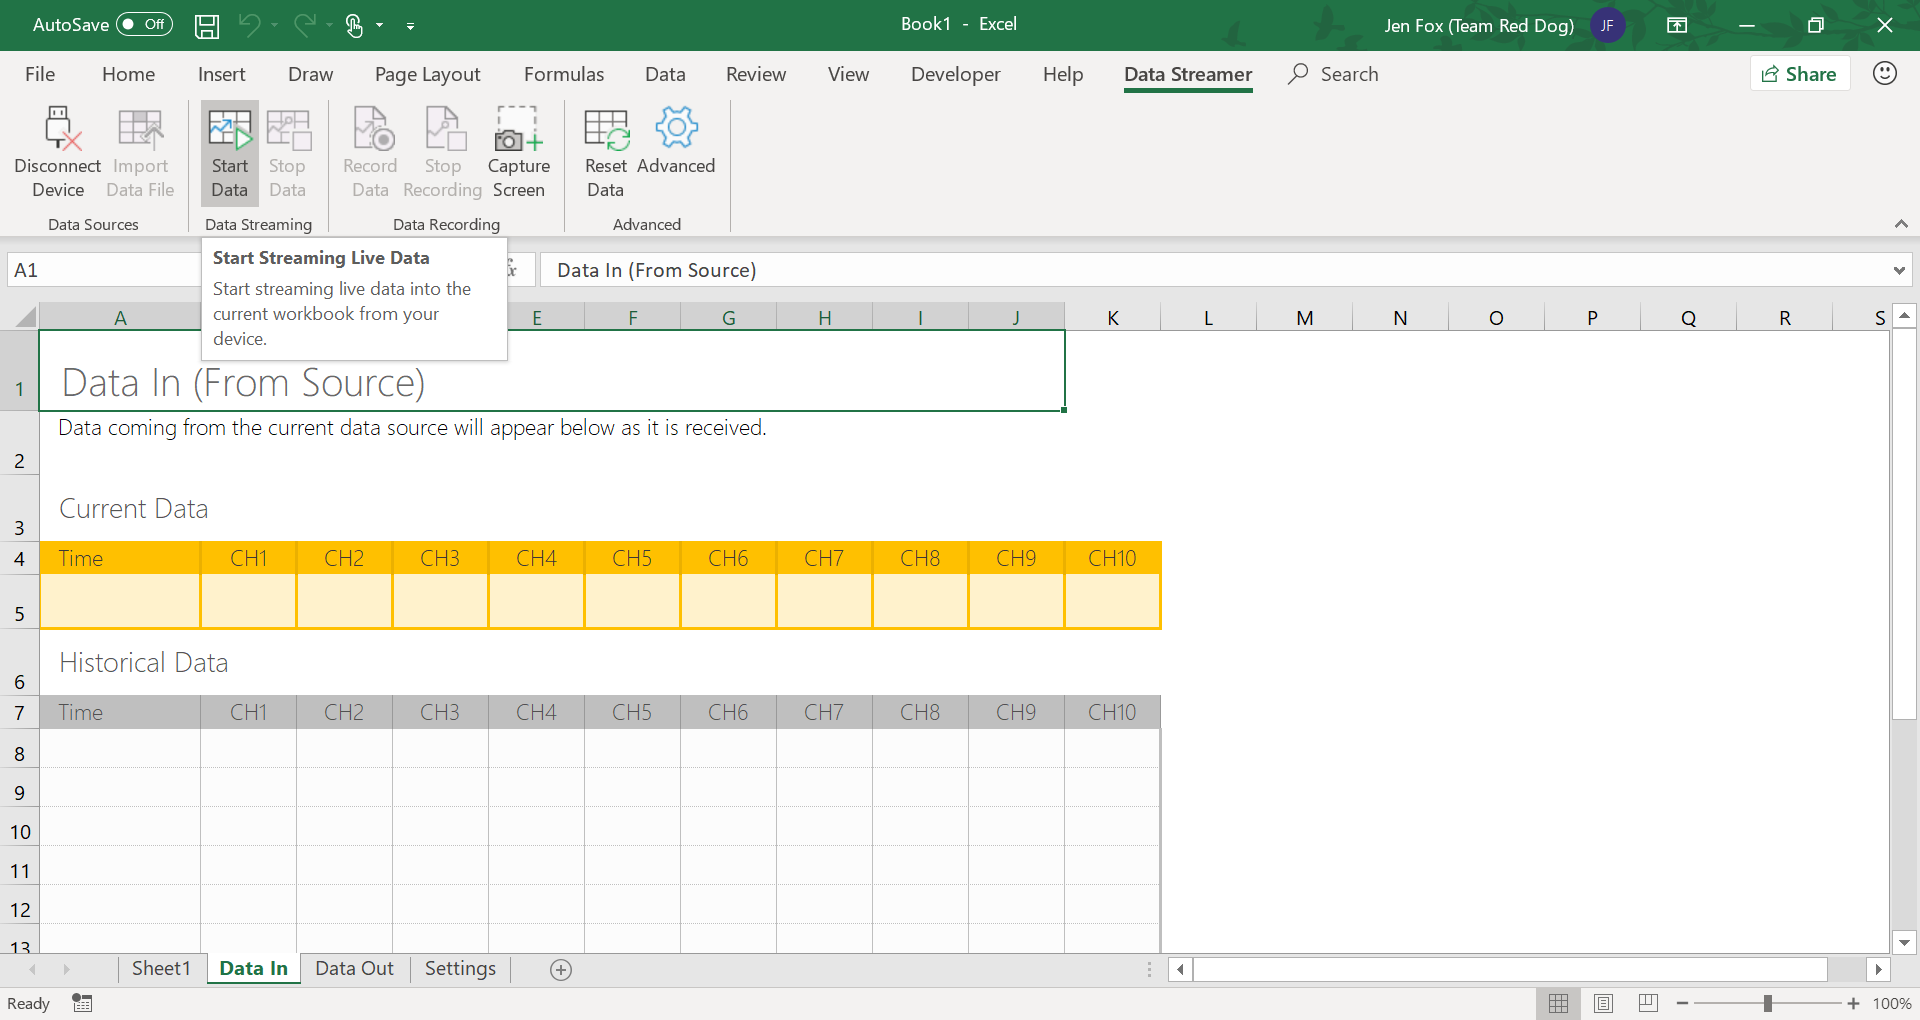
Select "start data" in the Data Streamer tab and navigate to the Data In sheet to see micro:bit accelerometer data printed in three separate columns.
You can plot the data to more easily observe changes over time and do data analysis with Excel’s built-in functions.
More to Explore
Excel Data Analysis
Experiment with different data visualization tools and built-in equations for data analysis. Here are some helpful Excel guides:
- Visualize Streaming Data in Excel
- Create Macros for Streaming Data
- Creating a Data Table
- Create a Trial Storage Table
HackingSTEM Projects
Check out the full HackingSTEM activity library here.
Reach out to us if you have any questions, comments, or ideas! We also love seeing what folks build with our projects, so share your creations and tag us on social media!