Note
Access to this page requires authorization. You can try signing in or changing directories.
Access to this page requires authorization. You can try changing directories.
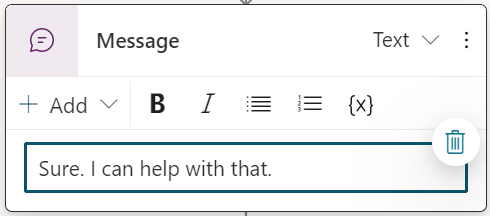
The Message node, within the flow of a topic, sends a message from the agent to the user. Messages can be simple text messages, but they can also include richer components, such as images, videos, quick replies, and cards.
Tip
All capabilities of the Message node are also available to the Question node.
Send a text message
Open the desired topic.
Select the Add node icon
 under the node after which you want your agent to send a message, and select Send a message.
In the text box, enter the message you want the agent to send.
Optionally, use the tools in the node's menu bar to add:
- basic formatting (bold, italic, bulleted, numbered)
- variables
- message variations and speech overrides
- images
- videos
- basic cards
- Adaptive Cards
- quick replies
Tip
Rename nodes to make them easier to identify. Select the node's name field to update the name directly, or select the three dots (…) of the node and select Rename from the menu. You can also rename nodes in the code editor.
It's not possible to rename Trigger nodes and Go to step nodes.
Node names can be up to 500 characters in length.
Insert a variable in a message
Select the desired message.
In the node's menu bar, select the Insert variable icon ({x}).
In Select a variable, switch to the tab that matches the scope of the variable you want to use. Learn more in Variables overview.
Select the desired variable (use the search box, if needed).
Use message variations
When you add message variations, the agent randomly picks one of them to use each time the node is triggered.
Add a message variation
In the node's menu bar, select Add, and then select Message variation.
Enter what you want the agent to say in the text box. Selecting outside of the Message node adds your variation to the list of messages.
Repeat these steps to add more variations.
Remove a message variation
Select a Message node with a variation.
Select the variation you want to remove, then select the Remove variation icon
 in the corner.
Add an image
To add an image, you need a URL-hosted image.
In the node's menu bar, select Add and select Image.
In the Image properties panel, enter the URL of your image.
Optionally, enter a title for the image.
Add a video
In the node's menu bar, select Add, and then select Video.
In the Video properties panel, under Media URL, enter the URL of your video. The URL can either be a direct link to a publicly accessible MP4 file or a YouTube URL.
Optionally, enter a Title, Subtitle, Image URL (the URL of a publicly accessible image file), or Text to be shown alongside the video on the card. You can also add buttons, which have the same properties as quick replies.
Add a basic card
A basic card is a general-purpose card used for adding text, images, and interactive elements to an agent response message.
In the node's menu bar, select Add, and then select Basic card.
In the Basic Card properties panel, fill in the properties for the content of your card. You can also add buttons, which have the same properties as quick replies.
Add an Adaptive Card
If a message node informs users of your store's hours, you could, for example, create an Adaptive Cards showing the hours with an image of the store. Adaptive Cards are platform-agnostic cards that you can customize. In the Adaptive Card designer, you can build an Adaptive Card from elements or author the JSON payload for your card directly in the card payload editor.
In the node's menu bar, select Add, and then select Adaptive card.
In the Adaptive Card properties panel, select Edit adaptive card. The Adaptive Card designer opens.
Enter the JSON literal for your card in the card payload editor pane, and select Save. A preview of the card appears on your Message node.
View multiple media cards in the same node and remove a card
If you add two or more media cards to a node, the following display options are available:
- Carousel (default) displays one card at a time.
- List displays all cards as a vertical list.
To present your cards as a vertical list, select one of the cards and select the List icon ![]() on the menu bar of the node. Proceed in the same fashion, selecting the Carousel icon
on the menu bar of the node. Proceed in the same fashion, selecting the Carousel icon ![]() if you want to present your cards as a carousel.
if you want to present your cards as a carousel.
To remove a card, select it and then select the Remove icon ![]() in the corner of the card.
in the corner of the card.
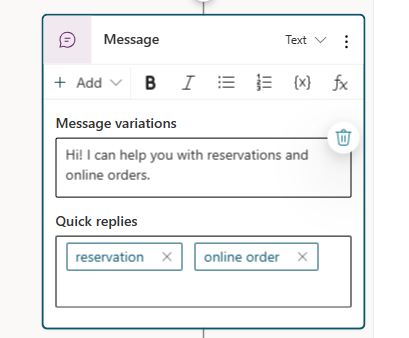
Use quick replies
Important
- Some channels don't support quick replies. In such cases, the quick-reply buttons aren't available during conversations with your agent.
- Some channels limit the number of quick replies shown at once.
Add quick replies to a message to suggest responses or actions to the customer. Actions taken by the customer go back to the agent.
When the customer selects a quick reply, it appears in the chat history until the agent or the customer sends another activity.
A customer can select a quick reply or type directly in the chat. To require the user to choose an option from a list, use a multiple-choice Question node instead.
Add a quick reply
In the node's menu bar, select Add and select Quick reply.
In the Quick replies box on the Message node, enter the desired quick replies, one by one.
Change the action type for a quick reply
You can configure quick replies to perform different types of actions.
Select the Quick replies box to open the Quick replies properties panel.
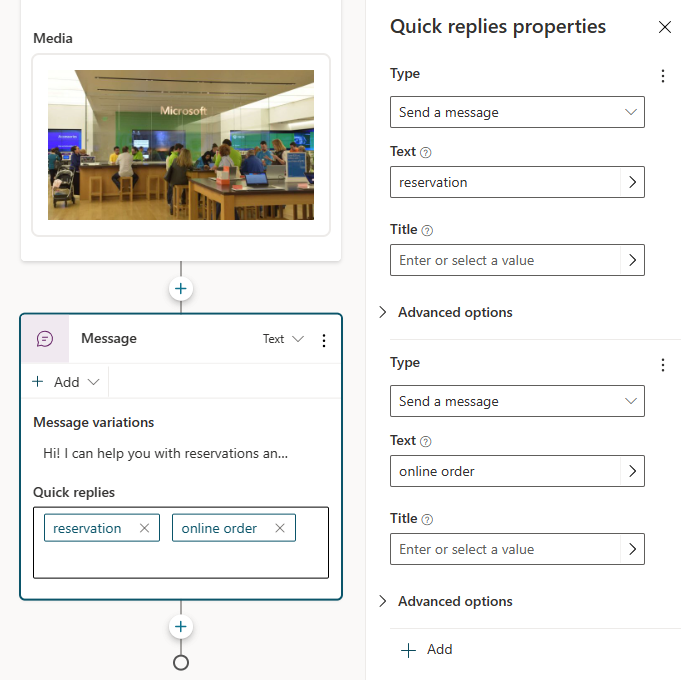
Select the desired value for Type:
- Send a message (default): Send a message to the agent and show it in the chat history.
- Open URL: Open a URL. The URL must start with
https://. - Make a call: Call a phone number. Enter the prefix
PhoneNumber:immediately followed by the desired phone number—for example,PhoneNumber:1234567890. - Send a hidden message to the agent: Send a message to the agent, but hide it from the chat history.
Different properties appear, depending on the type you select. To see more properties, expand Advanced options.
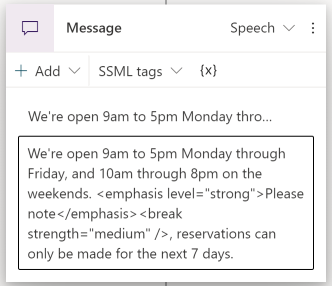
Add a speech message override
On voice-enabled channels such as Omnichannel for Customer Service, the message text is used for both text display and voice. However, you can override the text message with a different one for speech.
Select the desired Message node.
In the upper-right corner, expand the selector and select Speech.
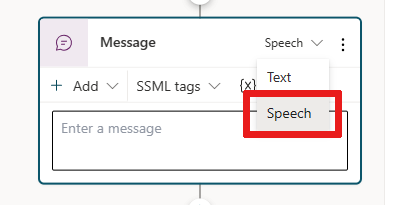
Enter what you want the agent to say.
Optionally, add variations for the speech message.
Optionally, add SSML to your speech message (and variations, if any) to control how the agent speaks the message.
Use SSML to customize speech responses
Speech Synthesis Markup Language (SSML) is an XML-based markup language that specifies how text is converted into synthesized speech. SSML is one of the many ways Copilot Studio can make your agent's responses sound like natural speech.
Select the speech message you want to customize.
In the menu bar, expand SSML tags, and then select the tag you want to add.
SSML tag Description Audio Add prerecorded audio. Break Insert pauses or breaks between words. Emphasis Add levels of stress to words or phrases. Prosody Specify changes to pitch, contour, range, rate, and volume. You can add multiple tags to a single speech message. You can also manually enter SSML tags that don't appear on the menu. Learn more in Speech Synthesis Markup Language (SSML) overview in the Microsoft Azure AI Speech service documentation.