Note
Access to this page requires authorization. You can try signing in or changing directories.
Access to this page requires authorization. You can try changing directories.
Users can sign in to Office, and your Office Web Add-in can take advantage of this sign-in process to authorize users to your add-in and to Microsoft Graph without requiring users to sign in a second time. This article walks you through the process of enabling single sign-on (SSO) in an add-in.
The sample shows you how to build the following parts:
- Client-side code that provides a task pane that loads in Microsoft Excel, Word, or PowerPoint. The client-side code calls the Office JS API
getAccessToken()to get the SSO access token to call server-side REST APIs. - Server-side code that uses ASP.NET Core to provide a single REST API
/api/files. The server-side code uses the Microsoft Authentication Library for .NET (MSAL.NET) for all token handling, authentication, and authorization.
The sample uses SSO and the On-Behalf-Of (OBO) flow to obtain correct access tokens and call Microsoft Graph APIs. If you are unfamiliar with how this flow works, see How SSO works at runtime for more detail.
Prerequisites
Visual Studio 2019 or later.
The Office/SharePoint development workload when configuring Visual Studio.
At least a few files and folders stored on OneDrive for Business in your Microsoft 365 subscription.
A build of Microsoft 365 that supports the IdentityAPI 1.3 requirement set. You might qualify for a Microsoft 365 E5 developer subscription, which includes a developer sandbox, through the Microsoft 365 Developer Program; for details, see the FAQ. The developer sandbox includes a Microsoft Azure subscription that you can use for app registrations in later steps in this article. If you prefer, you can use a separate Microsoft Azure subscription for app registrations. Get a trial subscription at Microsoft Azure.
Set up the starter project
Clone or download the repo at Office Add-in ASPNET SSO.
Note
There are two versions of the sample.
- The Begin folder is a starter project. The UI and other aspects of the add-in that are not directly connected to SSO or authorization are already done. Later sections of this article walk you through the process of completing it.
- The Complete folder contains the same sample with all coding steps from this article completed. To use the completed version, just follow the instructions in this article, but replace "Begin" with "Complete" and skip the sections Code the client side and Code the server side.
Use the following values for placeholders for the subsequent app registration steps.
| Placeholder | Value |
|---|---|
<add-in-name> |
Office-Add-in-ASPNET-SSO |
<fully-qualified-domain-name> |
localhost:44355 |
| Microsoft Graph permissions | profile, openid, Files.Read |
Register the add-in with Microsoft identity platform
You need to create an app registration in Azure that represents your web server. This enables authentication support so that proper access tokens can be issued to the client code in JavaScript. This registration supports both SSO in the client, and fallback authentication using the Microsoft Authentication Library (MSAL).
Sign in to the Azure portal with the admin credentials to your Microsoft 365 tenancy. For example, MyName@contoso.onmicrosoft.com.
Select App registrations. If you don't see the icon, search for "app registration" in the search bar.
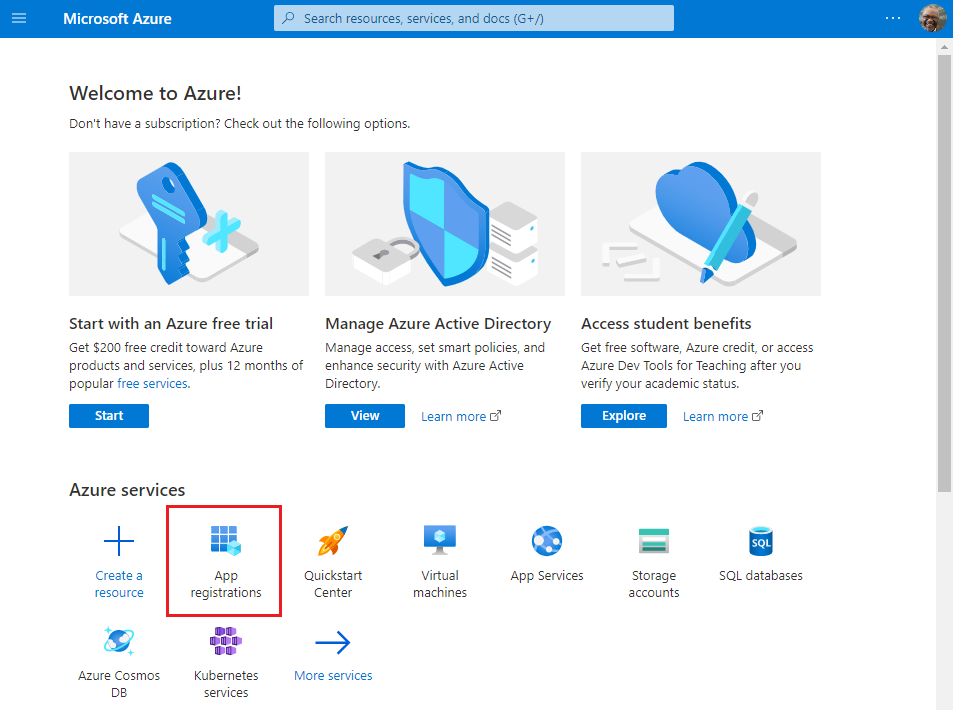
The App registrations page appears.
Select New registration.
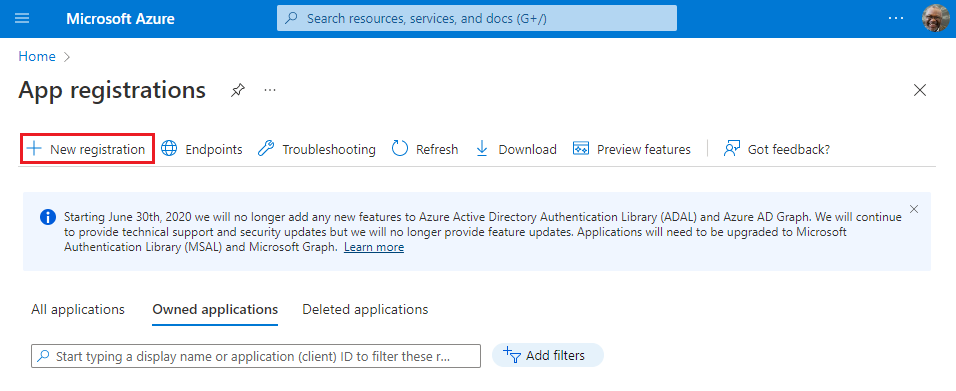
The Register an application page appears.
On the Register an application page, set the values as follows.
- Set Name to
<add-in-name>. - Set Supported account types to Accounts in any organizational directory (any Azure AD directory - multitenant) and personal Microsoft accounts (e.g. Skype, Xbox).
- Set Redirect URI to use the platform Single-page application (SPA) and the URI to
https://<fully-qualified-domain-name>/dialog.html.
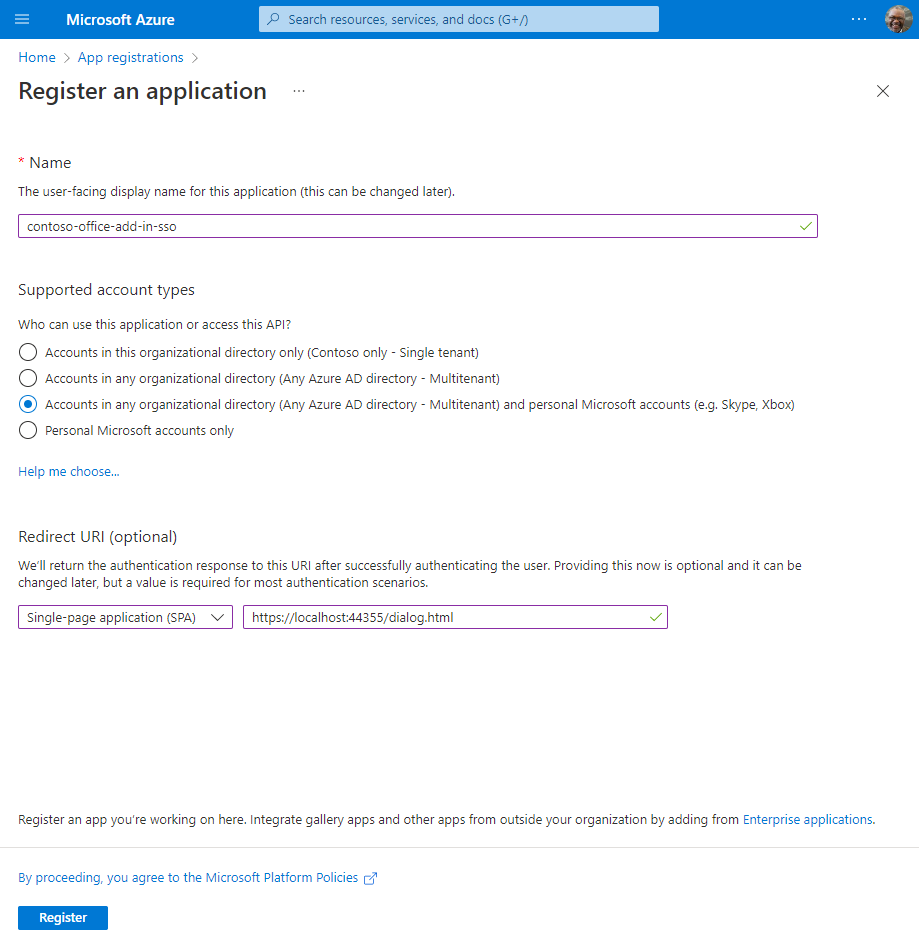
- Set Name to
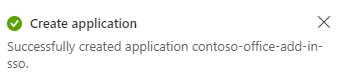
Select Register. A message is displayed stating that the application registration was created.
Copy and save the values for the Application (client) ID and the Directory (tenant) ID. You'll use both of them in later procedures.

Add a client secret
Sometimes called an application password, a client secret is a string value your app can use in place of a certificate to identity itself.
From the left pane, select Certificates & secrets. Then on the Client secrets tab, select New client secret.
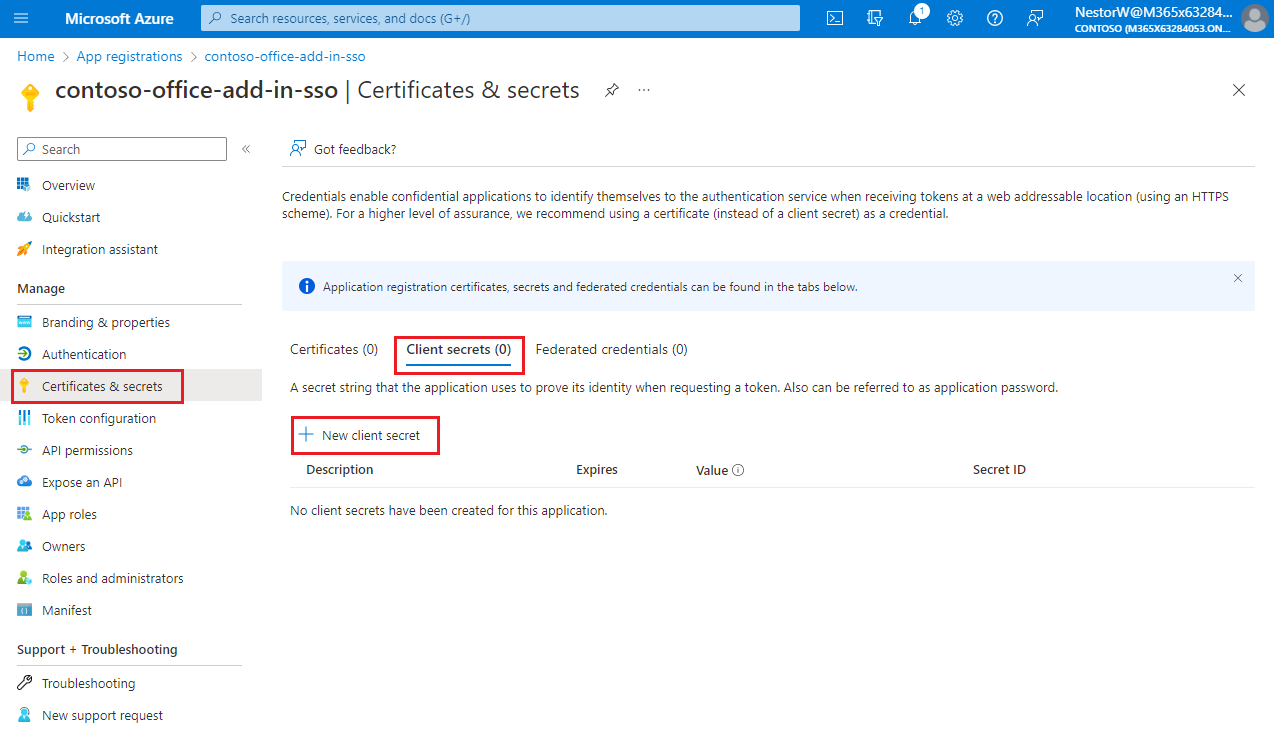
The Add a client secret pane appears.
Add a description for your client secret.
Select an expiration for the secret or specify a custom lifetime.
- Client secret lifetime is limited to two years (24 months) or less. You can't specify a custom lifetime longer than 24 months.
- Microsoft recommends that you set an expiration value of less than 12 months.
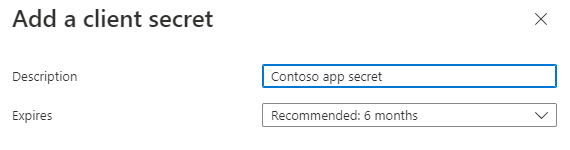
Select Add. The new secret is created and the value is temporarily displayed.
Important
Record the secret's value for use in your client application code. This secret value is never displayed again after you leave this pane.
Expose a web API
From the left pane, select Expose an API.
The Expose an API pane appears.
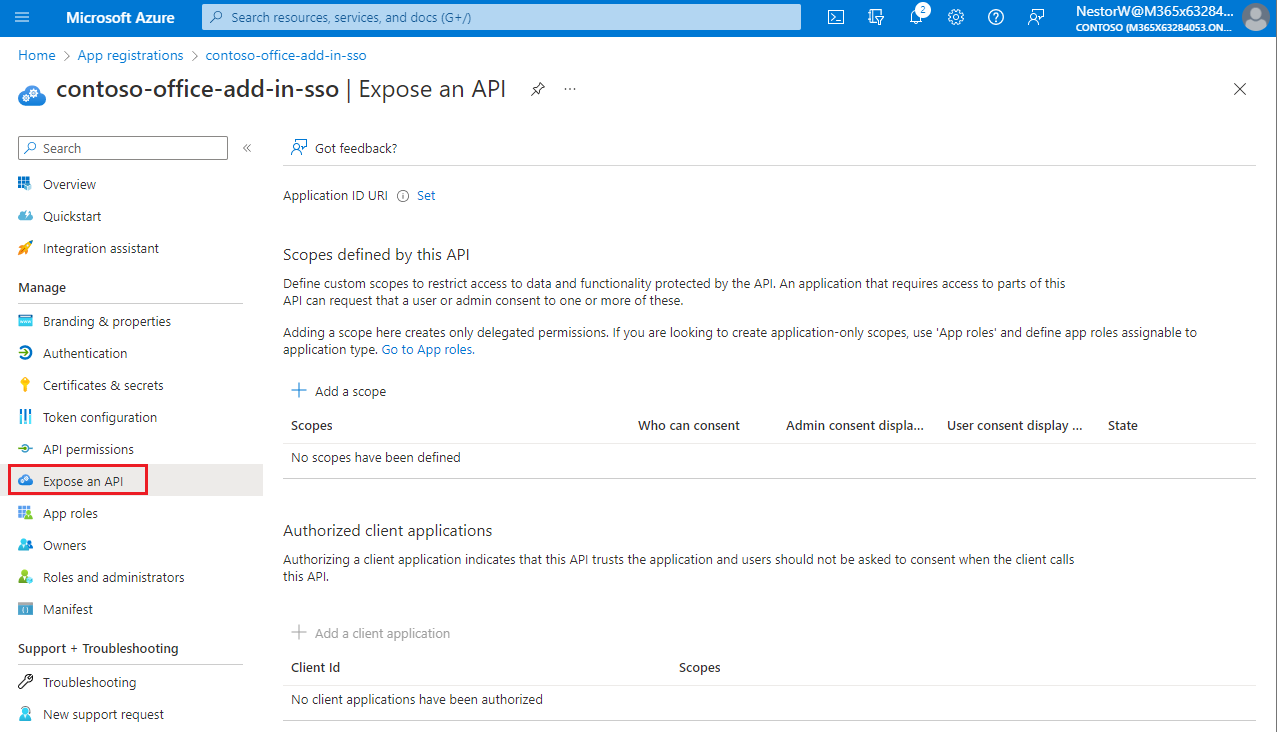
Select Set to generate an application ID URI.
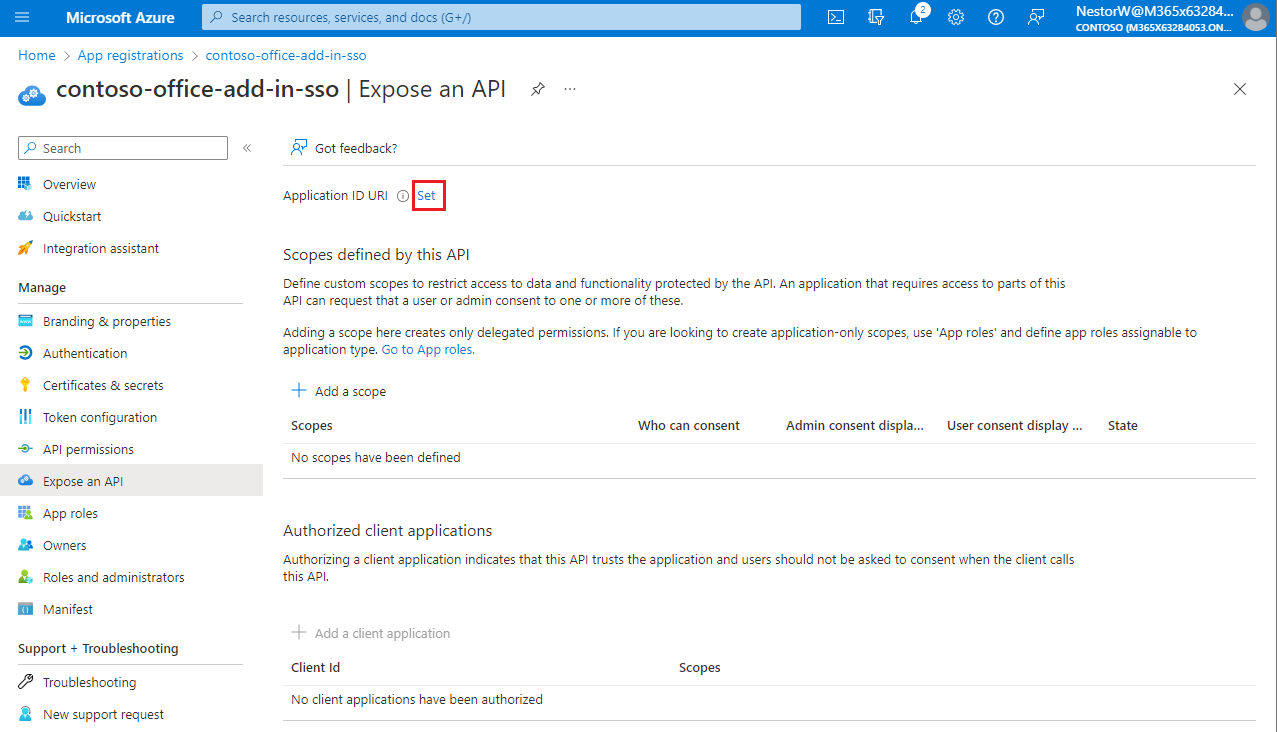
The section for setting the application ID URI appears with a generated Application ID URI in the form
api://<app-id>.Update the application ID URI to
api://<fully-qualified-domain-name>/<app-id>.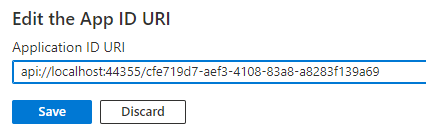
- The Application ID URI is pre-filled with app ID (GUID) in the format
api://<app-id>. - The application ID URI format should be:
api://<fully-qualified-domain-name>/<app-id> - Insert the
fully-qualified-domain-namebetweenapi://and<app-id>(which is a GUID). For example,api://contoso.com/<app-id>. - If you're using localhost, then the format should be
api://localhost:<port>/<app-id>. For example,api://localhost:3000/c6c1f32b-5e55-4997-881a-753cc1d563b7.
For additional application ID URI details, see Application manifest identifierUris attribute.
Note
If you get an error saying that the domain is already owned but you own it, follow the procedure at Add your custom domain name to your tenant to register it, and then repeat this step. (This error can also occur if you are not signed in with credentials of an admin in the Microsoft 365 tenancy. See step 2. Sign out and sign in again with admin credentials and repeat the process from step 3.)
- The Application ID URI is pre-filled with app ID (GUID) in the format
Add a scope
On the Expose an API page, select Add a scope.
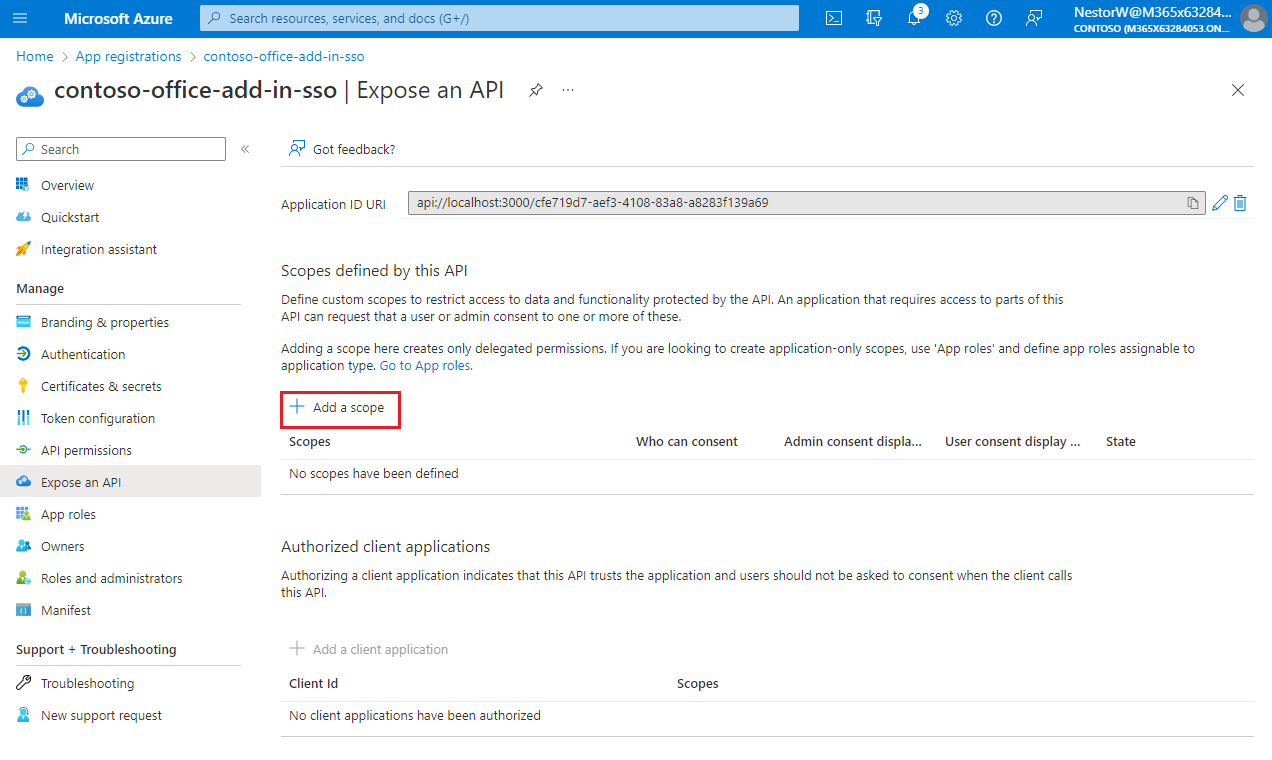
The Add a scope pane opens.
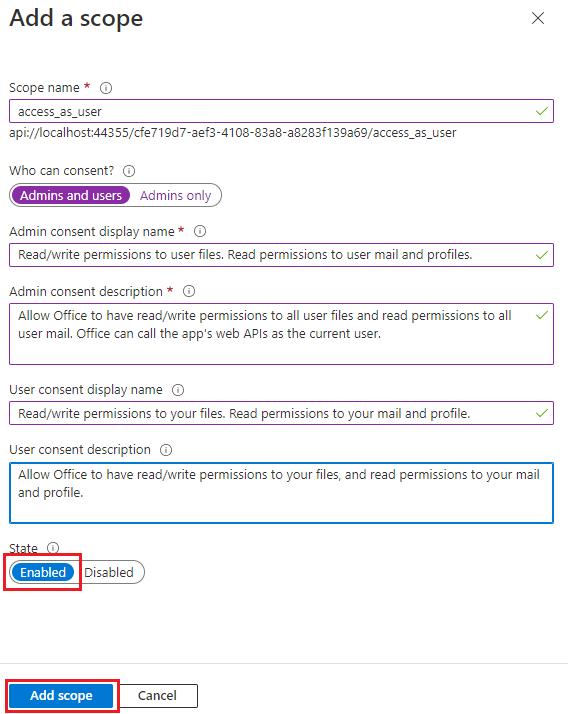
In the Add a scope pane, specify the scope's attributes. The following table shows example values for and Outlook add-in requiring the
profile,openid,Files.ReadWrite, andMail.Readpermissions. Modify the text to match the permissions your add-in needs.Field Description Values Scope name The name of your scope. A common scope naming convention is resource.operation.constraint.For SSO this must be set to access_as_user.Who can consent Determines if admin consent is required or if users can consent without an admin approval. For learning SSO and samples, we recommend you set this to Admins and users.
Select Admins only for higher-privileged permissions.Admin consent display name A short description of the scope's purpose visible to admins only. Read/write permissions to user files. Read permissions to user mail and profiles.Admin consent description A more detailed description of the permission granted by the scope that only admins see. Allow Office to have read/write permissions to all user files and read permissions to all user mail. Office can call the app's web APIs as the current user.User consent display name A short description of the scope's purpose. Shown to users only if you set Who can consent to Admins and users. Read/write permissions to your files. Read permissions to your mail and profile.User consent description A more detailed description of the permission granted by the scope. Shown to users only if you set Who can consent to Admins and users. Allow Office to have read/write permissions to your files, and read permissions to your mail and profile.Set the State to Enabled, and then select Add scope.
The new scope you defined displays on the pane.
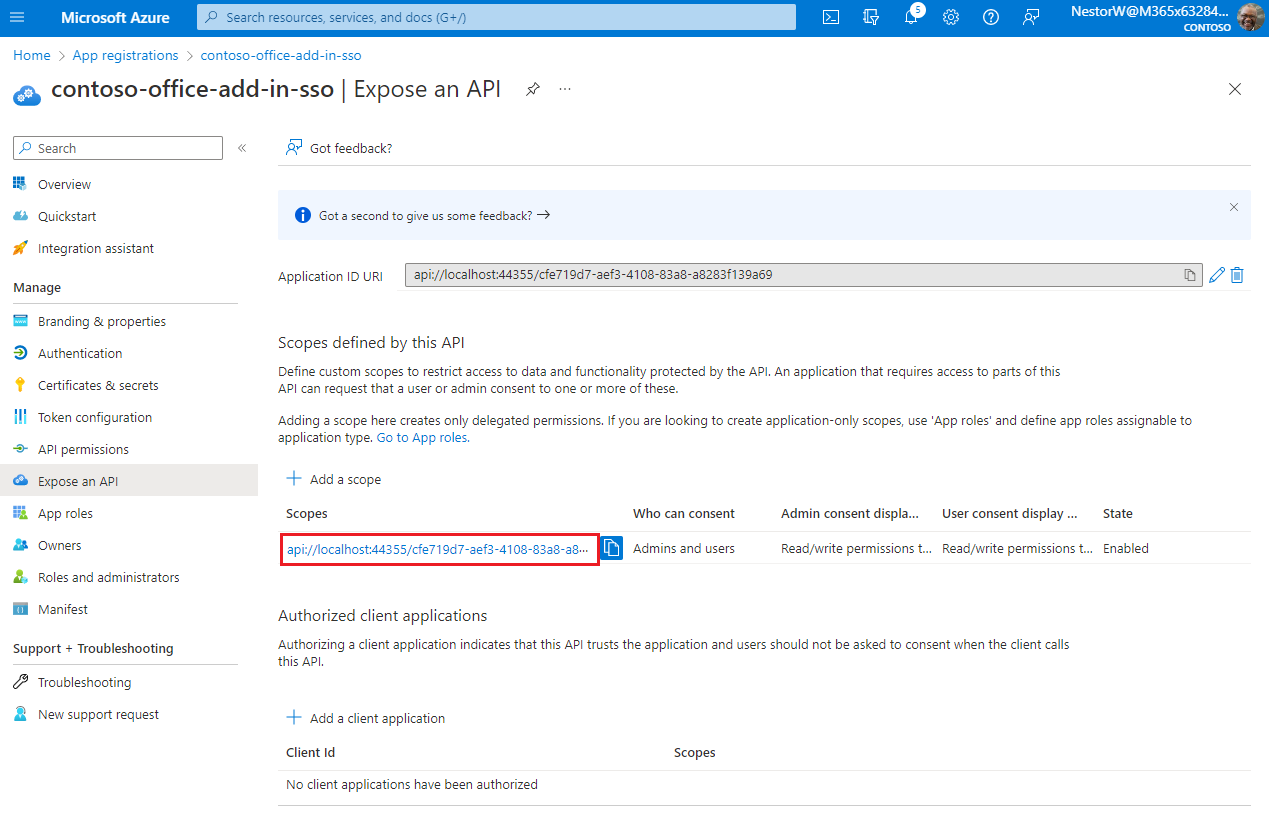
Note
The domain part of the Scope name displayed just below the text field should automatically match the Application ID URI set in the previous step, with
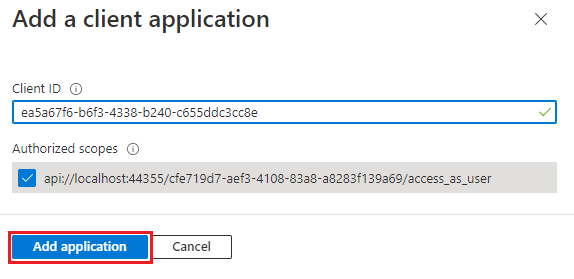
/access_as_userappended to the end; for example,api://localhost:6789/c6c1f32b-5e55-4997-881a-753cc1d563b7/access_as_user.Select Add a client application.
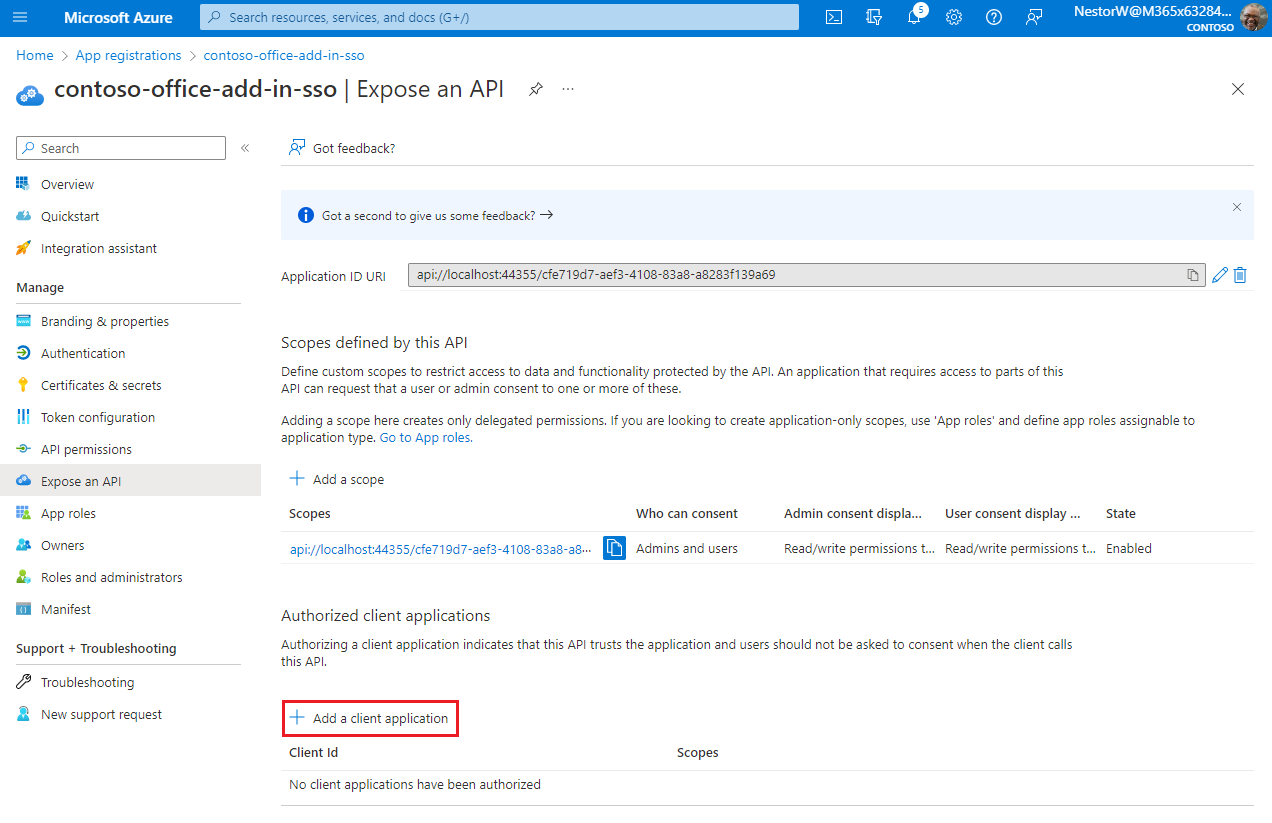
The Add a client application pane appears.
In the Client ID enter
ea5a67f6-b6f3-4338-b240-c655ddc3cc8e. This value pre-authorizes all Microsoft Office application endpoints. If you also want to pre-authorize Office when used inside of Microsoft Teams, add1fec8e78-bce4-4aaf-ab1b-5451cc387264(Microsoft Teams desktop and Teams mobile) and5e3ce6c0-2b1f-4285-8d4b-75ee78787346(Teams on the web).Note
The
ea5a67f6-b6f3-4338-b240-c655ddc3cc8eID pre-authorizes Office on all the following platforms. Alternatively, you can enter a proper subset of the following IDs if, for any reason, you want to deny authorization to Office on some platforms. If you do so, leave out the IDs of the platforms from which you want to withhold authorization. Users of your add-in on those platforms will not be able to call your Web APIs, but other functionality in your add-in will still work.d3590ed6-52b3-4102-aeff-aad2292ab01c(Microsoft Office)93d53678-613d-4013-afc1-62e9e444a0a5(Office on the web)bc59ab01-8403-45c6-8796-ac3ef710b3e3(Outlook on the web)
In Authorized scopes, select the
api://<fully-qualified-domain-name>/<app-id>/access_as_usercheckbox.Select Add application.
Add Microsoft Graph permissions
From the left pane, select API permissions.
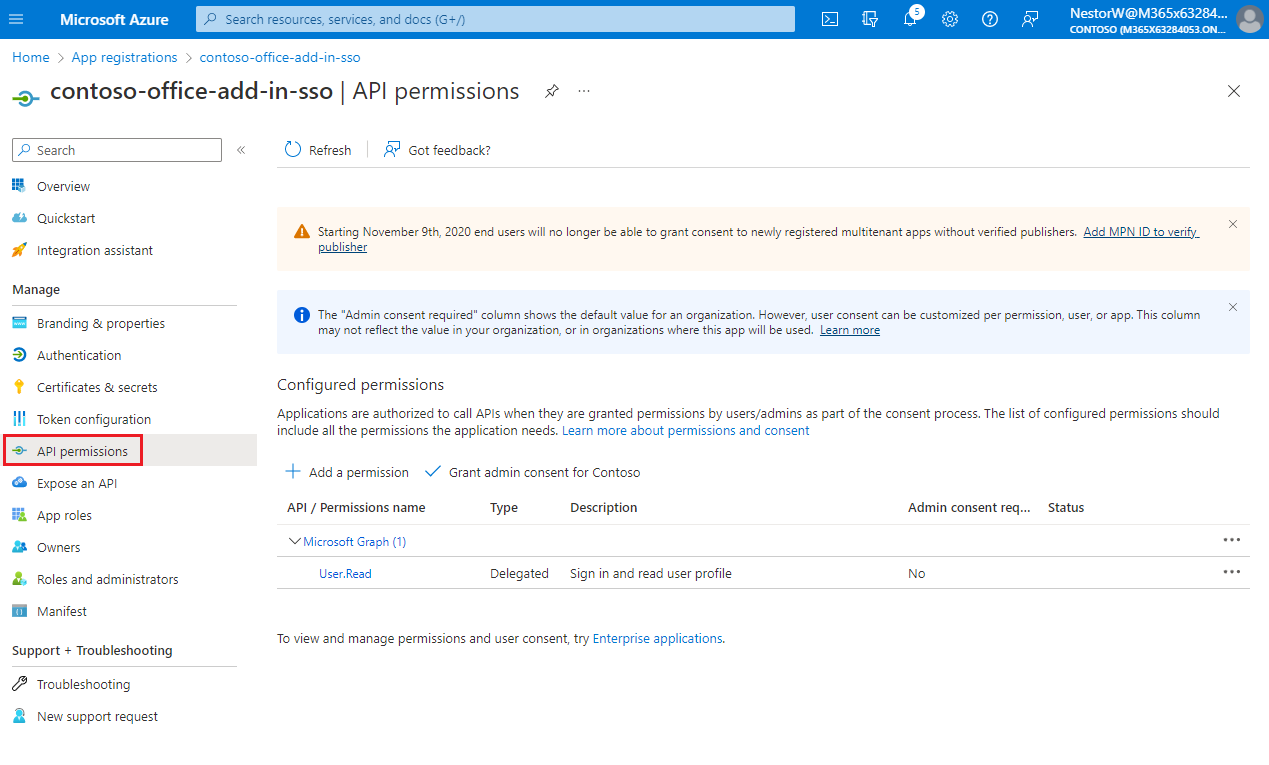
The API permissions pane opens.
Select Add a permission.
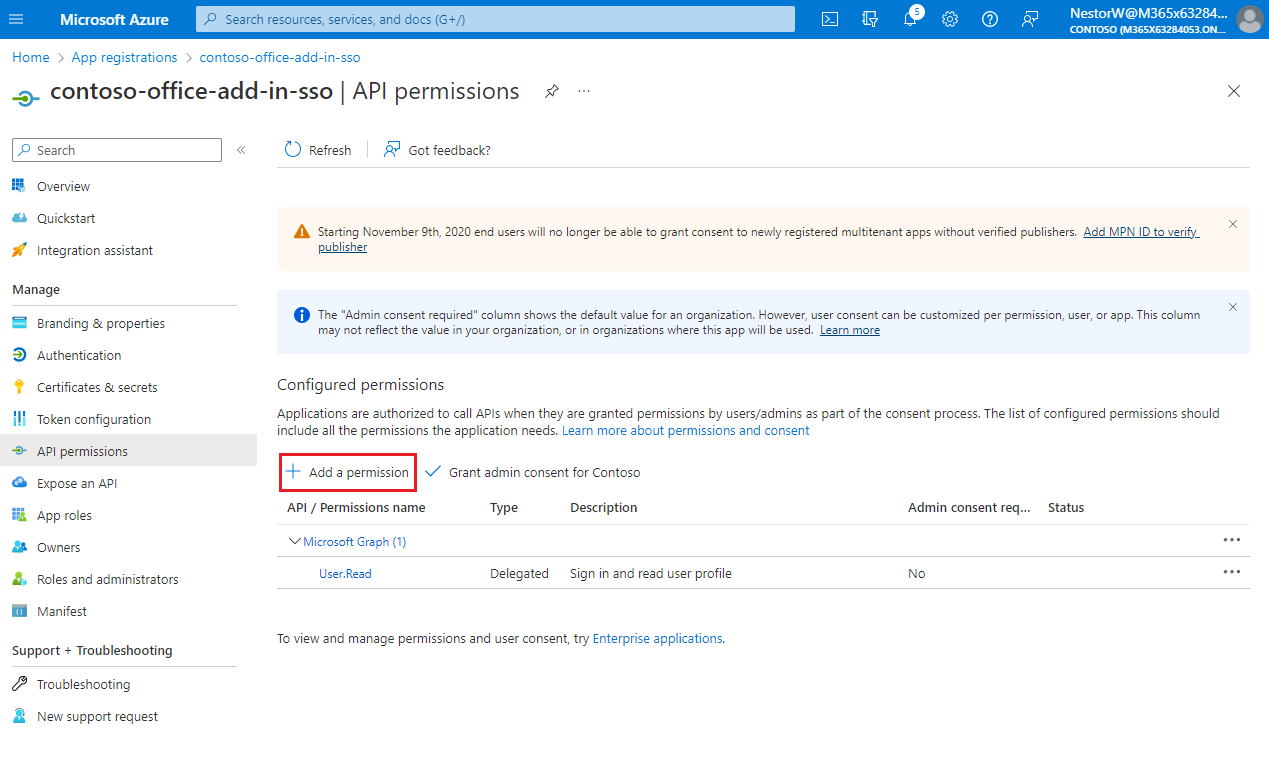
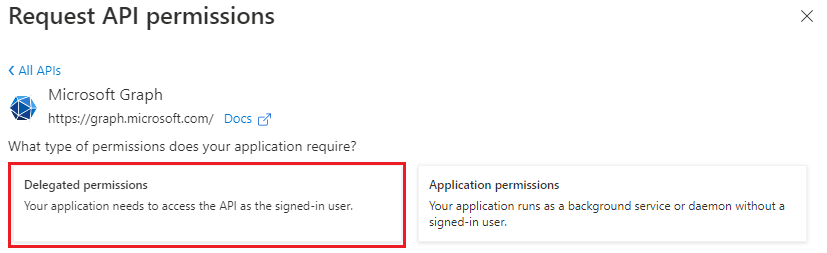
The Request API permissions pane opens.
Select Microsoft Graph.

Select Delegated permissions.
In the Select permissions search box, search for the permissions your add-in needs. For example, for an Outlook add-in, you might use
profile,openid,Files.ReadWrite, andMail.Read.Note
The
User.Readpermission may already be listed by default. It's a good practice to only request permissions that are needed, so we recommend that you uncheck the box for this permission if your add-in doesn't actually need it.Select the checkbox for each permission as it appears. Note that the permissions will not remain visible in the list as you select each one. After selecting the permissions that your add-in needs, select Add permissions.

Select Grant admin consent for [tenant name]. Select Yes for the confirmation that appears.
Configure access token version
You must define the access token version that is acceptable for your app. This configuration is made in the Microsoft Entra ID application manifest.
Define the access token version
The access token version can change if you chose an account type other than Accounts in any organizational directory (Any Azure AD directory - Multitenant) and personal Microsoft accounts (e.g. Skype, Xbox). Use the following steps to ensure the access token version is correct for Office SSO usage.
From the left pane, select Manifest.
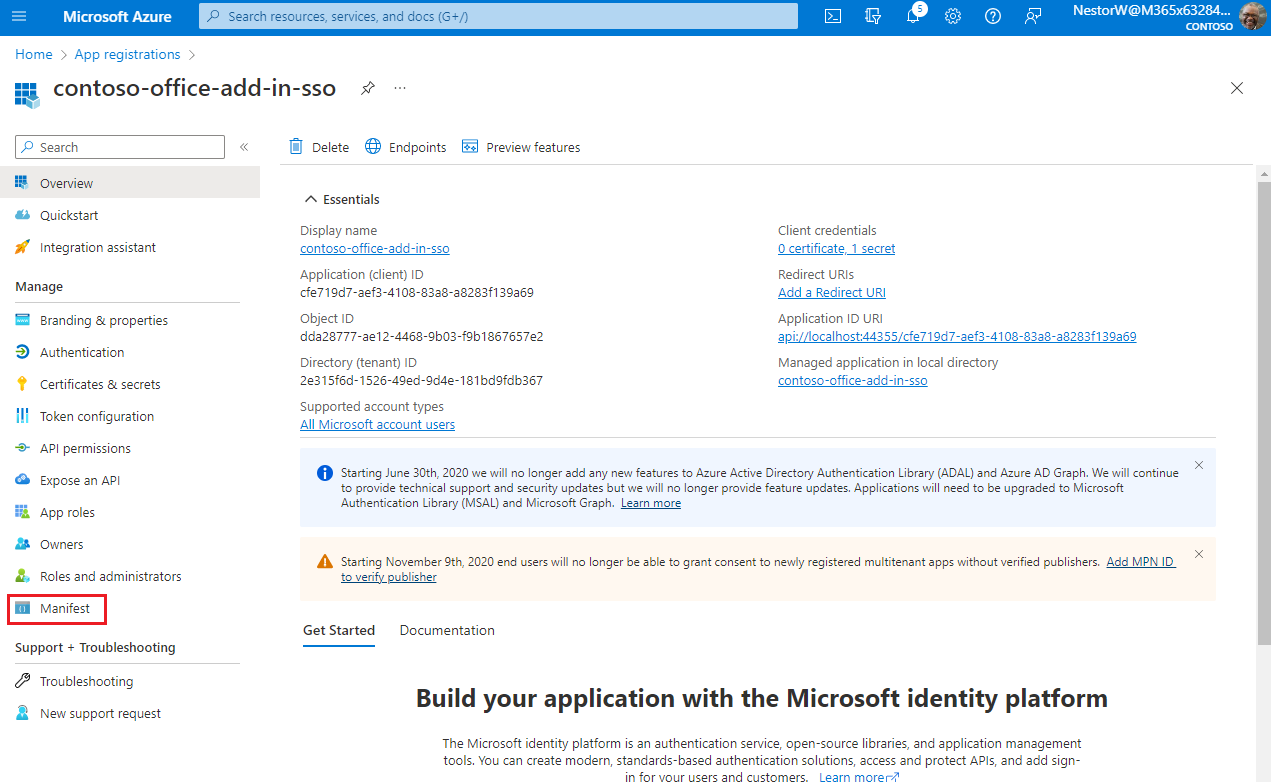
The Microsoft Entra ID application manifest appears.
Enter 2 as the value for the
requestedAccessTokenVersionproperty (in theapiobject).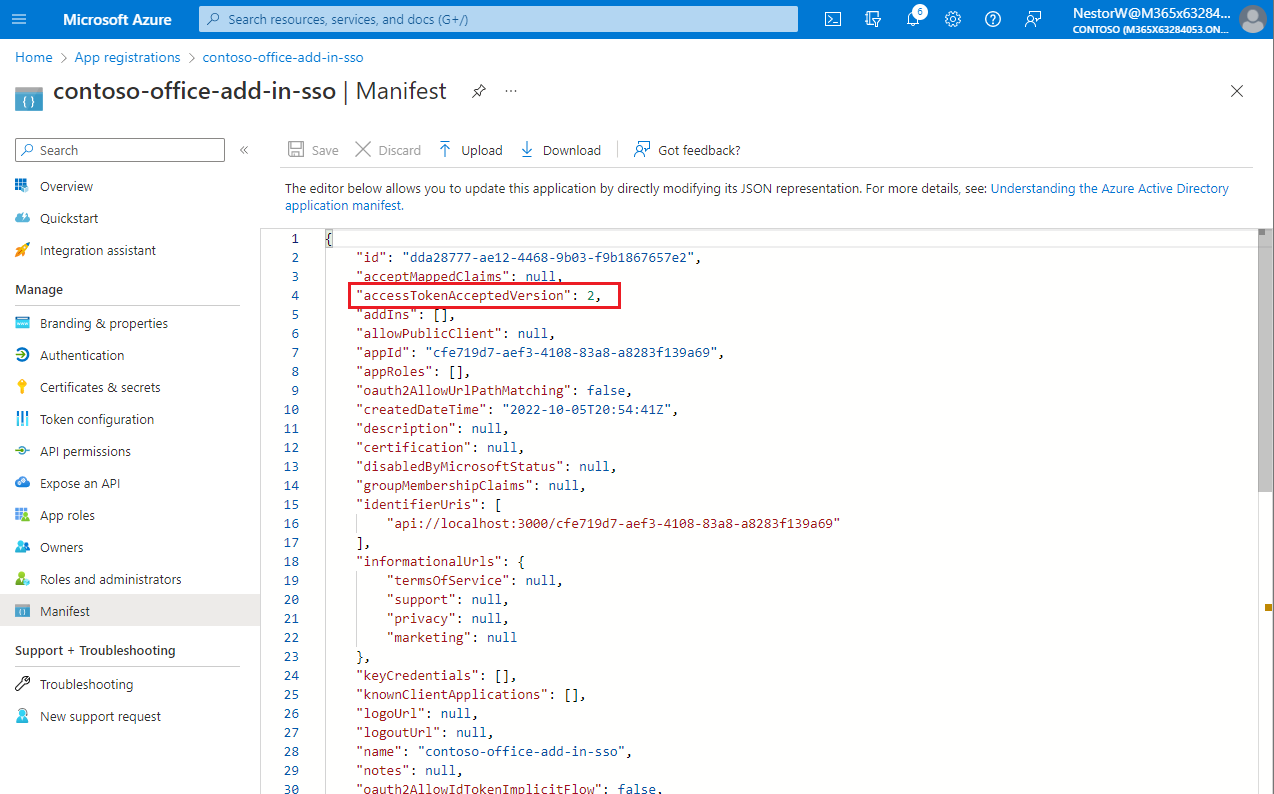
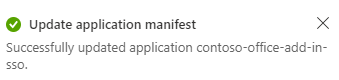
Select Save.
A message pops up on the browser stating that the manifest was updated successfully.
Congratulations! You've completed the app registration to enable SSO for your Office add-in.
Configure the solution
In the root of the Begin folder, open the solution (.sln) file in Visual Studio. Right-click (or select and hold) the top node in Solution Explorer (the Solution node, not either of the project nodes), and then select Set startup projects.
Under Common Properties, select Startup Project, and then Multiple startup projects. Ensure that the Action for both projects is set to Start, and that the Office-Add-in-ASPNETCoreWebAPI project is listed first. Close the dialog.
In Solution Explorer, choose the Office-Add-in-ASPNET-SSO-manifest project and open the add-in manifest file “Office-Add-in-ASPNET-SSO.xml” and then scroll to the bottom of the file. Just above the end
</VersionOverrides>tag, you'll find the following markup.<WebApplicationInfo> <Id>Enter_client_ID_here</Id> <Resource>api://localhost:44355/Enter_client_ID_here</Resource> <Scopes> <Scope>Files.Read</Scope> <Scope>profile</Scope> <Scope>openid</Scope> </Scopes> </WebApplicationInfo>Replace the placeholder "Enter_client_ID_here" in both places in the markup with the Application ID that you copied when you created the Office-Add-in-ASPNET-SSO app registration. This is the same ID you used for the application ID in the appsettings.json file.
Note
The
<Resource>value is the Application ID URI you set when you registered the add-in. The<Scopes>section is used only to generate a consent dialog box if the add-in is sold through Microsoft Marketplace.Save and close the manifest file.
In Solution Explorer, choose the Office-Add-in-ASPNET-SSO-web project and open the appsettings.json file.
Replace the placeholder Enter_client_id_here with the Application (client) ID value you saved previously.
Replace the placeholder Enter_client_secret_here with the client secret value you saved previously.
Note
You must also change the TenantId to support single-tenant if you configured your app registration for single-tenant. Replace the Common value with the Application (client) ID for single-tenant support.
Save and close the appsettings.json file.
Code the client side
Get the access token and call the application server REST API
In the Office-Add-in-ASPNETCore-WebAPI project, open the wwwroot\js\HomeES6.js file. It already has an
Office.onReadycall to assign a handler to the add-in's only button.In the
getUserFileNamesfunction, replaceTODO 1with the following code. About this code, note:- It calls
Office.auth.getAccessTokento get the access token from Office using SSO. This token will contain the user's identity as well as access permission to the application server. - The access token is passed to
callRESTApiwhich makes the actual call to the application server. The application server then uses the OBO flow to call Microsoft Graph. - Any errors from calling
getAccessTokenwill be handled byhandleClientSideErrors.
let fileNameList = null; try { let accessToken = await Office.auth.getAccessToken(options); fileNameList = await callRESTApi("/api/files", accessToken); } catch (exception) { if (exception.code) { handleClientSideErrors(exception); } else { showMessage("EXCEPTION: " + exception); } }- It calls
In the
getUserFileNamesfunction, replaceTODO 2with the following code. This will write the list of file names to the document.try { await writeFileNamesToOfficeDocument(fileNameList); showMessage("Your data has been added to the document."); } catch (error) { // The error from writeFileNamesToOfficeDocument will begin // "Unable to add filenames to document." showMessage(error); }In the
callRESTApifunction, replaceTODO 3with the following code. About this code, note:- It constructs an authorization header containing the access token. This confirms to the application server that this client code has access permissions to the REST APIs.
- It request JSON return types, so that all return values are handled in JSON.
- Any errors are passed to
handleServerSideErrorsfor processing.
 try {
     let result = await $.ajax({
         url: relativeUrl,
         headers: { "Authorization": "Bearer " + accessToken },
         type: "GET",
         dataType: "json",
         contentType: "application/json; charset=utf-8"
     });
     return result;
 } catch (error) {
     handleServerSideErrors(error);
 }
Handle SSO errors and application REST API errors
In the
handleSSOErrorsfunction, replaceTODO 4with the following code. For more information about these errors, see Troubleshoot SSO in Office Add-ins.switch (error.code) { case 13001: // No one is signed into Office. If the add-in cannot be effectively used when no one // is logged into Office, then the first call of getAccessToken should pass the // `allowSignInPrompt: true` option. showMessage("No one is signed into Office. But you can use many of the add-ins functions anyway. If you want to log in, press the Get OneDrive File Names button again."); break; case 13002: // The user aborted the consent prompt. If the add-in cannot be effectively used when consent // has not been granted, then the first call of getAccessToken should pass the `allowConsentPrompt: true` option. showMessage("You can use many of the add-ins functions even though you have not granted consent. If you want to grant consent, press the Get OneDrive File Names button again."); break; case 13006: // Only seen in Office on the web. showMessage("Office on the web is experiencing a problem. Please sign out of Office, close the browser, and then start again."); break; case 13008: // Only seen in Office on the web. showMessage("Office is still working on the last operation. When it completes, try this operation again."); break; case 13010: // Only seen in Office on the web. showMessage("Follow the instructions to change your browser's zone configuration."); break; default: // For all other errors, including 13000, 13003, 13005, 13007, 13012, and 50001, fall back // to non-SSO sign-in by using MSAL authentication. showMessage("SSO failed. In these cases you should implement a falback to MSAL authentication."); break; }In the
handleServerSideErrorsfunction, replaceTODO 5with the following code.// Check headers to see if admin has not consented. const header = errorResponse.getResponseHeader('WWW-Authenticate'); if (header !== null && header.includes('proposedAction=\"consent\"')) { showMessage("MSAL ERROR: " + "Admin consent required. Be sure admin consent is granted on all scopes in the Azure app registration."); return; }In the
handleServerSideErrorsfunction, replaceTODO 6with the following code. About this code, note:- In some cases, additional consent is required, such as 2FA. Microsoft identity returns the additional claims that are required to complete consent. This code adds the
authChallengeproperty with the additional claims and callsgetUserfileNamesagain. WhengetAccessTokenis called again with the additional claims, the user gets a prompt for all required forms of authentication.
// Check if Microsoft Graph requires an additional form of authentication. Have the Office host // get a new token using the Claims string, which tells Microsoft identity to prompt the user for all // required forms of authentication. const errorDetails = JSON.parse(errorResponse.responseJSON.value.details); if (errorDetails) { if (errorDetails.error.message.includes("AADSTS50076")) { const claims = errorDetails.message.Claims; const claimsAsString = JSON.stringify(claims); getUserFileNames({ authChallenge: claimsAsString }); return; } }- In some cases, additional consent is required, such as 2FA. Microsoft identity returns the additional claims that are required to complete consent. This code adds the
In the
handleServerSideErrorsfunction, replaceTODO 7with the following code. About this code, note:- In the rare case the original SSO token is expired, it will detect this error condition and call
getUserFilenamesagain. This results in another call togetAccessTokenwhich returns a refreshed access token. TheretryGetAccessTokenvariable counts the retries and is currently configured to only retry once. - Finally, if an error cannot be handled, the default is to display the error in the task pane.
// Results from other errors (other than AADSTS50076) will have an ExceptionMessage property. const exceptionMessage = JSON.parse(errorResponse.responseText).ExceptionMessage; if (exceptionMessage) { // On rare occasions the access token is unexpired when Office validates it, // but expires by the time it is sent to Microsoft identity in the OBO flow. Microsoft identity will respond // with "The provided value for the 'assertion' is not valid. The assertion has expired." // Retry the call of getAccessToken (no more than once). This time Office will return a // new unexpired access token. if ((exceptionMessage.includes("AADSTS500133")) && (retryGetAccessToken <= 0)) { retryGetAccessToken++; getUserFileNames(); return; } else { showMessage("MSAL error from application server: " + JSON.stringify(exceptionMessage)); return; } } // Default error handling if previous checks didn't apply. showMessage(errorResponse.responseJSON.value);- In the rare case the original SSO token is expired, it will detect this error condition and call
Save the file.
Code the server side
The server-side code is an ASP.NET Core server that provides REST APIs for the client to call. For example, the REST API /api/files gets a list of filenames from the user's OneDrive folder. Each REST API call requires an access token by the client to ensure the correct client is accessing their data. The access token is exchanged for a Microsoft Graph token through the On-Behalf-Of flow (OBO). The new Microsoft Graph token is cached by the MSAL.NET library for subsequent API calls. It's never sent outside of the server-side code. Microsoft identity documentation refers to this server as the middle-tier server because it is in the middle of the flow from client-side code to Microsoft services. For more information, see Middle-tier access token request
Configure Microsoft Graph and OBO flow
Open the
Program.csfile and replaceTODO 8with the following code. About this code, note:- It adds required services to handle token validation that is required for the REST APIs.
- It adds Microsoft Graph and OBO flow support in the call to
EnableTokenAcquisitionToCallDownstreamApi().AddMicrosoftGraph(...). The OBO flow is handled automatically for you, and the Microsoft Graph SDK is provided to your REST API controllers. - The DownstreamApi configuration is specified in the appsettings.json file.
// Add services to the container.
builder.Services.AddMicrosoftIdentityWebApiAuthentication(builder.Configuration)
                .EnableTokenAcquisitionToCallDownstreamApi()
                    .AddMicrosoftGraph(builder.Configuration.GetSection("DownstreamApi"))
                    .AddInMemoryTokenCaches();
Create the /api/filenames REST API
In the Controllers folder, open the FilesController.cs file. replace
TODO 9with the following code. About this code, note:- It specifies the
[Authorize]attribute to ensure the access token is validated for each call to any REST APIs in theFilesControllerclass. For more information, see Validating tokens. - It specifies the
[RequiredScope("access_as_user")]attribute to ensure the client has the correct access_as_user scope in the access token. - The constructor initializes the
_graphServiceClientobject to make calling Microsoft Graph REST APIs easier.
[Authorize] [Route("api/[controller]")] [RequiredScope("access_as_user")] public class FilesController : Controller { public FilesController(ITokenAcquisition tokenAcquisition, GraphServiceClient graphServiceClient, IOptions<MicrosoftGraphOptions> graphOptions) { _tokenAcquisition = tokenAcquisition; _graphServiceClient = graphServiceClient; _graphOptions = graphOptions; } private readonly ITokenAcquisition _tokenAcquisition; private readonly GraphServiceClient _graphServiceClient; private readonly IOptions<MicrosoftGraphOptions> _graphOptions; // TODO 10: Add the REST API to get filenames. }- It specifies the
Replace
TODO 10with the following code. About this code, note:- It creates the
/api/filesREST API. - It handles exceptions from MSAL through
MsalExceptionclass. - It handles exceptions from Microsoft Graph API calls through the
ServiceExceptionclass.
// GET api/files [HttpGet] [Produces("application/json")] public async Task<IActionResult> Get() { List<DriveItem> result = new List<DriveItem>(); try { var files = await _graphServiceClient.Me.Drive.Root.Children.Request() .Top(10) .Select(m => new { m.Name }) .GetAsync(); result = files.ToList(); } catch (MsalException ex) { var errorResponse = new { message = "An authentication error occurred while acquiring a token for downstream API", details = ex.Message }; return StatusCode((int)HttpStatusCode.Unauthorized, Json(errorResponse)); } catch (ServiceException ex) { if (ex.InnerException is MicrosoftIdentityWebChallengeUserException challengeException) { _tokenAcquisition.ReplyForbiddenWithWwwAuthenticateHeader(_graphOptions.Value.Scopes.Split(' '), challengeException.MsalUiRequiredException); } else { var errorResponse = new { message = "An error occurred calling Microsoft Graph", details = ex.RawResponseBody }; return StatusCode((int)HttpStatusCode.BadRequest, Json(errorResponse)); } } catch (Exception ex) { var errorResponse = new { message = "An error occurred while calling the downstream API", details = ex.Message }; return StatusCode((int)HttpStatusCode.BadRequest, Json(errorResponse)); } return Json(result); }- It creates the
Run the solution
In Visual Studio, on the Build menu, select Clean Solution. When it finishes, open the Build menu again and select Build Solution.
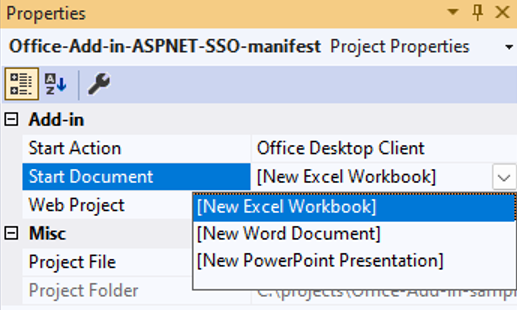
In Solution Explorer, select the Office-Add-in-ASPNET-SSO-manifest project node.
In the Properties pane, open the Start Document drop down and choose one of the three options (Excel, Word, or PowerPoint).
Press F5. Or select Debug > Start Debugging.
In the Office application, select the Show Add-in in the SSO ASP.NET group to open the task pane add-in.
Select Get OneDrive File Names. If you're logged into Office with either a Microsoft 365 Education or work account, or a Microsoft account, and SSO is working as expected, the first 10 file and folder names in your OneDrive for Business are displayed on the task pane. If you are not logged in, or you are in a scenario that does not support SSO, or SSO is not working for any reason, you will be prompted to sign in. After you sign in, the file and folder names appear.
Deploy the add-in
When you're ready to deploy to a staging or production server, be sure to update the following areas in the project solution.
- In the appsettings.json file, change the domain to your staging or production domain name.
- Update any references to
localhost:7080throughout your project to use your staging or production URL. - Update any references to
localhost:7080in your Azure App registration, or create a new registration for use in staging or production.
For more information, see Host and deploy ASP.NET Core.
See also
Collaborate with us on GitHub
The source for this content can be found on GitHub, where you can also create and review issues and pull requests. For more information, see our contributor guide.
Office Add-ins