Note
Access to this page requires authorization. You can try signing in or changing directories.
Access to this page requires authorization. You can try changing directories.
Use the MSAL.js library with nested app authentication (NAA) to enable single sign-on (SSO) from your Office Add-in. The procedures in this article guide you through creating an app registration and adding code to your project to use NAA.
NAA supported accounts and hosts
NAA supports both Microsoft Accounts and Microsoft Entra ID (work/school) identities. It doesn't support Azure Active Directory B2C for business-to-consumer identity management scenarios. For more information on NAA requirements, see Nested app auth requirement set.
Register your single-page application
You’ll need to create a Microsoft Azure App registration for your add-in on the Azure portal. The app registration must have at minimum:
- A name
- A supported account type
- An SPA redirect for NAA
If your add-in requires additional app registration beyond NAA and SSO, see Single-page application: App registration.
Add a trusted broker through SPA redirect
To enable NAA, your app registration must include a specific redirect URI to indicate to the Microsoft identity platform that your add-in allows itself to be brokered by supported hosts. The redirect URI of the application must be of type Single Page Application and conform to the following scheme.
brk-multihub://your-add-in-domain
Your domain must include only the origin and not its subpaths. For example:
✔️ brk-multihub://localhost:3000
✔️ brk-multihub://www.contoso.com
❌ brk-multihub://www.contoso.com/go
Trusted broker groups are dynamic by design and can be updated in the future to include additional hosts where your add-in may use NAA flows. Currently the brk-multihub group includes Word, Excel, PowerPoint, Outlook, and Teams (for when Office is activated inside).
Important
For Word, Excel, and PowerPoint on the web, you also need an additional redirect since the browser uses a standard authentication flow. The SPA redirect URI must reference the HTML page where you will use the MSAL.js library to request tokens through NAA.
Use the following steps to set up an app registration for your Office Add-in.
Sign in to the Azure portal with the admin credentials to your Microsoft 365 tenancy. For example, MyName@contoso.onmicrosoft.com.
Select App registrations. If you don't see the icon, search for "app registration" in the search bar.
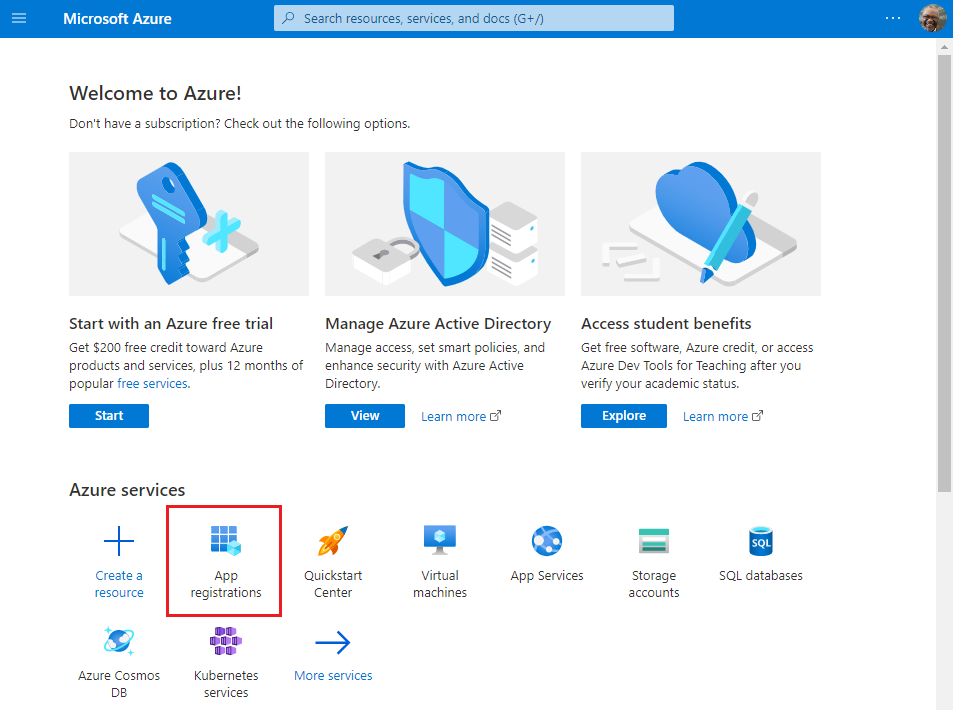
The App registrations page appears.
Select New registration.
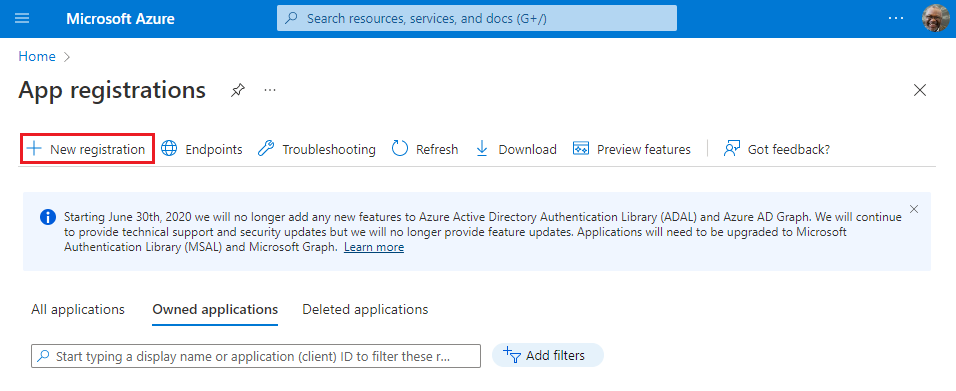
The Register an application page appears.
On the Register an application page, set the values as follows.
- Set Name to
contoso-office-add-in-sso. - Set Supported account types to Accounts in any organizational directory (any Azure AD directory - multitenant) and personal Microsoft accounts (e.g. Skype, Xbox).
- Set Redirect URI to use the platform Single-page application (SPA) and the URI to
brk-multihub://localhost:3000. This redirect assumes you are testing your add-in from a localhost server.

- Set Name to
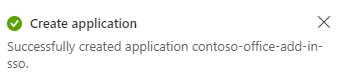
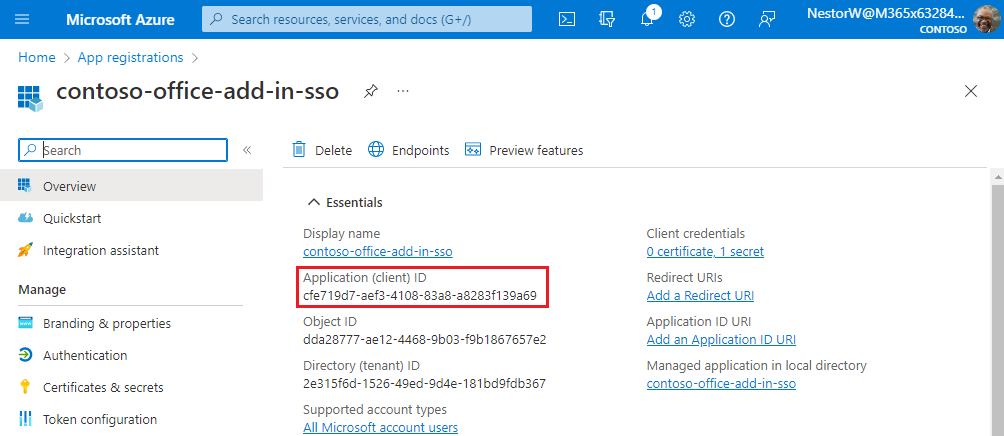
Select Register. A message is displayed stating that the application registration was created.
Copy and save the value for the Application (client) ID. You'll use it in a later procedure.
If your add-in supports Word, Excel, or PowerPoint on the web, you must add an SPA redirect URI for your task pane page. Use the following steps to add an SPA redirect URI for your task pane page.
- From the left pane, select Manage > Authentication.

- In the Platform configurations section there is a list of Single-page application Redirect URIs.
- Select Add URI.
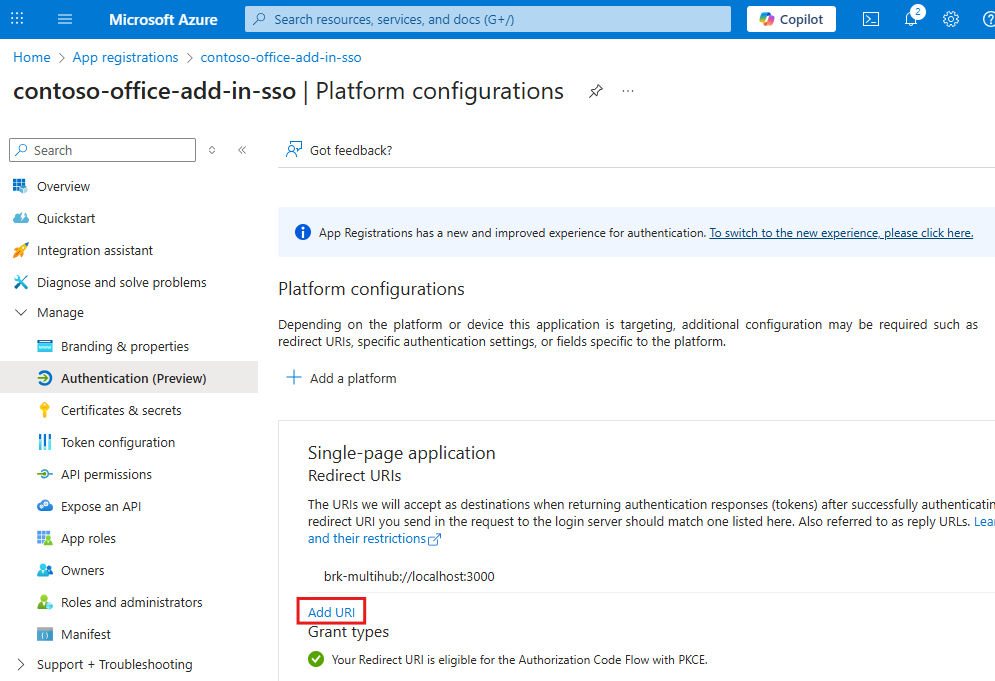
- Enter
https://localhost:3000/taskpane.htmland select Save. This redirect URI assume you are using NAA from thetaskpane.htmlfile.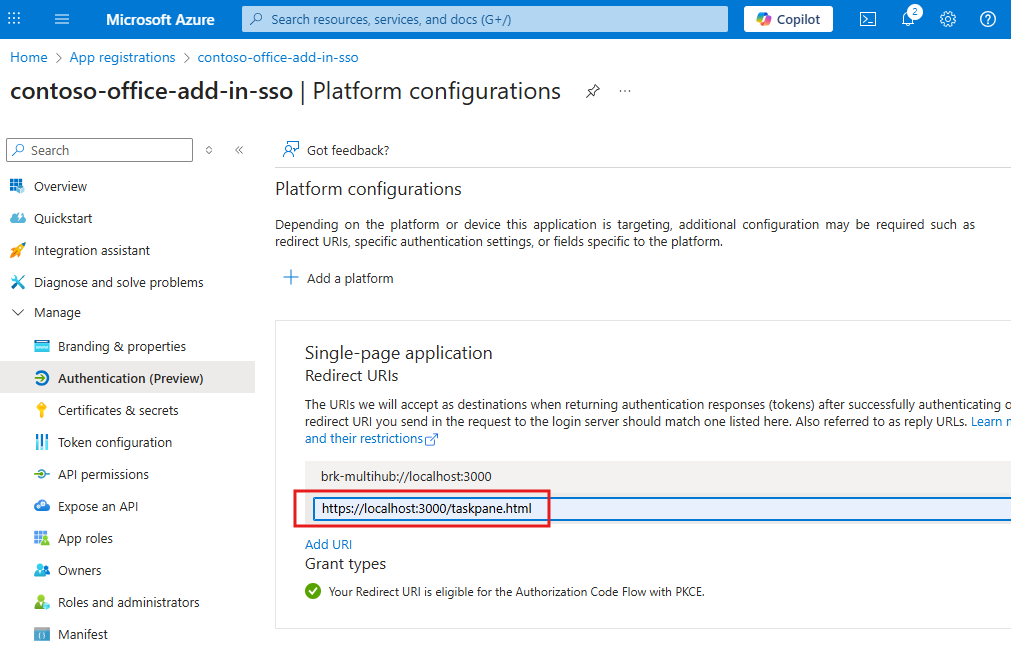
Configure MSAL config to use NAA
Configure your add-in to use NAA by calling the createNestablePublicClientApplication function in MSAL. MSAL returns a public client application that can be nested in a native application host (for example, Outlook) to acquire tokens for your application.
The following steps show how to enable NAA in the taskpane.js or taskpane.ts file in a project built with yo office (Office Add-in Task Pane project).
Add the
@azure/msal-browserpackage to thedependenciessection of thepackage.jsonfile for your project. For more information on this package, see Microsoft Authentication Library for JavaScript (MSAL.js) for Browser-Based Single-Page Applications. To install the latest version, run the following command.npm install @azure/msal-browserAdd the following code to the top of the
taskpane.jsortaskpane.tsfile. This will import the MSAL browser library.import { createNestablePublicClientApplication, InteractionRequiredAuthError } from "@azure/msal-browser";
The following steps are different for Outlook than for Word, Excel, and PowerPoint. Select the tab that corresponds to the type of add-in you're building.
Initialize the MSAL library
Next, you need to initialize MSAL and get an instance of the public client application.
Add the following code to the taskpane.js or taskpane.ts file. Replace the Enter_the_Application_Id_Here placeholder with the Azure app ID you saved previously. About the following code note:
- The
initMsalfunction initializes MSAL by callingcreateNestablePublicClientApplication. This creates a nestable public client application that supports SSO with Outlok. - The
initMsalfunction sets the authority to common, which supports work and school accounts or personal Microsoft accounts. If you want to configure a single tenant or other account types, see Application configuration options for additional authority options.
let msalInstance = undefined;

/**
 * Initialize MSAL as a nestable public client application.
  */
async function initMsal() {
  if (!msalInstance) {
    const clientId = "Enter_the_Application_Id_Here";
    const msalConfig = {
      auth: {
        clientId: clientId,
        authority: "https://login.microsoftonline.com/common"
      },
      cache: {
        cacheLocation: "localStorage"
      }
    };
    msalInstance = await createNestablePublicClientApplication(msalConfig);
  }
}
Acquire your first token
The tokens acquired by MSAL.js via NAA will be issued for your Azure app registration ID. In this code sample, you acquire a token for the Microsoft Graph API. If the user has an active session with Microsoft Entra ID the token is acquired silently. If not, the library prompts the user to sign in interactively. The token is then used to call the Microsoft Graph API.
The following steps show the pattern to use for acquiring a token.
- Specify your scopes. NAA supports incremental and dynamic consent so always request the minimum scopes needed for your code to complete its task.
- Call
acquireTokenSilent. This will get the token without requiring user interaction. - If
acquireTokenSilentfails, callacquireTokenPopupto display an interactive dialog for the user.acquireTokenSilentcan fail if the token expired, or the user has not yet consented to all of the requested scopes.
The following code shows how to implement this authentication pattern in your own project.
Replace the
runfunction intaskpane.jsortaskpane.tswith the following code. The code specifies the minimum scopes needed to read the user's files.export async function run() { await initMsal(); // Specify minimum scopes needed for the access token. const tokenRequest = { scopes: ["Files.Read", "User.Read"], }; let accessToken = null; // TODO 1: Use msalInstance to get an access token. // TODO 2: Call the Microsoft Graph API. }Important
The token request must include scopes other than just
offline_access,openid,profile, oremail. You can use any combination of the previous scopes, but you must include at least one additional scope. If not, the token request can fail.Replace
TODO 1with the following code. This code callsacquireTokenSilentto get the access token.try { const userAccount = await msalInstance.acquireTokenSilent(tokenRequest); console.log("Acquired token silently."); accessToken = userAccount.accessToken; } catch (silentError) { // TODO 1a: Handle acquireTokenSilent failure. }Replace
TODO 1awith the following code. This code checks ifacquireTokenSilentthrew anInteractionRequiredAuthError. If so the code callsacquireTokenPopupso that MSAL can use a popup dialog to interact with the user. Interaction can be required for a variety of reasons, such as completing multi-factor authorization.if (silentError instanceof InteractionRequiredAuthError) { console.log(`Unable to acquire token silently: ${silentError}`); // Silent acquisition failed. Continue to interactive acquisition. try { const userAccount = await msalInstance.acquireTokenPopup(tokenRequest); console.log("Acquired token interactively."); accessToken = userAccount.accessToken; } catch (popupError) { // Acquire token interactive failure. console.error(`Unable to acquire token interactively: ${popupError}`); return; } } else { // Acquire token silent failure. Error can't be resolved through interaction. console.error(`Unable to acquire token silently: ${silentError}`); return; }
Call an API
After acquiring the token, use it to call an API. The following example shows how to call the Microsoft Graph API by calling fetch with the token attached in the Authorization header.
Replace
TODO 2with the following code.// Call the Microsoft Graph API with the access token. const response = await fetch( `https://graph.microsoft.com/v1.0/me/drive/root/children?$select=name&$top=10`, { headers: { Authorization: `Bearer ${accessToken}` }, } ); if (response.ok) { // Write file names to the console. const data = await response.json(); const names = data.value.map((item) => item.name); // Be sure the taskpane.html has an element with Id = item-subject. const label = document.getElementById("item-subject"); // Write file names to task pane and the console. const nameText = names.join(", "); if (label) label.textContent = nameText; console.log(nameText); } else { const errorText = await response.text(); console.error("Microsoft Graph call failed - error text: " + errorText); }
Once all the previous code is added to the run function, be sure a button on the task pane calls the run function. Then you can sideload the add-in and try out the code.
What is nested app authentication
Nested app authentication enables SSO for applications that are nested inside of supported Microsoft applications. For example, Excel on Windows runs your add-in inside a webview. In this scenario, your add-in is a nested application running inside Excel, which is the host. NAA also supports nested apps in Teams. For example, if a Teams tab is hosting Excel, and your add-in is loaded, it is nested inside Excel, which is also nested inside Teams. Again, NAA supports this nested scenario and you can access SSO to get user identity and access tokens of the signed in user.
Best practices
We recommend the following best practices when using MSAL.js with NAA.
Use silent authentication whenever possible
MSAL.js provides the acquireTokenSilent method that handles token renewal by making silent token requests without prompting the user. The method first looks for a valid cached token. If it doesn't find one, the library makes the silent request to Microsoft Entra ID and if there's an active user session, a fresh token is returned.
In certain cases, the acquireTokenSilent method's attempt to get the token fails. Some examples of this are when there's an expired user session with Microsoft Entra ID or a password change by the user, which requires user interaction. When the acquireTokenSilent fails, you need to call the interactive acquireTokenPopup token method.
Have a fallback when NAA isn't supported
While we strive to provide a high-degree of compatibility with these flows across the Microsoft ecosystem, your add-in may be loaded in an older Office host that does not support NAA. In these cases, your add-in won't support seamless SSO and you may need to fall back to an alternate method of authenticating the user. Refer to the code samples in this article for samples that show how to handle a fallback scenario.
Use the following code to check if NAA is supported when your add-in loads.
Office.context.requirements.isSetSupported("NestedAppAuth", "1.1");
For more information, see the following resources.
- Authenticate and authorize with the Office dialog API.
- Microsoft identity sample for SPA and JavaScript
- Microsoft identity samples for various app types and frameworks
MSAL.js APIs supported by NAA
The following table shows which APIs are supported when NAA is enabled in the MSAL config.
| Method | Supported by NAA |
|---|---|
acquireTokenByCode |
No (throws exception) |
acquireTokenPopup |
Yes |
acquireTokenRedirect |
No (throws exception) |
acquireTokenSilent |
Yes |
addEventCallback |
Yes |
addPerformanceCallback |
No (throws exception) |
disableAccountStorageEvents |
No (throws exception) |
enableAccountStorageEvents |
No (throws exception) |
getAccountByHomeId |
Yes |
getAccountByLocalId |
Yes |
getAccountByUsername |
Yes |
getActiveAccount |
Yes |
getAllAccounts |
Yes |
getConfiguration |
Yes |
getLogger |
Yes |
getTokenCache |
No (throws exception) |
handleRedirectPromise |
No |
initialize |
Yes |
initializeWrapperLibrary |
Yes |
loginPopup |
Yes |
loginRedirect |
No (throws exception) |
logout |
No (throws exception) |
logoutPopup |
No (throws exception) |
logoutRedirect |
No (throws exception) |
removeEventCallback |
Yes |
removePerformanceCallback |
No (throws exception) |
setActiveAccount |
No |
setLogger |
Yes |
ssoSilent |
Yes |
Security reporting
If you find a security issue with our libraries or services, report the issue to secure@microsoft.com with as much detail as you can provide. Your submission may be eligible for a bounty through the Microsoft Bounty program. Don't post security issues to GitHub or any other public site. We'll contact you shortly after receiving your issue report. We encourage you to get new security incident notifications by visiting Microsoft technical security notifications to subscribe to Security Advisory Alerts.
Code samples
| Sample name | Description |
|---|---|
| Office Add-in with SSO using nested app authentication | Shows how to use NAA in an Office Add-in to access Microsoft Graph APIs for the signed-in user. |
| Outlook add-in with SSO using nested app authentication | Shows how to use NAA in an Outlook Add-in to access Microsoft Graph APIs for the signed-in user. |
| Implement SSO in events in an Outlook add-in using nested app authentication | Shows how to use NAA and SSO in Outlook add-in events. |
| Send identity claims to resources using nested app authentication (NAA) and SSO | Shows how to send the signed-in user's identity claims (such as name, email, or a unique ID) to a resource such as a database. This sample replaces an obsolete pattern for legacy Exchange Online tokens. |
See also
- NAA FAQ
- Nested app authentication in Microsoft Teams.
- Outlook sample: How to fall back and support Internet Explorer 11
- Authenticate and authorize with the Office dialog API.
- Microsoft identity sample for SPA and JavaScript
- Microsoft identity samples for various app types and frameworks
- Microsoft identity platform and OAuth 2.0 On-Behalf-Of flow
Collaborate with us on GitHub
The source for this content can be found on GitHub, where you can also create and review issues and pull requests. For more information, see our contributor guide.
Office Add-ins