Use marker detection with mixed-reality controls (preview)
[This article is pre-release documentation and is subject to change.]
Important
This is a preview feature.
Preview features aren’t meant for production use and may have restricted functionality. These features are available before an official release so that customers can get early access and provide feedback.
Use physical markers to improve the precision and persistence of media that's placed using the View in MR and View shape in MR controls. This topic covers how to enable marker detection and how to add markers to your space.
Prerequisites
In addition to the standard device compatibility requirements outlined in add mixed reality controls to your canvas app, marker detection requires physical markers to be present in your space.
To create a marker, print out the image below or display the image on a monitor or tablet. For best results, the marker should be printed in portrait orientation on standard A4 or 8.5" x 11" letter paper. Ensure that the marker is fully visible and not cut off on either the top or bottom. The marker should be approximately 20 x 20 cm for optimal tracking speed and accuracy.

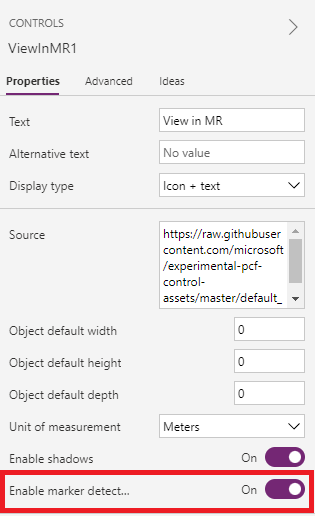
Enable marker detection
Enable marker detection for the View in MR and View shape in MR controls.
With an app open for editing in Power Apps Studio:
Open the Insert tab.
Expand Mixed reality.
Select the View shape in MR or Markup in MR control.
On the Properties tab, set the Enable marker detection property to On in the properties panel or the formula bar.
Use marker detection on device
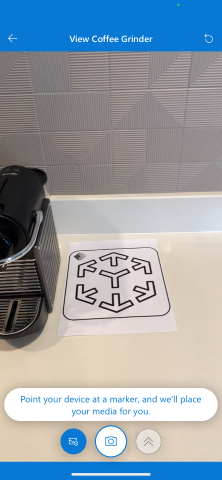
When you enter the mixed-reality experience, you'll be prompted to point your device at a physical marker in your space. To quickly acquire tracking, make sure the marker is fully in frame and about 2-5 feet from the device.
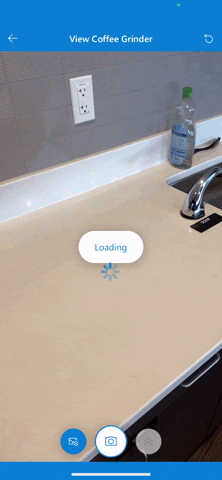
Once the marker is detected, the loaded media will be automatically aligned and placed directly on top of the marker. You can manipulate the media's position or rotate it by using the on-screen gestures or by physically moving the marker.
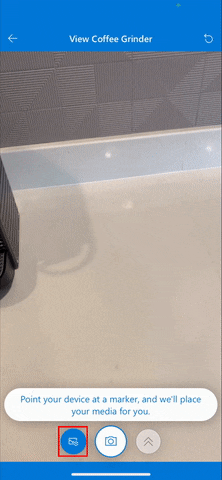
If no marker is present or detection is taking too long, you can turn off the marker detection by selecting the highlighted marker detection button.
See also
Feedback
Coming soon: Throughout 2024 we will be phasing out GitHub Issues as the feedback mechanism for content and replacing it with a new feedback system. For more information see: https://aka.ms/ContentUserFeedback.
Submit and view feedback for