Note
Access to this page requires authorization. You can try signing in or changing directories.
Access to this page requires authorization. You can try changing directories.
In this article, you'll learn how to create a multi-language app with localized experience. With this method, you can use canvas app components and make translations available in an app using a uniform formula syntax.
Important
The method described in this article use components for canvas apps which is in public preview. For more information, see Create a component for canvas apps
Create a translation component
When working with a multi-language app, the first step is to create a reusable component for translation. In this component, you'll store a table that acts as the dictionary of all translations you'll need. An output property will be used to provide output strings from this dictionary table based on the language of the user running the app that uses this component.
Sign in to Power Apps.
On the left pane, select Apps.
Under Apps, select Component libraries (preview).
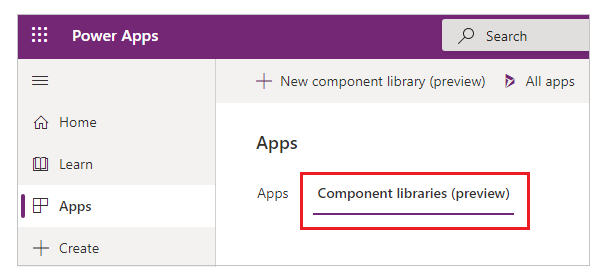
Select + New component library (preview).
Enter a name, such as "Translation components", and select Create to open the component in Power Apps Studio.
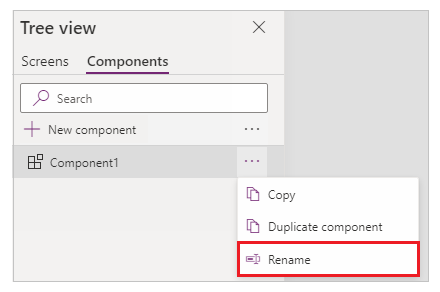
Rename "Component1" by selecting ... on the left pane, and then select Rename as "Translation component".
From the property pane on the right-side of the screen, select + New custom property.
Set the following property values:
Property name Value Display name Language Name Language Description The language that you want to translate the text to. Property type Input Data type Text Select Raise OnReset when value changes checkbox.
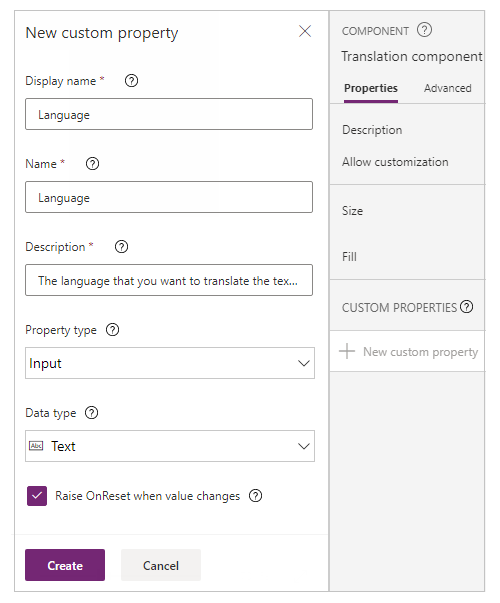
Select Create.
Note
This input property will receive the current locale ID (LCID) of the logged-in user.
From the property pane on the right-side of the screen, select + New custom property.
Set the following property values:
Property name Value Display name Labels Name Labels Description Translated labels. Property type Output Data type Record 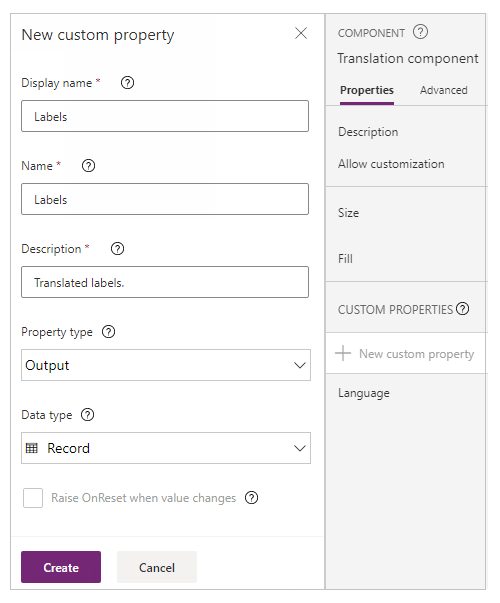
Select Create.
Note
This output property exposes the translated labels based on the input locale ID.
On the upper-left side of the screen, select the property list drop-down and choose OnReset property for the component.
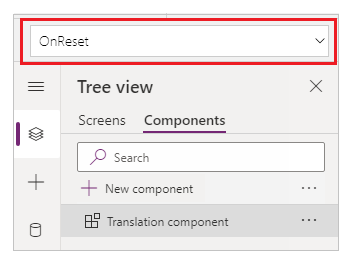
Copy and paste the following formula in the formula bar for the OnReset property.
Set(
 varTranslations,
 Table(
         {
             Language: "en-us",
             Labels: {
                 Title: "UI Tips for building canvas apps",
                 JobTitle: "Power Platform Specialist"
             }
         },
         {
             Language: "pt-br",
             Labels: {
                 Title: "Dicas de UI para construir canvas apps",
                 JobTitle: "Especialista de Power Platform"
             }
         }
     )
    )
The formula uses Set() function to create a table with the labels in different languages as a dictionary. To customize this table as the dictionary for your translations, change the control names such as Title, JobTitle, Platform, Close, Open, Cancel, and so on. You can add, or remove translations for control names depending on your business requirement.
The table should also have an entry for each language that your app supports. Each entry will have a Labels property that will contain the translated content of all possible buttons, inputs, and labels in your app.
On the upper-left side of the screen, select the property list drop-down and choose Labels property for the component.

Copy and paste the following formula in the formula bar for the Labels property.
   LookUp(
    varTranslations,
    Language = Lower(
        Coalesce(
            Self.Language,
            Language()
        )
    )).Labels
The formula finds the right translation entry based on the input Language using the Lookup() function. In case where the language isn't set, the formula uses the current user's language as the filter through Coalesce function.
Select File -> Save to save the component library.
Select Publish to publish the component library.
Tip
To learn more about creating, saving, and publishing component library, go to Create an example component library
Your translation component library is created, saved, and published for use.
Use the translation component in your app
Previously, you created the translation component library for reuse. In this section, you'll create an app that uses the translation component library and demonstrate the language translation based on the selected language.
Start by creating a blank canvas app with Phone layout.
On the left-side of the screen, select + (Insert).
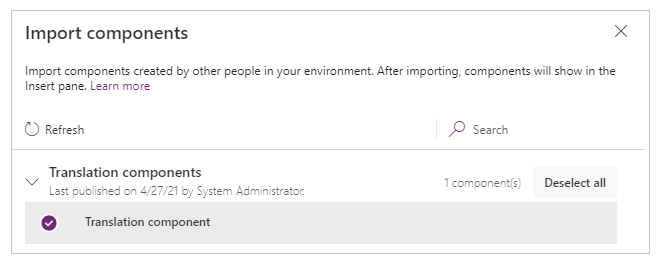
On the bottom-left side of the screen, select Get more components.
Select Translation component.
Note
The name might be different if you saved the component library created earlier with a different name.
Select Import.
On the left-side of the screen, select + (Insert).
Under Library components, select Translation component to add the component to this app.
On the left-side of the screen, select the tree view.
Select the translation component.
On the upper-left side of the screen, select the property list drop-down and choose Visible property for the component.
Set the value of the Visible property to false to make the component invisible on the app.
Under Input in the list of controls, select Toggle.
On the upper-left side of the screen, select the property list drop-down and choose OnChange property for the component.
Update the formula for the OnCheck property of the toggle control to the following.
Set(varLanguage,"pt-br")In this formula, the toggle sets a variable called varLanguage with the value of "pt-br" using the function Set(), for Portuguese (BR) language code.
Update the formula for the OnUncheck property of the toggle control to the following.
Set(varLanguage,"en-us")In this formula, the toggle sets a variable called varLanguage with the value of "en-us" using the function Set(), for English (US) language code.
On the left-side of the screen, select the translation component.
On the upper-left side of the screen, select the property list drop-down and choose Language property for the component.
Set the formula value for Language property to
varLanguage. The variable varLanguage is determined by the toggle configured earlier. When the toggle is checked, the language is set to "pt-br". When unchecked, the language is set to "en-us".On the left-side of the screen, select + (Insert).
Select Text label.
Update the label control name to Title from the right-side of the screen using the property pane.
Select Text label again to add one more label.
Update the label control name to JobTitle.
Set the Title, and JobTitle labels below the toggle control so that both labels are visible.
Set the Text property for Title, and JobTitle labels from the upper-left side of the screen to the following.
Label Formula Title 'Translation component_1'.Labels.TitleJobTitle 'Translation component_1'.Labels.JobTitleNote
Replace 'Translation component_1' in this formula to the name of the component in your app, if different.
Similarly, you can use different labels, and properties, as defined in the component that you created earlier to pass more property values. For example, in addition to Title, and JobTitle, you can create more properties such as Description, or Instructions in the component library with the translated text. And then, use such properties on the respective labels, as 'Translation component_1'.Labels.Description, or 'Translation component_1'.Labels.Instructions.
Select File -> Save, update the name for your app, and then select Save to save your app. More information: Save and publish an app
Test your app with language translation
Now your app is using the translation component. Go to Power Apps and select the app to run.
When the toggle is selected, the language is changed to Portuguese (BR) for the labels. When unchecked, the language is set back to English (US).

With this approach, you can now create your own component having the translations dictionary that fits your business requirement. And then, create more canvas apps that use the component that gives the business users the ability to use different languages.
See also
Add and configure controls
Understand variables
Formula reference