Note
Access to this page requires authorization. You can try signing in or changing directories.
Access to this page requires authorization. You can try changing directories.
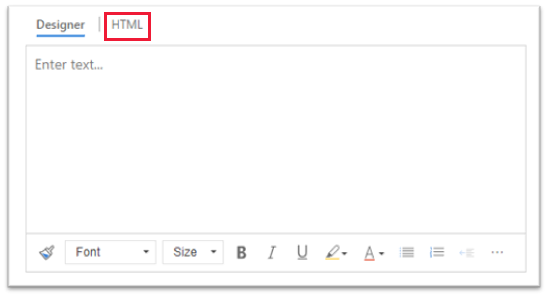
The rich text editor control is a lightweight, HTML-based editor built on the popular CKEditor. It lets you create, paste, and edit formatted text in your model-driven apps. To format text in the editor, you can use the editor toolbar, insert HTML tags, or paste formatted text from other applications, like a web browser or Word.
You can customize the editor's appearance, features, and behavior.

Modern text editor enhancements
The modern text editor is designed to align with the familiar and intuitive interfaces of Microsoft applications such as Outlook, Word, and OneNote. This experience, set by default, introduces a modern design, dark mode, high contrast themes, and a new Copilot feature to enhance your text editing capabilities.
Note
- The classic version of the rich text editor was deprecated as of April 2025. If you have issues with upgrading or using the modern rich text editor, contact Microsoft Customer Support.
- If you customized the previous version of the rich text editor, you might need to recreate your customizations in the modern rich text editor.
Add the rich text editor control to a text column on a form
Sign in to Power Apps.
In the left navigation pane, select Solutions.
Open a solution and then open a table in the solution.
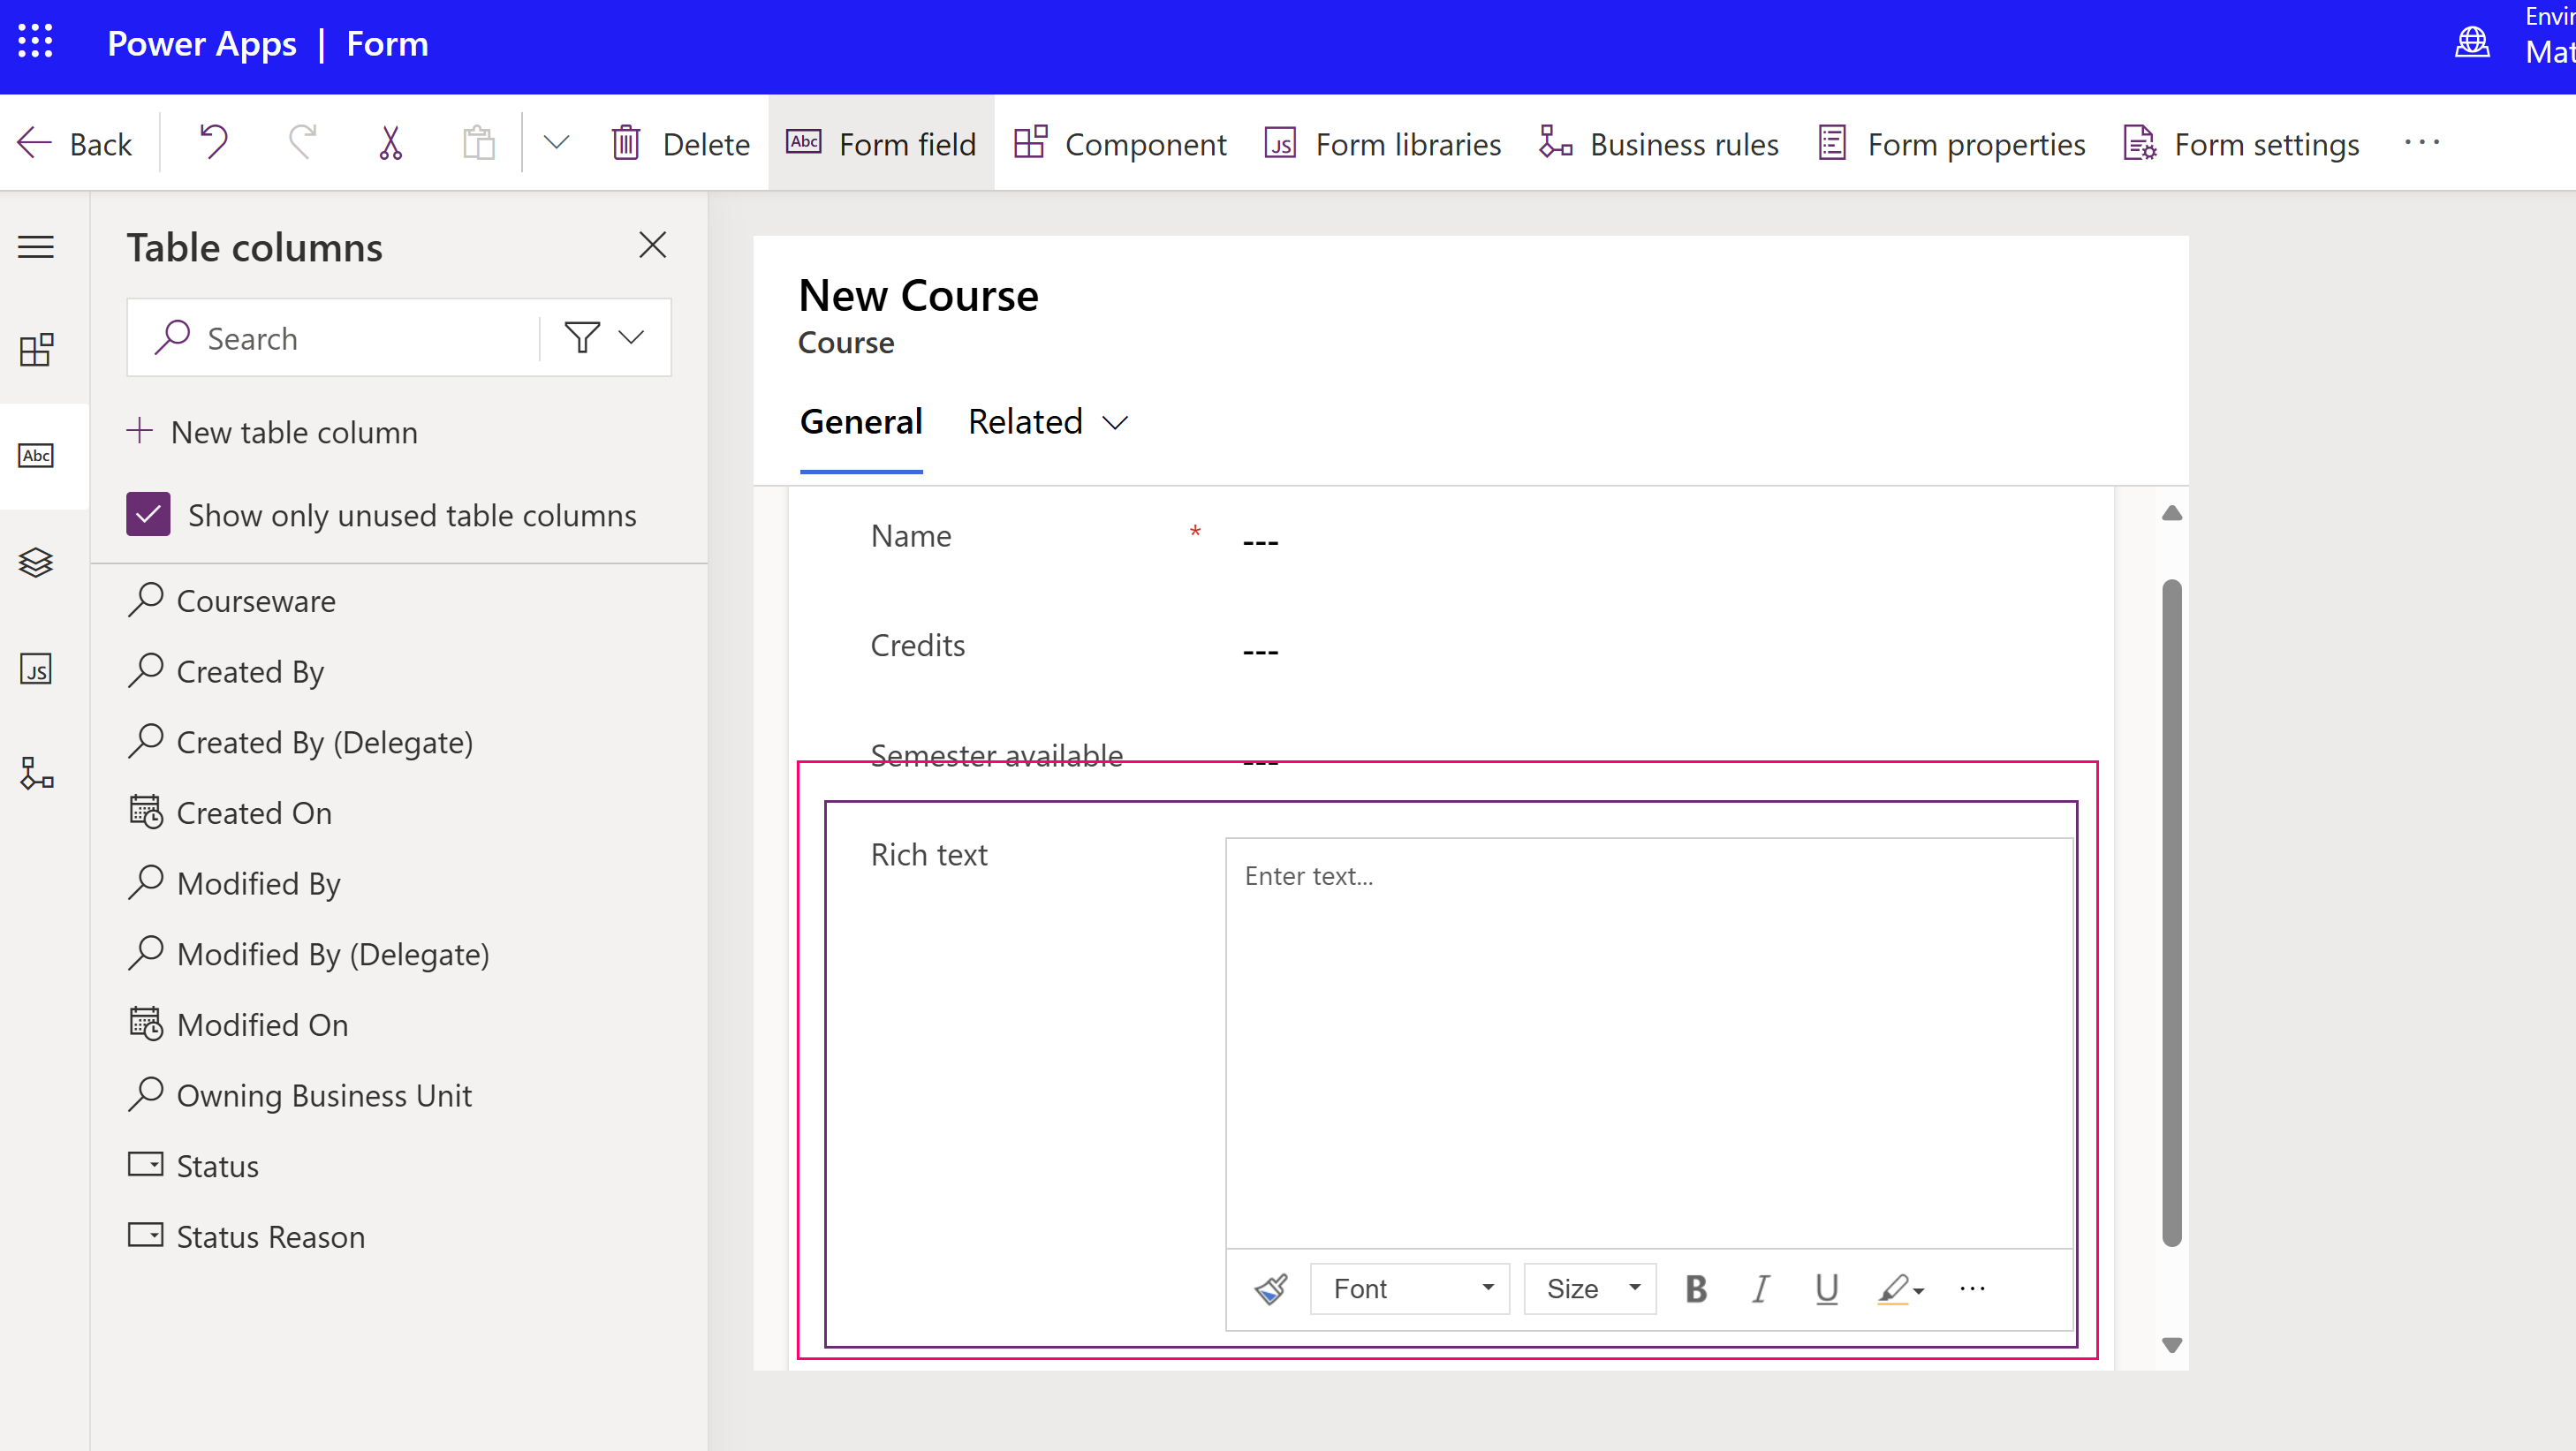
In the Data experiences area, select Forms, and then open the form that contains the text column you want to add the rich text editor to.
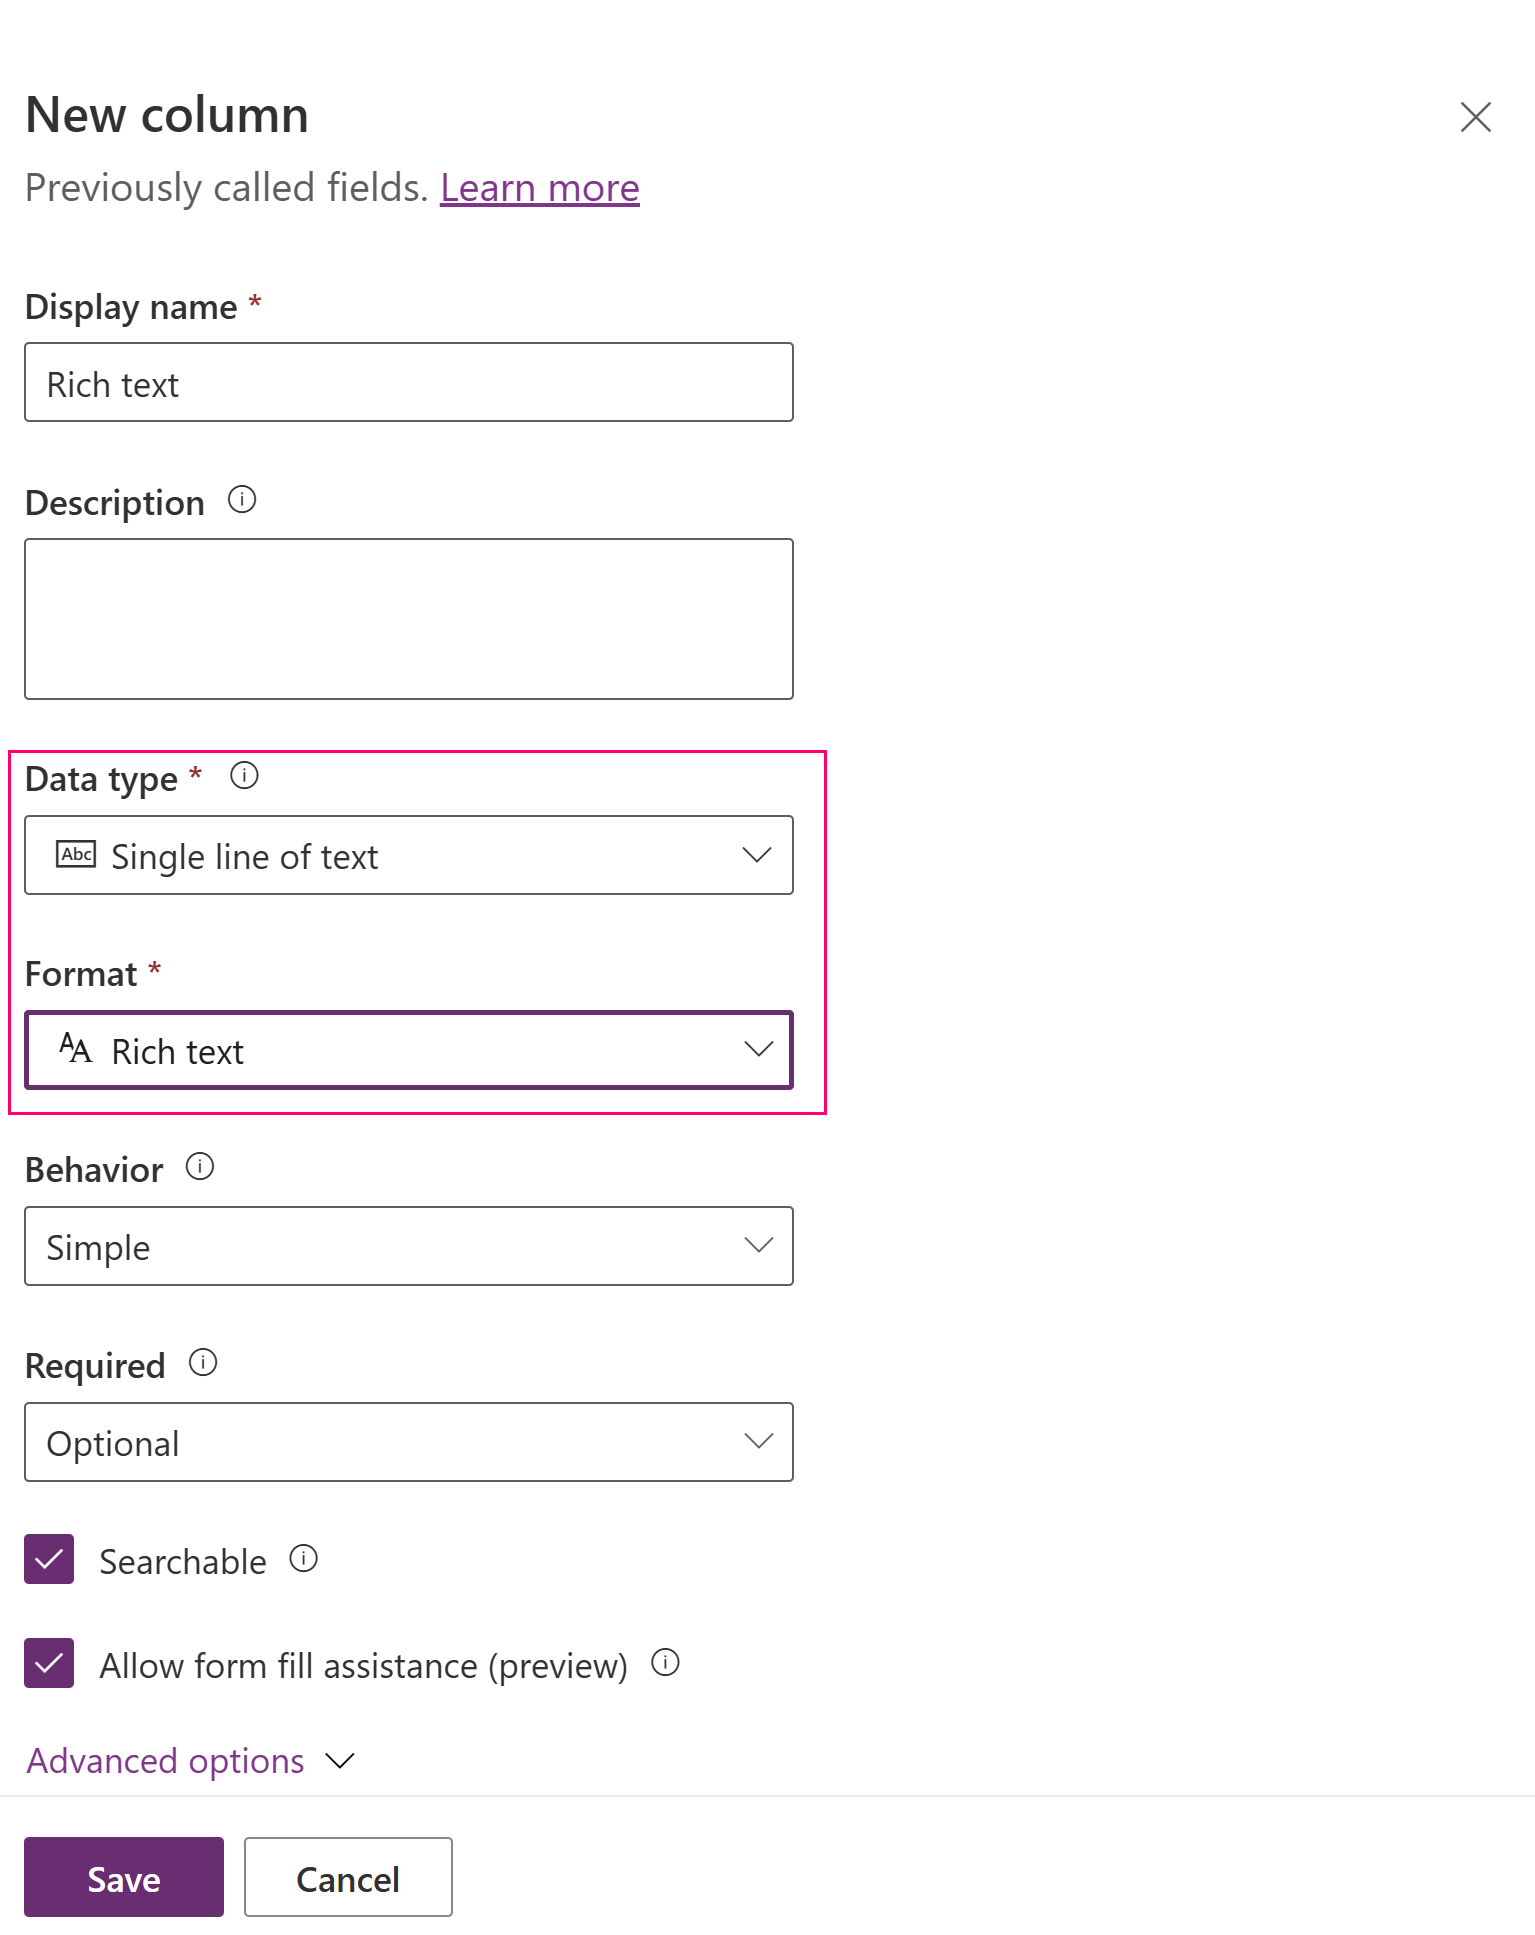
On the form designer canvas, select an existing text column. Alternatively, select New table column to create a new text column, enter a Display name, select Text > Rich text for the Data type, and then select Save.
Note
If you want to add the rich text editor control to a column that already exists, you must first change the column's data type to Text (if not already a text column) and then select the Format using the Rich text option.
In the column Properties pane, expand the Components list, select + Component, and then select Rich Text Editor Control.
In the Add Rich Text Editor Control pane, select Web, Phone, and Tablet to allow apps running on any device to use the editor.
If you want to customize the editor, enter the relative URL of its configuration file, a JavaScript web resource that contains the properties you want to change, in the Static value box. If you leave this field empty, the editor uses its default configuration.
Select Done. The rich text column is added to the form.
Select Save and publish to apply your changes to the form.

Add the rich text editor control to a text column
You can also create a column for a table that uses the rich text editor control. The following steps show you how to create a text column that you can later add to a form for a model-driven app.
Sign in to Power Apps.
In the left navigation pane, select Solutions.
Open a solution and a table in the solution.
In the Schema area, select Columns, and then open a text column.
If the table doesn't contain a text column, select New column and enter a name for the column.
In the right pane, select Format, and then select Rich text.
Save the column.
Customize the rich text editor control
The following customizations are available in the classic rich text editor experience.
Power Apps allows you to change the properties of the rich text editor control to customize its appearance, features, and behavior. To customize a specific instance of the control, specify properties and their values in an individual JSON-formatted configuration file. To customize the control's global configuration, change the properties in the default configuration file.
Levels of customization
You can apply up to three levels, or layers, of configuration to customize the rich text editor:
At the most fundamental level, every instance of the control takes its configuration from the file
RTEGlobalConfiguration_Readonly.json. The file is read-only, so you can't change these properties directly.Note
RTEGlobalConfiguration.jsondoesn't apply to email, knowledge articles, email templates, and signatures.At the next level, every instance of the control takes its configuration from the properties in the file
RTEGlobalConfiguration.json, if any are present. This configuration is layered on top of the previous one, so the properties in this file replace the same named properties in the read-only file.Finally, at the highest level, a specific instance of the control takes its configuration from a specific configuration file, if one exists. This configuration is layered on top of the previous one, so the properties in this file replace the same named properties in the two lower-level files.
The system doesn't replace all properties with those in a higher-level configuration. The extraPlugins properties merge to allow the use of a wide range of external and out-of-the-box plug-ins in the default configuration. This merge operation lets you activate and deactivate plug-ins as needed in the configuration file for specific instances of the control.
Customize a specific instance of the rich text editor
In Visual Studio Code or other text editor, create a file and give it a meaningful name.
The file
RTEGlobalConfiguration.jsoncontains the rich text editor's default, or global, configuration. If you're customizing the control in, say, a contact form, you might name the file something likeRTEContactFormConfiguration.json.Copy and paste the following code snippet into the file:
{
"defaultSupportedProps": {
  "propertyName": "value",
  "propertyName": "value",
  "propertyName": "value"
},
"propertyName": "value",
"propertyName": "value",
}
The last propertyName:value pair doesn't end with a comma.
Replace propertyName and value with the rich text editor control properties you want to change. String values must be enclosed in quotation marks.
We provided a few example configurations for you, but you can define others to suit your needs.
In Power Apps, create a JavaScript (JS) type web resource using the JSON file you created in step 1.
Add the rich text editor control to a text column on a form, and in the Add Rich Text Editor Control pane > Static value, enter the relative URL of the JavaScript web resource.
Although you can enter the absolute URL of the web resource, we recommend that you enter the relative URL. That way, the web resource still works if you import it as a solution into a different environment, provided the relative path is the same.
For example, if the URL of the web resource is
https://yourorg.crm.dynamics.com/WebResources/rtecontactform, the relative URL is /WebResources/rtecontactform.Select Done.
Select Save and publish to apply your changes to the form.
Customize the rich text editor globally
The editable global configuration file RTEGlobalConfiguration.json is the second level of customization you can apply. By default, the file is empty. That means that all instances of the rich text editor use the properties in the read-only file RTEGlobalConfiguration_Readonly.json, unless you create a configuration file for a specific instance of the control.
If your business needs require you to customize the control everywhere, specify the values you need in the RTEGlobalConfiguration.json file. Use the read-only file as an example to make sure you enter property-value pairs in the right format.
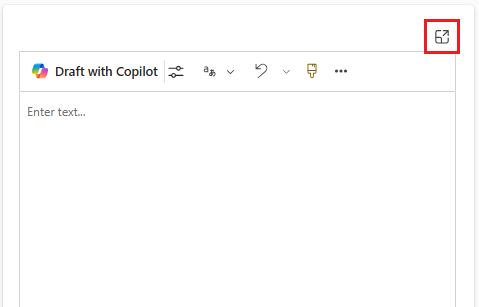
Use Copilot to refine text in the editor
Copilot uses natural language processing algorithms to help improve written content. You can add Copilot to the rich text editor and then get suggestions to improve the grammar, clarity, or overall quality of your text. Learn how to use Copilot in the rich text editor.
Rich text editor properties
The JSON file that determines the "look and feel" of an instance of the rich text editor contains two sets of properties:
- The
defaultSupportedPropssection contains properties of plug-ins that determine what the control can do. You're not limited to the properties of CKEditor and its plug-ins. You can also set values for properties of plug-ins that you add or create. - The individual properties section contains properties that determine what the control looks like.
Example configuration file
The following code is an example of a JSON file that contains both defaultSupportedProps properties and individual configuration properties. If a property has a default value, the default value is shown. If a property doesn't have a default value, a sample value is shown to illustrate the syntax. The properties are described in the two tables that follow.
{
    "defaultSupportedProps": {
        "height": 185,
        "stickyStyle": {
            "font-size": "12pt",
            "font-family": "'Segoe UI','Helvetica Neue',sans-serif"
        },
        "enterMode": 1,
        "stickyStyles_defaultTag": "div",
        "font_defaultLabel": "Segoe UI",
        "fontSize_defaultLabel":"12",
        "toolbarLocation": "top",
        "toolbar": [
        [ "CopyFormatting" ],
        [ "Font" ],
        [ "FontSize" ],
        [ "Bold" ],
        [ "Italic" ],
        [ "Underline" ],
        [ "BGColor" ],
        [ "TextColor" ],
        [ "BulletedList" ],
        [ "NumberedList" ],
        [ "Outdent" ],
        [ "Indent" ],
        [ "Blockquote" ],
        [ "JustifyLeft" ],
        [ "JustifyCenter" ],
        [ "JustifyRight" ],
        [ "Link" ],
        [ "Unlink" ],
        [ "Subscript" ],
        [ "Superscript" ],
        [ "Strike" ],
        [ "Image" ],
        [ "BidiLtr" ],
        [ "BidiRtl" ],
        [ "Undo" ],
        [ "Redo" ],
        [ "RemoveFormat" ],
        [ "Table" ]
        ],
        "extraPlugins": "accessibilityhelp,autogrow,autolink,basicstyles,bidi,blockquote,button,collapser,colorbutton,colordialog,confighelper,contextmenu,copyformatting,dialog,editorplaceholder,filebrowser,filetools,find,floatpanel,font,iframerestrictor,indentblock,justify,notification,panel,panelbutton,pastefromword,quicktable,selectall,stickystyles,superimage,tableresize,tableselection,tabletools,uploadfile,uploadimage,uploadwidget",
        "toolbarcollapser_enableResizer": false,
        "placeholder":"",
        "linkTargets": ["notSet", "_blank"],
        "stylesSet": "default",
        "fontSize_sizes": "8/8px;9/9px;10/10px;11/11px;12/12px;14/14px;16/16px;18/18px;20/20px;22/22px;24/24px;26/26px;28/28px;36/36px;48/48px;72/72px",
        "font_names": "Angsana New/'Angsana New', 'Leelawadee UI', Sathu, serif;Arial/Arial, Helvetica, sans-serif;Arial Black/'Arial Black', Arial, sans-serif;Calibri Light/'Calibri Light', 'Helvetica Light', sans-serif;Calibri/Calibri, Helvetica, sans-serif;Cambria/Cambria, Georgia, serif;Candara/Candara, Optima, sans-serif;Century Gothic/'Century Gothic', sans-serif;Comic Sans MS/'Comic Sans MS';Consolas/Consolas, Courier, monospace;Constantia/Constantia, 'Hoefler Text', serif;Corbel/Corbel, Skia, sans-serif;Cordia New/'Cordia New', 'Leelawadee UI', Silom, sans-serif;Courier New/'Courier New';DaunPenh/DaunPenh, 'Leelawadee UI', 'Khmer MN', sans-serif;Franklin Gothic Book/'Franklin Gothic Book', 'Avenir Next Condensed', sans-serif;Franklin Gothic Demi/'Franklin Gothic Demi', 'Avenir Next Condensed Demi Bold', sans-serif;Franklin Gothic Medium/'Franklin Gothic Medium', 'Avenir Next Condensed Medium', sans-serif;Garamond/Garamond, Georgia, serif;Gautami/Gautami, 'Nirmala UI', 'Telugu MN', sans-serif;Georgia/Georgia, serif;Impact/Impact, Charcoal, sans-serif;Iskoola Pota/'Iskoola Pota', 'Nirmala UI', 'Sinhala MN', sans-serif;Kalinga/Kalinga, 'Nirmala UI', 'Oriya MN', sans-serif;Kartika/Kartika, 'Nirmala UI', 'Malayalam MN', sans-serif;Latha/Latha, 'Nirmala UI', 'Tamil MN', sans-serif;Leelawadee UI/'Leelawadee UI', Thonburi, sans-serif;Lucida Console/'Lucida Console', Monaco, monospace;Lucida Handwriting/'Lucida Handwriting', 'Apple Chancery', cursive;Lucida Sans Unicode/'Lucida Sans Unicode';Mangal/Mangal, 'Nirmala UI', 'Devanagari Sangam MN', sans-serif;Nirmala UI/'Nirmala UI', sans-serif;Nyala/Nyala, Kefa, sans-serif;Palatino Linotype/'Palatino Linotype', 'Book Antiqua', Palatino, serif;Raavi/Raavi, 'Nirmala UI', 'Gurmukhi MN', sans-serif;Segoe UI/'Segoe UI', 'Helvetica Neue', sans-serif;Shruti/Shruti, 'Nirmala UI', 'Gujarati Sangam MN', sans-serif;Sitka Heading/'Sitka Heading', Cochin, serif;Sitka Text/'Sitka Text', Cochin, serif;Sylfaen/Sylfaen, Mshtakan, Menlo, serif;TW Cen MT/'TW Cen MT', 'Century Gothic', sans-serif;Tahoma/Tahoma, Geneva, sans-serif;Times New Roman/'Times New Roman', Times, serif;Times/Times, 'Times New Roman', serif;Trebuchet MS/'Trebuchet MS';Tunga/Tunga, 'Nirmala UI', 'Kannada MN', sans-serif;Verdana/Verdana, Geneva, sans-serif;Vrinda/Vrinda, 'Nirmala UI', 'Bangla MN', sans-serif;メイリオ/Meiryo, メイリオ, 'Hiragino Sans', sans-serif;仿宋/FangSong, 仿宋, STFangsong, serif;微軟正黑體/'Microsoft JhengHei', 微軟正黑體, 'Apple LiGothic', sans-serif;微软雅黑/'Microsoft YaHei', 微软雅黑, STHeiti, sans-serif;新宋体/NSimSun, 新宋体, SimSun, 宋体, SimSun-ExtB, 宋体-ExtB, STSong, serif;新細明體/PMingLiU, 新細明體, PMingLiU-ExtB, 新細明體-ExtB, 'Apple LiSung', serif;楷体/KaiTi, 楷体, STKaiti, serif;標楷體/DFKai-SB, 標楷體, BiauKai, serif;游ゴシック/'Yu Gothic', 游ゴシック, YuGothic, sans-serif;游明朝/'Yu Mincho', 游明朝, YuMincho, serif;隶书/SimLi, 隶书, 'Baoli SC', serif;黑体/SimHei, 黑体, STHeiti, sans-serif;굴림/Gulim, 굴림, 'Nanum Gothic', sans-serif;궁서/Gungsuh, 궁서, GungSeo, serif;돋움/Dotum, 돋움, AppleGothic, sans-serif;맑은 고딕/'Malgun Gothic', '맑은 고딕', AppleGothic, sans-serif;바탕/Batang, 바탕, AppleMyungjo, serif;바탕체/BatangChe, 바탕체, AppleMyungjo, serif;MS Pゴシック/'MS PGothic', 'MS Pゴシック', 'MS Gothic','MS ゴシック', 'Hiragino Kaku Gothic ProN', sans-serif;MS P明朝/'MS PMincho', 'MS P明朝', 'MS Mincho', 'MS 明朝', 'Hiragino Mincho ProN', serif",
        "copyFormatting_allowRules": "b s u i em strong span p div td th ol ul li(*)[*]{*}"
    },
    "readOnlySettings": {
    "height": 500,
    "showFullScreenExpander": true
    },
    "sanitizerAllowlist": {
    "attributes": [],
    "cssProperties": [],
    "domains": [],
    "protocols": [],
    "tags": []
    },
    "disableContentSanitization": true,
    "disableOnLoadEditModeSanitization": true,
    "disableDefaultImageProcessing": true,
    "showFullScreenExpander": false,
    "showAsTabControl": false,
    "showHtml": false
}
defaultSupportedProps
The following table describes the most commonly used properties, but you can configure all the properties that CKEditor supports. The rich text editor control uses CKEditor 4.
| Property | Description | Default value |
|---|---|---|
| height | Sets the initial height of the content area, in pixels. | "185" |
| stickyStyle | Sets the editor font and size. | See defaultSupportedProps |
| stickyStyles_defaultTag | Creates a wrapper around the text in the editor content area. It's initially set to "div," but you can change it to "p" or any alternate tag. | "div" |
| font_defaultLabel | Sets the font label displayed in the toolbar. The label is for appearance only and isn't functional. The stickyStyle property determines the editor font and size. |
"Segoe UI" |
| fontSize_defaultLabel | Sets the font size label displayed in the toolbar. The label is for appearance only and isn't functional. The stickyStyle property determines the editor font and size. |
"9" |
| toolbarLocation | Sets the location of the toolbar in the editor content area. Supported values are "top" and "bottom." | "bottom" |
| toolbar | Lists the toolbar buttons to display. | See defaultSupportedProps |
| plugins | Lists preset plug-ins that the editor can use. The plug-ins in this list might be different from the plug-ins that are loaded, if extraPlugins and removePlugins are given a value. If you set this property to an empty string, the editor loads without the toolbar. |
See defaultSupportedProps |
| extraPlugins | Appends plug-ins to the plugins list to load more plug-ins.Many plug-ins require other plug-ins to work. The rich text editor automatically adds them, and you can't use this property to override them. Use removePlugins instead. |
See defaultSupportedProps |
| removePlugins | Lists plug-ins not to load. Use it to change which plug-ins are loaded without changing the plugins and extraPlugins lists. |
See defaultSupportedProps |
| superimageImageMaxSize | Sets the maximum size in megabytes (MB) allowed for embedded images when using the superimage plug-in. | "5" |
| linkTargets | Allows you to configure which link target options are available for users when they create links: - "notSet": No target set - "frame": Opens the document in the specified frame - popupWindow": Opens the document in a popup window - "_blank": Opens the document in a new window or tab - "_top": Opens the document in the full body of the window - "_self": Opens the document in the same window or tab where the link is activated - "_parent": Opens the document in the parent frame |
"notSet", "_blank" |
Individual properties
The following table describes more properties you can use to customize the rich text editor control.
| Property | Description | Default value |
|---|---|---|
| attachmentEntity | To enforce more security on uploaded files by using a table other than the default, set this property and specify a different table. Syntax: "name": "tableName", "fileAttributeName": "attributeNameofBlobReference" |
See defaultSupportedProps |
| disableContentSanitization | Content sanitization removes some custom attributes or tags from rich text content. It's disabled by default to allow copying and pasting of rich text content from external sources. This property applies only to edit mode. When the editor control is read-only or disabled, content is always sanitized. | true |
| disableDefaultImageProcessing | By default, images that are inserted in the editor are uploaded to the attachmentEntity defined in the configuration. External users might lack privileges to view the content in the table. Instead, set this property to true to store images as base64 strings directly in the column configured to use the rich text editor control. |
false |
| disableImages | Determines whether images can be inserted in the editor. This property has highest priority. When this property is set to true, images are disabled, regardless of the value of the imageEntity property. |
false |
| imageEntity | To enforce more security on images by using a table other than the default, set this property and specify a different table. Syntax: "imageEntityName": "tableName", "imageFileAttributeName": "attributeNameofBlobReference" |
See defaultSupportedProps |
| readOnlySettings | These properties determine the behavior of the column when viewed in a read-only or disabled state. You can specify any supported property. | None; see defaultSupportedProps for an example |
| sanitizerAllowlist | Lists other kinds of content that can be displayed in the editor. | See defaultSupportedProps |
| showAsTabControl | Allows you to display more commands above the content area. Must be set to true to use the following properties: showFullScreenExpander, showHtml, showPreview, showPreviewHeaderWarning |
false |
| showFullScreenExpander | Determines whether the editor can be used in full-screen mode. showAsTabControl must be set to true. |
false |
| showHtml | Allows users to display and edit the HTML content directly. showAsTabControl must be set to true. |
false |
| showPreview | Allows users to preview the editor content rendered as HTML. showAsTabControl must be set to true. |
false |
| showPreviewHeaderWarning | Allows you to show or hide the warning message displayed when previewing content. showAsTabControl and showPreview must be set to true. |
false |
| allowSameOriginSandbox | Allows the content in the editor to be treated as from the same origin as the rendering app. Use this property with caution. Only use trusted external content. When this property is set to true, any external content could have access to internal resources. |
false |
Example configurations
The following sample configurations create specific customizations of the rich text editor in the classic experience. You can use them as-is or as a jumping-off point to customize a specific instance of the rich text editor or globally.
Set the default font to 11-point Calibri
Set these defaultSupportedProps properties in your configuration file. Each value except the last one must be followed by a comma (,).
"font_defaultLabel": "Calibri",
"fontSize_defaultLabel": "11",
"stickyStyle": {
  "font-size": "11pt",
  "font-family": "Calibri/Calibri, Helvetica, sans-serif;"
},
Make the Enter key insert a new line instead of a paragraph block
By default, pressing the Enter key creates a paragraph block with the <p> HTML tag. HTML uses paragraph blocks to group information, like paragraphs in a Word document. Browsers can format the <p> tag slightly differently, so for visual consistency, you might want to use the new line or line break tag <br\> tag instead.
Set this defaultSupportedProps property in your configuration file. Follow this value with a comma (,) unless it's the last property in the file.
"enterMode": 2,
Allow the editor to use the full screen
Set these individual properties in your configuration file. Each value except the last one must be followed by a comma (,).
"showFullScreenExpander": true,
Allow viewing and editing HTML content
To allow users to view and edit the HTML of their content directly, show the HTML tab.
Set these individual properties in your configuration file. Each value except the last one must be followed by a comma (,).
"showAsTabControl": true,
"showHtml": true,
Show a simplified toolbar or remove it entirely
By default, the editor toolbar contains all the available formatting tools. To provide a simplified toolbar, use the toolbar property and specify the tools that users can use to format their content.
Set this defaultSupportedProps property in your configuration file. Follow this value with a comma (,) unless it's the last property in the file.
"toolbar": [ { "items": [ "FontSize", "Bold", "Italic", "Underline", "BGColor" ] } ],
To remove the toolbar entirely, set the value of toolbar to '[]' (two square brackets).
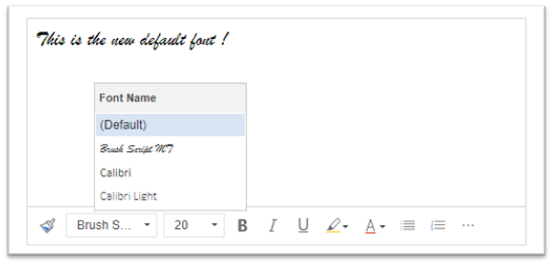
Add a new font list and set 20-point Brush Script MT as the default font
Set these defaultSupportedProps properties in your configuration file. Each value except the last one must be followed by a comma (,).
"font_names": "Brush Script MT/'Brush Script MT', cursive;Calibri/Calibri, Helvetica, sans-serif;Calibri Light/'Calibri Light', 'Helvetica Light', sans-serif;"
"font_defaultLabel": "Brush Script MT"
"fontSize_sizes": "8/8pt;12/12pt;20/20pt;32/32pt"
"fontSize_defaultLabel": "20"
"stickyStyle": {
  "font-size": "20pt",
  "font-family": "'Brush Script MT', cursive"
},
Position the toolbar at the top of the rich text editor
Set this defaultSupportedProps property in your configuration file. Follow this value with a comma (,) unless it's the last property in the file.
"toolbarLocation": "top",
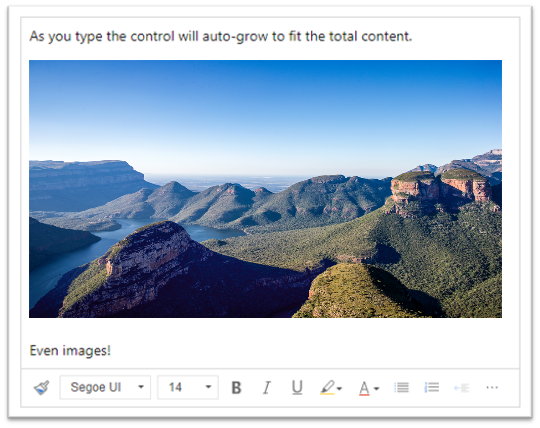
Start the editor at 30 pixels high and grow to fit content
Set these defaultSupportedProps properties in your configuration file. Each value except the last one must be followed by a comma (,).
"autoGrow_onStartup": false,
"autoGrow_maxHeight": 8000,
"autoGrow_minHeight": 30,
"height": 30,
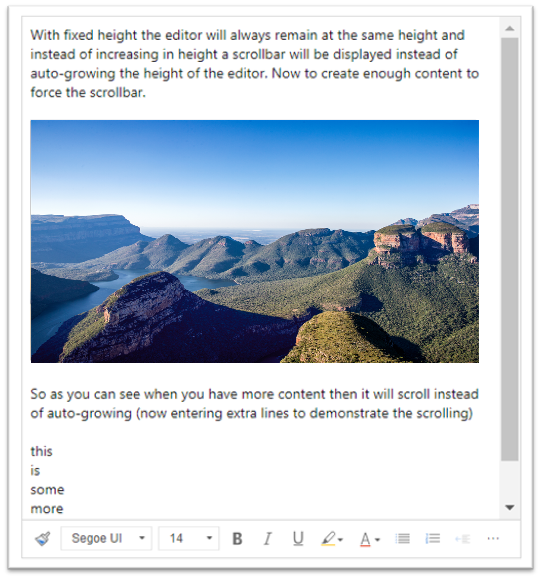
Fix the height of the editor at 500 pixels
Set these defaultSupportedProps properties in your configuration file. Each value, except the last one, must be followed by a comma.
"removePlugins": [ "autogrow" ],
"height": 500,
Make the context (right-click) menu use the browser's default context menu
To replace the editor control's context menu with the browser's default context menu, remove the contextmenu plug-in.
Set this defaultSupportedProps property in your configuration file. Follow this value with a comma (,) unless it's the last property in the file.
"removePlugins": "contextmenu,liststyle,openlink,tableresize,tableselection,tabletools",
The rich text editor toolbar
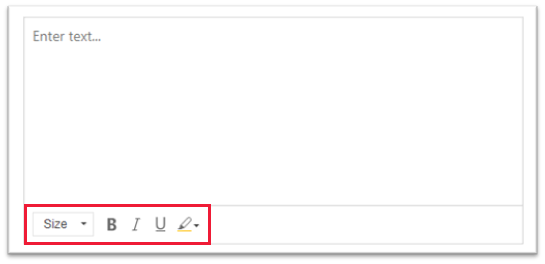
The following table describes the formatting tools that are available in the rich text editor by default.
| Icon | Name | Shortcut key | Description |
|---|---|---|---|
 |
Copy Formatting | Ctrl+Shift+C, Ctrl+Shift+V | Apply the look of a particular section to another section. |
 |
Font Name | Ctrl+Shift+F | Select a font. The application considers the font that you select the default font. Segoe UI is the default font if you don't select one. When you select formatted content, the name of the font applied to it displays. If your selection contains multiple fonts, the first one applied to the selection displays. |
 |
Font Size | Ctrl+Shift+P | Change the size of your text. The application considers the font size that you select the default size. 12 is the default size if you don't select one. When you select formatted content, the font size applied to it displays. If your selection contains multiple sizes, the first one applied to the selection displays. |
 |
Bold | Ctrl+B | Make your text bold. |
 |
Italic | Ctrl+I | Italicize your text. |
 |
Underline | Ctrl+U | Underline your text. |
 |
Background Color | Make your text stand out by highlighting it in a bright color. | |
 |
Text Color | Change the color of your text. | |
 |
Insert/Remove Bulleted List | Create a bulleted list. | |
 |
Insert/Remove Numbered List | Create a numbered list. | |
 |
Decrease Indent | Move your paragraph closer to the margin. | |
 |
Increase Indent | Move your paragraph farther away from the margin. | |
 |
Block Quote | Apply a block-level quotation format to your content. | |
 |
Align Left | Ctrl+L | Align your content with the left margin. |
 |
Align Center | Ctrl+E | Center your content on the page. |
 |
Align Right | Ctrl+R | Align your content with the right margin. |
 |
Link | Create a link in your document for quick access to web pages and other cloud resources. Enter or paste the anchor text in the Display Text box, and then enter or paste the URL in the URL box. Optionally, select a Link Type and protocol if the link is to something other than a web page. To specify where a URL-type link should open, select the Target tab and then select a Target. A pasted or typed URL is automatically converted into a link. For example, http://myexample.com becomes <a href="http://myexample.com">http://myexample.com</a>. |
|
 |
Unlink | Remove the link from an anchor and make it plain text. | |
 |
Superscript | Type small letters just above the line of text. | |
 |
Subscript | Type small letters just below the line of text. | |
 |
Strikethrough | Cross out text by drawing a line through it. | |
 |
Image | To insert an image, paste it from your clipboard into the content area or drag an image file from a folder to the content area. Drag any corner of the image to resize it. The control supports .png, .jpg., and .gif images. To have more control over the image's source, appearance, and behavior, select the Image button. Browse to the image file in a local folder or enter its URL. If the image is stored on an external server, enter the absolute path. If it's on a local server, you can enter a relative path. Optionally, enter a specific height and width to resize the image, and select an alignment. You should also enter alt text to describe the image for people who use screen readers. If the image is also a link to a web page or other cloud resource, enter the URL of the resource in the Target URL box and, if needed, select the Target where the link should open. |
|
 |
Text direction from left to right | Change the text to left-to-right. This setting is the default. | |
 |
Text direction from right to left | Change the text to right-to-left for bi-directional language content. | |
 |
Undo | Reverse the last change you made to the content. | |
 |
Redo | Undo your last undo, or reapply the last change you made to the content. | |
 |
Remove Format | Remove all formatting from the select text. | |
 |
Table | Insert a table with the number of rows and columns you select. To have more control over the table's size and appearance, select the Table button > More and change its properties. You can also right-click a table to view and change its properties. To change the width of a column, drag its border. You can select one or more cells, rows, or columns and apply specific formatting, add a link to selected text, and cut, copy, and paste entire rows or columns. |
|
| Personalization Settings | Set your default font and font size. | ||
| Accessibility Help | Alt+0 | Open the list of keyboard shortcuts you can use in the rich text editor. | |
 |
Expand Toolbar | When the window is too narrow to show the entire toolbar, select to expand the toolbar to a second row. | |
Tip
To use your browser's built-in spell checker, press the Ctrl key as you right-click the text you want to check. Otherwise, the right-click (context) menu provides contextual formatting for the element you select.
An alternative to your browser's built-in spell checker is the Microsoft Editor browser extension. Microsoft Editor works seamlessly with the rich text editor control, and when enabled, provides fast and easy inline grammar and spell-check capabilities.
Use the rich text editor offline
The rich text editor control is available when you're working offline, although without some of the features and functionality you're used to. Images that you upload using the editor's default configuration aren't available when you're working offline.
The following plug-ins are available to the rich text editor when it's offline:
- ajax, autogrow, basicstyles, bidi, blockquote, button, confighelper, contextmenu, dialog, dialogui, editorplaceholder, enterkey, entities, fakeobjects, floatingspace, floatpanel, format, horizontalrule, htmlwriter, indent, indentblock, indentlist, justify, lineutils, list, listblock, maximize, menu, menubutton, notification, notificationaggregator, panel, panelbutton, popup, preview, removeformat, resize, richcombo, selectall, showborders, sourcearea, specialchar, stylescombo, tab, textmatch, textwatcher, toolbar, undo, widgetselection, wysiwygarea, xml
The following formatting tools are available in the rich text editor when it's offline:
- Bold, italic, underline, bulleted and numbered lists, decrease and increase indent, block quote, align left, align center, align right, strikethrough, bi-directional text, undo and redo, and remove formatting
Best practices for using the rich text editor
Rich text fields store HTML tags for formatting along with user-entered data. When you set the maximum size of rich text fields, make sure to allow for both the HTML tags and the user's data.
For the best performance, keep your HTML content to 1 MB or less. At larger sizes, you might notice slower response times for loading and editing.
In the default configuration, images don't negatively affect performance because they're stored separately from the HTML content. However, images are stored as base64 content in the text column when the user who uploads them doesn't have permissions on the
msdyn_richtextfilestable. Base64 content is large, so you generally don't want to store images as part of the column content.If you have a system administrator or basic user security role, the user personalization feature works by default. If you don't have these roles, you must have privileges to create, read, and write on the
msdyn_customcontrolextendedsettingstable for the user personalization plug-in to work.In the default rich text editor configuration, if you drag and drop an image file into the rich text editor, it uploads the inline image to the
msdyn_richtextfilestable. For appropriate users to be able to view the inline image, make sure you apply the correct permissions tomsdyn_richtextfiles.
Rich text editor limitations
When using the rich text editor, consider the limitations listed in this section. For questions about feature availability, contact Microsoft Customer Support.
Important
The modern rich text editor is a new experience. For the functionality to work correctly, you must remove the classic version. Otherwise, your templates might not display correctly.
Rich text editor limitations include the following:
- You can't use rich text editor content from any external sources like Microsoft Word, Excel, and so forth.
- The rich text editor supports the following file types for attachments: .aac, .avi, .csv, .doc, .docx, .gif, .html, .jpeg, .mid, .midi, .mp3, .mp4, .mpeg, .msg, .pdf, .png, .ppt, .pptx, .svg, .txt, .vsd, .wav, .xls, .xlsm, and .xlsx. You can configure the allowed extensions for your environment in your advanced settings by going to Administration > General > Set blocked file extensions for attachments and removing the extensions you want to allow.
- The rich text editor doesn't support non-Microsoft plugins.
Email templates and signatures:
- If you experience an issue with the way an email template renders, we recommend that you recreate it in the modern editor.
- Nested HTML structures—such as deeply nested <div> or <table> elements—can cause rendering problems in the rich text editor. We recommend that you simplify the HTML structure by removing unnecessary nested <div> or <table> tags to ensure consistent rendering across clients.
HTML tags
The following HTML tags are either no longer supported or are replaced by a modern alternative in the rich text editor.
| Tag | Description | Modern rich text editor alternative |
|---|---|---|
| <acronym> | Defines an acronym | <abbr> |
| <applet> | Embeds Java applet | <object> |
| <basefont> | Sets default font size and color | CSS |
| <big> | Enlarges text | CSS font-size |
| <blink> | Makes text flash | CSS animations |
| <center> | Centers content | CSS text-align |
| <dir> | Directory list | <ul> |
| <font> | Styles fonts | CSS |
| <frame> | Defines a frame | <iframe> |
| <frameset> | Groups frames | <iframe> |
| <isindex> | Single-line input | <form> |
| <marquee> | Scrolling text | CSS animations |
| <menu> | Menu list | <ul> |
| <noframes> | Fallback for no frame support | Not needed |
| <plaintext> | Displays plain text | <pre> |
| <s> | Strikethrough text | <del>, CSS |
| <strike> | Strikethrough text | <del>, <s> |
| <tt> | Teletype text | <code>, CSS |
| <u> | Underlined text | CSS text-decoration |
| <xmp> | Preformatted text | <pre> |
HTML attributes
The following HTML attributes are either no longer supported or are replaced by a modern alternative in the rich text editor.
| Attribute | Affected tags | Modern rich text editor alternative |
|---|---|---|
| align | Many | CSS text-align, float |
| alink, vlink, link | <body> | CSS :link, :visited |
| background | <body>, <table> | CSS background-image |
| bgcolor | Many | CSS background-color |
| border | <img>, <table> | |
| height, width | <body>, <td> | CSS height, width |
| hspace, vspace | <img> | |
| language | <script> | type="text/JavaScript" |
| nowrap | <td> | CSS white-space: nowrap |
| type (on <li>, <ul>) | Lists | CSS list-style-type |
Frequently asked questions
Why do typed characters display slowly?
If you have a lot of content in the editor, the response time can increase. Keep the content to 1 MB or less for the best performance. Spelling or grammar checks can also slow the typing performance.
Why doesn't my content render until the editor is refreshed?
This behavior occurs when custom code injects content into the rich text editor without triggering a re-render of the control. The rich text editor doesn’t automatically detect external updates unless it's explicitly notified.
To work around this issue, you can do either of the following actions:
Use an event listener (for example, formContext.data.entity.addOnSave) to trigger a refresh after content is injected.
Use formContext.ui.refreshRibbon() or a similar API to force an update.
Example:
window.top.addEventListener('rteEditorReady', (event) => {
    const { parentEntity } = event.detail;

    if (parentEntity?.typeName === 'email' &&
        parentEntity?.fieldName === 'description') {

        const descriptionAttr = Xrm.Page.getAttribute("description");
        if (descriptionAttr) {
            descriptionAttr.setValue(emailSignature);
        }
    }
}, { once: true });
In this example, the event listener is automatically removed after the rteEditorReady event triggers. This approach ensures the listener runs only once, helping to prevent memory leaks and unnecessary resource usage.
Why can't I upload an image? Why does the image preview fail to load?
If the image file name, including the path, is long, the file might fail to upload, or the preview might not be displayed. Try shortening the file name or moving it to a location with a shorter path, and then upload it again.
Why do I see HTML in my text?
If you use the rich text editor control in a column that isn't formatted for rich text, the content appears in the underlying HTML instead of as formatted text.
What's the size limit of HTML content?
For the best performance, keep your HTML content to 1 MB or less. At larger sizes, you might notice slower response times for loading and editing.
To resolve this issue, make sure the format of the column is set to Rich text.
I exceeded the character limit but there are fewer characters than the limit. Why?
The database stores the entire HTML formatting, not just the characters, which takes up extra space.
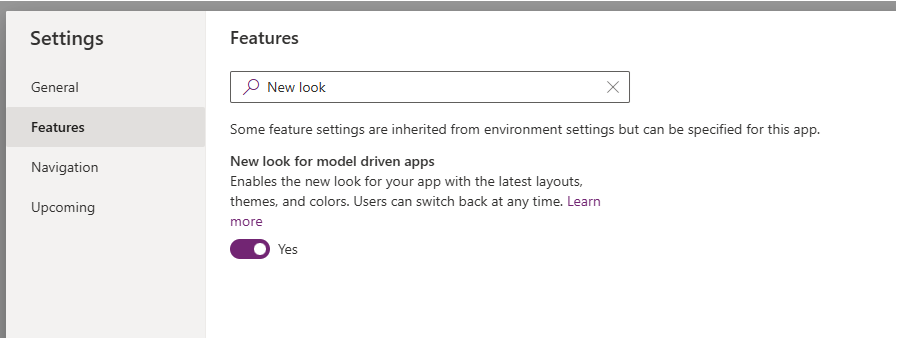
Why don't I see the modern rich text editor?
The modern rich text editor control is part of the New look for model-driven apps and doesn’t appear unless the app setting is turned on. Without the setting enabled, you might see an older version of the editor.