Note
Access to this page requires authorization. You can try signing in or changing directories.
Access to this page requires authorization. You can try changing directories.
Unless someone has 'pinned' a different view in your app as their personal default, they will see the default view specified by the app maker. Any of the public views can be set as the default view for a table.
Sign in to Power Apps.
Select Solutions on the left navigation pane. If the item isn’t in the side panel pane, select …More and then select the item you want.
Open the solution where the table is located.
Open the table, and then select the Views area.
Select More commands
 next to the view, and then select Set as default view. This can also be set on the command bar.
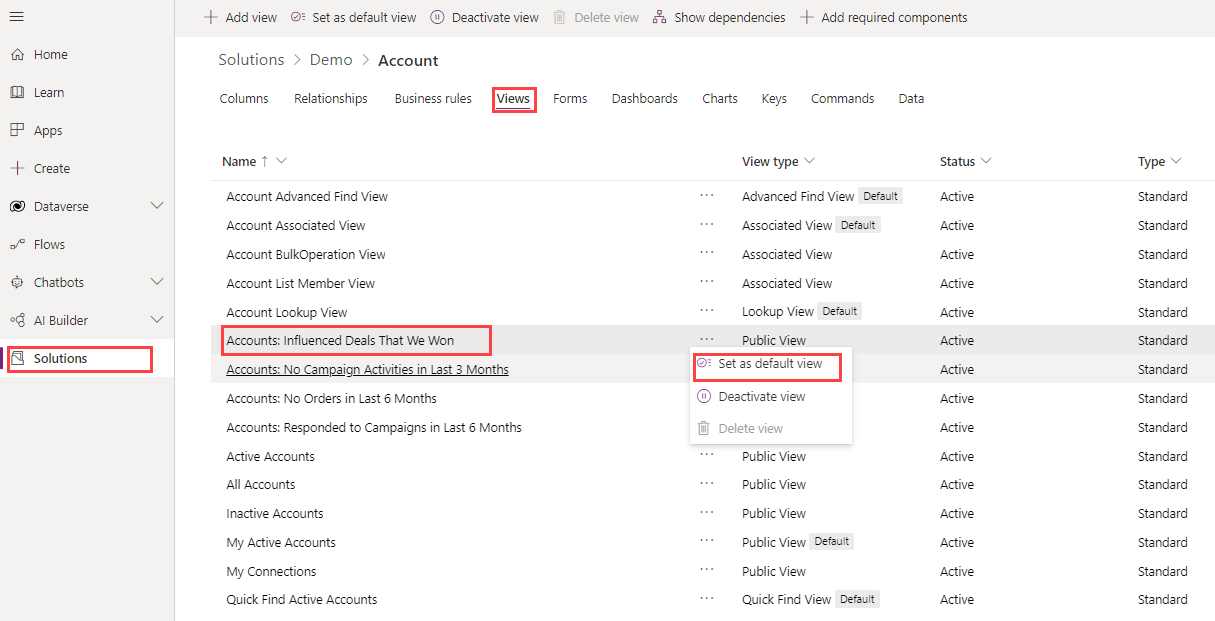
Note
You can also specify the views that can be displayed in a model-driven app using the model-driven app designer. More information: Manage views and charts
Set the default view for a table in solution explorer
Open solution explorer, expand Entities, select the table that you want, and then select Views.
Select one of the public views.
On the menu bar, select More Actions > Set Default.

On the solution explorer toolbar, select Publish All Customizations.