Note
Access to this page requires authorization. You can try signing in or changing directories.
Access to this page requires authorization. You can try changing directories.
Create a cloud flow that performs one or more tasks automatically after an event triggers it. For example, create a cloud flow that notifies you by email when someone sends a tweet that contains a keyword you specify. In this example, sending a tweet is the event, and sending mail is the action.
Prerequisites
- An account for Power Automate
- An X account
- Office 365 credentials
Create a cloud flow
You can create a cloud flow using natural language in Copilot, or create it from scratch. If you have access to Copilot, select the Using copilot tab to create your flow. If you don't have access to Copilot, select the Without copilot tab.
With Copilot, you can create a cloud flow using natural language. Copilot generates a flow based on your prompt. You can use it 'as is', or customize it further. Learn more in Configure your cloud flow in the designer.
Sign in to Power Automate.
Copy the following prompt and paste it in the Copilot field:
when a new tweet is posted, send an email to eug@contoso.com with X usernameSelect Generate.
Based on the description, Copilot begins to create a suggested trigger and actions for your flow. A trigger is an event that starts a cloud flow. Actions are the events you want the flow to do after the trigger event takes place.
In this example, the trigger is When a new tweet is posted and the actions are Get user and Send an email.
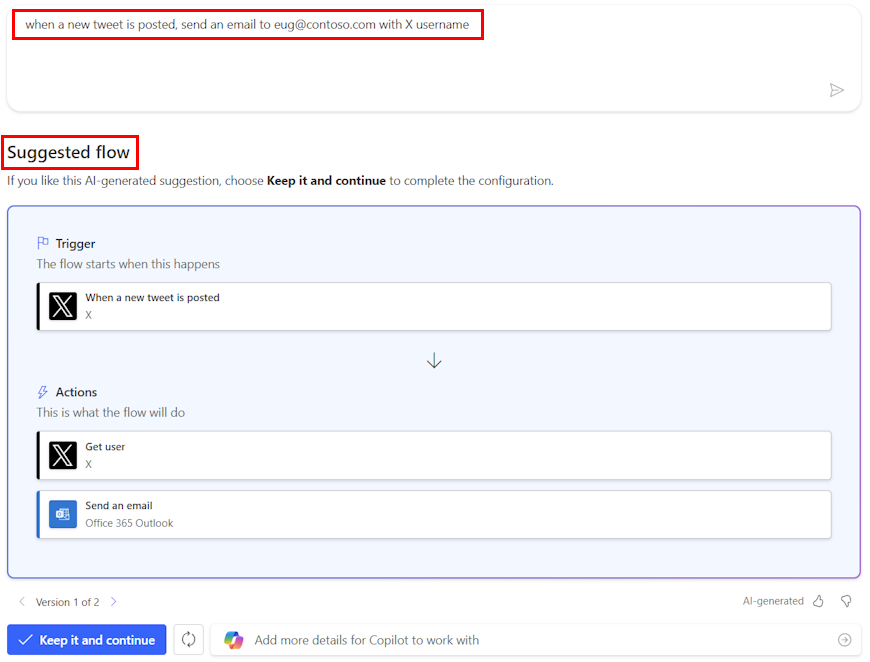
Select Keep it and continue.
Review your connected apps and services to X and Outlook. A green checkmark indicates that the connection is valid.
Select Next. Your flow appears on the designer.
Save the flow and it's ready to use.
Your flow triggers when new tweets mentioning the key phrase Contoso Company are posted. It also sends an email to the specified email address in the Send an email action.
Go to Test your flow.

Configure your cloud flow in the designer
Power Automate allows you to use either the new designer or the classic designer to configure your cloud flow. The steps are similar in both designers. Learn more (with examples) in Identify differences between the new designer and the classic designer.
Make sure you completed the steps in Create a cloud flow.
Below the When a new tweet is posted trigger, select the plus sign (+).
In the Search for an action or connector field, enter send email.
Under Office 365 Outlook, select Send an email (V2). The configuration pane opens.
In the configuration pane, enter your email address in the To field.
In the Subject field, enter New tweet from:, and then type a space.
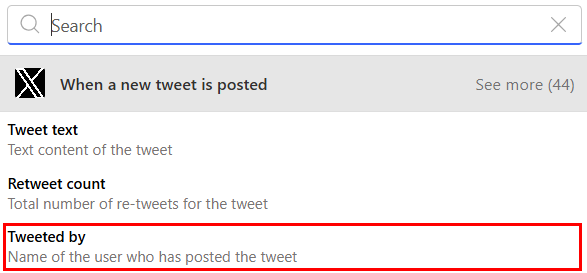
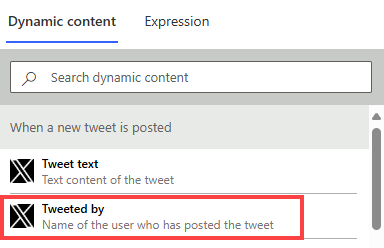
Select the lightning bolt to the right and select Tweeted by to add a placeholder for it.
If you don't see the Tweeted by dynamic content, select See more at the top of the list.
Select the Body field, select the lightning bolt, and then select Tweet text to add a placeholder for it.
Note
Optionally, you can add more dynamic content, other text, or both to the body of the email.
Close the configuration pane by selecting << in the upper-right corner of the pane.
Select Save and go to Test your flow.
Test your flow
After you create a cloud flow and save it, send a tweet with the keyword that you indicated, or wait for someone else to post such a tweet.
In about a minute after the tweet is posted, an email message notifies you of the new tweet.
Tip
Use the Send email (V2) action to format email in which you customize the font, use bold, italic, or underline, customize the color and highlight, create lists or links, and more.
Manage a cloud flow
You can have up to 600 flows in your account. If you already have 600 flows, delete one before you create another flow.
Sign in to Power Automate.
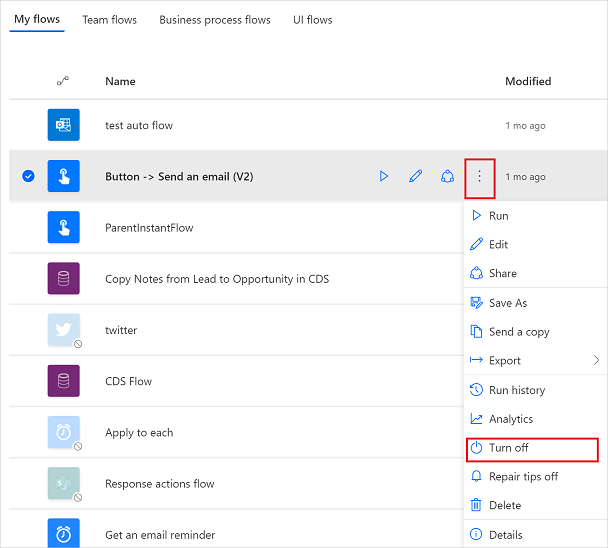
On the navigation pane to the left, select My flows.
Select the vertical ellipsis (⋮) next to the flow you want to manage, and then do any of the following:
To pause a cloud flow, select Turn off.
To resume a cloud flow, select Turn on.
To edit a cloud flow, select Edit (or the pencil icon) that corresponds to the flow you want to edit.
To delete a cloud flow, Delete, and then select Delete on the message box that appears.
To view the run history of a cloud flow, select the flow from the My flows page. Then, select Details to see the history under the 28 day run history section. Select a cloud flow run from the list to view the inputs and outputs of each step.
Related information
- Add steps, such as different ways to be notified, to your flow.
- Run tasks on a schedule, when you want an action to occur daily, on a specific date, or after a specific number of minutes.
- Add a cloud flow to an app
- Get started with team flows and invite others to collaborate with you to design flows.
- Training: Get started with Power Automate (module)
- Training: Enhance communication using Power Automate and the Office 365 Users Connector (module)