Note
Access to this page requires authorization. You can try signing in or changing directories.
Access to this page requires authorization. You can try changing directories.
Create a cloud flow that performs one or more tasks such as sending a report in email.
- Once a day, an hour, or a minute.
- On a date that you specify.
- After many days, hours, or minutes that you specify.
Create a scheduled cloud flow
You can create a scheduled cloud flow using natural language in Copilot, or create it from scratch. If you have access to Copilot, select the Using copilot tab to create your flow. If you don't have access to Copilot, select the Without copilot tab.
You can ask Copilot to create a scheduled cloud flow.
Sign in to Power Automate.
On the navigation pane to the left, make sure that Home is selected.
In the Create your automation with Copilot field, type the following prompt:
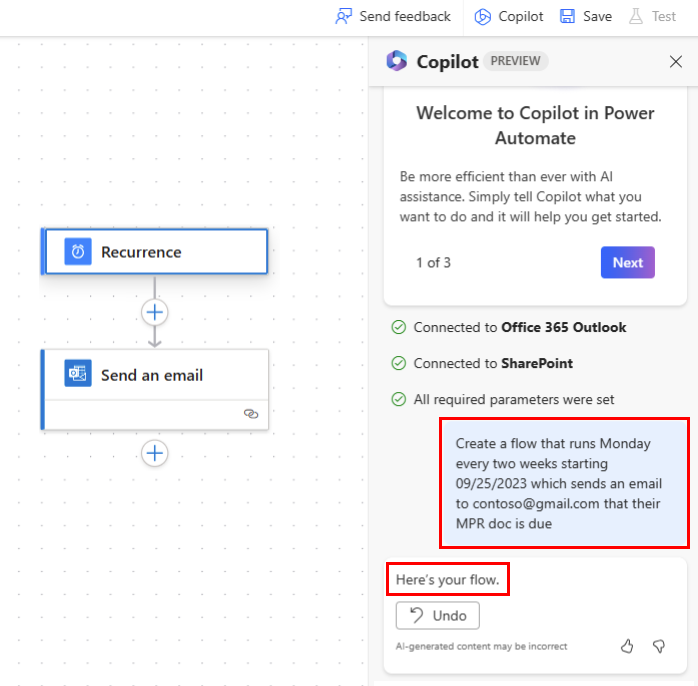
Create a flow that runs Monday every week starting 04/14/2025 which sends an email to contoso@gmail.com that their MPR doc is due.**Select Generate.

Copilot generates a flow based on your prompt. You can review the generated flow and make any necessary adjustments. If you're satisfied with the suggested flow, select Keep it and continue.
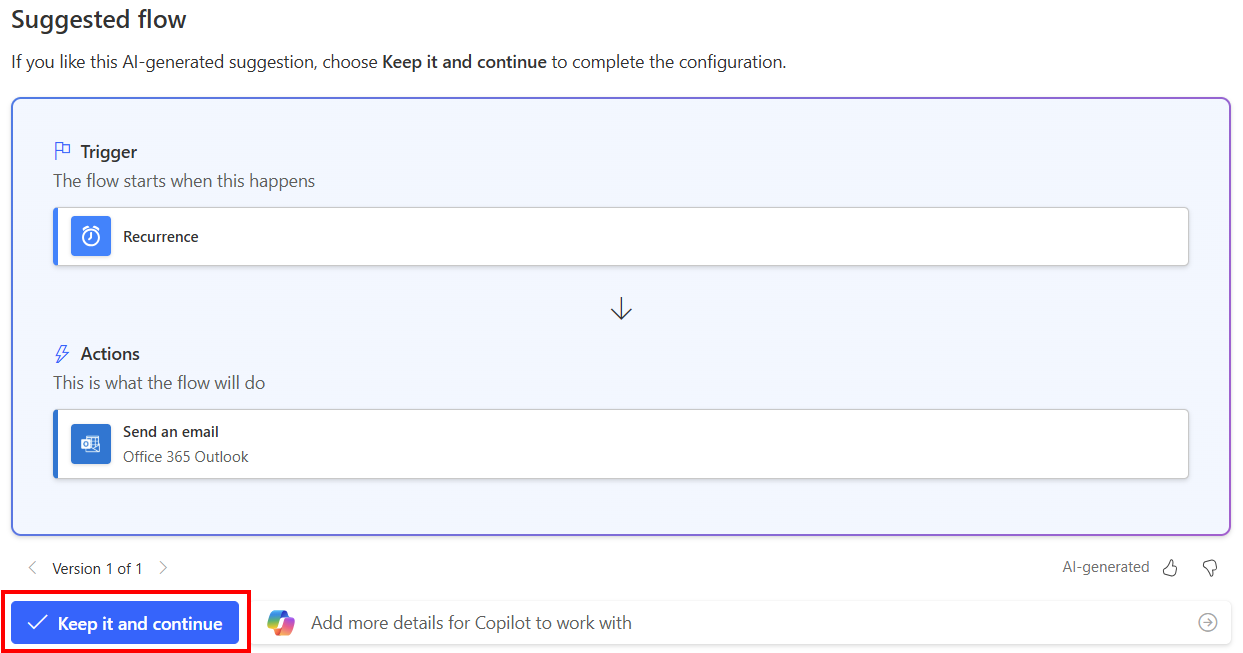
Review the connected apps and services. A green checkmark means the connection is ready to go.
If you don't have a green checkmark, select the connection to set it up.
Select Create flow.
Use Copilot to configure actions
In the designer, select Copilot.
In the Copilot panel, ask Copilot to make changes to your scheduled flow. For example, you can enter the following prompt:
Change the interval from every week to 2 weeks.After Copilot generates a response, it confirms that it made the update successfully. If you change your mind, you can select Undo to revert the changes.
If you're not using Copilot to configure your actions, go to Configure cloud flow triggers and actions.
Configure cloud flow triggers and actions
Power Automate allows you to use either the new designer or the classic designer to configure your cloud flow. The steps are similar in both designers. Learn more (with examples) in Identify differences between the new designer and the classic designer.
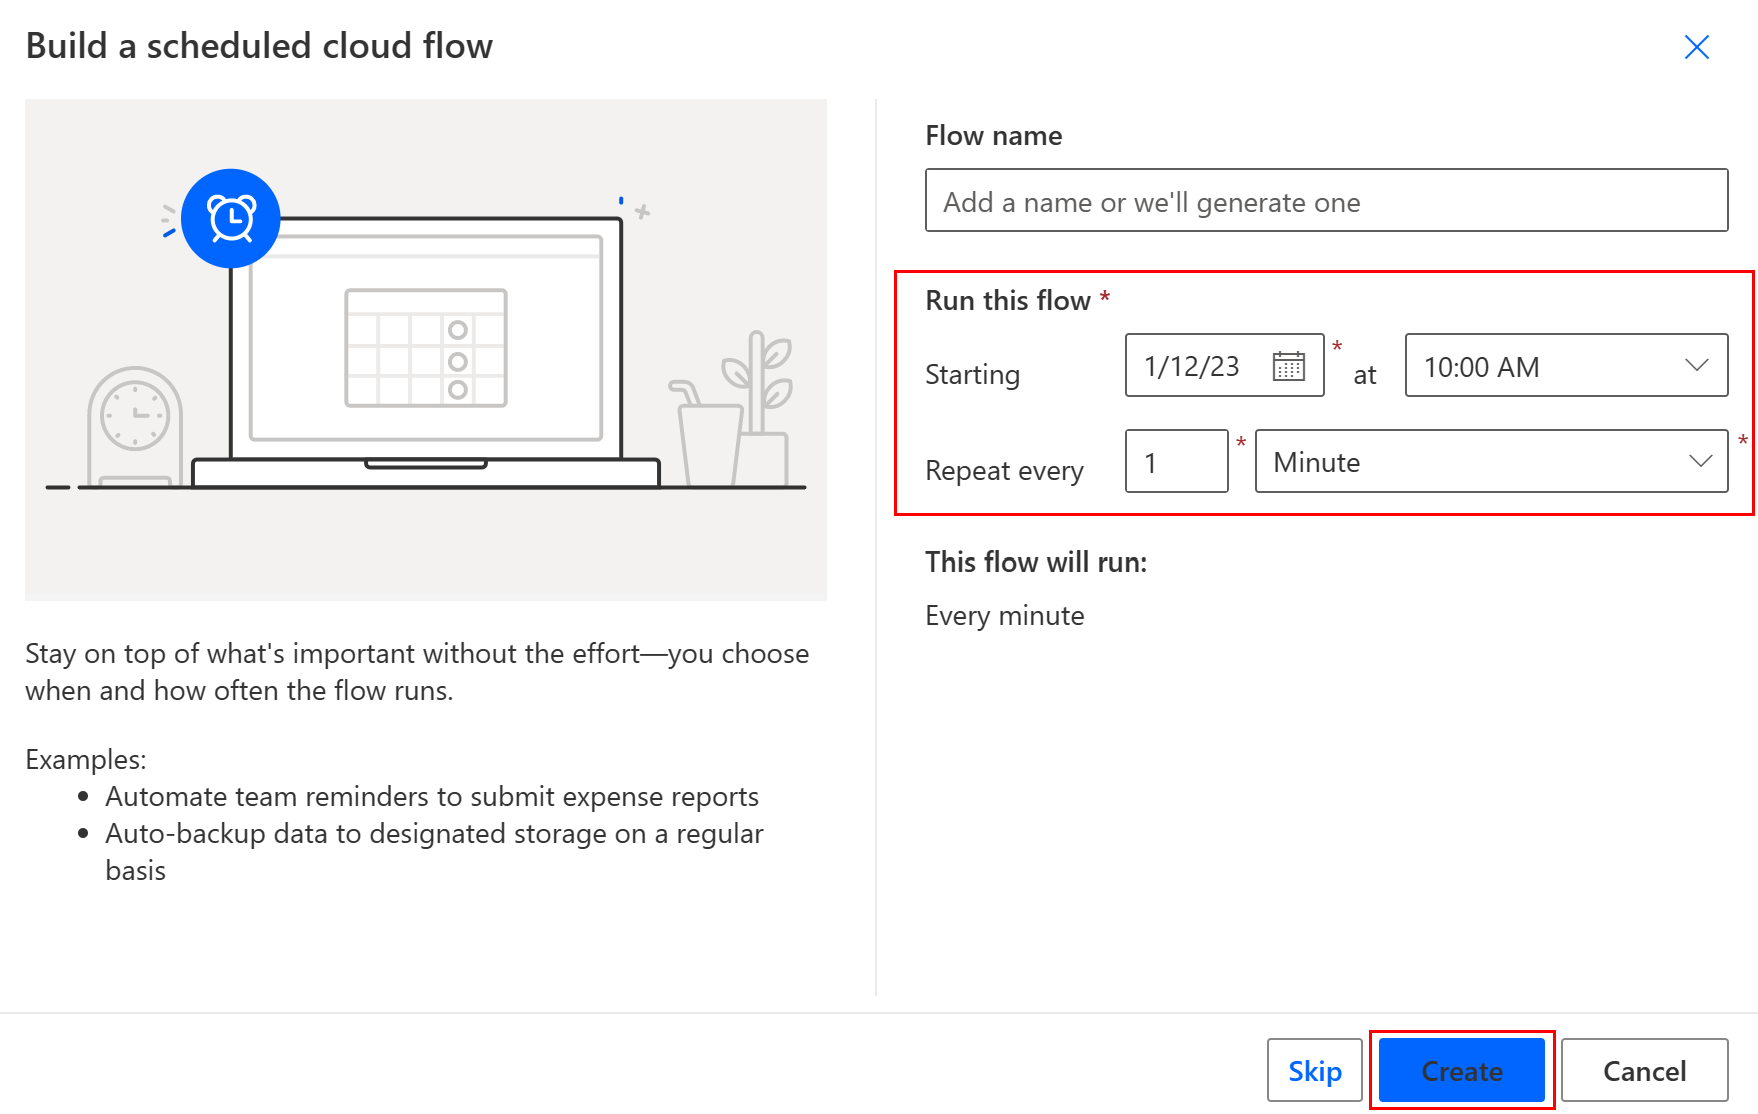
Make sure you Created a scheduled cloud flow.
Select the trigger or action to configure.
Configure the parameters.
- New designer: In the designer, select the trigger or action. The configuration pane opens on the left side of the screen.
- Classic designer: In the designer, select Recurrence > Show advanced options. When you select Show advanced options, the dropdown name changes to Hide advanced options.
New designer Classic designer 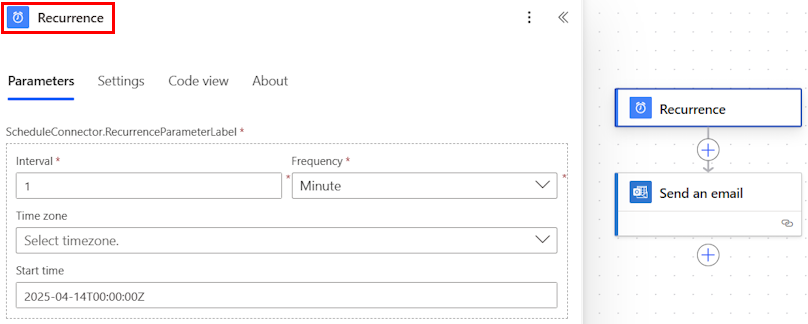
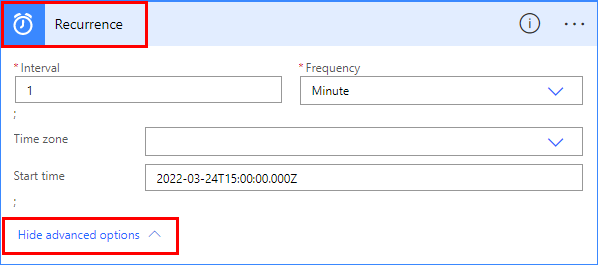
In the Time zone field, select a time zone from the dropdown list to specify whether the Start time reflects a local time zone, Coordinated Universal Time (UTC), or other time zone.
In the Start time field, enter a start time in this format: YYYY-MM-DDTHH:MM:SSZ.
- YYYY = four-digit year
- MM = two-digit month (01-12)
- DD = two-digit day of the month (01-31)
- T = literal character that separates the date and time
- HH = two-digit hour in 24-hour format (00-23)
- MM = two-digit minute (00-59)
- SS = two-digit second (00-59)
- Z = literal character that indicates UTC time
For example, enter 2025-03-24T22:00:00Z to specify 3:00 PM Pacific time on March 24, 2025.
If you specified Day under Frequency, select the time of day when the flow should run in the At these hours and At these minutes dropdown lists.
If you specified Week under Frequency, do the following.
- In the On these days and At these hours dropdown menus, select the day or days of the week on which the flow should run and the time or times of day when the flow should run.
- In the At these minutes field, enter the minute values (from 0 to 59) separated by a comma.
If you run a flow on the month frequency, the flow runs on the same date each month.
Add the action or actions that you want the flow to take, as described in Create a cloud flow from scratch.