Events
Take the Microsoft Learn AI Skills Challenge
Sep 24, 11 PM - Nov 1, 11 PM
Elevate your skills in Microsoft Fabric and earn a digital badge by November 1.
Register nowThis browser is no longer supported.
Upgrade to Microsoft Edge to take advantage of the latest features, security updates, and technical support.
Important
Legacy Power BI apps will be retired on May 1, 2024. Please upgrade to Power BI apps with audiences.
In Power BI, you can create official packaged content, then distribute it to a broad audience as an app. You create apps in workspaces, where you can collaborate on Power BI content with your colleagues. Then you can publish the finished app to large groups of people in your organization. The app consumer view section of this article outlines the app consumer experience in the Power BI service and in the Power BI mobile apps.

Here are the steps to publishing an app in Power BI:
Your business users often need multiple Power BI dashboards, reports, and other content to run their business. With Power BI apps, you can create collections of content and publish these collections as apps, to your whole organization or to specific people or groups. You can create multiple audiences for your app, and show or hide different content to each audience. For you as a report creator or admin, apps and audiences make managing permissions on these collections easier.
Business users get your apps in a few different ways:
Your app consumers can't modify the contents of the app. They can interact with it either in the Power BI service, or one of the mobile apps: filtering, highlighting, and sorting the data. You can also give them permission to share semantic models and create their own content in the app.
To create or update an app, you need a Power BI Pro or Premium Per User (PPU) license. For app consumers, there are two options.
If the workspace for this app is not in a Power BI Premium capacity: All business users need Power BI Pro or Premium Per User (PPU) licenses to view your app.
If the workspace for this app is in a Power BI Premium capacity/F64 or higher Fabric capacity: Business users without Power BI Pro or Premium Per User (PPU) licenses in your organization can view app content. However, they can't copy the reports, or create reports based on the underlying semantic models. Read these articles for details:
When the content in your workspace is ready, you can start the publishing process. You decide how many different audience groups you need. Then you choose which content you want to publish to each audience. You can create up to 25 audience groups in one app.
In the workspace list view, select Create app to start the process of creating and publishing an app from the workspace.

On the Setup tab, give it a name and add a description to help people find the app. You can also set a theme color, add a link to a support site, and specify contact information.
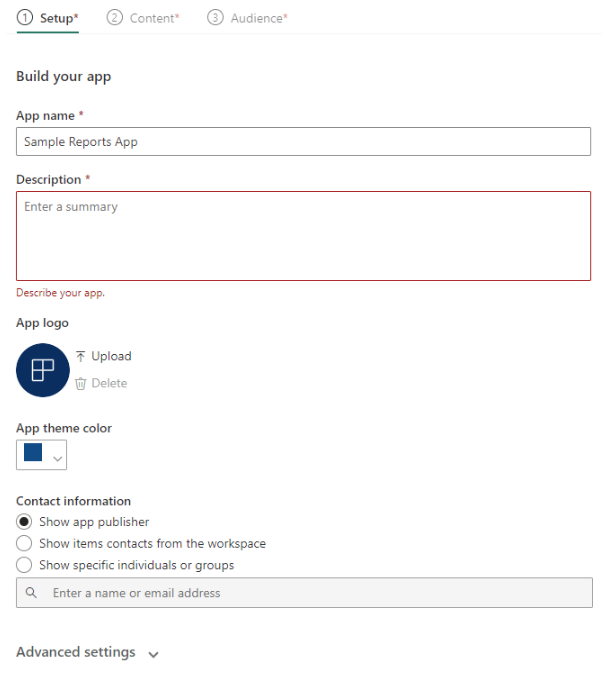
Select Next: Add content.
Before you leave the Setup tab, you can decide if you want to allow app users who have build permissions to save copies of reports to their workspace. Once they save the reports, app users can customize their report copies to meet their needs.
Expand Advanced settings and select Allow users to make a copy of the reports in this app.
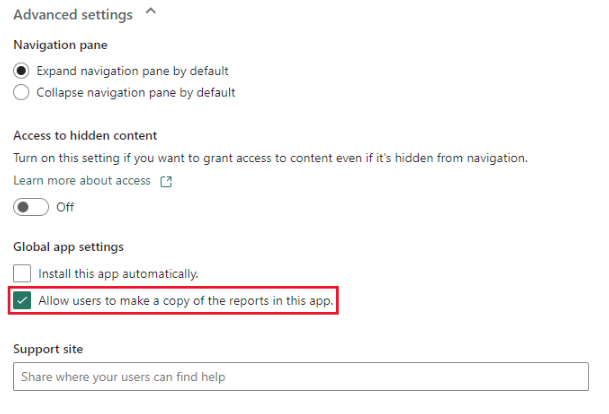
When you select that, app users who have build permissions can save a copy of a report from the app consumer view. You can also grant build permissions to your app users through the app using Advanced option under Manage audience access pane.
Select Next: Add content.
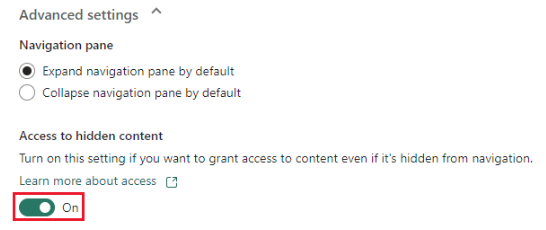
Also, before you leave the Setup tab, you can decide if you want users to have access to hidden content.
Caution
If users have a direct link to any of the content in your app, they can access the hidden content, even if that item is visually hidden in the navigation pane for that audience.
Expand Advanced settings.
Under Access to hidden content, slide the toggle to On.
Select Next: Add content.
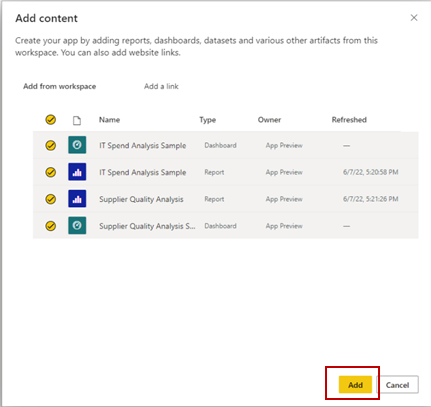
On the Content tab, you add the content from the workspace to the app.
Select Add content on the Content tab.
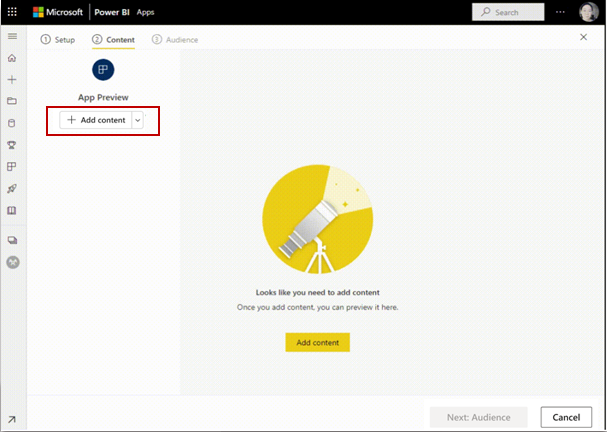
Select the contents that you want to add from the current workspace.
Note
When you publish an app, it includes all app content by default for each audience group. However, when you update an app, newly added content isn't included by default.
You can also add links to other websites. Select Add a link from the drop-down menu next to Add content.
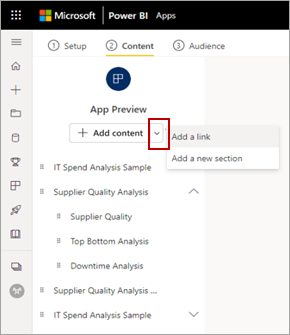
After you've added the content, you can change the order of the content:


Select Next: Add audience.
When you include Power BI reports that have paginated report visuals, we recommend including the referred paginated reports in the app. This way, the published Power BI report work with the published version of the paginated report instead of the report stored in the workspace.
During publishing, Power BI can detect reports with visuals that point at missing paginated reports:
You can address the issue in one of two ways:
Include the paginated report in the app and make sure the audience that has access to the Power BI report also has access to the paginated report.
Make sure the audience has access to the paginated report in the workspace.
On the Audience tab, you create and manage audience groups within the app.
To create an audience, select New Audience.
Double-click the default audience label to change the audience name.
Select the hide/show icon next to each item in the workspace to determine the content that this app audience can see.
Important
To address these issues, make sure that all the dependent reports are added to the app and visible for the audience. If they're hidden from the audience, select Allow access to hidden content.
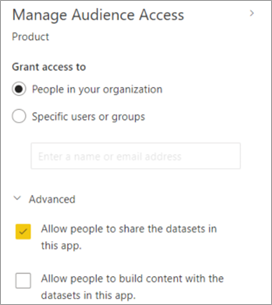
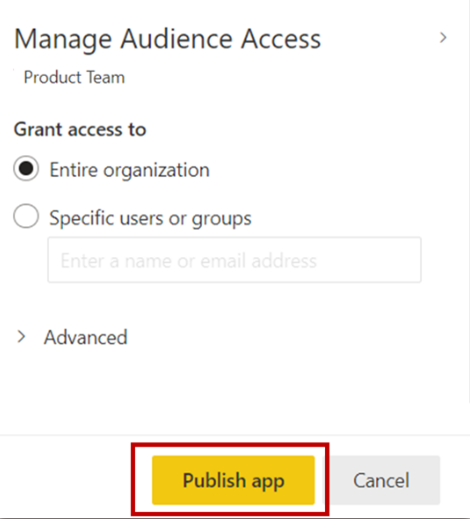
In the Manage audience access pane, specify groups or users to add to the current audience group.

Important
For each audience group, grant access to either all people in your organization or specific users or groups. You can also expand the Advanced option to configure the following settings per audience group:
Allow users to share the semantic models in this app: This option gives app consumers permission to share the underlying semantic models of the app audience.
Allow users to build content with the semantic models in this app: This option lets your app consumers create their own reports and dashboards based on the app audience semantic models.
Note
Now that you've decided on the audiences and the content for each audience, it's time to publish your app. You can install the app automatically for the recipients, if your Power BI admin has enabled this setting for you in the Power BI Admin Portal. Read more about automatically installing an app in this article.
Select Publish app.
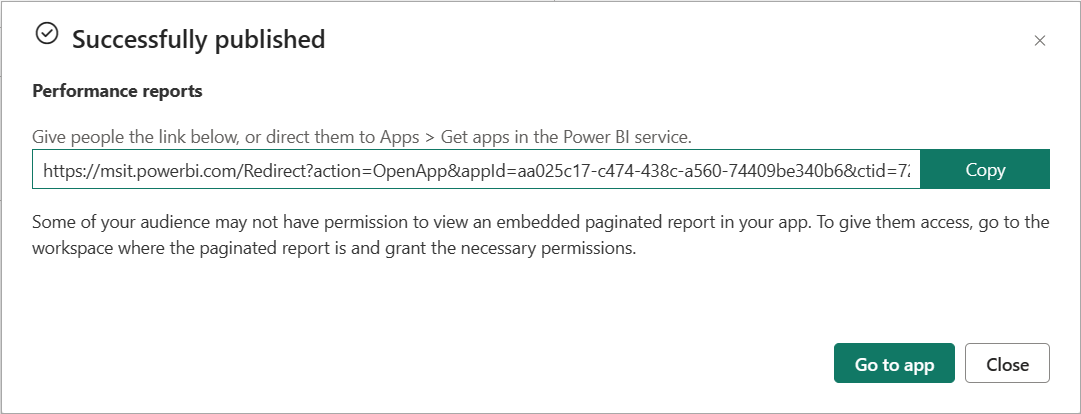
After you've successfully published the app, you see a Successfully published message that includes a shareable app link. You can copy and share that link with your app consumers.
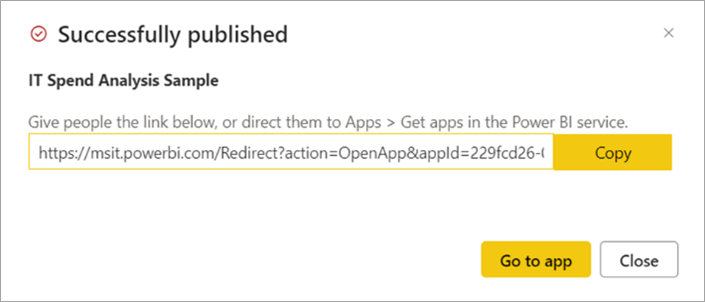
You can also share the published app by selecting the Copy link button at the bottom of the Setup page. That creates a shareable app link to share with your app consumers.

Your app consumers can also request access to your app by searching for the app from Apps marketplace or AppSource. See the app consumer view section of this article for more about the app experience for consumers.
You can add your entire organization to any of the app audience groups when you publish your app.
However, this option is disabled in these three scenarios:
You can control what users see when they attempt to view an app but they don't have access. The default setting triggers the access request flow. Users see that they're denied access, and can submit a request for access.
The default option is for access requests to come to you via email. See the section in this article for more on managing access requests.
But you can also display a custom message.
Some organizations have processes and systems outside of Power BI for reviewing and managing access requests. The custom message setting is a chance for you to explain or provide a link to how a user can get access to the Power BI app. You can change the default access request behavior for a Power BI app by going to the Power BI app settings and configuring the Access requests options as desired. Select Replace with automated custom message.
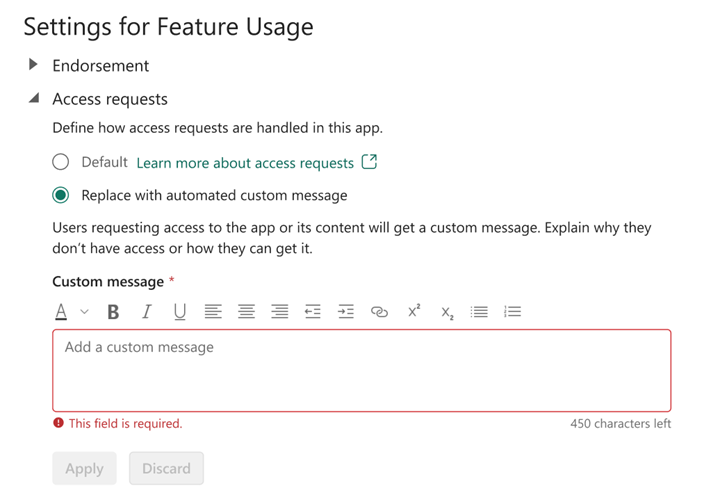
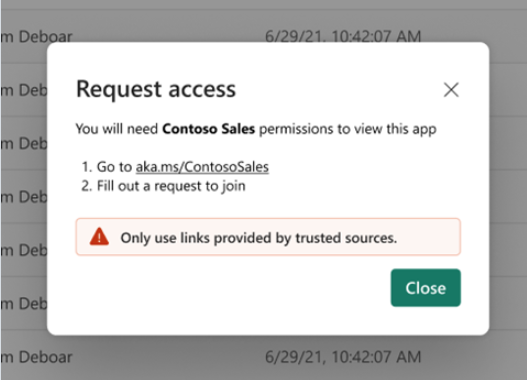
Create your own custom message. You can include a link for your users to request access. This option is for you to provide instructions about how a user can get access to your Power BI app, rather than receiving requests via email. You might choose this option, for example, if your organization uses an automated system for handling access requests. When users who don't have access to your Power BI app try to view it, they see a message with the instructions you provide.
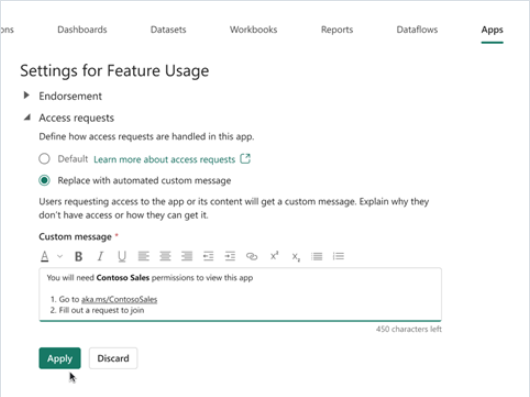
The Custom message text area in the Access requests example shows sample instructions. Instructions can be rich text with formatting and links. The following example shows the experience for users see when they try to view a Power BI app they don’t have access to.
Note
Custom messages aren't supported in Power BI mobile apps for iOS and Android. Even if you choose to show a custom message to users who don't have access to your Power BI app, users on mobile still see the default access request flow.
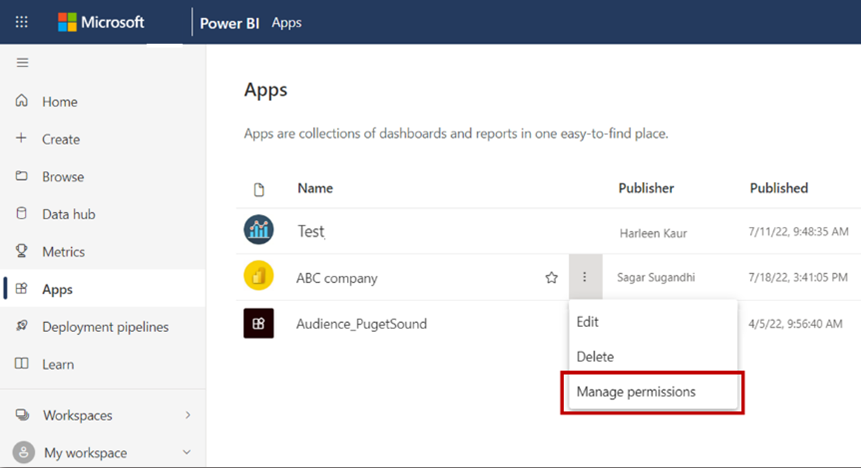
After you publish an app, you can manage app permission.
In the Apps list page, select More options (...) next to an app, then select Manage permissions.
You also see a notification banner in the workspace if there are any pending access requests. Select View to access the app permission management page directly.

The Permission management page contains these tabs:
Direct access: Lists all the users who already have access to the app.
Pending access: Lists all pending requests.

After you publish your app, you might want to change or update it.
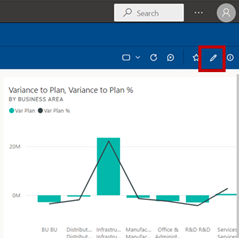
Open the workspace that corresponds to the app. If you're a workspace Admin or Member, you can also open the workspace right from the app, by selecting the Edit app pencil.
Make any changes you want to the content of your app.
The workspace is your staging area, so your changes aren't live in the app until you publish again. This lets you make changes without affecting the published apps.
Important
If you remove a report and update the app, even if you add the report back to the app, your app consumers lose all customizations they've made, such as bookmarks, comments, and so on.
Select Update app in the Workspace content view.
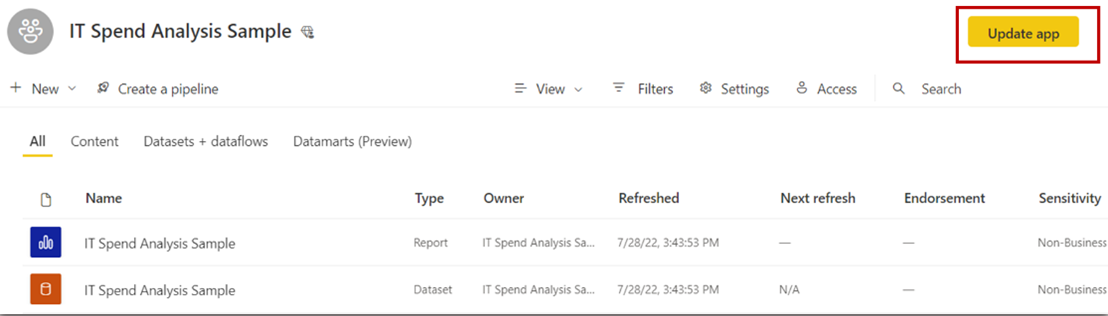
Update Setup, Content, and Audience, if you need to, then select Update app.
The people you've published the app to automatically see the updated version of the app.
Note
If you removed app permissions as part of the update, new app installers won't get those permissions. However, the update won't remove the permissions from users who already have them. To remove such existing access, go to the Direct access tab on the semantic models manage permissions page and remove the permissions manually.
Before you can copy a link to an item in an app, you have to publish it first. An app that you're creating doesn't show the Copy link in the Content tab for the item.
You can copy a link to these items in an app:
You can't copy a link to an Excel workbook in an app.
In the app, select More options (...) next to the item whose link you want to copy.
Select Copy link.
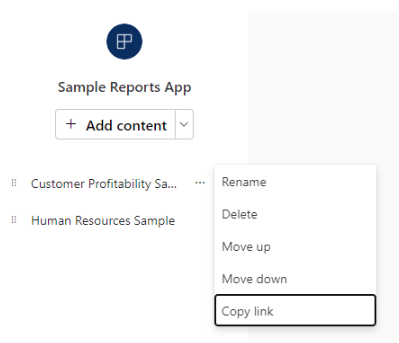
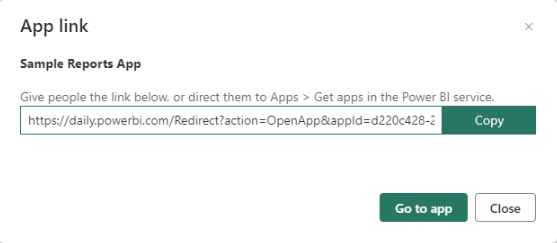
In the App link dialog box, select Copy and then Close or Go to app.
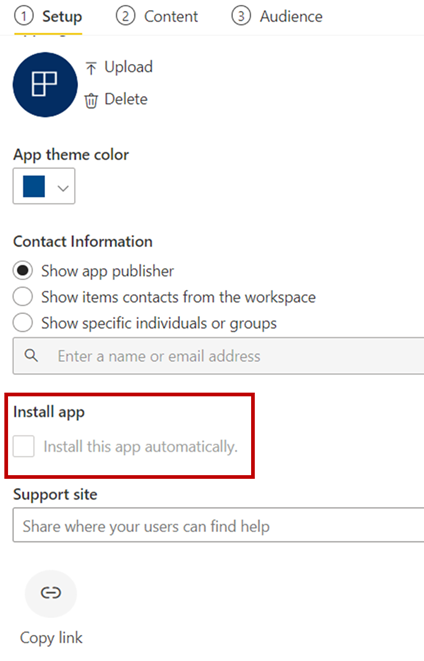
If an admin gives you permission, you can install apps automatically when you publish them, and push the apps to app consumers This push functionality makes it easier to distribute the right apps to the right people or groups. Your app appears automatically in your end users' Apps content list. They don't have to find it from the Apps marketplace or Microsoft AppSource or follow an installation link. See how admins enable publishing apps to end users in the Power BI admin portal article.
Once the admin has assigned permissions to you, you have a new option to install the app automatically. When you check the box and select Publish app (or Update app), the app is published to all audience groups defined in the Audience tab of the app.
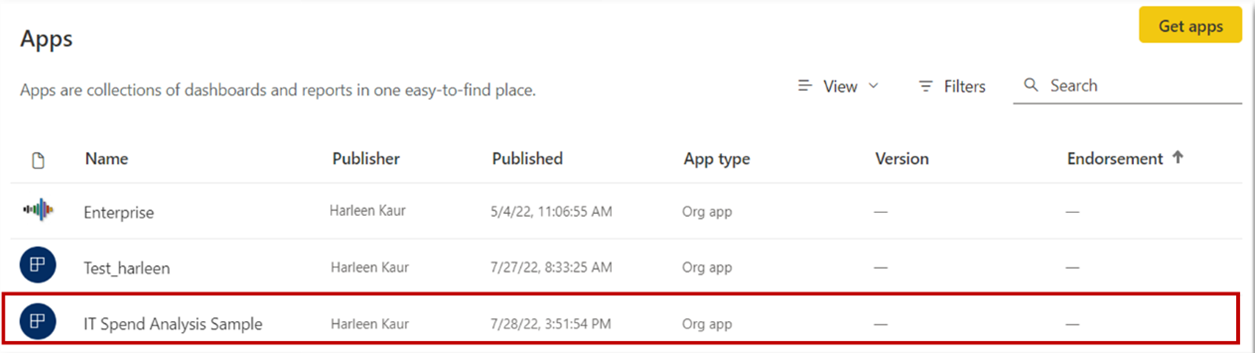
After you publish an app to your users, it shows up in their Apps list automatically. In this way, you can curate the apps that specific users or job roles in your organization need to have at their fingertips.
Keep these things in mind when publishing apps and pushing them automatically to end users:
You can't automatically install an app for an entire organization. You notice that when you select the checkbox for install app automatically, the option for entire organization becomes inactive.
Installing an app automatically to users can take time. Most apps install immediately for users, but publishing apps can take time. It depends on the number of items in the app and the number of people given access. We recommend publishing apps during off hours with plenty of time before users need them. Verify with several users before sending broad communication about the apps' availability.
If users don't immediately see the app in the Apps list, they should refresh or close and reopen their browser.
Try not to overwhelm users. Be careful not to publish too many apps to your users, so they perceive the pre-installed apps are useful to them. It's best to control who can publish apps to end users to coordinate timing. Establish a point of contact for getting apps in your organization published to end users.
Guest users who haven't accepted an invite don't get apps automatically installed for them.
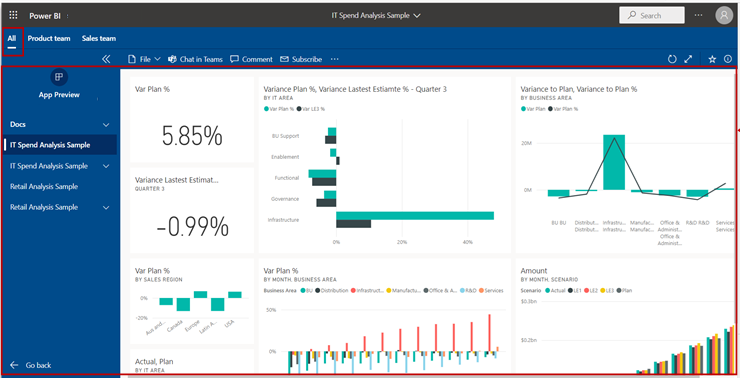
App consumers in the Power BI service and in the Power BI mobile apps only see the content based on the access permissions for their respective audience groups. Consumers who have access to multiple audience groups see group tabs on the top bar to switch between different audience views easily. For example, if the user is part of both product team and sales team groups, they see three view tabs, as shown in the following image. By default, consumers see the All tab view, which is a consolidated view showing all content that they have access to. App consumers can browse different audience group tabs to see the content for each group.
The consolidated All view
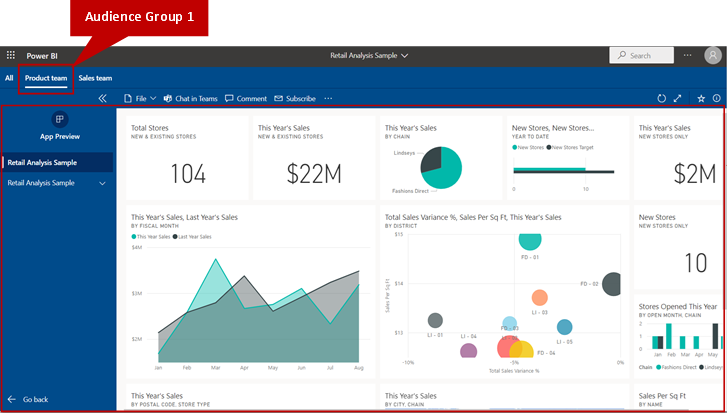
Audience group one, Product Team
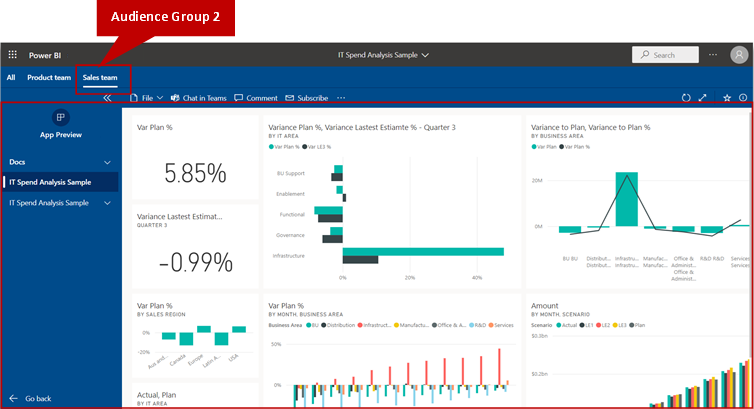
Audience group two, Sales Team
Read more about how app consumers experience apps.
Any Admin or Member of a workspace can unpublish the app.
In a workspace, select More options (...) > Unpublish app.

This action uninstalls the app for everyone you've published it to, and they no longer have access to it. This action doesn't delete the workspace or its contents.
Important
When you unpublish an app, app consumers lose their customizations, even if you republish the app later. They lose any personal bookmarks, comments, and so on associated with content in the app. Only unpublish an app if you need to remove it.
To maintain app reliability and performance here are some app, audience group, and access limits to consider:
Additional things to keep in mind about publishing apps:
Events
Take the Microsoft Learn AI Skills Challenge
Sep 24, 11 PM - Nov 1, 11 PM
Elevate your skills in Microsoft Fabric and earn a digital badge by November 1.
Register nowTraining
Learning path
Embed Power BI analytics - Training
This learning path teaches you how to embed Power BI content in apps, develop programmatic solutions using the Power BI REST API and the Power BI Client APIs, enforce row-level security (RLS) for embedded content, automate common Power BI setup tasks, configure a development environment, and determine appropriate licensing.
Certification
Microsoft Certified: Power Platform Fundamentals - Certifications
Demonstrate the business value and product capabilities of Microsoft Power Platform, such as Power Apps, data connections with Dataverse, and Power Automate.