Note
Access to this page requires authorization. You can try signing in or changing directories.
Access to this page requires authorization. You can try changing directories.
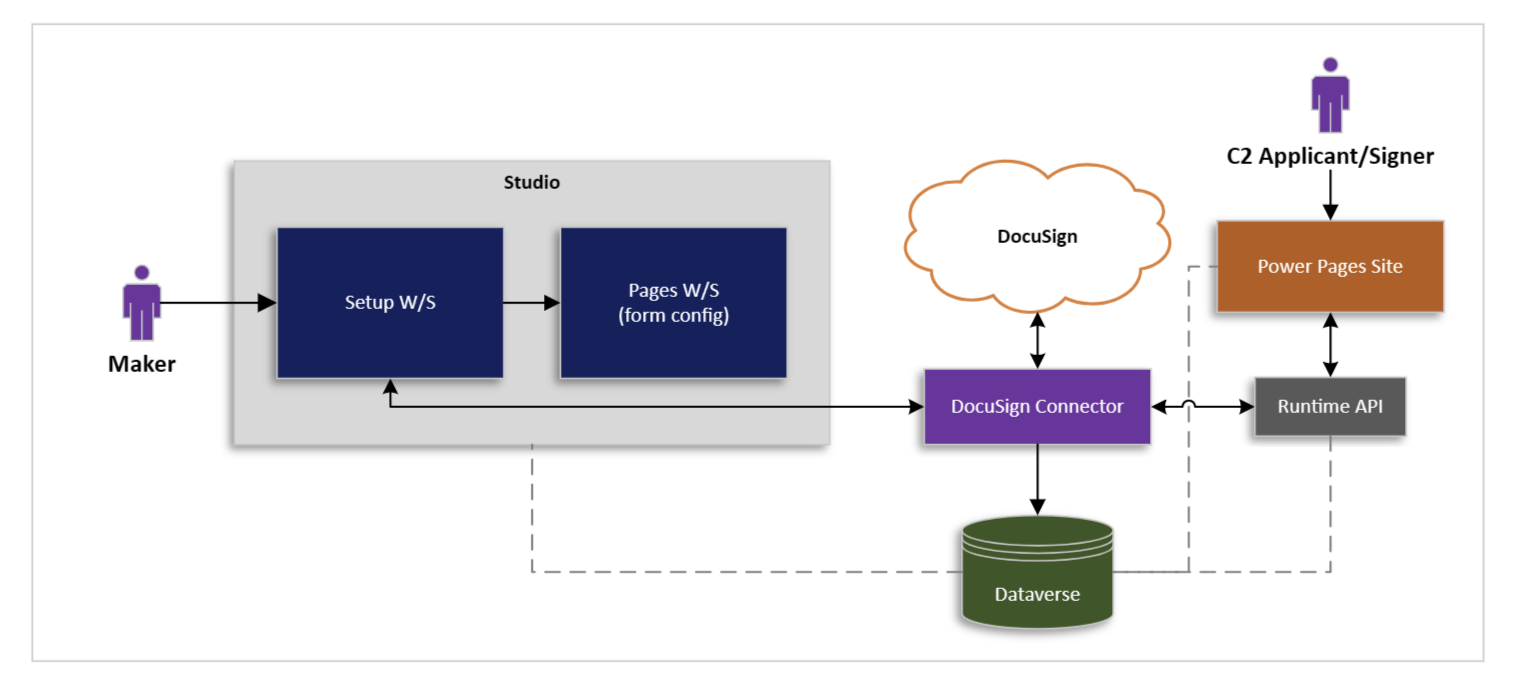
Power Pages and DocuSign integration offers an efficient workflow for incorporating e-signatures into multistep forms through a low-code Studio experience. This integration uses the DocuSign connector-based Microsoft Power Automate Flow to enable an end user to view and sign documents. The configuration of these components is through a newly introduced Integrations > External Apps tab in the Set up workspace and allows you to map your specific Dataverse tables to DocuSign. With this integration, you can add an e-signature step to your multistep forms, enabling a streamlined process for capturing digital signatures.
Integrating DocuSign into your application requires three steps:
Step 1: Install DocuSign. In this step, the site admin installs the DocuSign package consisting of required tables, flows, Dataverse plug-in, and PCF control for the environment.
Step 2: Configure DocuSign. In this step, the site admin or maker configures specific DocuSign credentials and templates.
Step 3: Enable DocuSign. In this step, the maker includes the form and enables e-signatures on the required step for the multistep form.
Prerequisites
- Set up a template in DocuSign. The template can contain one or more documents for viewing and signing. The template is assigned a recipient role but doesn't need any name or email association—these fields are assigned from the Power Pages website. The document can include tabs or fields including the signature tab. See DocuSign Template documentation for details or watch this video.
- You might wish to review how to Configure Power Automate cloud flows in Power Pages prior to integrating DocuSign with your Power Pages site.
- Create or identify a Microsoft Dataverse table to use in a multistep form. The table needs to be configured such that Creating a new activity needs to be selected in the Make this table an option when section. More information: How to create and modify Dataverse tables by using the Data workspace.
- Configure a multistep form using the Dataverse table that has a step to allow users to sign documents. This step displays a subgrid displaying the documents requiring signature. This is configured in a later step.
- The e-signature integration only works with authenticated users who must have their first name, last name, and email configured in their profile.
Step 1: Install DocuSign
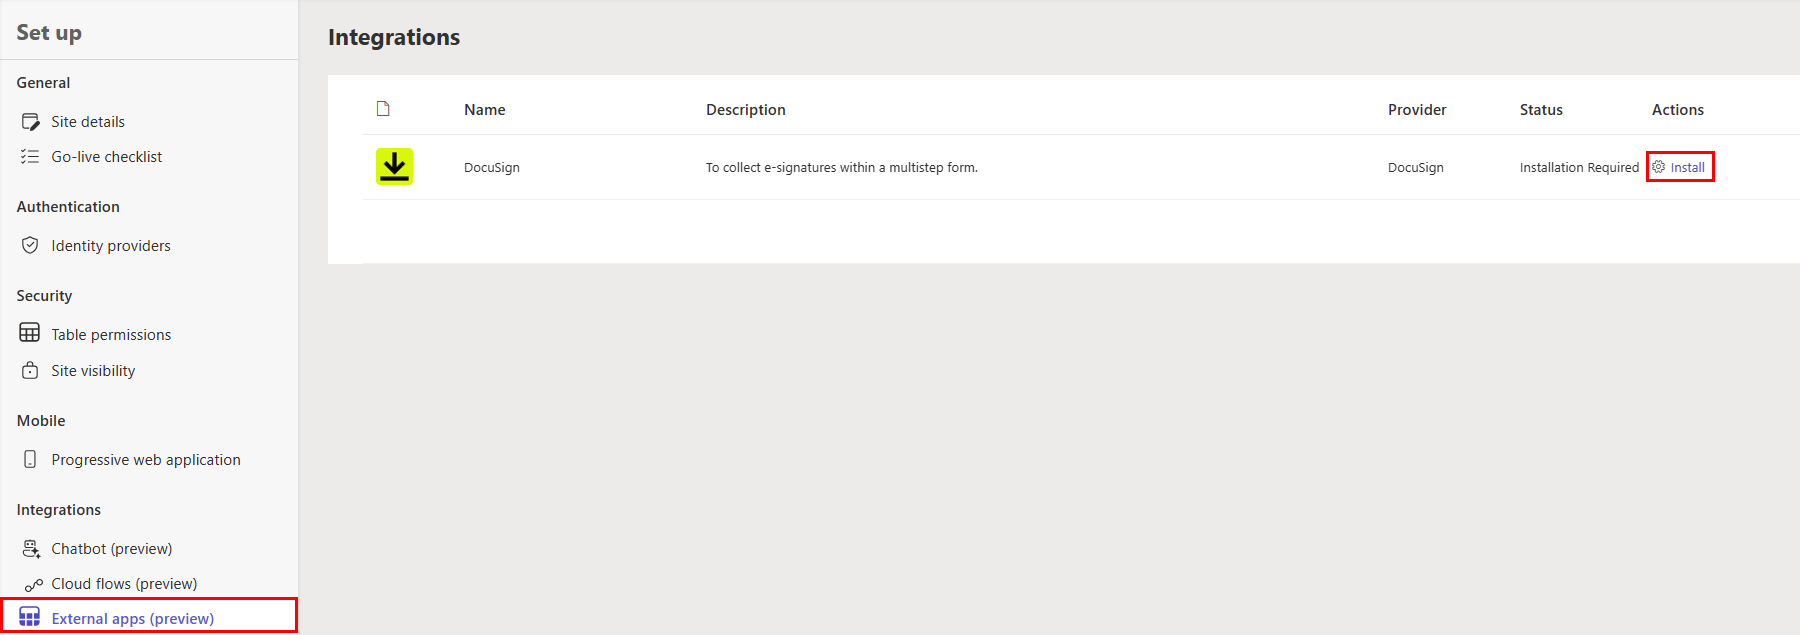
In the design studio, choose Set up > Integrations > External apps.
Select the Install action for DocuSign.
The install action might take a few moments. The action changes to configure once the action is complete. This installs a solution, which contains tables, flows, Dataverse plug-ins, and code components to render signed documents.
Step 2: Configure DocuSign
Once you install the DocuSign package, you can begin to configure DocuSign for your Power Pages site.
In the design studio, choose Set up > Integrations > External Apps.
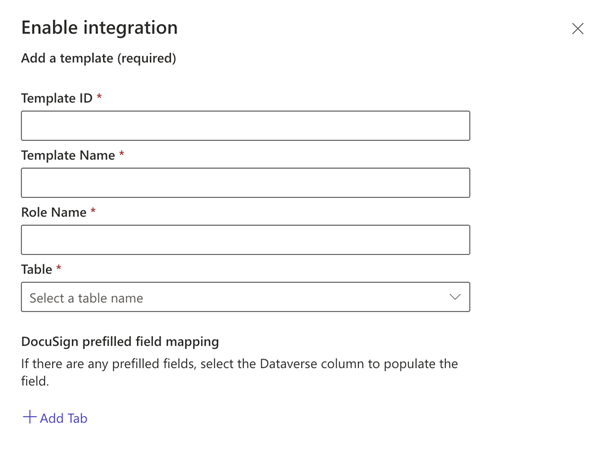
In the Integrations table, select the Configure action for DocuSign. The Enable integration menu displays.
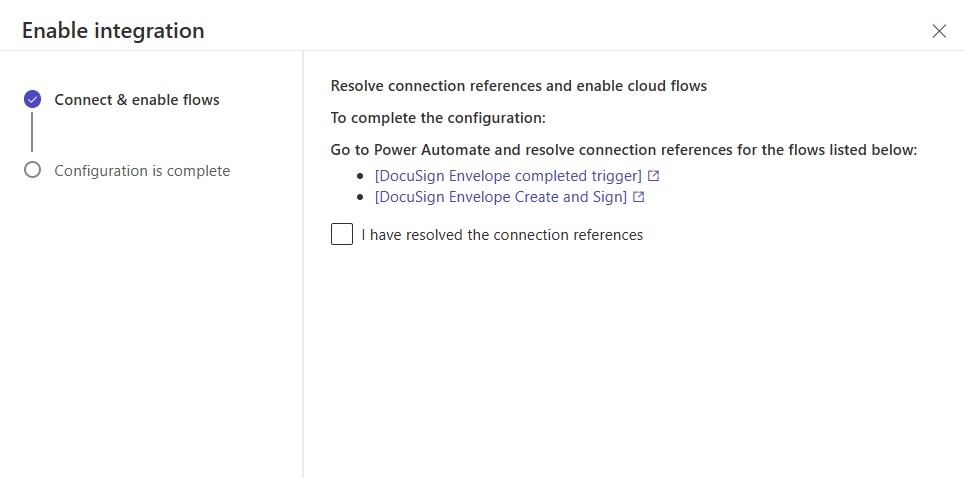
Select the links to resolve the connection references and enable cloud flows in Power Automate, ensuring both cloud flows are turned on.
Note
- There are two flows, one that accesses DocuSign and one that accesses Dataverse.
- Use the appropriate credentials to access DocuSign and Dataverse.
- For the DocuSign Envelope completed trigger flow, you'll need to select the appropriate DocuSign account ID for the Account setting on the When an envelope status changes trigger.
Return to the Enable integration menu in design studio and select the I have resolved the connection references checkbox.
Select Next, then Close to exit the Enable integration menu.
In the Set up workspace, choose Cloud Flows.
Add the DocuSign Envelope Create and Sign cloud flow from the previous step to this website.
Enter the DocuSign template metadata in the fields provided:
Value Source Template ID DocuSign eSignature website Template Name DocuSign eSignature website Role Name DocuSign eSignature website Table Dataverse table used in the multistep form requiring e-signatures (Optional) Map the form table fields to the DocuSign tabs in the document.
Step 3: Enable DocuSign
To enable DocuSign, complete the following steps:
Create a multistep form step for the Dataverse table used in your multistep form process to represent the documents grid.
Add table permissions for the Dataverse table used in the document signature multistep form process (you need at least Create and Write) and assign appropriate web roles. More information: Configuring table permissions
Select the Sync button.
On a webpage, add or edit the multistep form, and create a step entitled Sign Document (or similar). More information: Add a multistep form
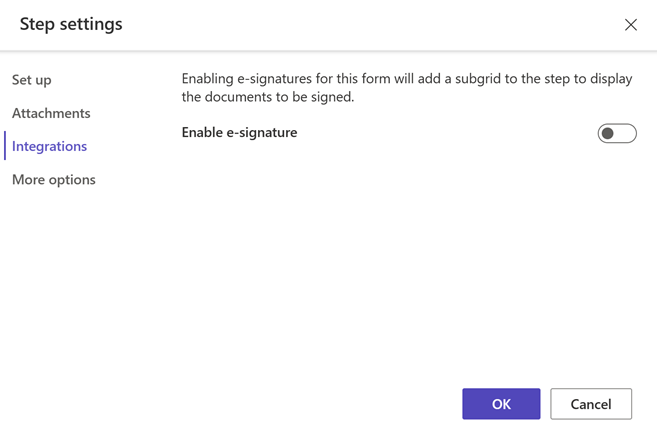
Proceed to Step settings.
Select Integrations.
Choose the correct template to associate with the form.
Enable the form toggle for e-signature.
Note
You must open the form to give permission to authenticated users.
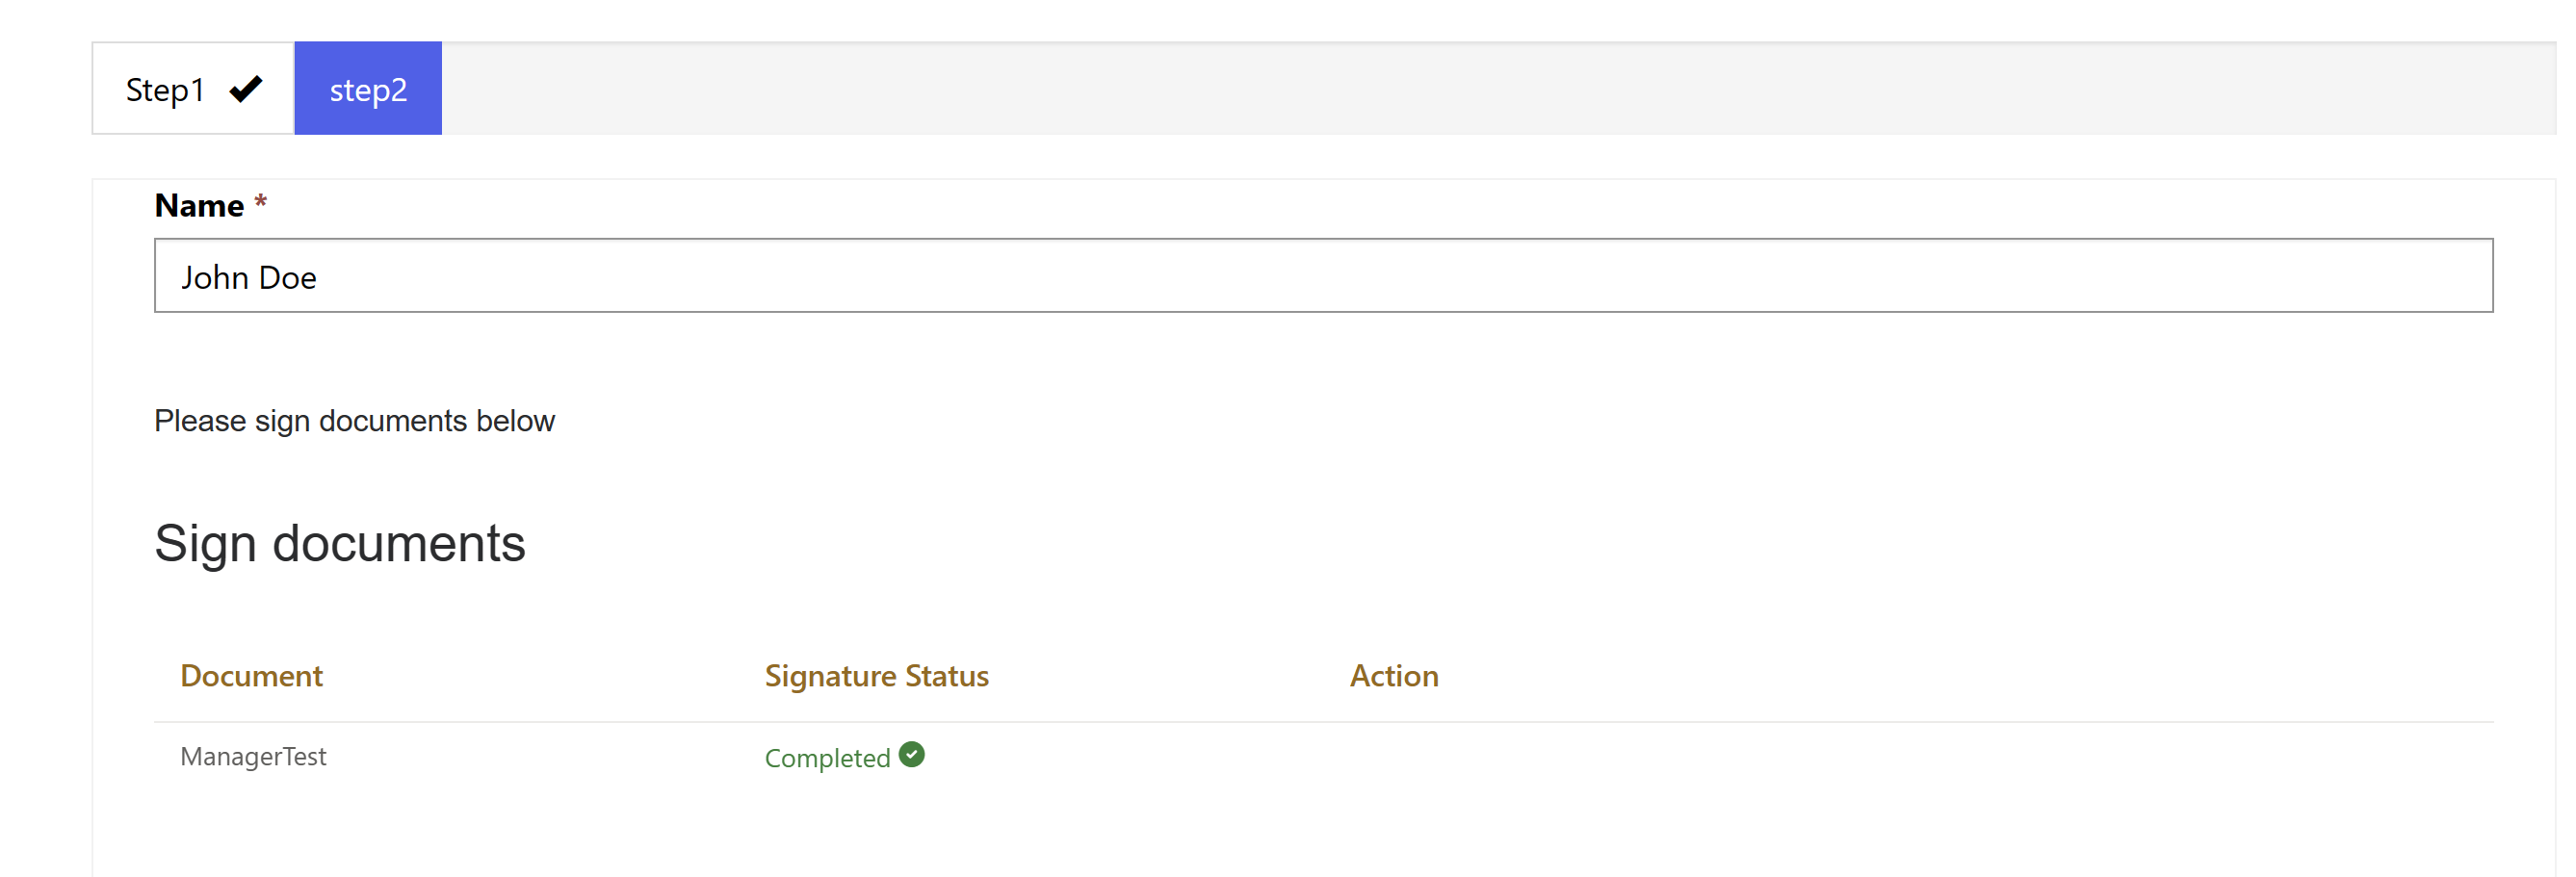
A subgrid is automatically added to the form step that lists the documents that are to be signed.
Preview and test your webpage. You should be able to open the document, e-sign the appropriate fields, exit, and return to the multistep process.