Note
Access to this page requires authorization. You can try signing in or changing directories.
Access to this page requires authorization. You can try changing directories.
Note
The ALM Accelerator is deprecated and will be removed in a future release. Use Pipelines in Power Platform to bring ALM automation capabilities to Power Platform and Dynamics 365 services. Pipelines can be used with source code integration or extended to integrate with other providers.
You can configure the components of the ALM Accelerator for Power Platform either using its administration app or manually. This article guides you through using the admin app and is structured in seven sections:
- Prerequisites
- Configure Microsoft Entra app registrations
- Install Azure DevOps extensions
- Import the solution and configure the app
- Set up your first Azure DevOps project for use with the ALM Accelerator
- Create an app user in your Dataverse environments
- Set up makers to use the ALM Accelerator app
Prerequisites
Before you install the ALM Accelerator for Power Platform, make sure you've met the following prerequisites.
The ALM Accelerator must be installed in a Power Platform environment that has a Microsoft Dataverse database. All the environments you use the ALM Accelerator to deploy solutions to also require a Dataverse database.
Note
The ALM Accelerator isn't compatible with Dataverse for Teams. Both the ALM Accelerator app and the associated pipelines assume that you're using the full version of Dataverse in all environments.
We recommend you install the ALM Accelerator in the same environment as other CoE Starter Kit solutions. Learn more about how to determine the best strategy for your organization:
The ALM Accelerator uses Azure DevOps for source control and deployments. If you don't have an Azure DevOps organization, sign up for free for up to five users on the Azure DevOps site.
To complete the steps in this section, you need the following users and permissions in Azure, Azure DevOps, and Power Platform:
- A licensed Azure user with permissions to create and view Microsoft Entra groups, create app registrations, and grant admin consent to app registrations in Microsoft Entra ID
- A licensed Azure DevOps user with permissions to create and manage pipelines, service connections, repos, and extensions
- A licensed Power Platform user with permissions to create application users and grant them administrative permissions
The following connectors must be available to be used together in the environment into which the ALM Accelerator is imported:
- Dataverse (legacy)
- HTTP
- Power Apps for Makers
- HTTP with Microsoft Entra ID (with endpoint access to https://graph.microsoft.com)
- ALM Accelerator Custom DevOps (this connector is created as part of the accelerator solution import)
- Office 365 Users
- HTTP
Install the Creator Kit in the environment where you install the ALM Accelerator.
Configure Microsoft Entra app registrations
The following steps are general to the functionality of the ALM Accelerator and aren't specific to any project or solution.
Create an app registration in your Microsoft Entra environment
Create an app registration for the ALM Accelerator to grant the app and associated pipelines permissions required to perform operations in Azure DevOps and Power Apps or Dataverse. You only need to do this once.
The following steps show how to create a single app registration with permissions for both Dataverse and Azure DevOps. However, you might want to create separate app registrations to divide responsibilities. You should consider how separate app registrations affect both maintenance and security before you decide on an app registration strategy.
Create the app registration
Sign in to the Azure portal.
Select Microsoft Entra ID > App registrations.
Select + New registration, and then give the registration a name, such as ALMAcceleratorServicePrincipal.
Leave all other options at their default values, and select Register.
Add permissions to the app registration
In the left side panel, select API permissions.
Select + Add a permission.
Select Dynamics CRM, and then select Delegated permissions and user_impersonation.
Select Add permissions to add the Dynamics CRM API user_impersonation permission to the app registration.
Select + Add a permission again.
Select the APIs my organization uses tab. Search for and select PowerApps-Advisor, and then select Delegated permissions and Analysis.All (admin consent not required).
This permission is required to run static analysis through the app checker.
Select Add permissions to add the PowerApps-Advisor API Analysis.All permission to the app registration.
Select + Add a permission again.
On either the Microsoft APIs tab or the APIs my organization uses tab, select Azure DevOps, and then select Delegated permissions and user_impersonation.
This permission is required for connecting to Azure DevOps through the custom connector in the ALM Accelerator app.
If you added the Azure DevOps permission from the APIs my organization uses tab, copy the Application (client) ID for use later in this procedure.
You'll use it as the DevOps Application (client) ID, which is different from the Application (client) ID you'll copy later in this procedure.

If you can't find the Azure DevOps permission on the APIs my organization uses tab, follow these steps to get the DevOps Application (client) ID:
- Open a private browser window and go to
https://dev.azure.com/<your devops organization>/_apis. - On the sign-in page, copy the value of the client_id parameter in the URL.
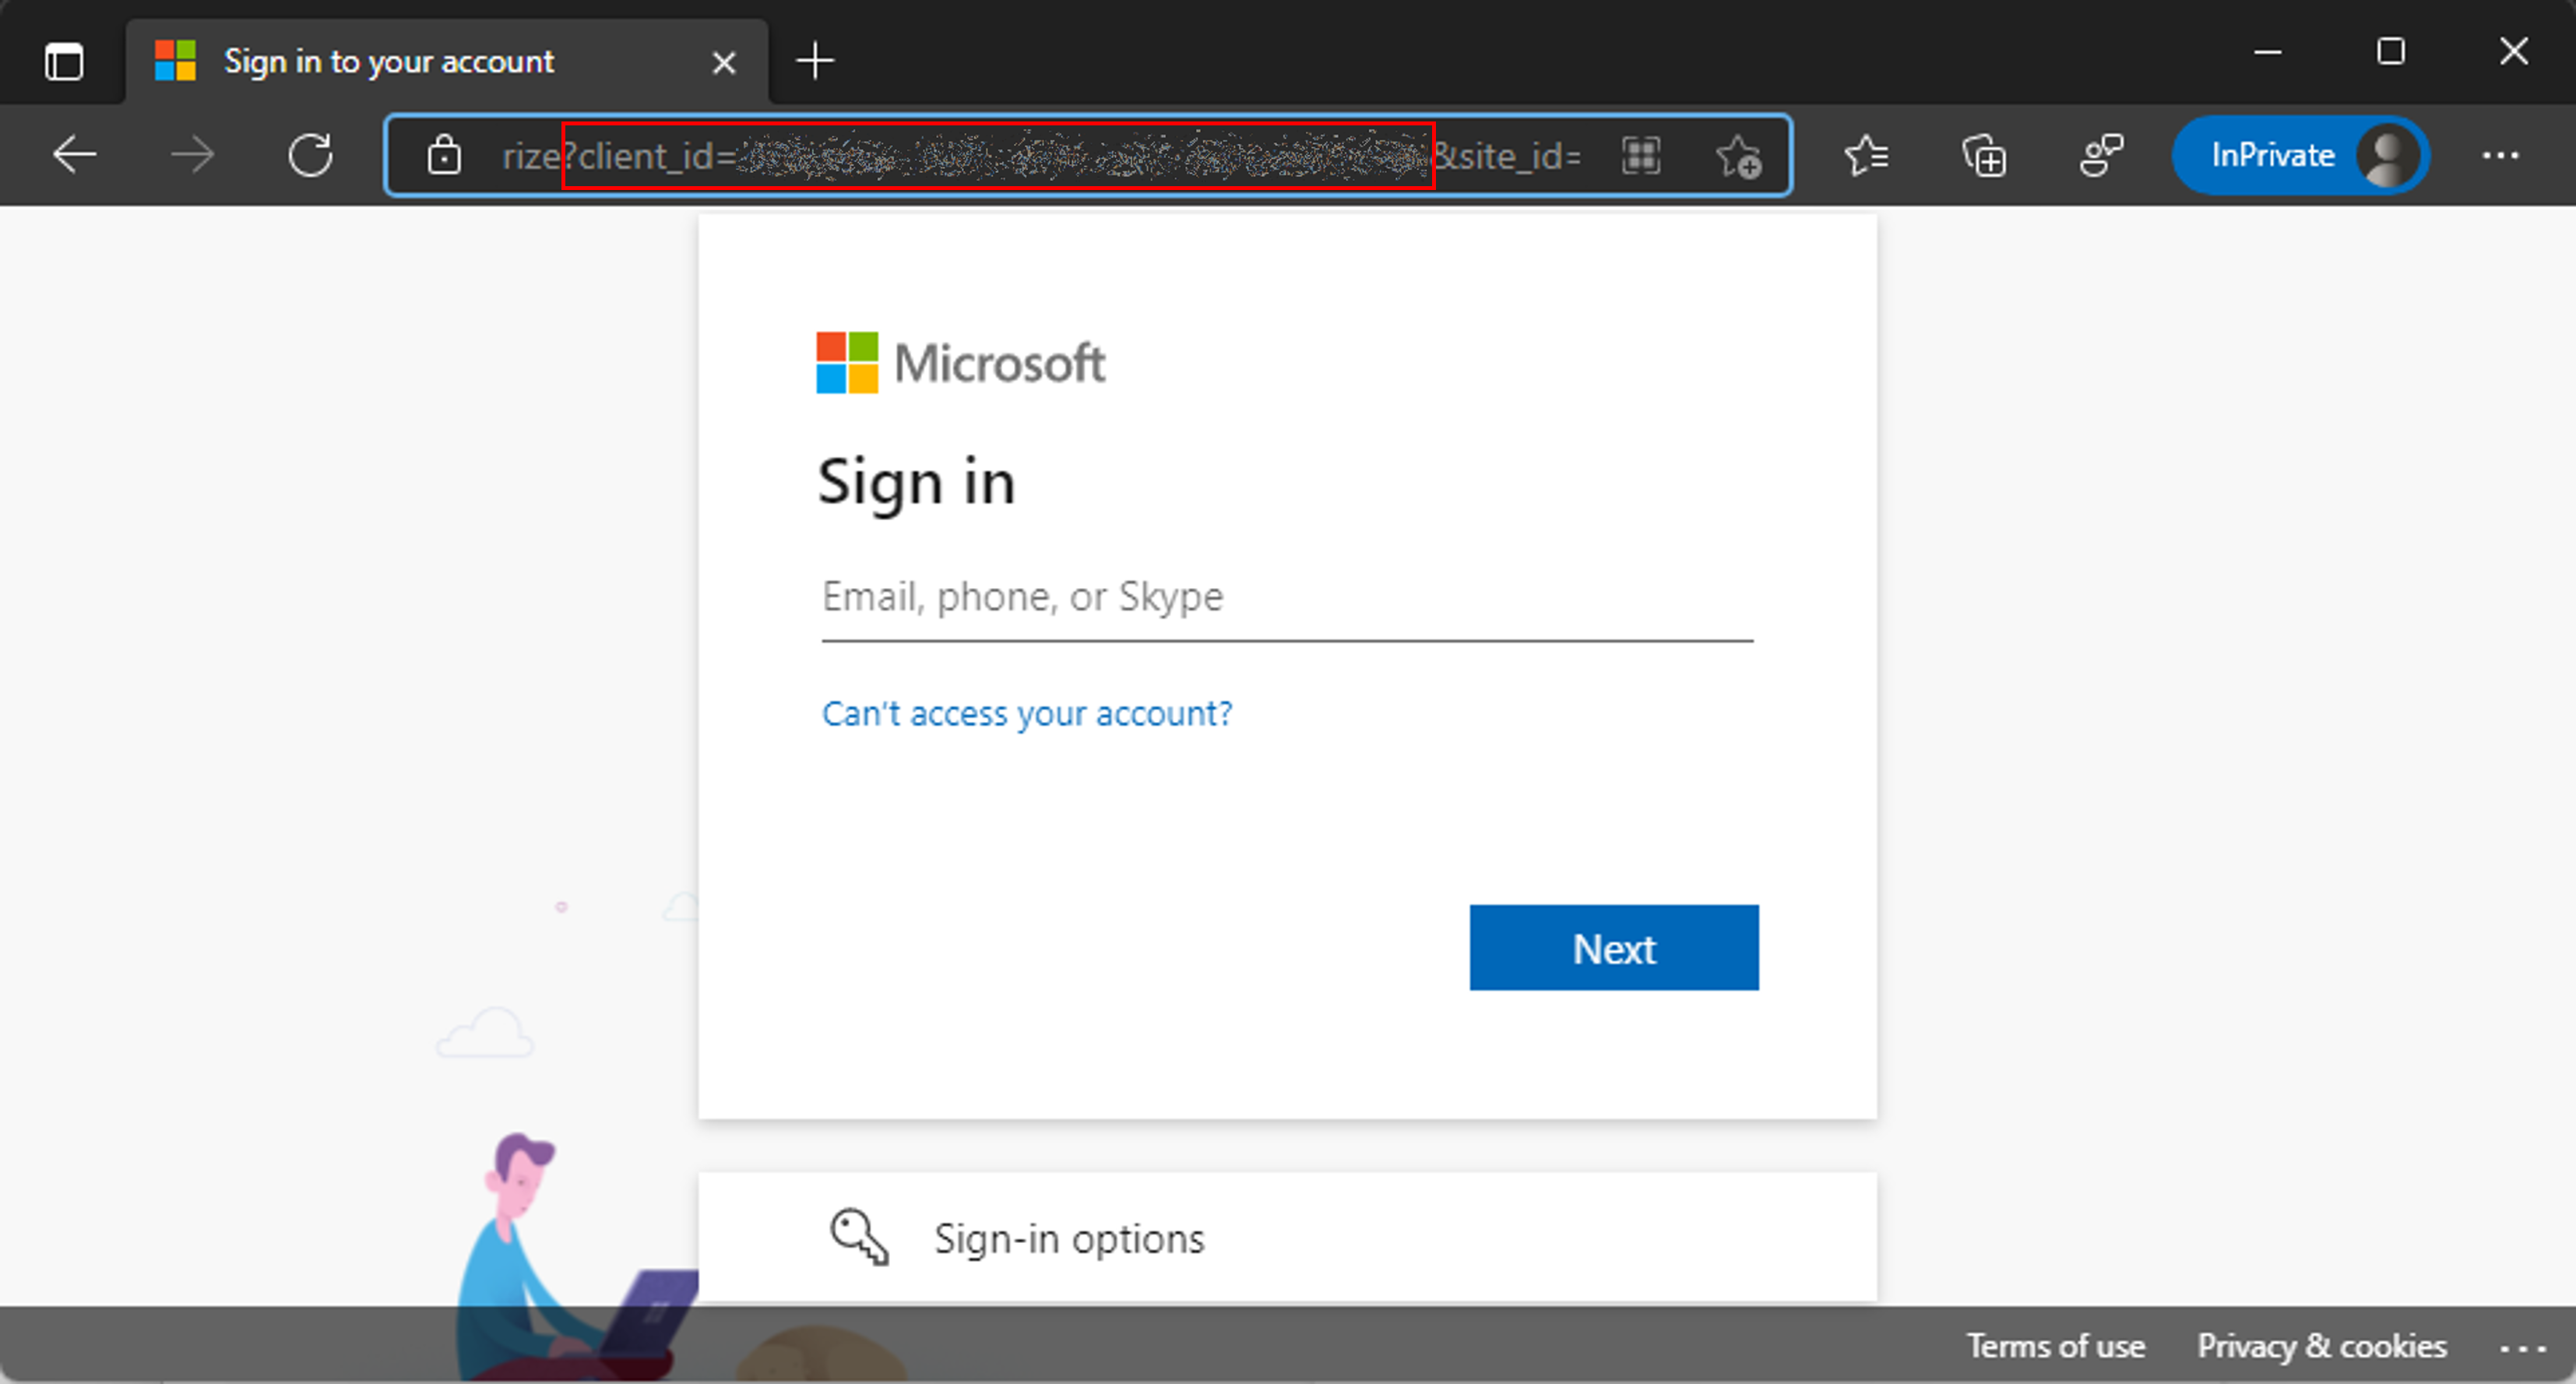
- Open a private browser window and go to
Select Add permissions to add the Azure DevOps API user_impersonation permission to the app registration.
Select Grant admin consent for <your tenant>.
Configure the client secret and redirect URI
In the left side panel, select Certificates & secrets.
Select + New client secret.
Select an expiration date, and then select Add.
Copy the client secret Value for use later. This is the only time you can copy the value. Be sure to do so before you leave the page.
In the left side panel, select Overview.
Copy the Application (client) ID and Directory (tenant) ID.
Select Add a Redirect URI.
Select + Add a Platform, and then select Web.
For the redirect URI of the application, enter
https://global.consent.azure-apim.net/redirect.You might need to change this value after you install the ALM Accelerator app and configure the Azure DevOps custom connector. If the redirect URI that's populated in the custom connector is different from what you enter here, change this URI to match the one in the custom connector.
Select Configure.
Give Power App Management permission to your app registration
Grant Power App Management permissions to your app registration so that the pipelines can perform the actions they need to in your environments. To do that, run the following PowerShell cmdlet as an interactive user that has Power Apps administrative privileges. You only need to run this command once, after you create your app registration.
Important
The following PowerShell cmdlet gives the app registration elevated permissions like Power Platform Admin. Your organization's security policies may not allow these types of permissions. Make sure they're allowed before you continue. If they aren't allowed, certain capabilities don't work in the ALM Accelerator pipelines.
Install-Module -Name Microsoft.PowerApps.Administration.PowerShell
Install-Module -Name Microsoft.PowerApps.PowerShell -AllowClobber
New-PowerAppManagementApp -ApplicationId <the Application (client) ID you copied when you created the app registration>
Install Azure DevOps extensions
The ALM Accelerator uses several Azure DevOps extensions, including some third-party extensions that are available in the Azure DevOps marketplace. The website of each third-party extension and a link to their source code are provided in the following instructions. Learn how to evaluate a Marketplace extension publisher.
Sign in to Azure DevOps.
Select Organization settings.
Select General > Extensions.
Search for and install the following extensions:
Power Platform Build Tools (required): This extension contains the Microsoft build tasks for Power Platform. (https://marketplace.visualstudio.com/items?itemName=microsoft-IsvExpTools.PowerPlatform-BuildTools)
Replace Tokens (required): The pipelines use this extension to replace tokens in configuration files and store secure values in private variables configured for a pipeline. (https://marketplace.visualstudio.com/items?itemName=qetza.replacetokens | https://github.com/qetza/vsts-replacetokens-task)
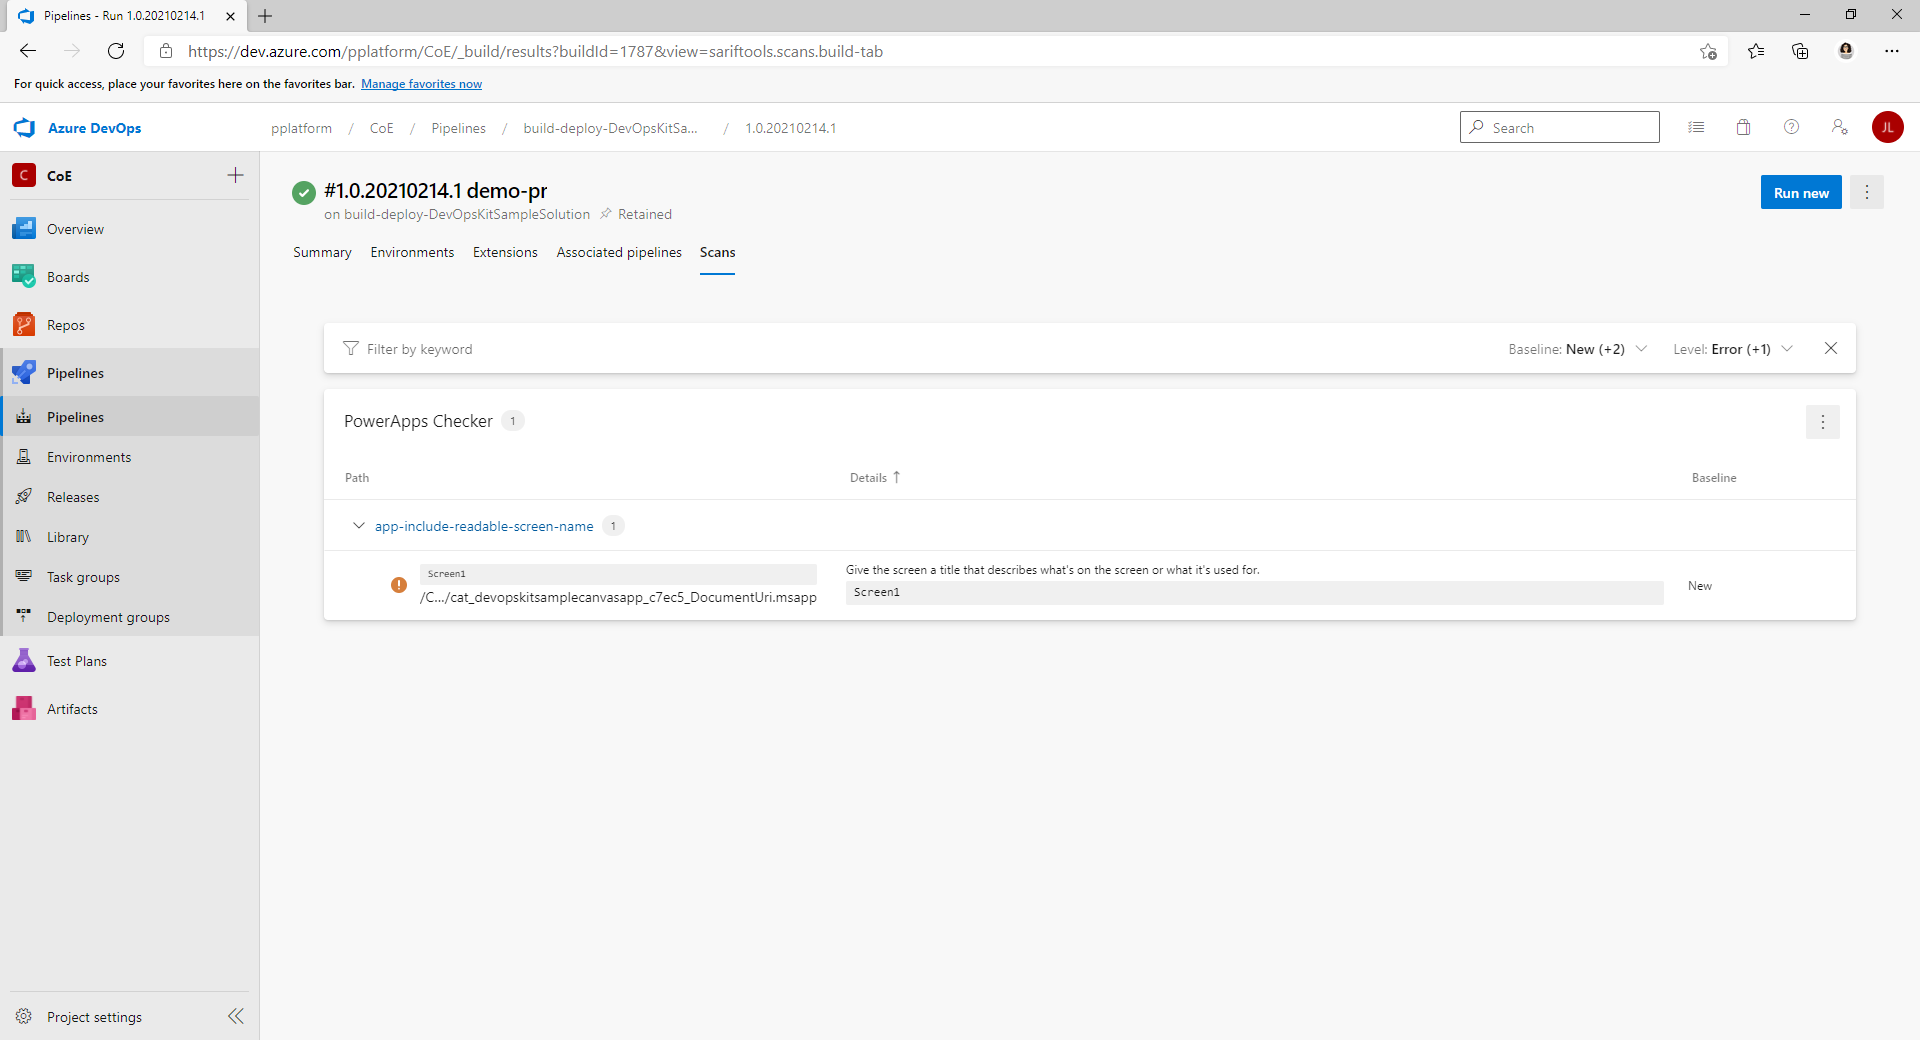
SARIF SAST Scans Tab (optional): Use this extension to visualize the SARIF files the solution checker generates during a build. (SARIF SAST Scans Tab - Visual Studio Marketplace)
Import the solution and configure the app
Import the ALM Accelerator canvas app into your Power Platform environment, and then configure the included custom connector for Azure DevOps.
Install the ALM Accelerator in Dataverse
Download the latest managed solution file from GitHub. Scroll down to Assets and select CenterofExcellenceALMAccelerator_<latest version>_managed.zip.
Sign in to Power Apps, and then select the environment you want to host the ALM Accelerator app.
In the left side panel, select Solutions.
Select Import solution > Browse, and then browse to the location of the managed solution you downloaded and select the file.
Select Next, and then select Next again.
On the Connections page, select or create a connection to connect the CDS DevOps connection to Dataverse.
When you create a connection for HTTP with Microsoft Entra, use Microsoft Graph for both parameters.
Select Import.
Configure the DevOps custom connector
Select Data > Custom Connectors > CustomAzureDevOps.
Select Edit.
On the Security tab, select Edit, and then set the following values:
Name Value Authentication Type OAuth 2.0 Identity provider Microsoft Entra ID Client ID The Application (client) ID you copied when you created the app registration Client secret The Application (client) secret value you copied when you created the app registration Tenant ID Leave the default value, common Resource URL The DevOps Application (client) ID you copied when you added permissions to your app registration Select Update connector.
Confirm that the Redirect URL on the Security page is
https://global.consent.azure-apim.net/redirect.If it isn't, copy the URL. Return to the app registration you created earlier and replace the redirect URI there with the copied URL.
Test the custom connector
Open the Test menu.
Select New Connection, and then follow the prompts to create a connection.
In Power Apps, select your environment, and then select Dataverse > Custom Connectors > CustomAzureDevOps.
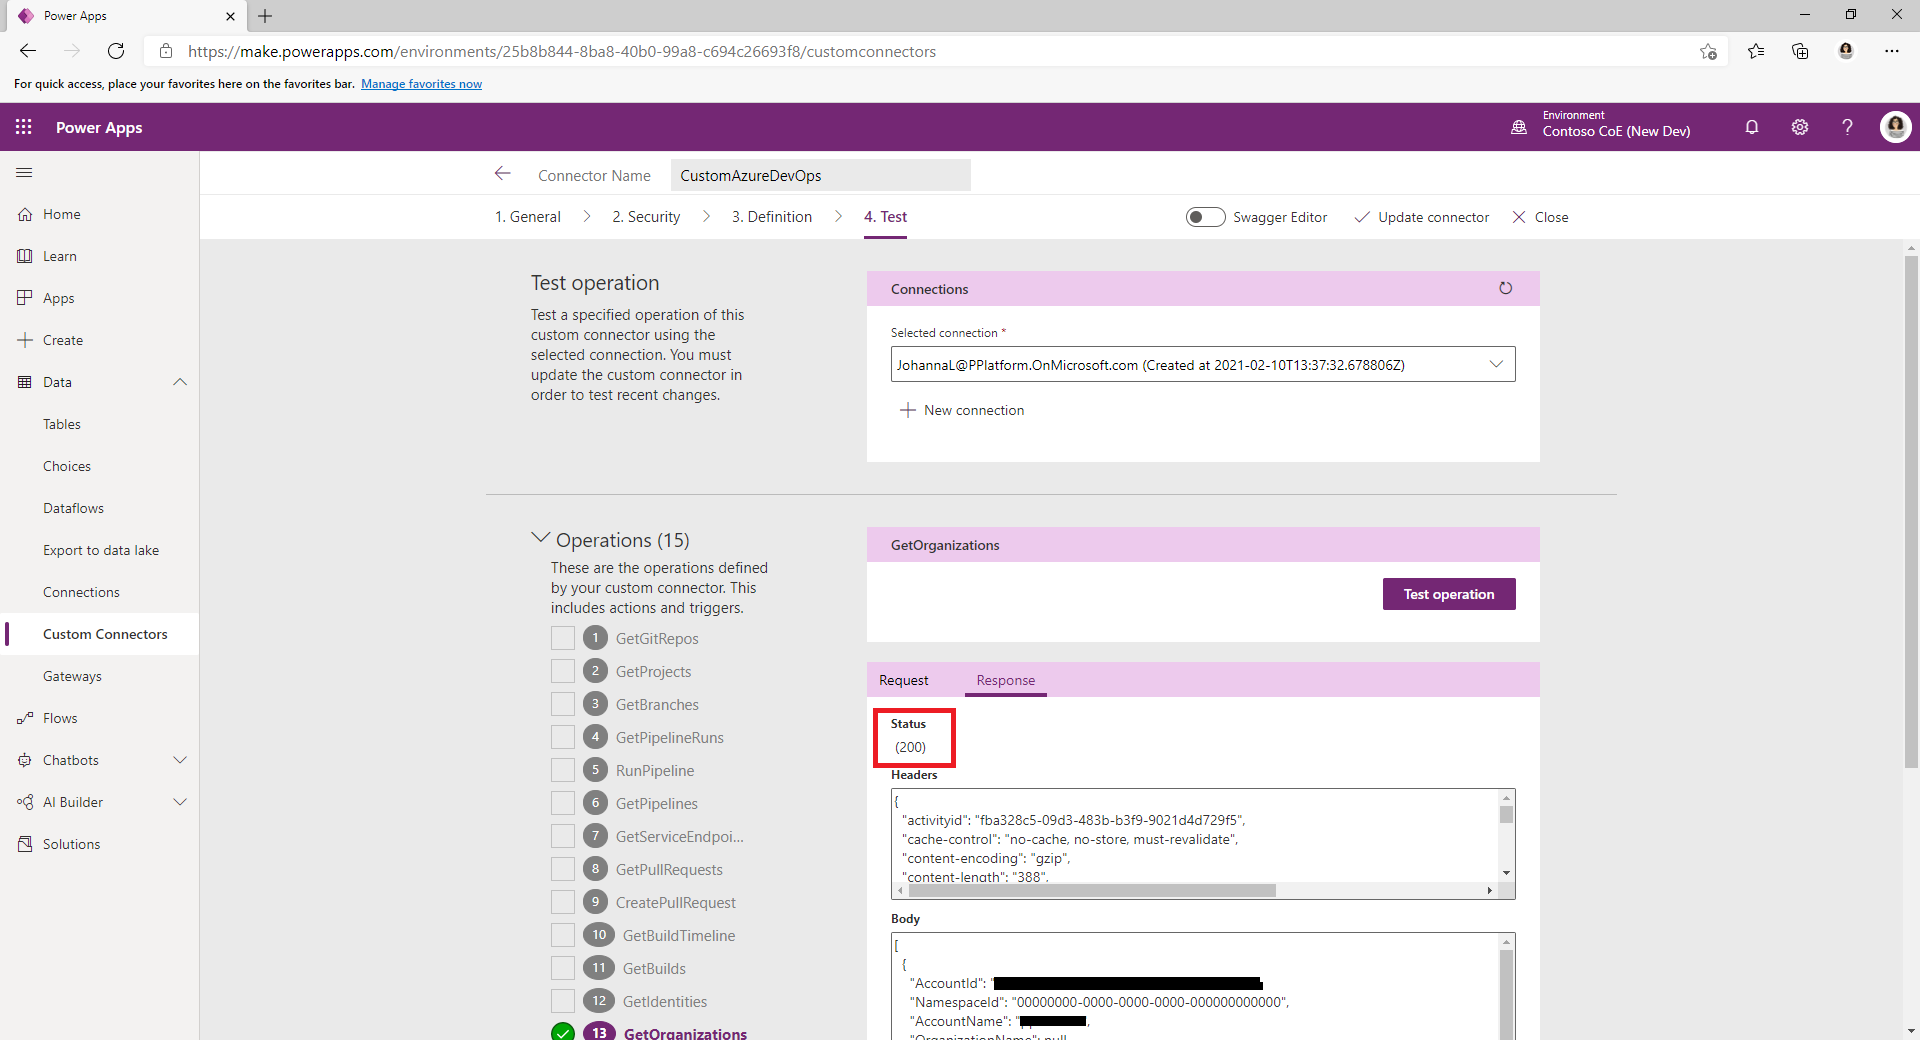
Select Edit, go to the Test page, and then find the GetOrganizations operation.
Select Test operation.
Confirm the Response Status returned is 200 and that the Response Body is a JSON representation of your Azure DevOps organization.
Set up your first Azure DevOps project for use with the ALM Accelerator
Use the included wizard to set up your Azure DevOps project to deploy Power Platform solutions using the ALM Accelerator. You can configure an existing empty project or create one.
Open the ALM Accelerator administration app.
In the left side panel, select Projects in the Azure DevOps group.
If you're prompted to update Release Tags, select Okay.
Select your Azure DevOps organization in the list.
In the Projects List, select New.
Select Project Wizard.
In the Project step, enter the name of your project. Optionally, enter a description and enable preview features.
Select Next.
In the Pipeline Templates step, select Next to install templates in your project.
The app installs the pipeline templates into a new repository in the project. Alternatively, you can configure the project to use templates from a project that already has them installed.
In the Service Connections steps, select the environments for which you want to create a service connection.
You can select multiple environments and create service connections for all of them at the same time. To use different app registrations for your environments, create a service connection for each app registration individually.
After you configure a service connection for an app registration, select Add.
After you've configured all the service connections, select Next.
In the Generic Pipelines step, select Next to create the pipelines and variable group and set the Azure DevOps permissions the project needs for ALM Accelerator functionality.
Create an app user in your Dataverse environments
Create an application user in your environments to allow the pipelines to connect to Dataverse. Do this in each environment you plan to use the ALM Accelerator to deploy to.
Sign in to the Power Platform admin center.
Select your development environment, and then select Settings.
Select Users + permissions > Application users.
Select + New app user.
Select + Add an app, select the app registration you created earlier, and then select Add.
Select the Business Unit.
Select the pencil icon to the right of Security roles, and then select security roles for the app user.
We recommend you give the app user system administrator security role privileges, so the user can perform the required functions in each environment.
Select Create.
Repeat these steps in your validation, test, and production environments.
Set up makers to use the ALM Accelerator app
Configure user permissions for a maker's account in Dataverse and Azure DevOps.
Configure deployment user settings to set up the app's user experience and grant access to solutions and deployment profiles.