Author using conditions (preview)
Important
Power Virtual Agents capabilities and features are now part of Microsoft Copilot Studio following significant investments in generative AI and enhanced integrations across Microsoft Copilot.
Some articles and screenshots may refer to Power Virtual Agents while we update documentation and training content.
Important
This article contains Microsoft Copilot Studio preview documentation and is subject to change.
Preview features aren't meant for production use and may have restricted functionality. These features are available before an official release so that you can get early access and provide feedback.
If you're building a production-ready copilot, see Microsoft Copilot Studio Overview.
You can use Condition nodes to add branches in your topic, comparing the value of one variable to that of another variable or to a specific value. For example, if the value of isClubMember is True, then the topic offers a discount; if the value is False, the topic presents the standard item price.
Prerequisites
Add a condition
Open your topic.
Select + to add a node, and then select Add a condition.
This action adds two branches to your topic. One branch starts with a Condition node and defines the conversation path for when the condition is true. The other branch starts with an All Other Conditions node and defines the path for when the condition is false.
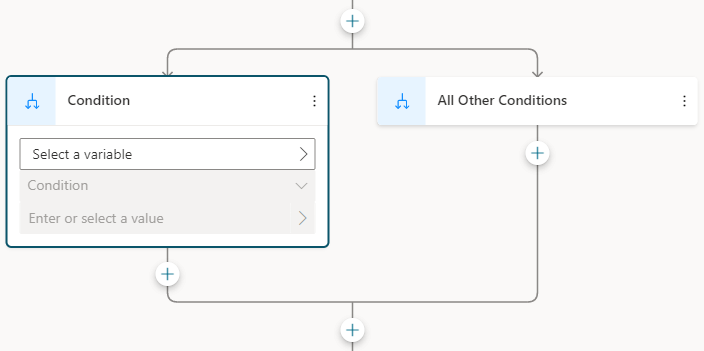
To build your condition in the Condition branch, select a variable, a logical operator, and a value.
Select Select a variable and select the variable to compare.
By default, the operator is set to is equal to. Select another operator if needed.
The logical operators available depend on the type of the variable you selected. For example, is equal to is available for all variable types. is greater than is available for number types, but not for string types.
Enter a value to compare with your variable. For simple types, such as text, number, or Boolean, type a literal value. Select Select variable (>) to select a variable or use a Power Fx formula.
The value or variable to compare must be of a compatible type, based on the variable and the operator. Some operators, such as is Blank or is not Blank, don't require you to add a comparison value.
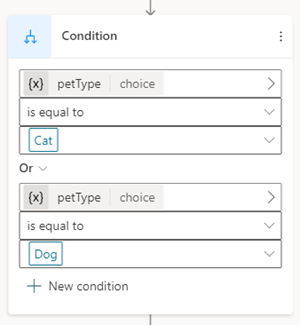
Select + New condition if you need to add more criteria to your condition. Select And to make the criteria cumulative, or select Or to make them exclusive of one another.
Add more Condition branches
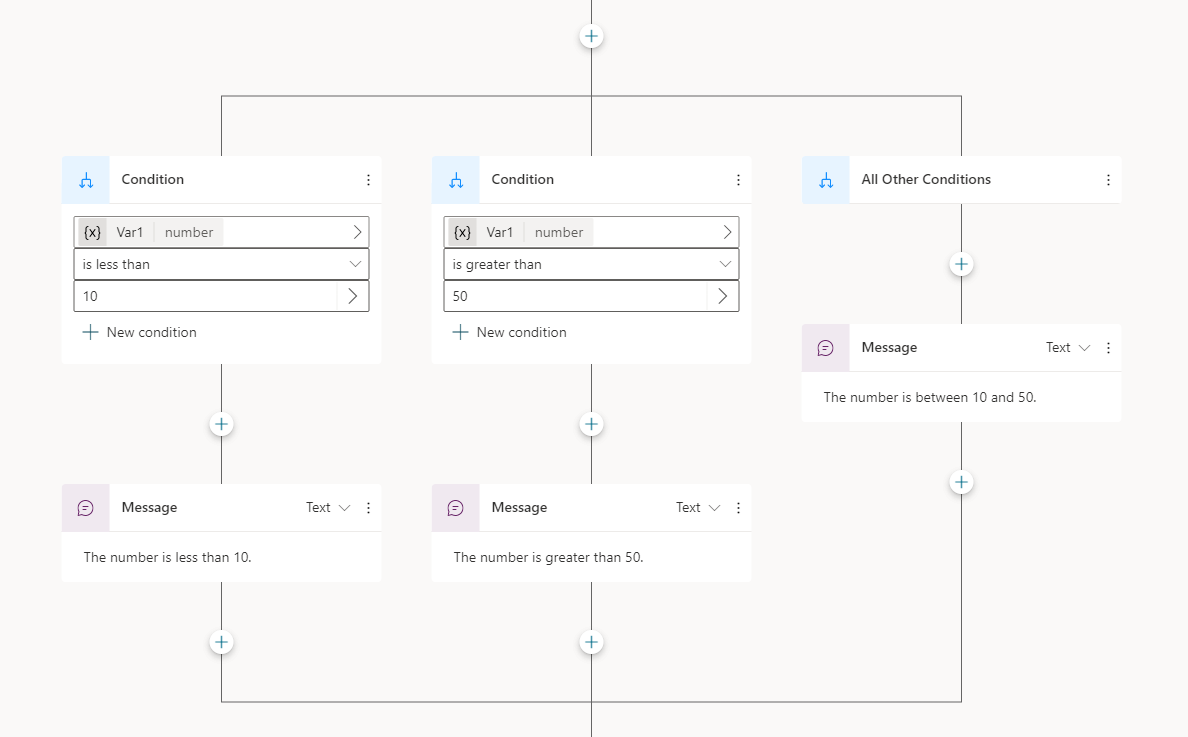
Initially, a Condition node inserts two branches, a Condition branch for when your condition is true, and an All Other Conditions branch for when it's false. You can add as many Condition branches as you need. Each condition is evaluated in order. The first branch with a condition that evaluates to true is followed. If all conditions evaluate to false, the All Other Conditions branch is followed.
For example, you might have a number variable and want three branches for when:
- The number is less than 10.
- The number is greater than 50.
- All other numbers—the number is greater than 10 and less than 50.
To add another Condition branch, select the + above an existing Condition branch and select Add a condition.
If you select Add node (+) below the Condition branch, you'll add an entire new Condition and All Other Conditions node, not a new Condition branch.
Use Power Fx to define a condition
The default condition editor is good for most scenarios. If you need more flexibility, use Power Fx in the Condition branch.
In the Condition branch, select the Node Menu (⋮), and then select Change to formula.
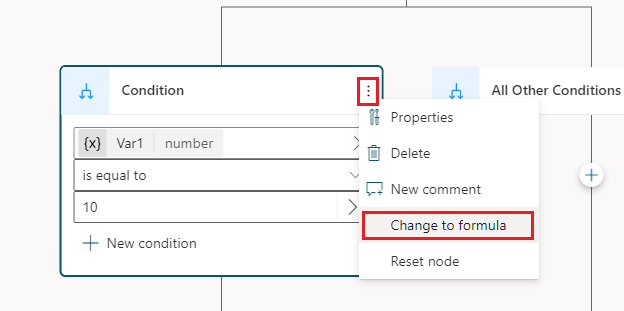
The node switches to the formula editor control. If you defined a condition earlier, the formula behind that condition is shown in the formula editor.
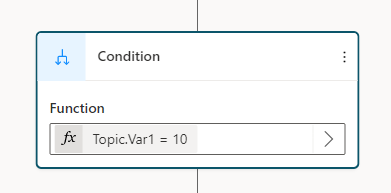
To change the formula, select Select variable (>) to open the Power Fx formula editor. The formula you enter here must return a Boolean (true or false) value.
Learn how to use Microsoft Power Fx in Microsoft Copilot Studio.
To switch back to the simple condition editor, select the Node Menu (⋮), and then select Reset node.
Feedback
Coming soon: Throughout 2024 we will be phasing out GitHub Issues as the feedback mechanism for content and replacing it with a new feedback system. For more information see: https://aka.ms/ContentUserFeedback.
Submit and view feedback for