Visual Studio 2019 | Visual Studio 2017 | Visual Studio 2015
Git uses the parent reference information stored in each commit to manage a full history of your development.
Review this commit history to find out when file changes were made and determine differences between versions of your code.
Git's use of feature branches and merges through pull requests mean that the commit history of your development doesn't form a straight, chronological line.
When you use history to compare versions, think in terms of file changes between two commits instead of file changes between two points in time.
A recent change to a file in the main branch may have come from a commit created two weeks ago in a feature branch but was only merged yesterday.
In this tutorial you learn how to:
Compare files
Retrieve files
Compare branches
Compare files
Compare the changes between two versions of a file in your Git repo.
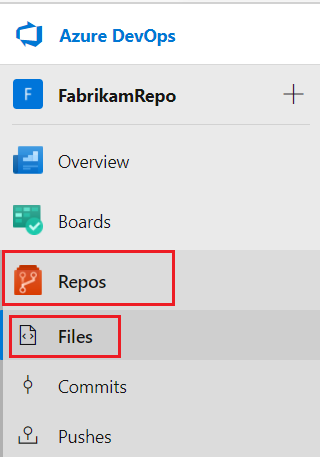
In your project, click Repos, and then click Files.
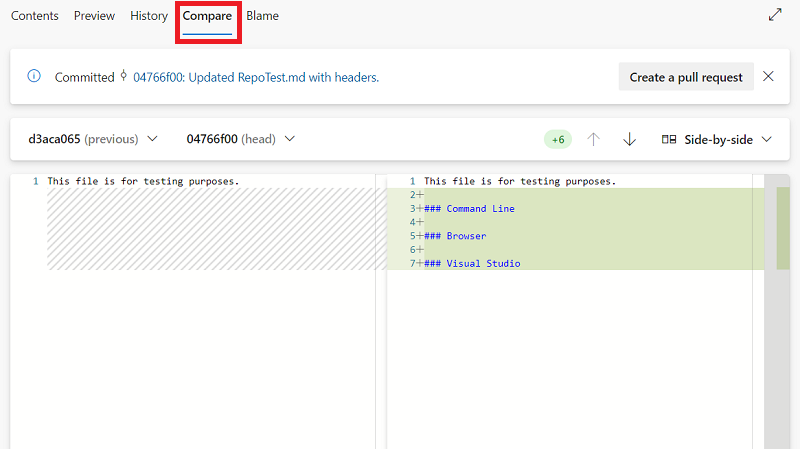
Select a file, and then click the Compare tab. A diff view shows the most recent commit and the head commit in a side-by-side view.
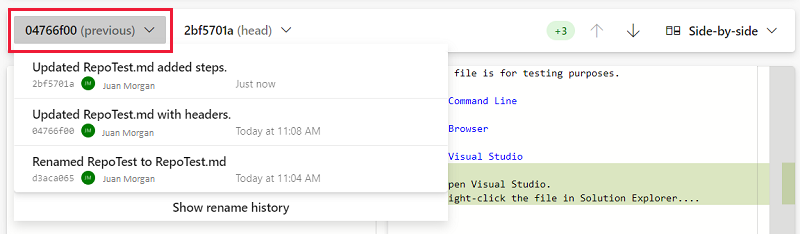
Select the the two commits you want to compare.
Note
Visual Studio 2019 version 16.8 and later versions provide a new Git menu for managing the Git workflow with less context switching than Team Explorer. Procedures provided in this article under the Visual Studio 2019 tab provide information for using the Git experience as well as Team Explorer. To learn more, see Side-by-side comparison of Git and Team Explorer.
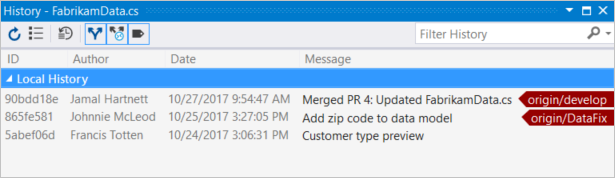
Right-click the file in Solution Explorer and choose View History.... The history window will appear showing the commit ID, author, date, and description of all changes to the file in your local repo across all branches.
Find the latest commit for a branch by looking for its name on an arrow to the right of a commit.
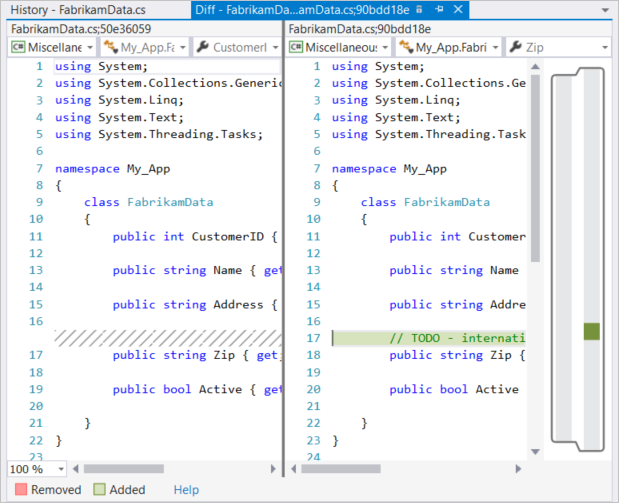
View changes from the previous version of the file by right-clicking and choosing Compare with previous.... View the changes between any two versions by selecting both commits, then right-clicking and select Compare...
The diff view shows lines removed from the older commit and added in the new one.
Use the git log command to view the commits that changed a file in your repo for your current branch.
Filter the git log output based on author, description or date information by using the corresponding options.
Leave out the filename if you want to see the commits matching all files in your repo.
Retrieve a specific version of a file from your history, even if the file was deleted or renamed in the latest version of your code.
Retrieving an older version of the file doesn't make any changes to your current branch. Create a new commit to bring the older version of the file into
your branch.
In your project, click Repos, and then click Files.
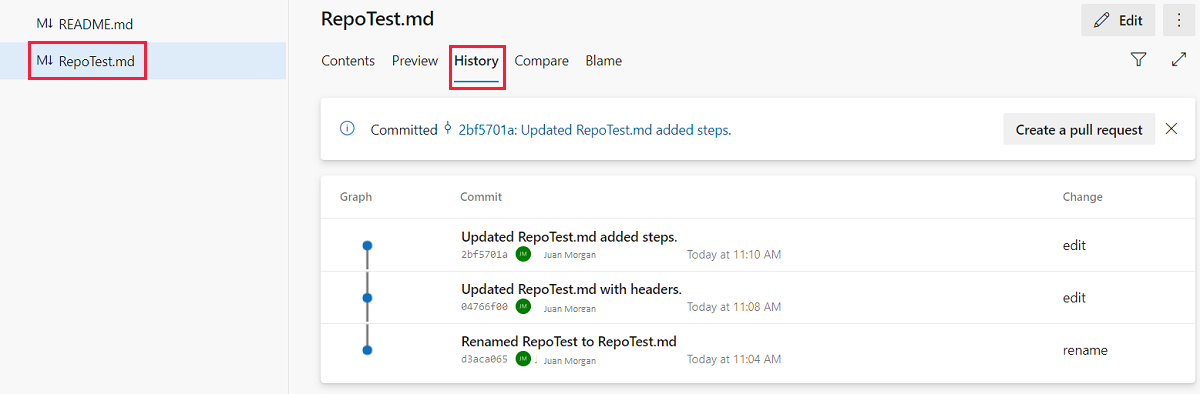
Select a file, and then select the History tab.
Select a commit from the list.
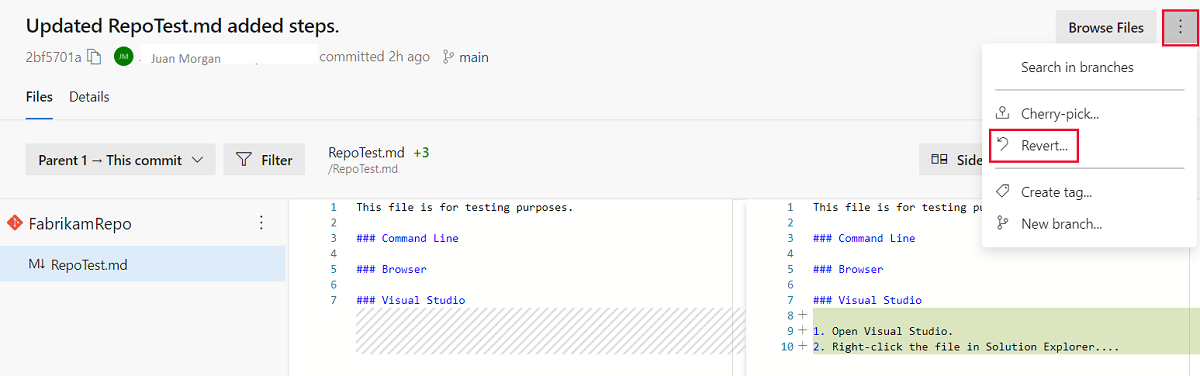
Click the ellipses in the top-right corner, and then select Revert from the drop-down.
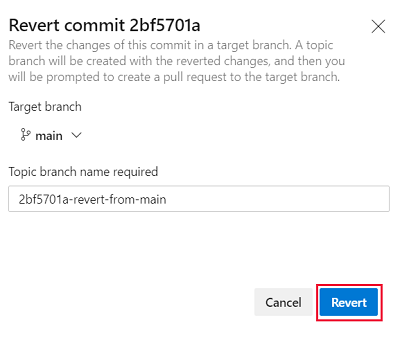
Select your target branch, type a topic branch name if necessary, and click Revert.
Note
Visual Studio 2019 version 16.8 and later versions provide a new Git menu for managing the Git workflow with less context switching than Team Explorer. Procedures provided in this article under the Visual Studio 2019 tab provide information for using the Git experience as well as Team Explorer. To learn more, see Side-by-side comparison of Git and Team Explorer.
To retrieve a previous version of a file that exists in your Visual Studio project:
Right-click the file in Solution Explorer and select View History. The Visual Studio History view will appear, showing the commits in your repo that updated the file.
You can filter the commits to find the exact commit with the file version you want to restore. Double click on the version to open it in Visual Studio.
To retrieve a previous version of a file that was deleted in a previous commit:
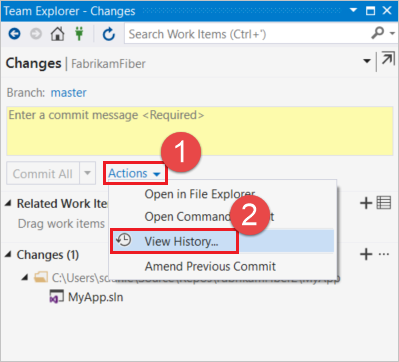
Open the Changes view in Team Explorer and select View History from the Actions drop-down.
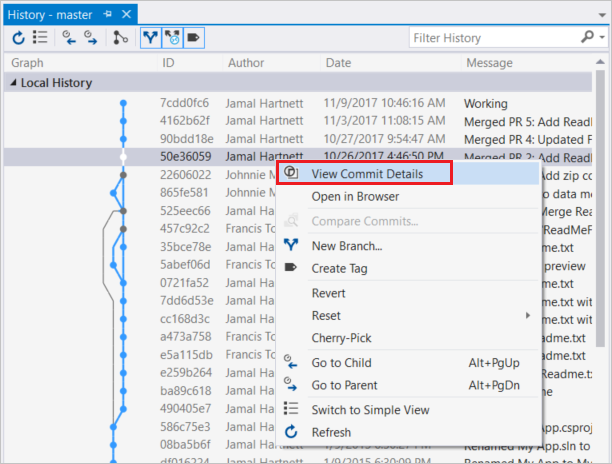
Right-click the commit containing the version of the file you want to restore and select View Commit Details.
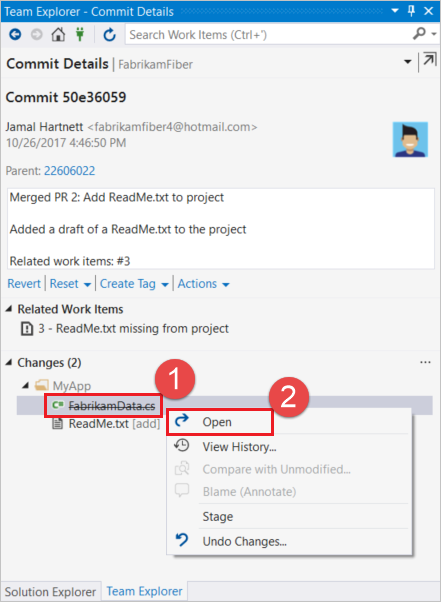
Right click the file to restore in the Commit Details in Team Explorer and select Open.
Note
The retrieved version of a file is not automatically saved to your project. To save the retrieved version to your project, select Save As... from the File menu. If you save the file in your current project, either as a new file or overwriting
an existing one, you'll need to commit your changes to add the previous version to your local branch.
Use git log to find the version to restore and git checkout or git show to restore the file from your history.
Find the commit with the version of the file you need to restore using git log using the steps from comparing versions above.
Restore the version in its current location using git checkout:
> git checkout 85435fac src/app.ts
Using git checkout this way will rewrite the current version of the file at that path location.
Restore a file to any location by using git show. This command prints the file contents to the terminal-you'll want to redirect the output to your desired location.
> git show 85435fac:src/app.ts
> /home/frank/oldapp.ts
Compare branches
Review potential changes from a merge or rebase by comparing branches directly.
You can compare both local and remote branches, which is useful when checking for potential merge conflicts or to see how the
changes others have made will affect your work.
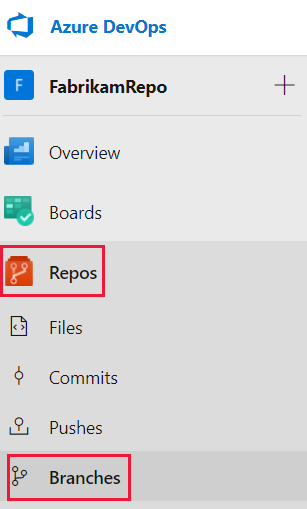
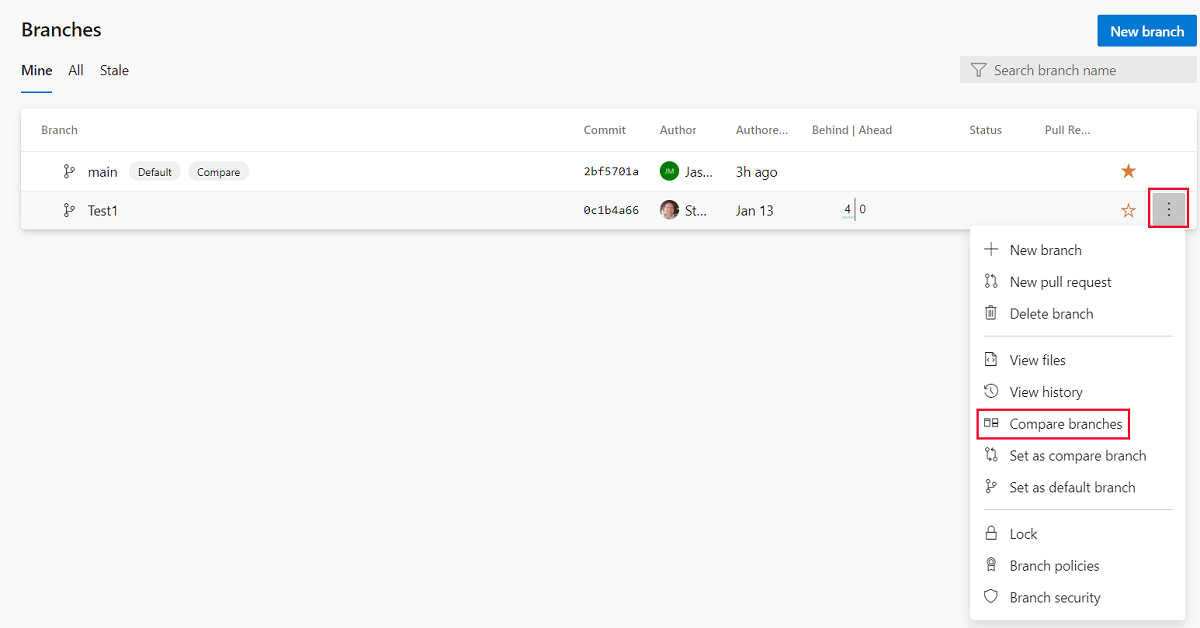
In your project, click Repos, and then click Branches.
On the branch you want to compare, click the ellipses on the right-side, and then select Compare branches from the drop-down.
Select the other branch you want to compare with. The view displays all changes between the branches.
Note
Visual Studio 2019 version 16.8 and later versions provide a new Git menu for managing the Git workflow with less context switching than Team Explorer. Procedures provided in this article under the Visual Studio 2019 tab provide information for using the Git experience as well as Team Explorer. To learn more, see Side-by-side comparison of Git and Team Explorer.
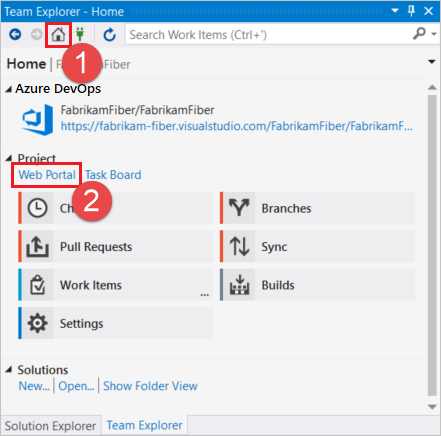
Comparing branches can be done in the web portal, which you can access from the Team Explorer Home view in Visual Studio by choosing Web Portal.
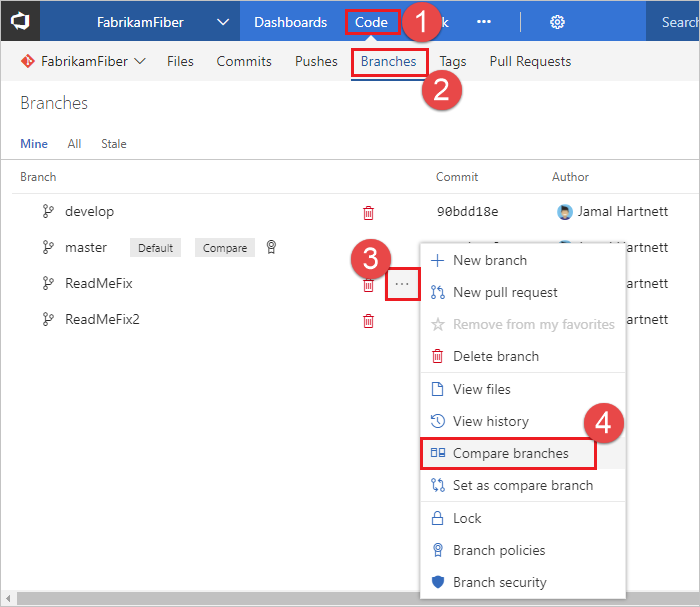
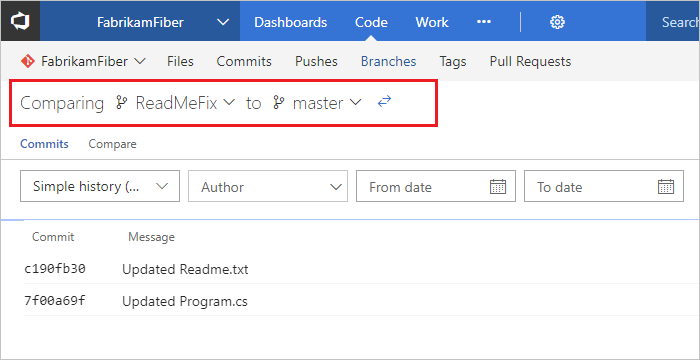
Select Branches from the menu under Code. Locate your branch and select the ... icon to view the branch options. Select Compare branches.
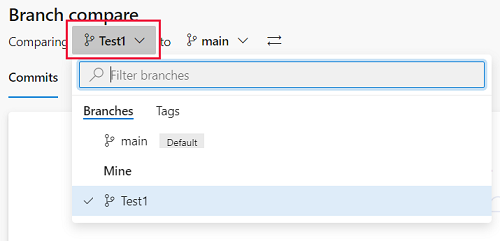
Select the branch to compare to from the drop-downs at the top. The view will display all changes between the branches.
Use git diff to compare the contents of two branches. You can compare any combination of local and remote branches.
The output shows the deletions and additions between the two versions of the code.
> git diff users/frank/feature origin/main
index 36843b8..03afc4b 100644
--- a/tsapp/index.html
+++ b/tsapp/index.html
@@ -4,7 +4,7 @@
 <head>
     <meta charset="utf-8" />
     <title>TypeScript HTML App</title>
-    <link rel="stylesheet" href="fabrikam-test.css" type="text/css" />
+    <link rel="stylesheet" href="fabrikam.css" type="text/css" />
     <script src="app.js"></script>
 </head>
 ...
--- a/tsapp/app.ts
+++ b/tsapp/app.ts
     constructor(element: HTMLElement) {
         this.element = element;
-        this.element.innerHTML += "The time is: ";
+        this.element.innerHTML += "The time is now: ";
         this.span = document.createElement('span');
         this.element.appendChild(this.span);
         this.span.innerText = new Date().toUTCString();
This will output the diff for every change between the branches.
You can narrow down specific file changes by specifying a file after the branch names: