Note
Access to this page requires authorization. You can try signing in or changing directories.
Access to this page requires authorization. You can try changing directories.
See Authenticate from an application for an overview of getting an Azure Active Directory (Azure AD) token.
This article gives you an example of getting an Azure AD token that you can use to send messages to a Service Bus namespace. It uses the Postman tool for testing purposes.
Prerequisites
- Follow instructions from Quickstart: Use Azure portal to create a Service Bus queue to create a Service Bus namespace and a queue in the namespace.
- Download and install Postman desktop app.
Register your app with Azure AD
First step is to register you application with the Azure AD tenant and note down the values of tenant ID, client ID, and client secret. You will use these values latest when testing the REST API using the Postman tool.
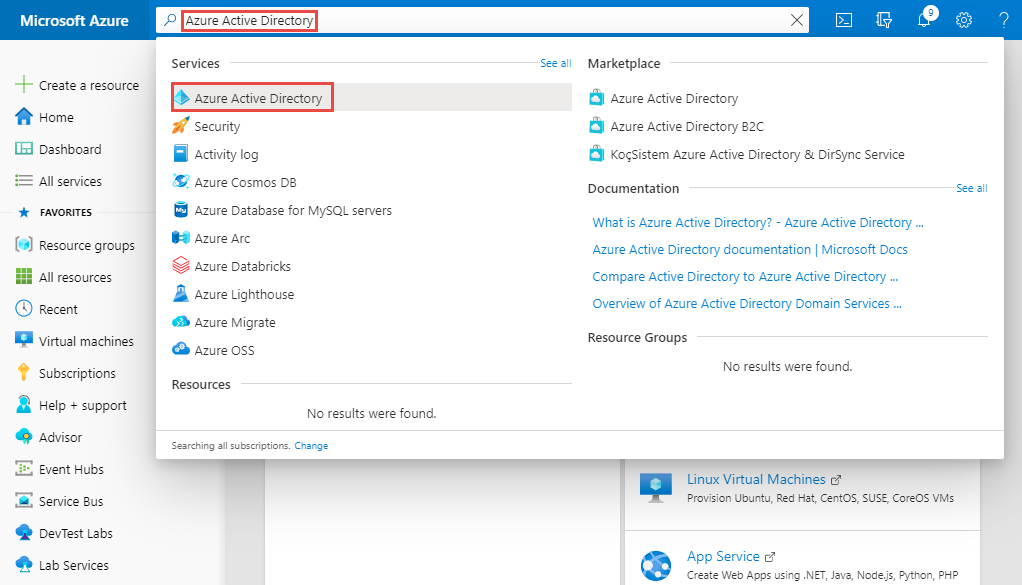
Sign in to the Azure portal.
In the search bar, search for Azure Active Directory, and select it from the drop-down list.
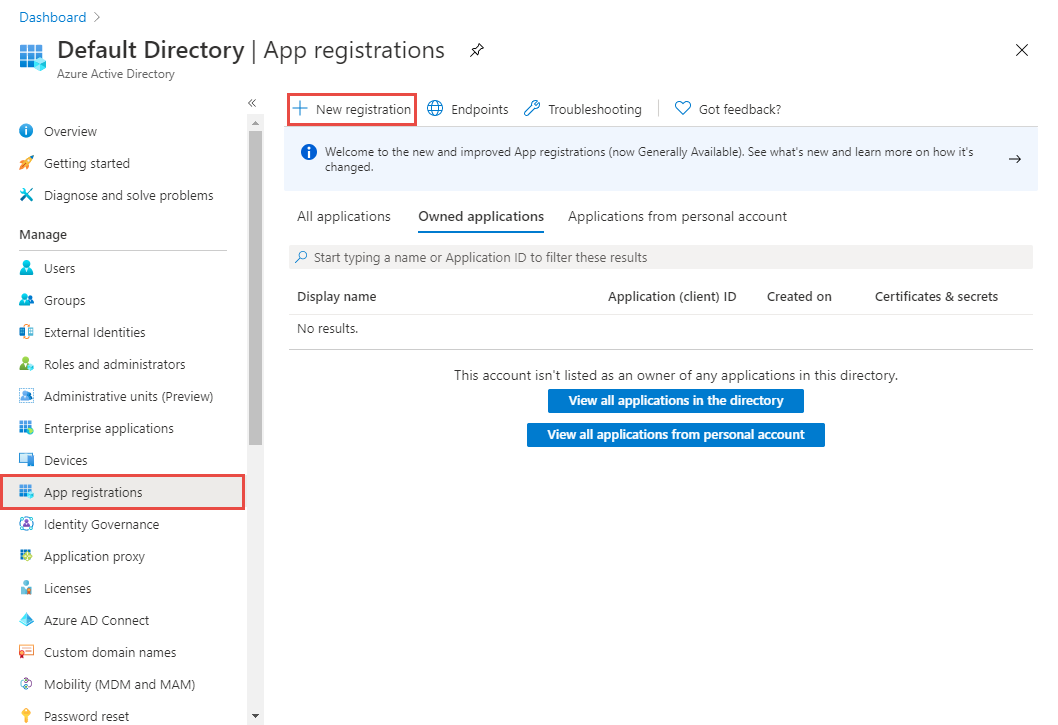
On the Azure Active Directory page, select App Registrations link on the left menu, and then select + New registration on the toolbar.
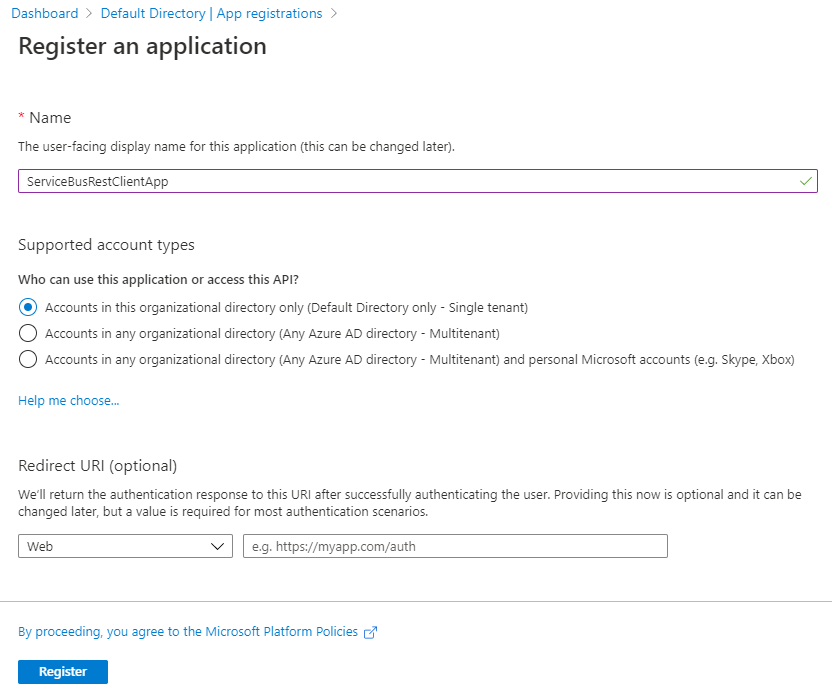
Enter a name for the app, and select Register.
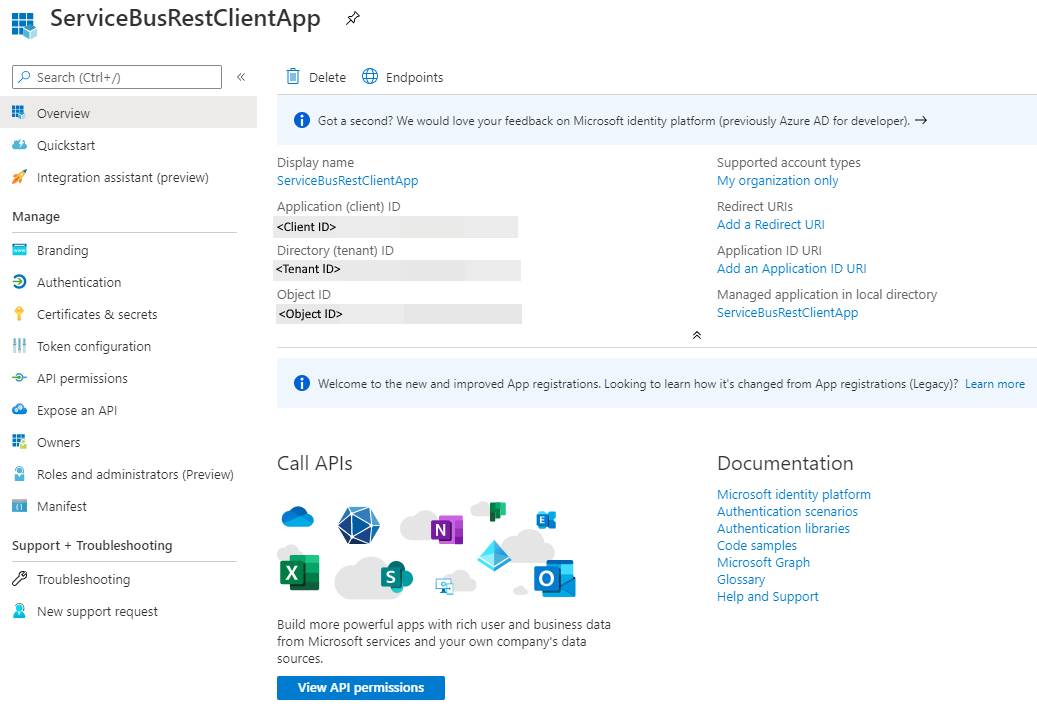
On the home page for the application, note down the values of Application (client) ID and Directory (tenant) ID. You will use these values to get a token from Azure AD.
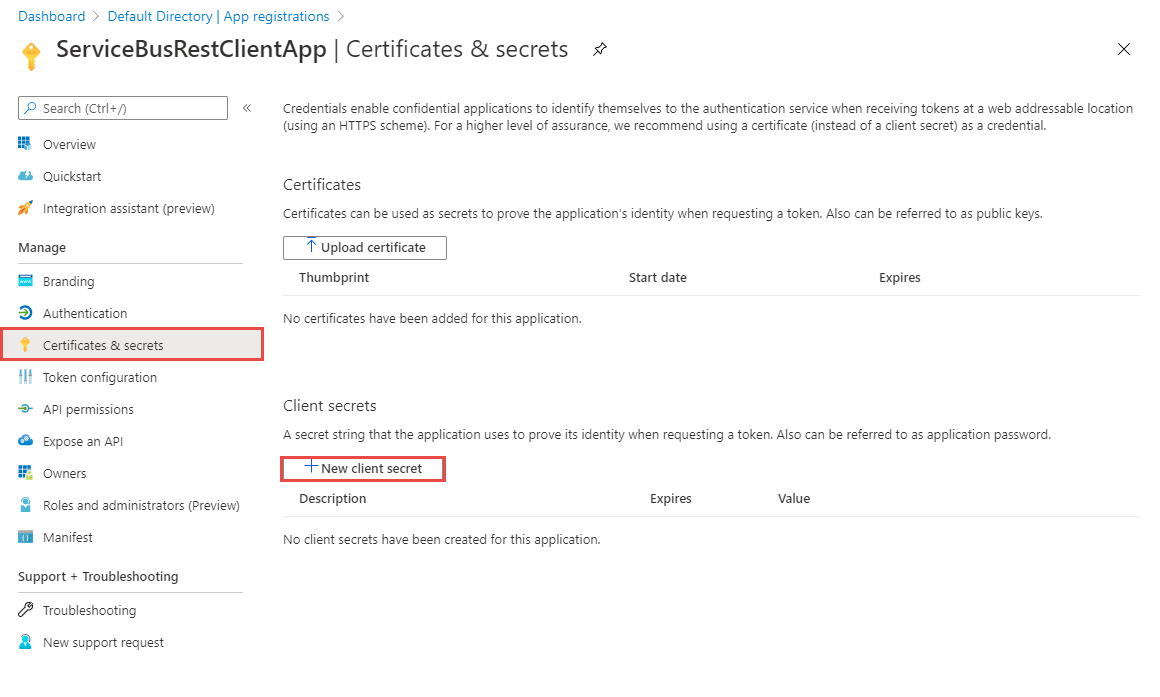
Now, select Certificates & secrets on the left menu, and select + New client secret.
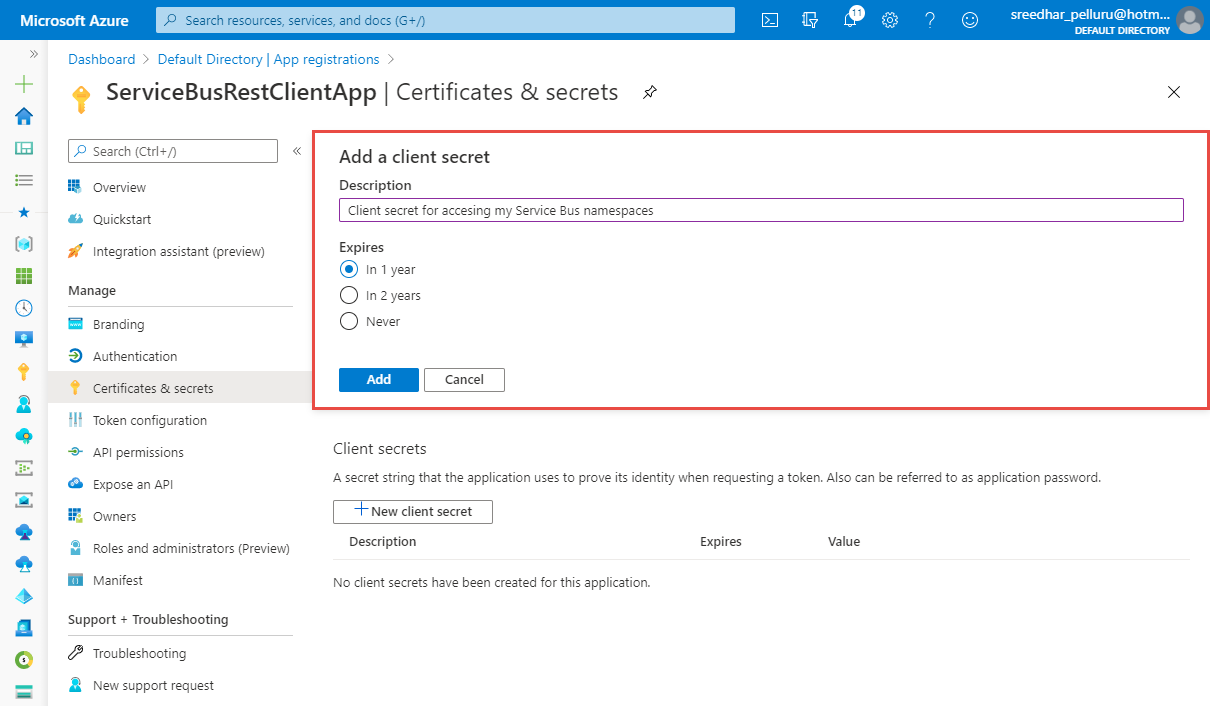
Enter a description, select when the secret will expire, and select Add.
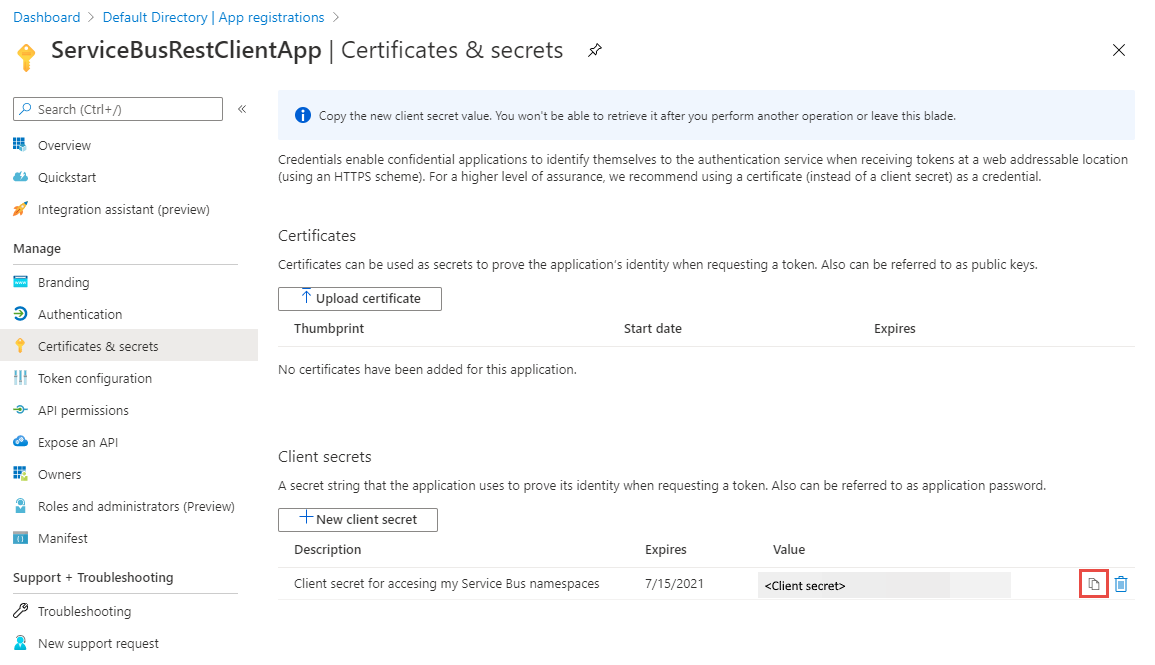
Select the copy button next to the secret value in the Client secrets list to copy the value to the clipboard. Paste it somewhere. You will use it later to get a token from Azure AD.
Add application to the Service Bus Data Sender role
In this example, we are only sending messaging to the Service Bus queue, so add the application to the Service Bus Data Sender role.
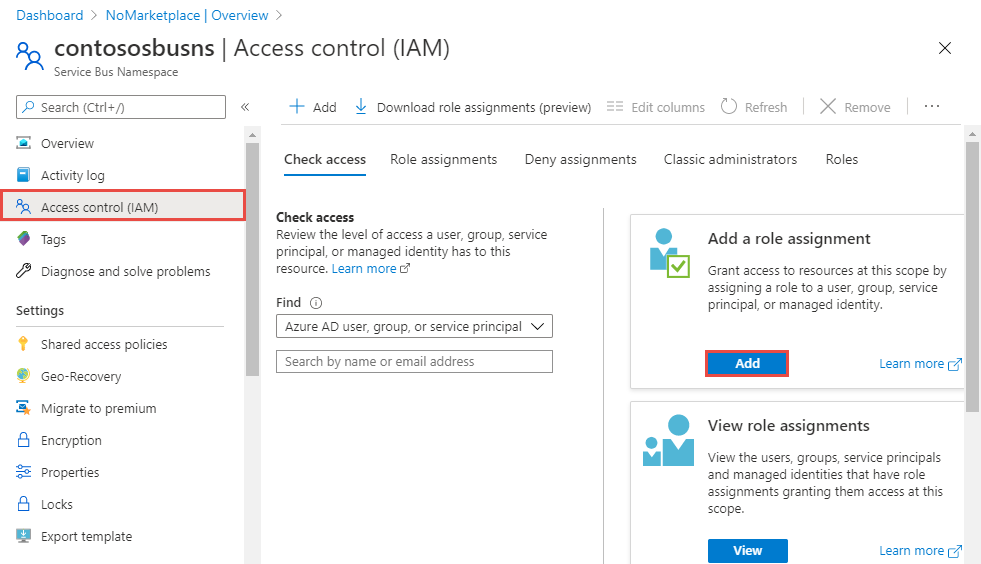
On the Service Bus Namespace page, select Access control from the left menu, and then select Add on the Add a role assignment tile.
On the Add role assignment page, select Azure Service Bus Data Sender for Role, and select your application (in this example, ServiceBusRestClientApp) for the service principal.
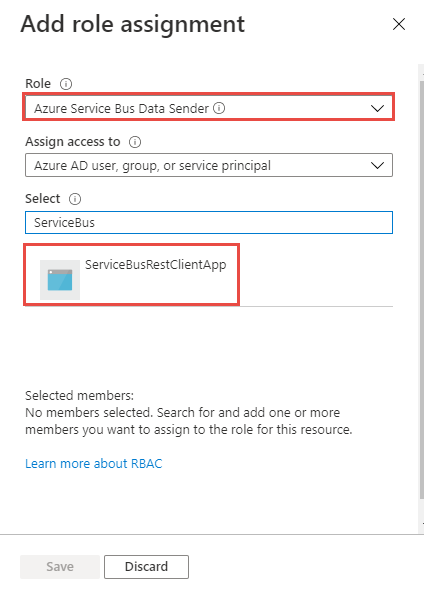
Select Save on the Add role assignment page to save the role assignment.
Use Postman to get the Azure AD token
Launch Postman.
For the method, select GET.
For the URI, enter
https://login.microsoftonline.com/<TENANT ID>/oauth2/token. Replace<TENANT ID>with the tenant ID value you copied earlier.On the Headers tab, add Content-Type key and
application/x-www-form-urlencodedfor the value.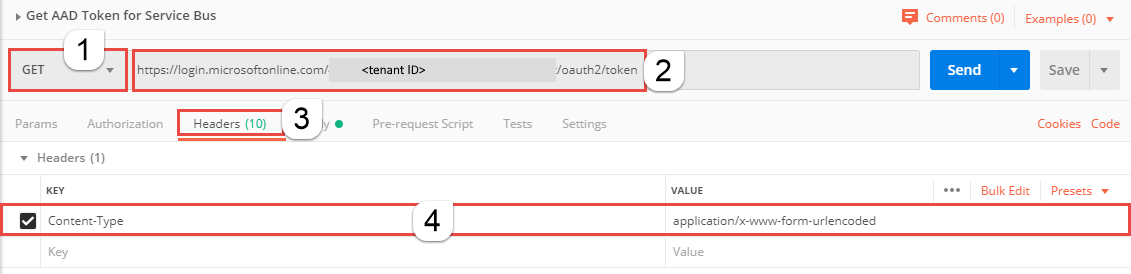
Switch to the Body tab, and add the following keys and values.
Select form-data.
Add
grant_typekey, and typeclient_credentialsfor the value.Add
client_idkey, and paste the value of client ID you noted down earlier.Add
client_secretkey, and paste the value of client secret you noted down earlier.Add
resourcekey, and typehttps://servicebus.azure.netfor the value.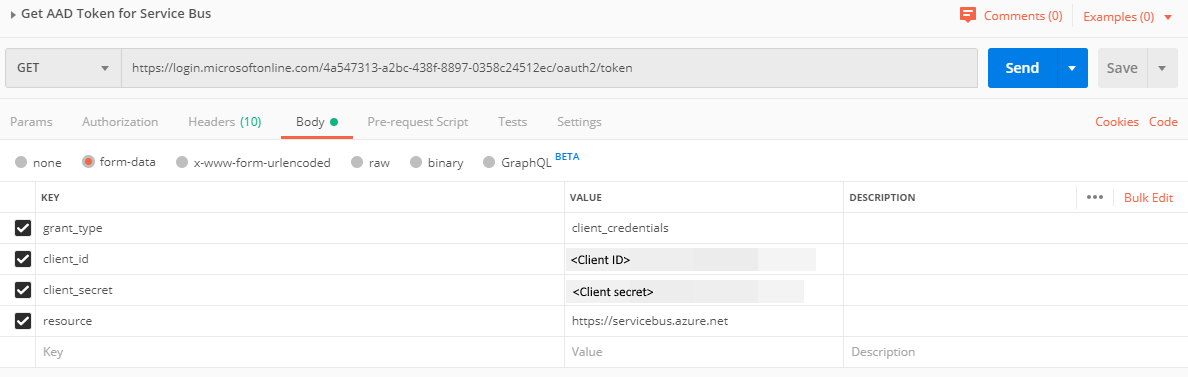
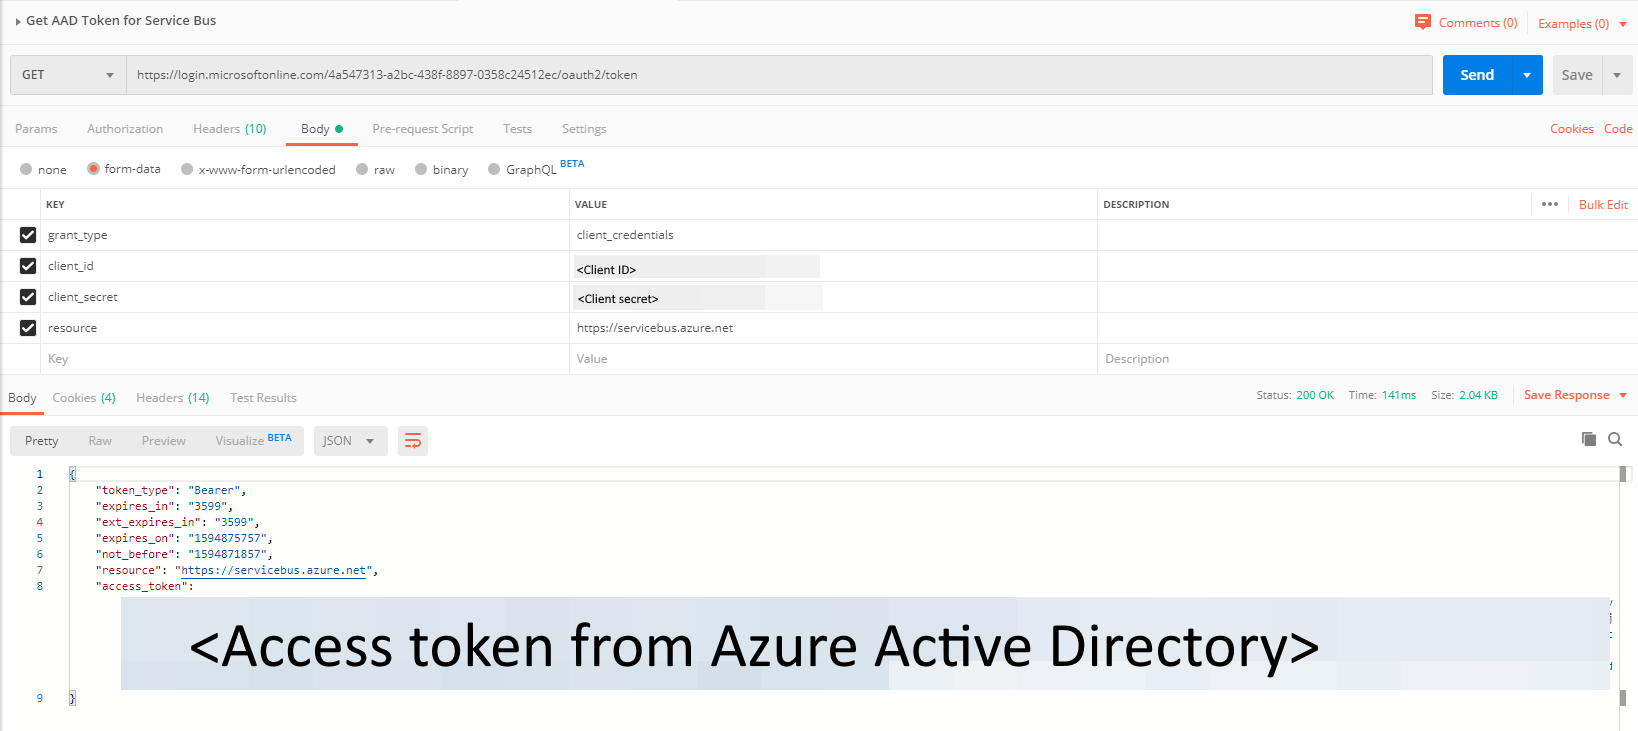
Select Send to send the request to get the token. You see the token in the result. Save the token (excluding double quotes). You will use it later.


Send messages to a queue
In Postman, open a new tab.
Select POST for the method.
Enter URI in the following format:
https://<SERVICE BUS NAMESPACE NAME>.servicebus.windows.net/<QUEUE NAME>/messages. Replace<SERVICE BUS NAMESPACE NAME>with the name of the Service Bus namespace. Replace<QUEUE NAME>with the name of the queue.On the Headers tab, add the following two headers.
Add
Authorizationkey and value for it in the following format:Bearer <TOKEN from Azure AD>. When you copy/paste the token, don't copy the enclosing double quotes.Add
Content-Typekey andapplication/atom+xml;type=entry;charset=utf-8as the value for it.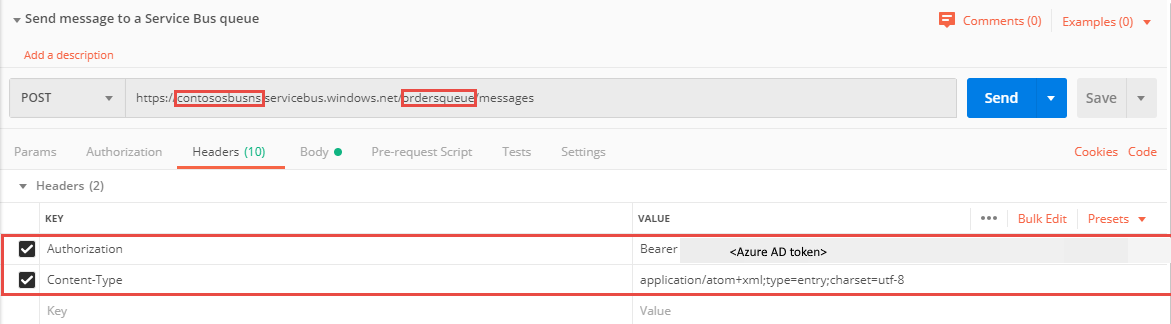
On the Body tab, select raw for the data type, and enter
This is a messageor any message for the body.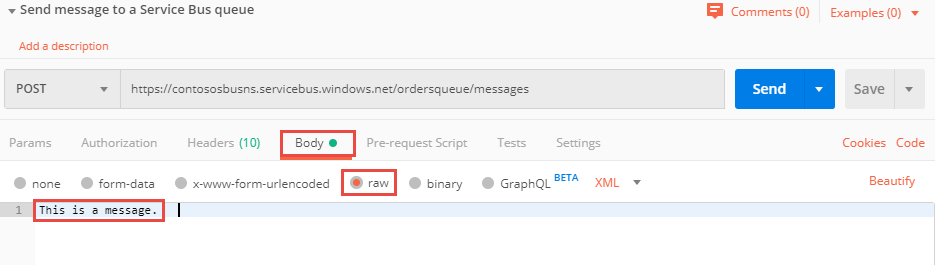
Select Send to send the message to the queue. You see the status as
Createdwith the code 201 as shown in the following image.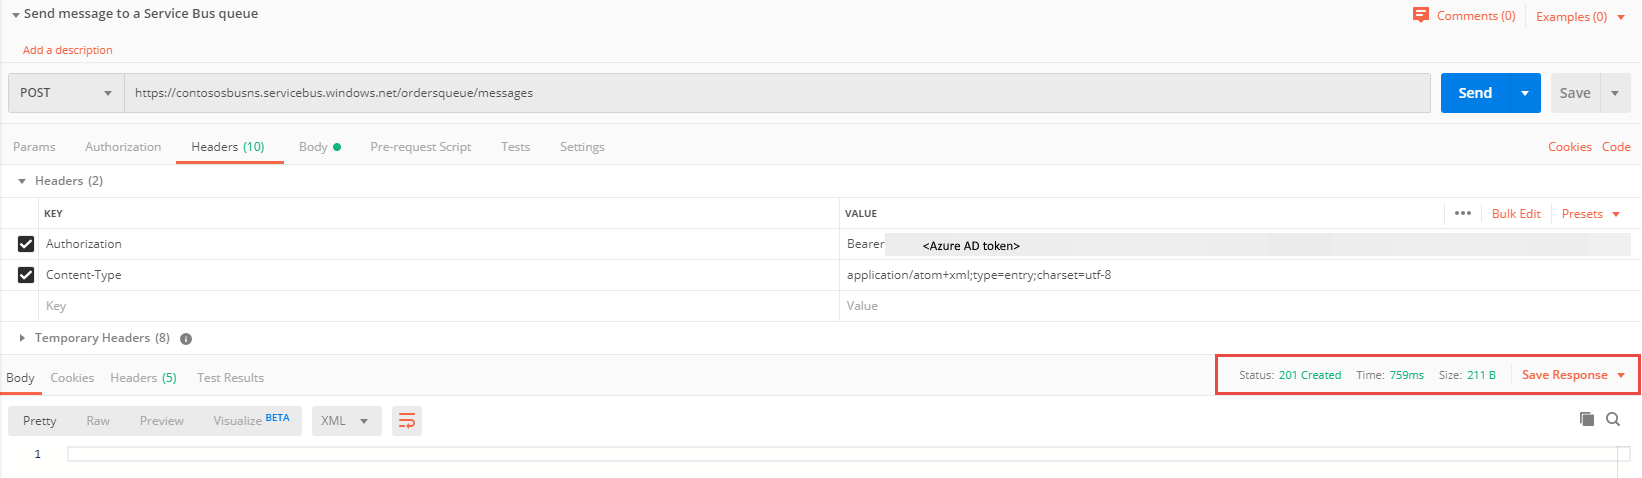
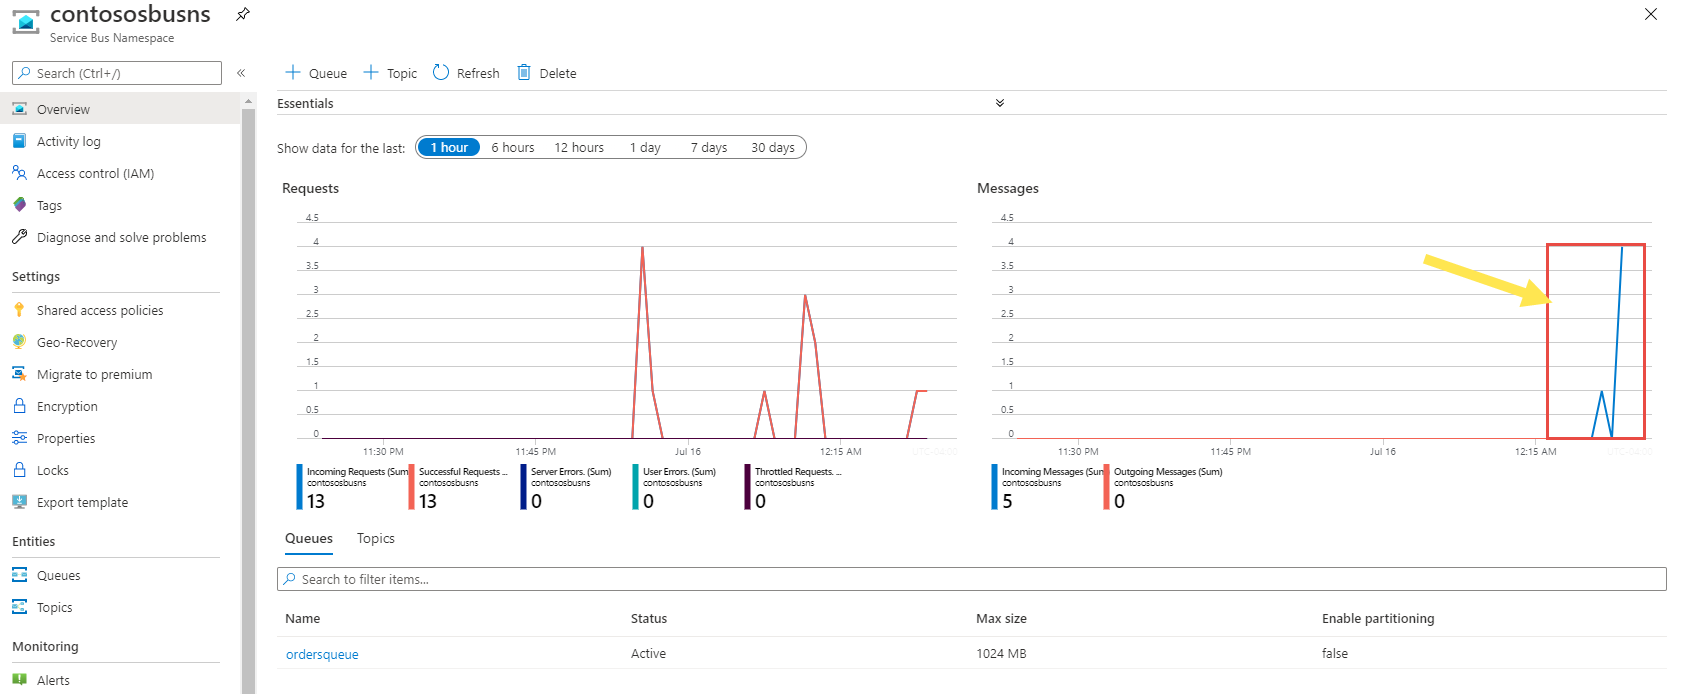
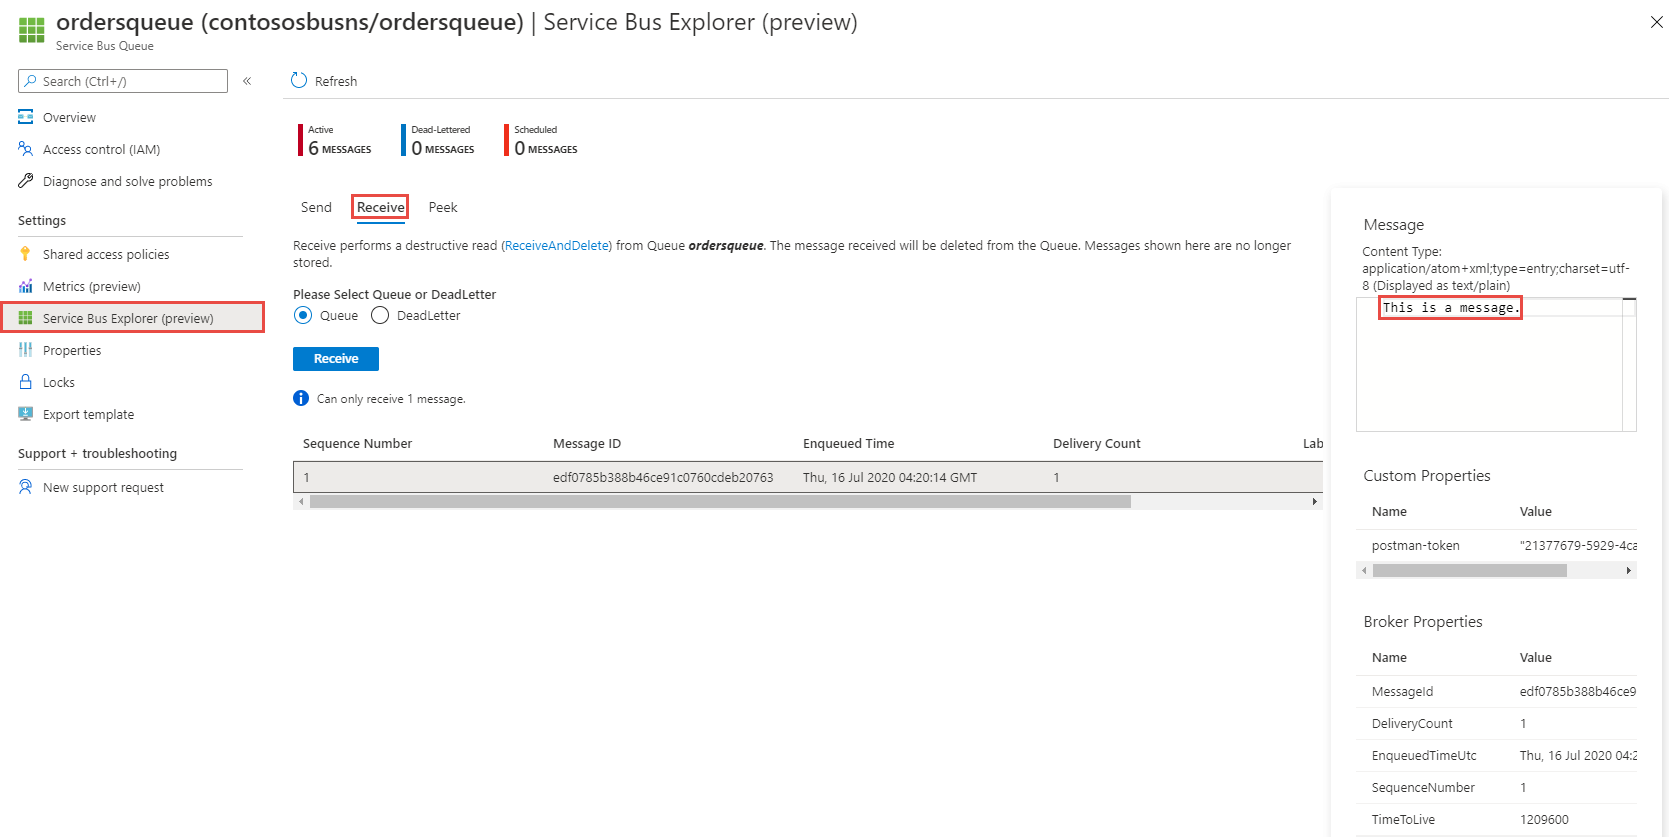
On the namespace page in the Azure portal, you can see that the messages are posted to the queue.
You can also use the Service Bus Explorer (preview) on the Service Bus Queue page as shown in the following image to receive or peek messages.


See Also
See the following articles: