How to secure a Blazor Server app with the Microsoft identity platform on CIAM
- Overview
- Scenario
- Prerequisites
- Setup the sample
- Explore the sample
- Troubleshooting
- About the code
- How to deploy this sample to Azure
- Contributing
- Learn More
Overview
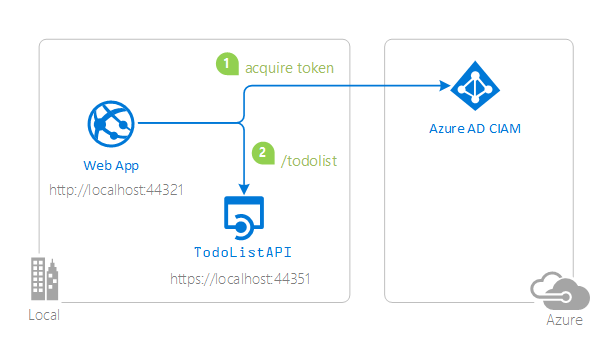
This sample demonstrates a Blazor Server App calling a ASP.NET Core Web API that is secured using Azure AD for Customers.
Scenario
- The client Blazor Server App uses the Microsoft.Identity.Web to sign-in a user and obtain a JWT ID Token and an Access Token from Azure AD for Customers.
- The access token is used as a bearer token to authorize the user to call the ASP.NET Core Web API protected by Azure AD for Customers.
- The service uses the Microsoft.Identity.Web to protect the Web api, check permissions and validate tokens.
Prerequisites
- Either Visual Studio or Visual Studio Code and .NET Core SDK
- An Azure AD for Customers tenant. For more information, see: How to get an Azure AD for Customers tenant
- A user account in your Azure AD for Customers tenant.
Setup the sample
Step 1: Clone or download this repository
From your shell or command line:
git clone https://github.com/Azure-Samples/ms-identity-ciam-dotnet-tutorial.git
or download and extract the repository .zip file.
⚠️ To avoid path length limitations on Windows, we recommend cloning into a directory near the root of your drive.
Step 2: Navigate to project folder
cd 2-Authorization\2-call-own-api-blazor-server\ToDoListAPI
cd 2-Authorization\2-call-own-api-blazor-server\ToDoListClient
Step 3: Register the sample application(s) in your tenant
There are two projects in this sample. Each needs to be separately registered in your Azure AD tenant. To register these projects, you can:
- follow the steps below for manually register your apps
- or use PowerShell scripts that:
- automatically creates the Azure AD applications and related objects (passwords, permissions, dependencies) for you.
- modify the projects' configuration files.
Expand this section if you want to use this automation:
⚠️ If you have never used Microsoft Graph PowerShell before, we recommend you go through the App Creation Scripts Guide once to ensure that your environment is prepared correctly for this step.
Ensure that you have PowerShell 7 or later which can be installed at this link.
Run the script to create your Azure AD application and configure the code of the sample application accordingly.
For interactive process -in PowerShell, run:
cd .\AppCreationScripts\
.\Configure.ps1 -TenantId "[Optional] - your tenant id" -AzureEnvironmentName "[Optional] - Azure environment, defaults to 'Global'"
Other ways of running the scripts are described in App Creation Scripts guide. The scripts also provide a guide to automated application registration, configuration and removal which can help in your CI/CD scenarios.
ℹ️ This sample can make use of client certificates. You can use AppCreationScripts to register an Azure AD application with certificates. See: How to use certificates instead of client secrets
Choose the Azure AD for Customers tenant where you want to create your applications
To manually register the apps, as a first step you'll need to:
- Sign in to the Azure portal.
- If your account is present in more than one Azure AD for Customers tenant, select your profile at the top right corner in the menu on top of the page, and then switch directory to change your portal session to the desired Azure AD for Customers tenant.
Create User Flows
Please refer to: Tutorial: Create user flow in Azure Active Directory CIAM
ℹ️ To enable password reset in Customer Identity Access Management (CIAM) in Azure Active Directory (Azure AD), please refer to: Tutorial: Enable self-service password reset
Add External Identity Providers
Please refer to:
Register the service app (ciam-dotnet-api)
- Navigate to the Azure portal and select the Azure AD for Customers service.
- Select the App Registrations blade on the left, then select New registration.
- In the Register an application page that appears, enter your application's registration information:
- In the Name section, enter a meaningful application name that will be displayed to users of the app, for example
ciam-dotnet-api. - Under Supported account types, select Accounts in this organizational directory only
- Select Register to create the application.
- In the Name section, enter a meaningful application name that will be displayed to users of the app, for example
- In the Overview blade, find and note the Application (client) ID. You use this value in your app's configuration file(s) later in your code.
- In the app's registration screen, select the Authentication blade to the left.
- In the app's registration screen, select the Expose an API blade to the left to open the page where you can publish the permission as an API for which client applications can obtain access tokens for. The first thing that we need to do is to declare the unique resource URI that the clients will be using to obtain access tokens for this API. To declare an resource URI(Application ID URI), follow the following steps:
- Select Set next to the Application ID URI to generate a URI that is unique for this app.
- For this sample, accept the proposed Application ID URI (
api://{clientId}) by selecting Save.ℹ️ Read more about Application ID URI at Validation differences by supported account types (signInAudience).
Publish Delegated Permissions
- All APIs must publish a minimum of one scope, also called Delegated Permission, for the client apps to obtain an access token for a user successfully. To publish a scope, follow these steps:
- Select Add a scope button open the Add a scope screen and Enter the values as indicated below:
- For Scope name, use
ToDoList.Read. - For Admin consent display name type in Read users ToDo list using the 'ciam-dotnet-api'.
- For Admin consent description type in Allow the app to read the user's ToDo list using the 'ciam-dotnet-api'.
- Keep State as Enabled.
- Select the Add scope button on the bottom to save this scope.
- Repeat the steps above for another scopes named ToDoList.ReadWrite.
- For Scope name, use
- Select the Manifest blade on the left.
- Set
accessTokenAcceptedVersionproperty to 2. - Select on Save.
- Set
ℹ️ Follow the principle of least privilege when publishing permissions for a web API.
Publish Application Permissions
- All APIs should publish a minimum of one App role for applications, also called Application Permission, for the client apps to obtain an access token as themselves, i.e. when they are not signing-in a user. Application permissions are the type of permissions that APIs should publish when they want to enable client applications to successfully authenticate as themselves and not need to sign-in users. To publish an application permission, follow these steps:
- Still on the same app registration, select the App roles blade to the left.
- Select Create app role:
- For Display name, enter a suitable name for your application permission, for instance ToDoList.Read.All.
- For Allowed member types, choose Application to ensure other applications can be granted this permission.
- For Value, enter ToDoList.Read.All.
- For Description, enter Allow the app to read every user's ToDo list using the 'ciam-dotnet-api'.
- Select Apply to save your changes.
- Repeat the steps above for another app permission named ToDoList.ReadWrite.All
Configure Optional Claims
- Still on the same app registration, select the Token configuration blade to the left.
- Select Add optional claim:
- Select optional claim type, then choose Access.
- Select the optional claim idtyp.
Indicates token type. This claim is the most accurate way for an API to determine if a token is an app token or an app+user token. This is not issued in tokens issued to users.
- Select Add to save your changes.
Configure the service app (ciam-dotnet-api) to use your app registration
Open the project in your IDE (like Visual Studio or Visual Studio Code) to configure the code.
In the steps below, "ClientID" is the same as "Application ID" or "AppId".
- Open the
ToDoListAPI\appsettings.jsonfile. - Find the placeholder
Enter_the_Tenant_Id_Hereand replace the existing value with your Azure AD tenant/directory ID. - Find the placeholder
Enter_the_Application_Id_Hereand replace the existing value with the application ID (clientId) ofciam-dotnet-apiapp copied from the Azure portal. - Find the placeholder
Enter_the_Tenant_Subdomain_Hereand replace it with the Directory (tenant) subdomain. For instance, if your tenant primary domain is contoso.onmicrosoft.com, use contoso.
Register the client app (ciam-blazor-webapp)
- Navigate to the Azure portal and select the Azure AD for Customers service.
- Select the App Registrations blade on the left, then select New registration.
- In the Register an application page that appears, enter your application's registration information:
- In the Name section, enter a meaningful application name that will be displayed to users of the app, for example
ciam-blazor-webapp. - Under Supported account types, select Accounts in this organizational directory only
- Select Register to create the application.
- In the Name section, enter a meaningful application name that will be displayed to users of the app, for example
- In the Overview blade, find and note the Application (client) ID. You use this value in your app's configuration file(s) later in your code.
- In the app's registration screen, select the Authentication blade to the left.
- If you don't have a platform added, select Add a platform and select the Web option.
- In the Redirect URI section enter the following redirect URIs:
https://localhost:44321/https://localhost:44321/signin-oidc
- In the Front-channel logout URL section, set it to
https://localhost:44321/signout-oidc. - Click Save to save your changes.
- In the Redirect URI section enter the following redirect URIs:
- In the app's registration screen, select the Certificates & secrets blade in the left to open the page where you can generate secrets and upload certificates.
- In the Client secrets section, select New client secret:
- Type a key description (for instance
app secret). - Select one of the available key durations (6 months, 12 months or Custom) as per your security posture.
- The generated key value will be displayed when you select the Add button. Copy and save the generated value for use in later steps.
- You'll need this key later in your code's configuration files. This key value will not be displayed again, and is not retrievable by any other means, so make sure to note it from the Azure portal before navigating to any other screen or blade.
⚠️ For enhanced security, consider using certificates instead of client secrets. See: How to use certificates instead of secrets.
- Type a key description (for instance
- Since this app signs-in users, we will now proceed to select delegated permissions, which is is required by apps signing-in users.
- In the app's registration screen, select the API permissions blade in the left to open the page where we add access to the APIs that your application needs:
- Select the Add a permission button and then:
- Ensure that the My APIs tab is selected.
- In the list of APIs, select the API
ciam-dotnet-api. - In the Delegated permissions section, select ToDoList.Read, ToDoList.ReadWrite in the list. Use the search box if necessary.
- Select the Add permissions button at the bottom.
- Select the Add a permission button and then:
- Ensure that the Microsoft Graph tab is selected.
- In the Commonly used Microsoft APIs section, select
Microsoft Graph. - In the Delegated permissions section, select openid, offline_access in the list. Use the search box if necessary.
- Select the Add permissions button at the bottom.
- At this stage, the permissions are assigned correctly, but since it's a CIAM tenant, the users themselves cannot consent to these permissions. To get around this problem, we'd let the tenant administrator consent on behalf of all users in the tenant. Select the Grant admin consent for {tenant} button, and then select Yes when you are asked if you want to grant consent for the requested permissions for all accounts in the tenant. You need to be a tenant admin to be able to carry out this operation.
Configure Optional Claims
- Still on the same app registration, select the Token configuration blade to the left.
- Select Add optional claim:
- Select optional claim type, then choose ID.
- Select the optional claim acct.
Provides user's account status in tenant. If the user is a member of the tenant, the value is 0. If they're a guest, the value is 1.
- Select Add to save your changes.
Configure the client app (ciam-blazor-webapp) to use your app registration
Open the project in your IDE (like Visual Studio or Visual Studio Code) to configure the code.
In the steps below, "ClientID" is the same as "Application ID" or "AppId".
- Open the
ToDoListClient\appsettings.jsonfile. - Find the placeholder
Enter_the_Application_Id_Hereand replace the existing value with the application ID (clientId) ofciam-blazor-webappapp copied from the Azure portal. - Find the placeholder
Enter_the_Tenant_Subdomain_Hereand replace it with the Directory (tenant) subdomain. For instance, if your tenant primary domain is contoso.onmicrosoft.com, use contoso. - Find the placeholder
Enter_the_Client_Secret_Hereand replace the existing value with the generated secret that you saved during the creation ofciam-blazor-webappcopied from the Azure portal. - Find the placeholder
Enter_the_Web_Api_Application_Id_Hereand replace the existing value with the application ID (clientId) ofciam-dotnet-apiapp copied from the Azure portal.
Step 4: Running the sample
From your shell or command line, execute the following commands:
    cd 2-Authorization\2-call-own-api-blazor-server\ToDoListAPI
    dotnet run
Then, open a separate command terminal and run:
    cd 2-Authorization\2-call-own-api-blazor-server\ToDoListClient
    dotnet run
Explore the sample
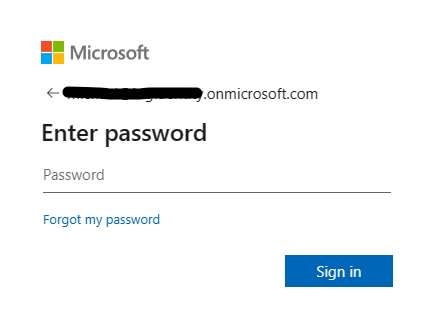
After starting the application, go to the url https://localhost:44321 in any web browser. If you haven't signed in to a CIAM account already you will be prompted with a sign-in screen similar to what is shown below.
After successfully signing in, you should see the home screen with a greeting label at the top and a navigation bar to the side.
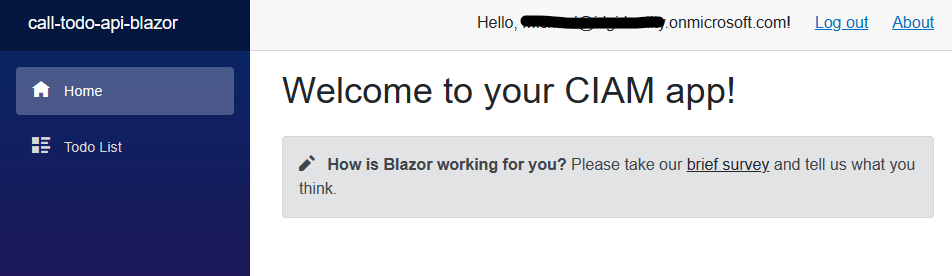
You can click on the Todo list button in the side navigation bar to see a todo list that interacts with your Azure AD for Customers protected API.
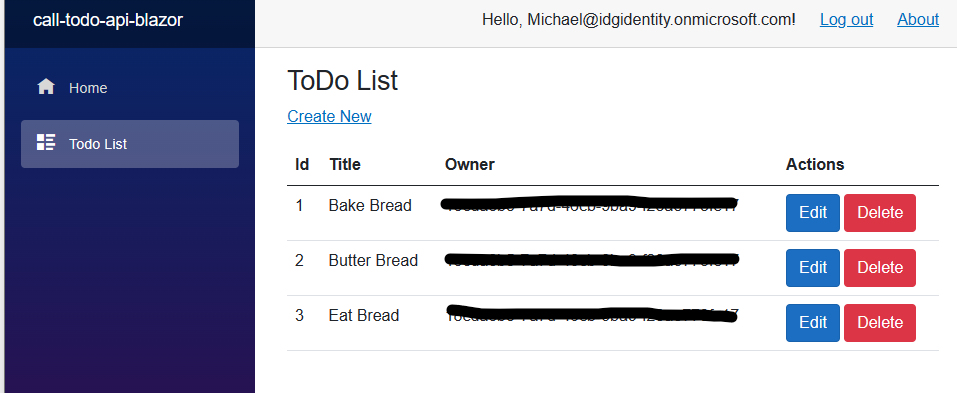
Each of the todo's displayed show a simple message along with an object id for the user who posted the to-do. From the to-do list screen you'll be able to read, create, update and delete individual to-do's.
To sign-out of the application click the Log out button in the upper right corner of the screen.
We'd love your feedback!
Were we successful in addressing your learning objective? Consider taking a moment to share your experience with us.
Troubleshooting
Expand for troubleshooting info
To provide feedback on or suggest features for Azure Active Directory, visit User Voice page.
About the code
The setup for the main Blazor application happens in the ToDoClient\Program.cs file. An application is created and configured based on the settings found within the appsettings.json file including information such as the application's tenant id and the id for the application registered in Azure AD for Customers.
builder.Services.AddAuthentication(OpenIdConnectDefaults.AuthenticationScheme)
    .AddMicrosoftIdentityWebApp(builder.Configuration)
    .EnableTokenAcquisitionToCallDownstreamApi()
    .AddDownstreamApi("ToDoApi", builder.Configuration.GetSection("ToDoApi"))
    .AddInMemoryTokenCaches();
Note that this sample uses the Microsoft.Identity.Web.DownstreamApi library to simplify making authenticated HTTP calls to your API and is already configured to cache access tokens for your requests. This will be discussed further down this section.
The login controllers and navigation are configured for you automatically with the Microsoft.Identity.Web.UI library.
builder.Services.AddControllersWithViews()
        .AddMicrosoftIdentityUI();
The part of the application responsible for calling the todo API is found within the ToDoListClient\Pages\ToDoPages directory of the project.
The ToDoList.razor file is responsible for displaying all todo's stored in the ToDoListAPI by using to-do's retrieved by the ToDoListBase.cs file. It will only show to-do's affiliated with the logged-in user and fetches these to-do's using an injected IDownstreamApi interface. With the IDownstreamApi all request authentication is handled for you with respect to acquiring and providing access tokens with requests. It's also already configured to use tokens stored within the application's cache.
// ToDoListBase.cs

/// <summary>
/// Gets all todo list items.
/// </summary>
/// <returns></returns>
private async Task GetToDoListService()
{
    try
    {
        toDoList = (await DownstreamApi.GetForUserAsync<IEnumerable<ToDo>>(
            ServiceName,
            options => options.RelativePath = "/api/todolist"))!;
    }
    catch (Exception ex)
    {
        Console.WriteLine(ex.Message);

        // Process the exception from a user challenge
        ConsentHandler.HandleException(ex);
    }
}
<!-- Fetch the values stored in the 'toDoList' variable and display them to the user -->
<tbody>
    @foreach (var item in toDoList)
    {
        <tr>
            <td>
                @item.Id
            </td>
            <td>
                @item.Description
            </td>
            <td>
                @item.Owner
            </td>
            <td>
                <a class="btn btn-primary" href="/edit/@item.Id">Edit</a>
                <button class="btn btn-danger" @onclick="@(() => DeleteItem(item.Id))">Delete</button>
            </td>
        </tr>
    }
</tbody>
The other files also leverage the IDownstreamAPI to make basic POST, PATCH, PUT and DELETE requests with the needed authentication as mentioned before. They are also configured to handle serialization for you to translate JSON responses into C# objects and vice versa.
A good example can be found in the ToDoListClient\Pages\ToDoPages\Edit.razor file. After a user finishes editing a todo and submits their edit they'll trigger the EditTask method which takes in the C# ToDo object, converts it to JSON and sends it to the API. The method also returns a deserialized ToDo object from the JSON response from the API even though it is not used directly here.
protected async Task EditTask()
{
    await _downstreamApi.PutForUserAsync<ToDo, ToDo>(
        ServiceName,
        toDo,
        options => options.RelativePath = $"api/todolist/{Id}");

    Navigation.NavigateTo("todolist");
}
How to deploy this sample to Azure
Expand the section
Deploying web API to Azure App Services
There is one web API in this sample. To deploy it to Azure App Services, you'll need to:
- create an Azure App Service
- publish the projects to the App Services
⚠️ Please make sure that you have not switched on the Automatic authentication provided by App Service. It interferes the authentication code used in this code example.
Publish your files (ciam-dotnet-api)
Publish using Visual Studio
Follow the link to Publish with Visual Studio.
Publish using Visual Studio Code
- Install the Visual Studio Code extension Azure App Service.
- Follow the link to Publish with Visual Studio Code
ℹ️ When calling the web API, your app may receive an error similar to the following:
Cross-Origin Request Blocked: The Same Origin Policy disallows reading the remote resource at https://some-url-here. (Reason: additional information here).
If that's the case, you'll need enable cross-origin resource sharing (CORS) for you web API. Follow the steps below to do this:
- Go to Azure portal, and locate the web API project that you've deployed to App Service.
- On the API blade, select CORS. Check the box Enable Access-Control-Allow-Credentials.
- Under Allowed origins, add the URL of your published web app that will call this web API.
Deploying Web app to Azure App Service
There is one web app in this sample. To deploy it to Azure App Services, you'll need to:
- create an Azure App Service
- publish the projects to the App Services, and
- update its client(s) to call the website instead of the local environment.
Publish your files (ciam-blazor-webapp)
Publish using Visual Studio
Follow the link to Publish with Visual Studio.
Publish using Visual Studio Code
- Install the Visual Studio Code extension Azure App Service.
- Follow the link to Publish with Visual Studio Code
Update the CIAM app registration (ciam-blazor-webapp)
- Navigate back to to the Azure portal. In the left-hand navigation pane, select the Azure Active Directory service, and then select App registrations (Preview).
- In the resulting screen, select the
ciam-blazor-webappapplication. - In the app's registration screen, select Authentication in the menu.
- In the Redirect URIs section, update the reply URLs to match the site URL of your Azure deployment. For example:
https://ciam-blazor-webapp.azurewebsites.net/https://ciam-blazor-webapp.azurewebsites.net/signin-oidc
- Update the Front-channel logout URL fields with the address of your service, for example https://ciam-blazor-webapp.azurewebsites.net
- In the Redirect URIs section, update the reply URLs to match the site URL of your Azure deployment. For example:
Update authentication configuration parameters (ciam-blazor-webapp)
- In your IDE, locate the
ciam-blazor-webappproject. Then, openToDoListClient\appsettings.json. - Find the key for redirect URI and replace its value with the address of the web app you published, for example, https://ciam-blazor-webapp.azurewebsites.net/redirect.
- Find the key for web API endpoint and replace its value with the address of the web API you published, for example, https://ciam-dotnet-api.azurewebsites.net/api.
⚠️ If your app is using an in-memory storage, Azure App Services will spin down your web site if it is inactive, and any records that your app was keeping will be empty. In addition, if you increase the instance count of your website, requests will be distributed among the instances. Your app's records, therefore, will not be the same on each instance.
Contributing
If you'd like to contribute to this sample, see CONTRIBUTING.MD.
This project has adopted the Microsoft Open Source Code of Conduct. For more information, see the Code of Conduct FAQ or contact opencode@microsoft.com with any additional questions or comments.
Learn More
- Customize the default branding
- OAuth 2.0 device authorization grant flow
- Customize sign-in strings
- Building Zero Trust ready apps
- Microsoft.Identity.Web
- Validating Access Tokens
- User and application tokens
- Validation differences by supported account types
- How to manually validate a JWT access token using the Microsoft identity platform