Note
Access to this page requires authorization. You can try signing in or changing directories.
Access to this page requires authorization. You can try changing directories.
Summary: To apply Zero Trust principles to a spoke virtual network in Azure, you must leverage Role Based Access Control (RBAC), isolate subnets and virtual machines (resource groups, network security groups, and application security groups), secure traffic and resources within the VNet and virtual machine applications, and enable advanced threat detection, alerting, and protection.
This article helps you apply the principles of Zero Trust to a spoke virtual network (VNet) for IaaS workloads in Azure in the following ways:
| Zero Trust principle | Definition | Met by |
|---|---|---|
| Verify explicitly | Always authenticate and authorize based on all available data points. | Use application security groups to verify that individual NICs have permissions to communicate over specific channels. |
| Use least privileged access | Limit user access with Just-In-Time and Just-Enough-Access (JIT/JEA), risk-based adaptive policies, and data protection. | Don't enable 3389/RDP access by default on any channel. Use correct role permissions for the spoke context. |
| Assume breach | Minimize blast radius and segment access. Verify end-to-end encryption and use analytics to get visibility, drive threat detection, and improve defenses. | Limit unnecessary communication between resources. Ensure that you're able to log in to network security groups and that you have proper visibility into anomalous traffic. Track changes to network security groups. |
This article is a part of a series of articles that demonstrate how to apply the principles of Zero Trust across an environment in Azure that includes a spoke VNet hosting a virtual machine-based workload. For more information, see the Apply Zero Trust principles to Azure IaaS overview.
Reference architecture
The following diagram shows a common reference architecture for IaaS-based workloads.

In the diagram:
- A spoke VNet includes components to support an IaaS application comprised of virtual machines.
- The IaaS application is a three-tier application comprised of two virtual machines for each tier: front end, application, and data.
- Each tier is contained within a dedicated subnet with a dedicated network security group.
- Each virtual machine role is assigned to an application security group corresponding to its role.
- Access to the application is provided through an Application Gateway contained in its own subnet.
The application shown in the reference architecture follows the N-tier architecture style
The following diagram shows the components of a resource group for a spoke VNet in an Azure subscription separate from the subscription for the hub VNet.

In the diagram, all the components of the spoke VNet are contained in a dedicated resource group:
- One VNet
- One Azure Application Gateway (App GW), including a Web Application Firewall (WAF)
- Three network security groups, one for each application tier
- Three application security groups, one for each application tier
What's in this article
Zero Trust principles are applied across the architecture, from the tenant and directory level down to the assignment of virtual machines to application security groups. The following table describes the recommendations for securing this architecture.
| Step | Task | Zero Trust principle(s) applied |
|---|---|---|
| 1 | Use Microsoft Entra role-based access control (RBAC) or set up custom roles for networking resources. | Use least privileged access |
| 2 | Isolate infrastructure into its own resource group. | Assume breach |
| 3 | Create a network security group for each subnet. | Use least privileged access Assume breach |
| 4 | Create an application security group for each virtual machine role. | Verify explicitly Use least privileged access Assume breach |
| 5 | Secure traffic and resources within the VNet: |
Verify explicitly Use least privileged access Assume breach |
| 6 | Secure access to the VNet and application. | Use least privileged access Assume breach |
| 7 | Enable advanced threat detection, alerting, and protection. | Assume breach |
Step 1: Use Microsoft Entra RBAC or set up custom roles for networking resources
You can use Microsoft Entra RBAC built-in roles for network contributors. However, another approach is to use custom roles. Spoke network managers don't need full access to networking resources granted by the Microsoft Entra RBAC Network Contributor role, but need more permissions than other common roles. You can use a custom role to scope the access to just what is needed.
One easy way to implement this is to deploy the custom roles found in the Azure Landing Zone Reference Architecture.
The specific role is the Network Management custom role has the following permissions:
- Read all in the scope
- Any actions with the network provider
- Any actions with the support provider
- Any actions with the Resources provider
You can create this role using the scripts for the custom roles or through Microsoft Entra ID with the process described in Azure custom roles - Azure RBAC.
Step 2: Isolate infrastructure into its own resource group
By isolating network resources from compute, data, or storage resources, you reduce the likelihood of permissions bleed. In addition, by ensuring that all related resources are in one resource group, you can make one security assignment and better manage logging and monitoring to these resources.
Rather than having the spoke network resources available in multiple contexts in a shared resource group, create a dedicated resource group for it. The reference architecture that this article supports illustrates this concept.

In the figure, resources and components across the reference architecture are divided into dedicated resource groups for virtual machines, storage accounts, hub VNet resources, and spoke VNet resources.
With a dedicated resource group, you can assign a custom role using the following process: Tutorial: Grant a user access to Azure resources using the Azure portal - Azure RBAC.
Additional recommendations:
- Reference a security group for the role instead of named individuals.
- Manage access to the security group through your enterprise identity management patterns.
If you aren't using policies that enforce log forwarding on resource groups, configure this in the Activity log for the resource group: Navigate to Activity log > Export Activity Logs and then select + Add diagnostic setting.
On the Diagnostic setting screen, select all log categories (especially Security) and send them to the appropriate logging sources, such as a Log Analytics workspace for observability, or a storage account for long term storage.
Subscription Democratization
While not directly related to networking, you should plan your subscription RBAC in a similar way. In addition to isolating resources logically by resource group, you should also isolate the subscription based on business areas and portfolio owners. The subscription as a management unit should be narrowly scoped.
For more about subscription democratization, see Azure landing zone design principles - Cloud Adoption Framework.
You configure diagnostics from the Security category of Diagnostic setting in Azure Monitor, as shown here.

See Diagnostic Settings to understand how to review these logs and alert on them.
Step 3: Create a network security group for each subnet
Azure network security groups are used to filter network traffic between Azure resources in an Azure VNet. It's recommended to apply a network security group to each subnet, which is enforced through Azure policy by default when deploying Azure Landing Zones. A network security group contains security rules that allow or deny inbound network traffic to, or outbound network traffic from, several types of Azure resources. For each rule, you can specify source and destination, port, and protocol.
For a multi-tier virtual-machine based application, the recommendation is to create a dedicated network security group (NSG in the following figure) for each subnet that hosts a virtual machine role.

In the diagram:
- Each tier of the application is hosted in a dedicated subnet such as, front end tier, app tier, and data tier.
- A network security group is configured for each of these subnets.
Configuring network security groups in a different way than shown in the figure can result in incorrect configuration of some or all of the network security groups and can create issues in troubleshooting. It can also make it difficult to monitor and log.
Create a network security group using this process: Create, change, or delete an Azure network security group
See network security groups to understand how you can use them to secure the environment.
Step 4: Create an application security group for each virtual machine role
Application security groups enable you to configure network security as a natural extension of an application's structure, allowing you to group virtual machines and define network security policies based on those groups. You can reuse your security policy at scale without manual maintenance of explicit IP addresses. The platform handles the complexity of explicit IP addresses and multiple rule sets, allowing you to focus on your business logic.
Inside your workload, identify the specific virtual machine roles. Then, build an application security group for each role. In the reference architecture, three application security groups are represented.

In the diagram:
- Three application security groups are created to support this app, one for each tier: front end, app, and data.
- Each virtual machine is assigned to the corresponding application security group for its role (red text in the diagram).
For more information about application security groups and how to assign these to virtual machines, see Azure application security groups overview.
Note
If you're using load balancers, using the IP address of the load balancer in the network security groups is required as application security groups can't scope a load balancer.
Step 5: Secure traffic and resources within the VNet
This section covers the following recommendations:
- Deploy baseline deny rules for network security groups
- Deploy application specific rules for application security groups
- Plan for management traffic in the VNet
- Deploy network security group flow logging
Deploy baseline deny rules for network security groups
A key element of Zero Trust is using the least level of access needed. By default, network security groups have allowed rules. By adding a baseline of deny rules, you can enforce the least level of access.
Once provisioned, create a deny all rule in each of the inbound and outbound rules, with a priority of 4096. This is the last custom priority available, which means you still have the remaining scope to configure Allow actions.
In the network security group, navigate to Outbound Security Rules and select Add. Fill in the following:
- Source: Any
- Source port ranges: *
- Destination: Any
- Service: Custom
- Destination Port Ranges: *
- Protocol: Any
- Action: Deny
- Priority: 4096
- Name: DenyAllOutbound
- Description: Denies all outbound traffic unless specifically allowed.
Here's an example.

Repeat this process with inbound rules, adjusting the name and description as appropriate. You'll notice that on the Inbound security rules tab, there's a warning sign on the rule, as shown here.

If you click the rule and scroll to the bottom, you'll see more details, as shown here.

This message gives the following two warnings:
- Azure Load Balancers won't, by default, be able to access resources using this network security group.
- Other resources on this VNet won't, by default, be able to access resources using this network security group.
For our purpose in Zero Trust, this is how it should be. It means that just because something is on this VNet, doesn't mean that it has immediate access to your resources. For each traffic pattern, you'll need to create a rule explicitly allowing it and you should do so with the least amount of permissions. Therefore, if you've specific outbound connections for management–such as to Active Directory Domain Services (AD DS) domain controllers, private DNS virtual machines, or to specific external websites–they need to be controlled here.
Alternative Deny Rules
If you're using Azure Firewall to manage your outbound connections, then instead of performing a deny outbound all, you can leave all outbound open. As a part of the Azure Firewall implementation, you'll set up a route table that sends the default route (0.0.0.0/0) to the firewall, which handles traffic outside of the VNet.
You can then either create a deny all VNet outbound, or instead allow all outbound (but secure items with their inbound rules).
Read more about Azure Firewall and Route Tables to understand how you can use them to further increase the security of the environment.
Virtual machine management rules
To configure virtual machines with Microsoft Entra Login, Anti-Malware, and automatic updates enabled, you'll need to allow the following outbound connections. Many of these are by FQDN, meaning that either Azure Firewall is needed for FQDN rules, or you'll make a more complex plan. Azure Firewall is recommended.
The outbound connections are:
- On port 443:
- enterpriseregistration.windows.net
- settings-win.data.microsoft.com
- sls.update.microsoft.com
- v10.events.data.microsoft.com
- login.microsoftonline.com
- pas.windows.net
- 169.254.169.254
- On port 80:
- ctldl.windowsupdate.com
- www.msftconnecttest.com
- On port 123:
- time.windows.com
- On port 1688:
- Azkms.core.windows.net
Deploy application specific rules for application security groups
Define traffic patterns with the least amount of permissions and only following explicitly allowed paths. Here's an example diagram of using application security groups to define network traffic patterns in the network security groups for a spoke VNet that is used along with a hub VNet. This is the recommended configuration.

As another example, here's a configuration for a stand-alone spoke VNet in which the Web Application Firewall is placed in the Application Gateway subnet of the spoke VNet.

You need the following network security group rules:
- Allowing internet traffic into the APP GW subnet (HTTPS 443).
- Allowing traffic from the APP GW subnet to the front end tier virtual machines (HTTPS 433).
- Allowing traffic from the front end tier virtual machines to the app tier load balancer (HTTPS 443).
- Allowing traffic from the app tier load balancer to the app tier virtual machines (HTTPS 443).
- Allowing traffic from the app tier virtual machines to the data tier load balancer (SQL 1433).
- Allowing traffic from the data tier load balancer to the data tier virtual machines (SQL 1433).
- Allowing traffic between data tier virtual machines (SQL 1433)
Configure the SQL pattern first and then repeat the process with the remaining tiers. The following sections are the configurations for the rules that confine network traffic for a single application tier.
Rule 5 - Allow traffic from app tier virtual machines to the data tier load balancer (SQL 1433)
In the network security group for the app tier subnet, navigate to Inbound Security Rules, and select Add. Populate the list with the following:
- Source: Application Security Group
- Source application security groups: Select your business tier application security group
- Source port ranges: 1433 (Sometimes source traffic can come from different ports and if this pattern occurs you can add source port ranges to * to allow any source port. Destination port is more significant and some recommendations are to always use * for source port)
- Destination: IP addresses
- Destination IP addresses/CIDR ranges: the explicit IP of the load balancer
- You need to use the explicit IP here because you can't associate a load balancer with an application security group.
- You can plan your IP schema or deploy the load balancer and refer to the IP it's assigned.
- Service: MS SQL
- Destination Port Ranges: This is automatically filled in for port 1433
- Protocol: This is automatically selected for TCP
- Action: Allow
- Priority: A value between 100 and 4096. You can start with 105.
- Name: Allow-App-Tier-to-Data-LB-Inbound
- Description: Allows inbound access from the data tier load balancer to the app tier virtual machines.
You'll notice after completion that there's a blue icon for informational alerts on the rule. Clicking the rule gives the following message:
- "Rules using application security groups may only be applied when the application security groups are associated with network interfaces on the same virtual network."
Here's an example.

The rule only applies when this application security group is used in this network.
Finally, in the same network security group, navigate to Outbound Security Rules and select Add. Populate the list similar to the example, changing Inbound to Outbound.
Rule 6 - Allow traffic from data tier load balancer to data tier virtual machines (SQL 1433)
In the network security group for the data tier subnet, navigate to Inbound Security Rules and select Add. Populate the list with the following:
- Source: IP Address
- Source IP Address: The IP address of the load balancer
- Source port ranges: 1433
- Destination: Application security group
- Destination application security groups: Select your data tier application security group
- Service: MS SQL
- Destination Port Ranges: This is automatically filled in for port 1433.
- Protocol: This is automatically selected for TCP.
- Action: Allow
- Priority: A value between 100 and 4096. You can start with 105.
- Name: Allow-SQL-LB-to-SQL-VMs-Inbound
- Description: Allows inbound access to the SQL-based data tier virtual machines from the data tier load balancer.
In the same network security group, navigate to Outbound Security Rules and select Add. Populate the list as done in the example, changing Inbound to Outbound.
Rule 7 - Allow traffic between data tier virtual machines (SQL 1433)
In the network security group for the data tier subnet, navigate to Inbound Security Rules and select Add. Populate the list with the following:
- Source: Application security group
- Destination application security groups: Select your data tier application security group
- Source port ranges: 1433
- Destination: Application security groups
- Destination application security groups: Select your data tier application security group
- Service: MS SQL
- Destination Port Ranges: This is automatically filled in for port 1433.
- Protocol: This is automatically selected for TCP.
- Action: Allow
- Priority: A value between 100 and 4096. You can start with 105.
- Name: Allow-SQL-VM-to-SQL-VM-Inbound
- Description: Allows inbound access between SQL-based data tier virtual machines.
In the same network security group, navigate to Outbound Security Rules and select Add. Populate the list as the previous list, changing Inbound to Outbound.
With these three rules, you have defined the Zero Trust connectivity pattern for a single application tier. You can repeat this process as required for additional flows.
Plan for management traffic in the VNet
In addition to the application specific traffic, you need to plan for management traffic. However, management traffic generally originates outside of the spoke VNet. Additional rules are required. First, you'll need to understand the specific ports and sources that management traffic will be coming from. Generally, all management traffic should flow from a firewall or other NVA located in the hub network for the spoke.
See the full reference architecture in the Apply Zero Trust principles to Azure IaaS overview article.
This varies based on your specific management needs. However, rules on the firewall appliances and rules on the network security group should be used to explicitly allow connections on both the platform networking side and the workload networking side.
Deploy network security group flow logging
Even if your network security group is blocking unnecessary traffic doesn't mean that your goals are met. You still need to observe the traffic occurring outside your explicit patterns, so that you know if an attack is occurring.
To enable Network Security Group Flow Logging, you can follow the Tutorial: Log network traffic flow to and from a virtual machine against the existing network security group that is created.
Note
- The storage account should follow the Zero Trust storage account guidance.
- Access to the logs should be restricted as needed.
- They should also flow in to Log Analytics and Sentinel as needed.
Protect inbound web traffic with IDPS
In addition to the controls in your spoke virtual network, you can also use an Azure Firewall in order to apply additional inspection. While the Web Application Firewall function for Azure Front Door and Application Gateway inspects traffic for common web attacks, using Azure Firewall can provide a deeper level of inspection.
To use every signal available and maintain central visibility into network traffic, routing traffic from your Application Gateway to Azure Firewall is recommended. It can then inspect the traffic for additional signals, and capture the behavior in its logs. You can read more about this configuration in the article Zero-trust network for web applications with Azure Firewall and Application Gateway. For more information on how to set up this behavior, see Configure Azure Firewall Premium for Zero Trust.
Step 6: Secure access to the VNet and application
Securing access to the VNet and application includes:
- Securing traffic within the Azure environment to the application.
- Using multifactor authentication and conditional access policies for user access to the application.
The following diagram shows both of these access modes across the reference architecture.

Secure traffic within Azure environment for the VNet and application
Much of the work of security traffic within the Azure environment is already complete. Secure connections between storage resources and the virtual machines are configured in Apply Zero Trust principles to Azure storage.
To secure access from hub resources to the VNet, see Apply Zero Trust principles to a hub virtual network in Azure.
Using multifactor authentication and Conditional Access policies for user access to the application
The article, Apply Zero Trust principles to virtual machines recommends how to protect access requests directly to virtual machines with multifactor authentication and conditional access. These requests are most likely from administrators and developers. The next step is to secure access to the application with multifactor authentication and conditional access. This applies to all users who access the app.
First, if the application isn't yet integrated with Microsoft Entra ID, see Application types for the Microsoft identity platform.
Next, add the application to the scope of your identity and device access policies.
When configuring multifactor authentication with conditional access and related policies, use the recommended policy set for Zero Trust as a guide. This includes "Starting point" policies that don't require managing devices. Ideally, the devices accessing your virtual machines are managed and you can implement the "Enterprise" level, which is recommended for Zero Trust. For more information, see Common Zero Trust identity and device access policies.
The following diagram shows the recommended policies for Zero Trust.

Step 7: Enable advanced threat detection and protection
Your spoke VNet built on Azure may already be protected by Microsoft Defender for Cloud (MDC) as other resources from your IT business environment running on Azure or on-premises may also be protected.
As mentioned in the other articles from this series, Microsoft Defender for Cloud is a Cloud Security Posture Management (CSPM) and Cloud Workload Protection (CWP) tool that offers Security Recommendations, Alerts, and advanced features such as Adaptive Network Hardening to assist you as you progress in your Cloud Security journey. To better visualize where Defender for Cloud fits into the greater Microsoft security landscape, see Microsoft Cybersecurity Reference Architectures.
This article doesn't discuss Microsoft Defender for Cloud in detail, but it's important to understand that Microsoft Defender for Cloud works based on Azure Policies and logs ingested in a Log Analytics workspace. Once enabled on the subscription(s) with your spoke VNet and associated resources, you'll be able to see recommendations to improve their Security Posture. You can filter these Recommendations further by MITRE tactic, Resource Group, etc. Consider prioritizing the resolution of Recommendations that have a greater impact on your organization's Secure score.
Here's an example in the Microsoft Defender for Cloud portal.

If you choose to onboard one of the Defender for Cloud plans that offer Advanced Workload Protections, it includes Adaptive Network Hardening Recommendations to improve your existing network security group rules. Here's an example.

You can accept the recommendation by selecting Enforce, which either creates a new network security group rule or modify an existing one.
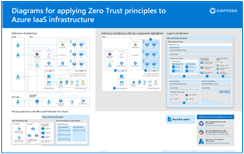
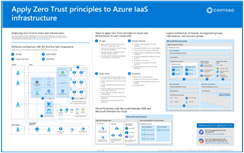
Technical illustrations
These illustrations are replicas of the reference illustrations in these articles. Download and customize these for your own organization and customers. Replace the Contoso logo with your own.
| Item | Description |
|---|---|
 Download Visio
 Updated October 2024 |
Apply Zero Trust principles to Azure IaaS Use these illustrations with these articles: - Overview - Azure storage - Virtual machines - Azure spoke virtual networks - Azure hub virtual networks |
 Download Visio
 Updated October 2024 |
Apply Zero Trust principles to Azure IaaS — One page poster A one-page overview of the process for applying the principles of Zero Trust to Azure IaaS environments. |
For additional technical illustrations, see Zero Trust illustrations for IT architects and implementers.
Recommended training
- Secure your Azure resources with Azure role-based access control (Azure RBAC)
- Configure and manage Azure Monitor
- Configure network security groups
- Design and implement network security
- Secure access to your applications by using Azure identity services
For more training on security in Azure, see these resources in the Microsoft catalog:
Security in Azure | Microsoft Learn
Next Steps
See these additional articles for applying Zero Trust principles to Azure:
- Azure IaaS overview
- Azure Virtual Desktop
- Azure Virtual WAN
- IaaS applications in Amazon Web Services
- Microsoft Sentinel and Microsoft Defender XDR