Note
Access to this page requires authorization. You can try signing in or changing directories.
Access to this page requires authorization. You can try changing directories.
The Surface Support Portal simplifies device support and service management for businesses. This portal offers faster, more efficient support for Surface devices, ensuring that any issues are promptly addressed.
With the Surface Support Portal, you benefit from:
- Enhanced security with authentication processes to prevent unauthorized access.
- Access to qualified Surface technicians via chat or phone.
- The ability to track your complete audit history of exchanges, repairs, and technical support.
- Detailed warranty status, entitlements, and eligibility for advanced warranty programs.
To learn more, see Surface Support Portal delivers significant time savings for IT admins
Video demo
This video provides an overview of the Surface Support Portal, showcasing its features for efficient device support and management:
Access Surface Support Portal
If you already have access to the portal, skip to the Prerequisites section.
How to access Surface Support Portal
The onboarding process includes steps to validate your organization’s Microsoft tenant. If your organization doesn't already have a tenant, these instructions help you create one, ensuring seamless access to the Surface Support Portal via the Microsoft 365 Admin Center. To get started, check out the following video:
Check if your organization has an existing tenant
- Go to the tenant validation page.
- Enter your organization's domain to check if a tenant exists.
- If the tenant exists, contact your organization's administrator to create a user account for access to the Microsoft 365 Admin Center.
Validate your organization's email and domain
- Use this onboarding page to validate your email and domain.
- If your organization is already registered, sign in with your credentials.
- If your organization doesn’t have a tenant, skip to Step 3.

Set up a new account for your organization
- Provide your organization’s name, address, phone number, and the email address you want to associate with the account.
Verify your identity
- Confirm your identity via text or call.
- A verification code is sent to you. Once verified, create your account credentials.
Add your credentials
- Save your email and password before proceeding. Select Next to continue.
Add payment details
- Provide payment information. This step links the details to your account but doesn't incur charges unless a product is purchased.
- The Surface Support Portal on the Microsoft 365 Admin Center doesn't require a subscription for access.
Note
The payment information links with your account, but you aren't charged until you purchase a product from Microsoft. The Surface Support Portal on Microsoft 365 Admin Center doesn't require any subscription to access Surface support and services.
Access the Microsoft 365 Admin Center
After completing the payment information, you'll be redirected to the Admin Center homepage. Select Finish.
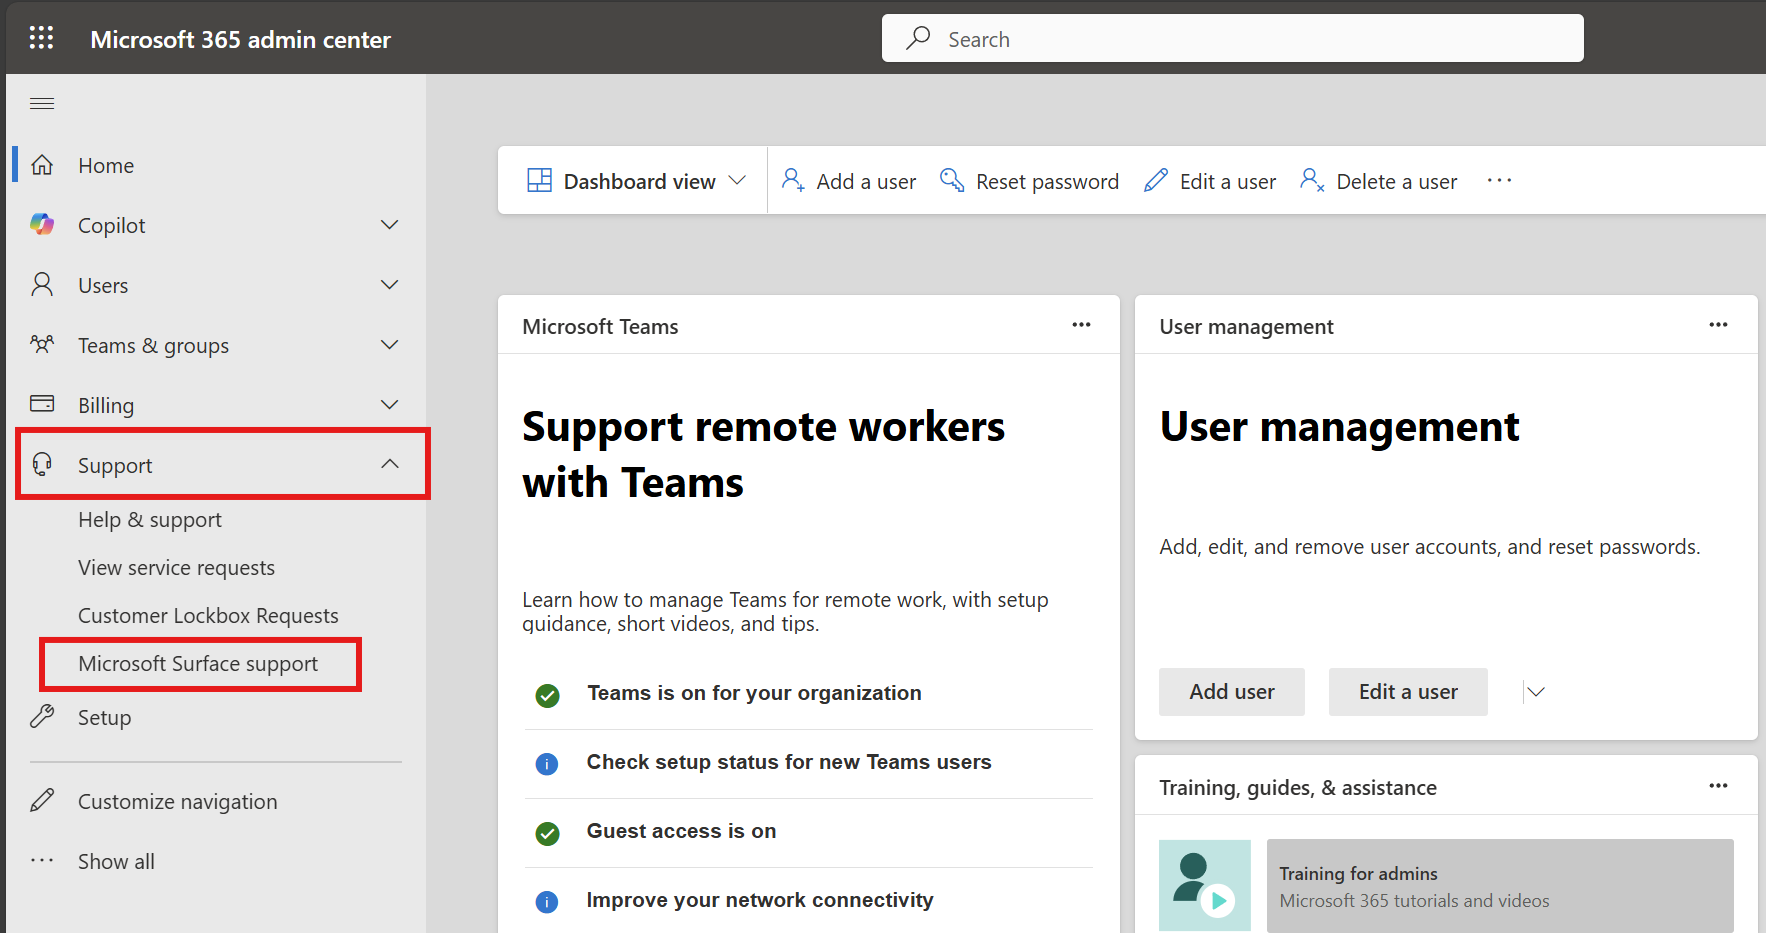
In the Support section of the left-hand navigation menu, select Microsoft Surface support
Request access to the Surface Support Portal.
If access is delayed or denied, you can still create support orders for your Surface devices by selecting the Help and Support node.
Expedite your support request
- Include device serial numbers and your shipping address in the Issue Description field to speed up processing.
Prerequisites
Before proceeding, you first need to configure at least one admin role. To learn more, see:
To manage devices or take advantage of the option to use Windows Autopilot, you first need to register them with the Surface Support Portal, as explained in the following section.
IT admin tasks in Surface Support Portal
This section includes key tasks to ensure your Surface devices remain compliant, up-to-date, and fully functional:
- Register Surface devices
- Manage Surface device warranty and coverage
- Create and track support requests
- Create and track service requests for device replacement or repair
- Review Administrator roles
- View related Surface IT tools
Register Surface devices
Register your Surface devices through the Surface Support Portal to associate them with your organization’s tenant. This enables you to manage devices with Windows Autopilot, ensuring seamless integration into your IT infrastructure and simplifying device management.
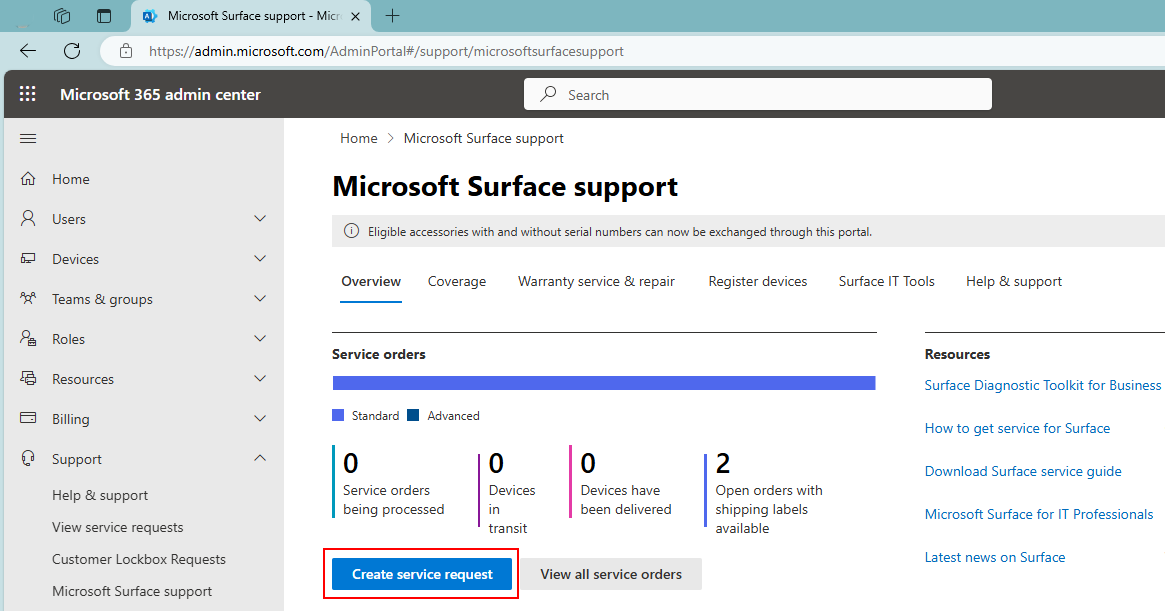
Begin new device registration:
- Select Register devices to start a new registration or request support.
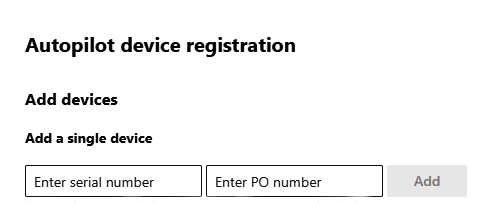
Add a single device:
- Enter the device serial number and PO (Purchase Order) number in the provided fields.
- Select Add to register the device.
Add devices in bulk:
- Prepare a CSV file with two columns: Device Serial Number and PO Number. Ensure all serial numbers include leading zeros.
- Select Import CSV to upload your file, or download a sample CSV template for reference.
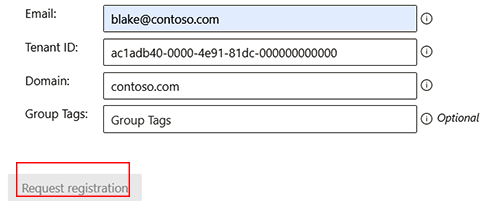
Confirm tenant details:
- Provide the required information, including contact email, tenant ID, and domain name.
- These details are prepopulated from your signed-in account.
Provide proof of ownership:
- Attach purchase receipts or invoices that include your company name and all device serial numbers listed.
Finalize registration:
- Verify all details are correct and select Request registration.
- Your registered devices are listed under Date & Time, Request number, and State for tracking and management.
Manage Surface device warranty and coverage
Easily manage your Surface device warranties via the Surface Support Portal. You can view the coverage status of each device, track warranty timelines, and monitor the status of your service orders.
- Select Coverage to view devices covered under warranty, the time remaining for each device under warranty, and related details.
- Select Warranty & service to view the status of service orders.
Create and track support requests
Easily submit support requests through the Surface Support Portal by providing detailed information about the issue you’re facing. The more specific your description, the faster we can help resolve your problem.
Navigate to the Microsoft 365 admin center.
In the left-hand navigation menu, select Support.
Under Support, select Microsoft Surface support.
On the Microsoft Surface support Overview tab or in the Help & support tab, select Create support request.
Enter your question or issue into the live chat field.
Review suggested troubleshooting steps.
If additional support is needed, select Contact support.
Select your preferred contact method (phone or email).
Provide a Title and Description of the support issue. Stronger descriptions help in delivering a resolution.
Enter your Phone number and confirm your email address of authorized contacts.
If available, add any supporting attachments.
Optionally, choose your preferred time zone and contact language settings and your accessibility settings.

Select Contact me to submit your support request. A Microsoft Customer Service Representative contacts you using your preferred method.
Your request will also be listed under the Help & support tab, where you can track the status and manage any open or closed requests.
Create and track service requests for device replacement or repair
Quickly address hardware issues by creating a service request for device replacement or repair. Additionally, you can access a complete history of your support and repair requests, giving you a comprehensive view of your device’s service history.
Navigate to the Microsoft 365 admin center.
In the left-hand navigation menu, select Support.
Under Support, select Microsoft Surface support.
On the Microsoft Surface support Overview tab or under the Warranty service & repair tab, select Create service request.
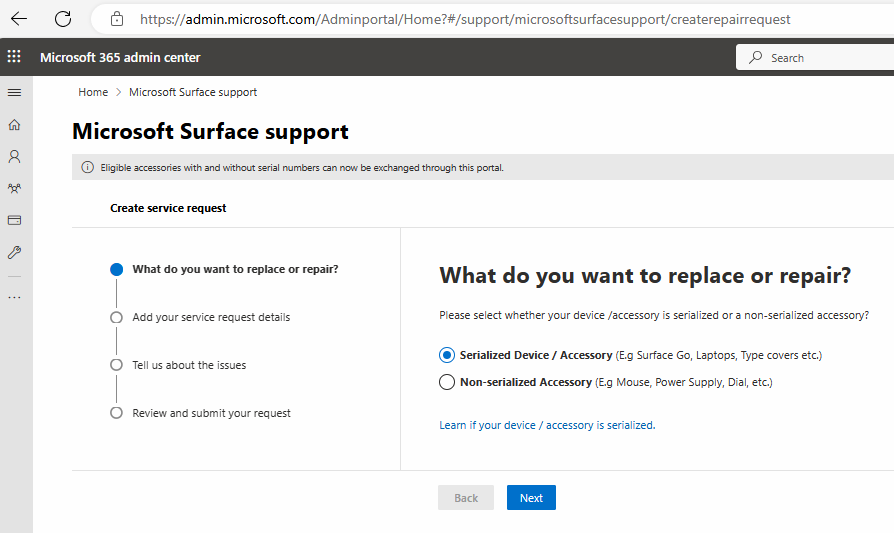
Select Create service request and follow the instructions.
Choose between creating a repair or replacement for a serialized device/accessory or nonserialized accessory and select Next.
Add your Shipping address by clicking the Add shipping address link. Select or add a new shipping address in the pop-up window.
If applicable, add your VAT ID or Tax Exempt ID, and select Done
Update the Billing address to ensure the invoice is directed correctly for paid orders and select Done.
Add your devices and accessories by Selecting devices from your tenant, adding a single device by entering its Serial number, or you can Add devices in bulk by uploading a completed CSV template.
Once added, the serial number populates in the Device added section. Select the devices and select Next.
On the Tell us about the issues page, select the problem symptom in the Issue type box.
Choose the service offer (for example, Advanced Exchange, Same Unit Repair, Standard Exchange).
Optionally, add a brief description of the issue and select Next.
Review the order details on the summary page and select Submit your request. A service order ID is generated, and you receive an email confirmation and shipping label if applicable.
Your request will also be listed under the Warranty service & repair tab, where you can track the status and manage any open or closed requests.
Review Administrator roles
- For details about all available admin roles, see Assign admin roles for Surface portals.
- To learn more about configuring roles, see Add an admin.
View related Surface IT tools
- Select Surface IT Tools to access details about the latest tools, including the Surface IT Toolkit, Surface Diagnostics Toolkit for Business, and Surface API Management Service.