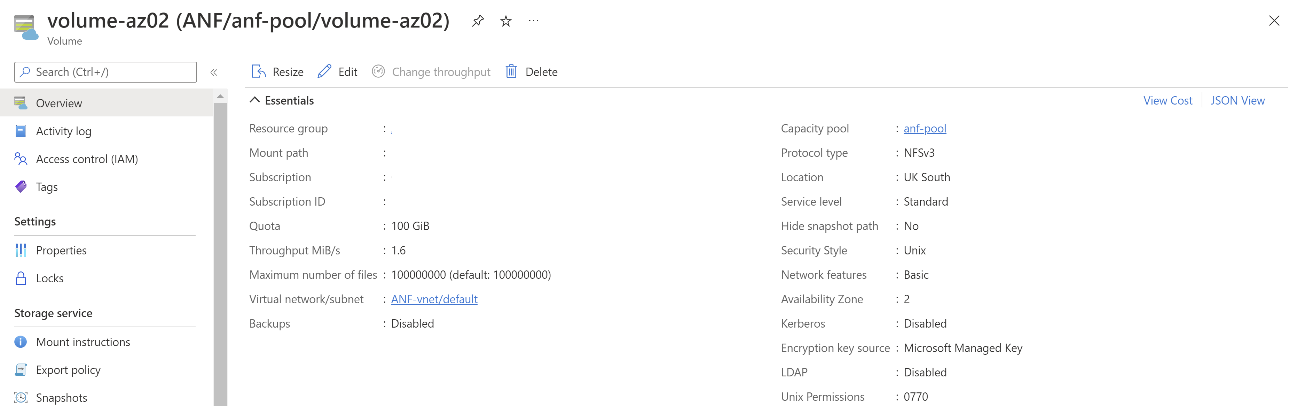
Exercise 3 - Manage replication
In this exercise, you learn how to set up cross-region replication by creating replication peering. You also learn to monitor replication status, manage disaster recovery, delete volume replications.
Setting up replication peering enables you to asynchronously replicate data from an Azure NetApp Files volume (source) to another Azure NetApp Files volume (destination). The source volume and the destination volume must be deployed in separate regions. The service level for the destination capacity pool can match that of the source capacity pool, or you can select a different service level.
Task 1 - Locate the source volume Resource ID
In this task, you obtain the resource ID of the source volume that you want to replicate.
Go to the source volume, and select Properties under Settings to display the source volume resource ID.
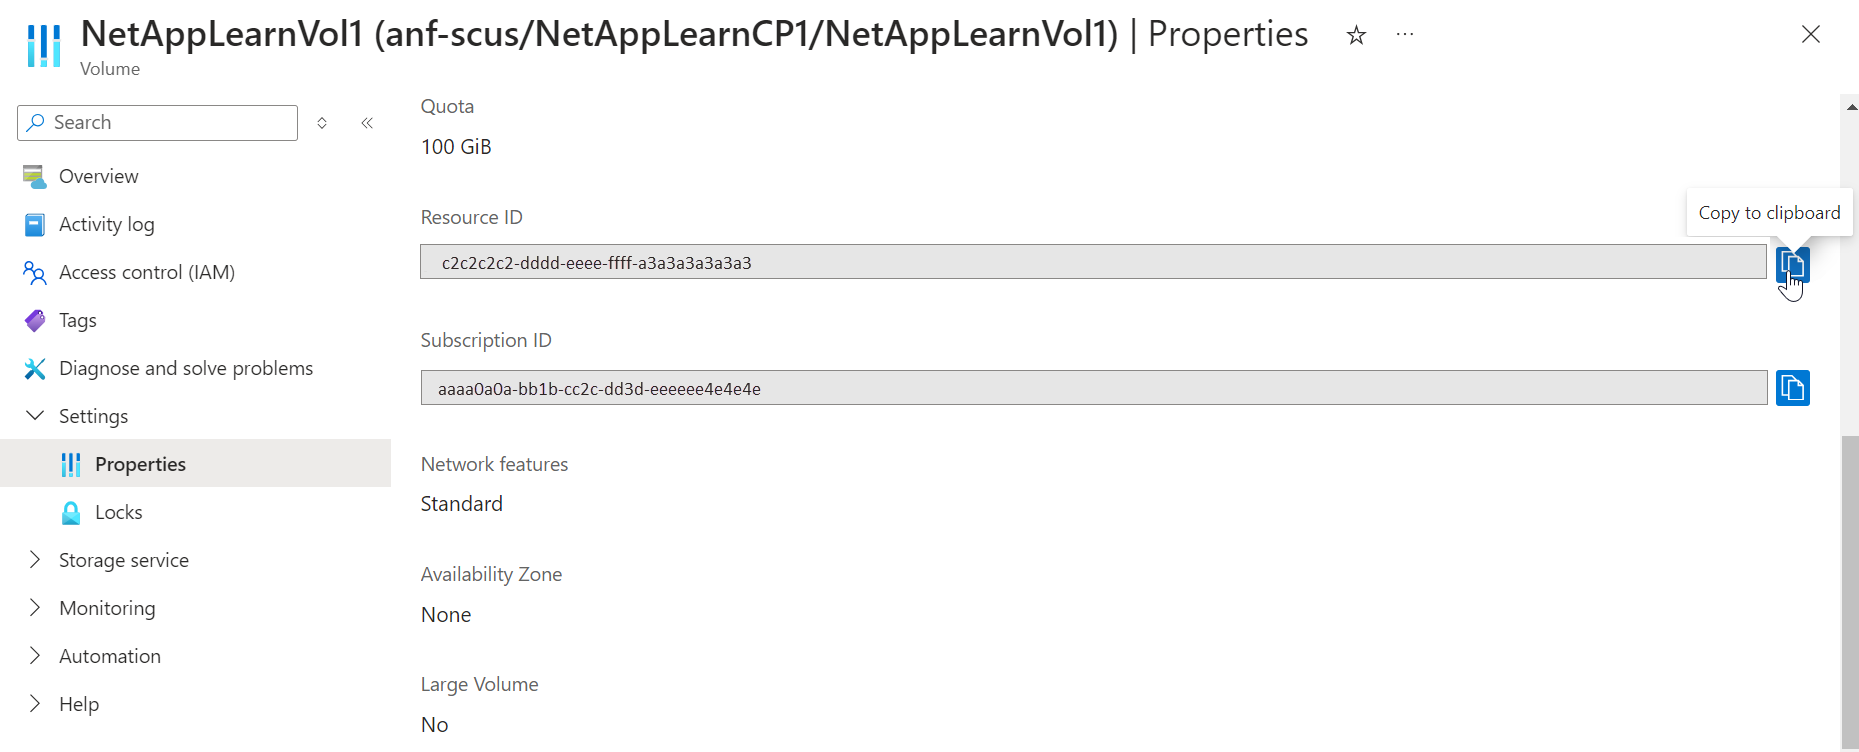
Copy the resource ID to the clipboard. You'll need it later.
Task 2 - Create the data replication volume (the destination volume)
In this task, you create a destination volume where you want the data from the source volume to be replicated to.
Before you can create a destination volume, you need to have a NetApp account and a capacity pool in the destination region.
Delegate a subnet in the region to be used for replication by following the steps in Delegate a subnet to Azure NetApp Files.
Create the data replication volume by selecting Volumes under Storage Service in the destination NetApp account. Then select the + Add data replication button.
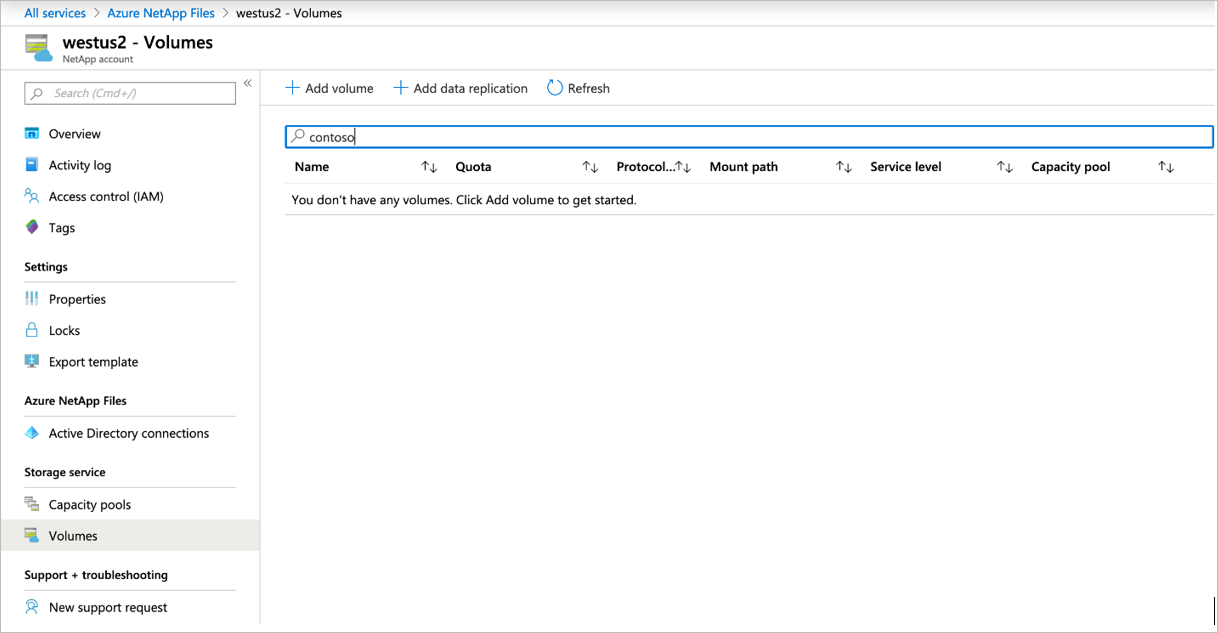
In the Create a Volume page that appears, complete the following fields under the Basics tab:
- Volume name
- Capacity pool
- Volume quota
- Virtual network
- Subnet
Under the Protocol tab, select the same protocol as the source volume.
For the NFS protocol, ensure that the export policy rules satisfy the requirements of any hosts in the remote network that will access the export.
Under the Tags tab, create key/value pairs as necessary.
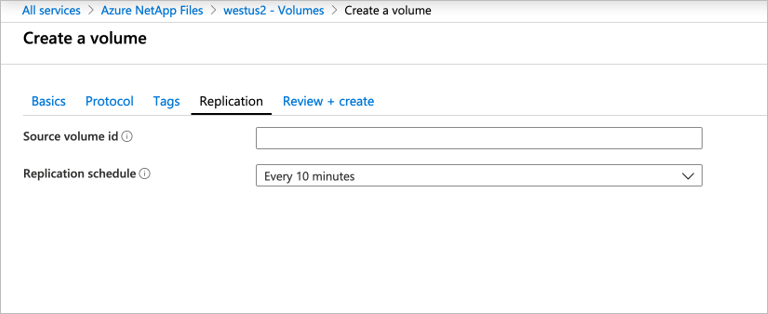
Under the Replication tab, paste in the source volume resource ID that you obtained in Task 1 - Locate the source volume resource ID, and then select the desired replication schedule.
There are three options for the replication schedule: every 10 minutes, hourly, and daily.
Select Review + Create, then select Create to create the data replication volume.
Task 3 - Authorize replication from the source volume
To authorize the replication, you need to obtain the resource ID of the replication destination volume and paste it to the Authorize field of the replication source volume.
In the Azure portal, navigate to Azure NetApp Files.
Go to the destination NetApp account and destination capacity pool where the replication destination volume is located.
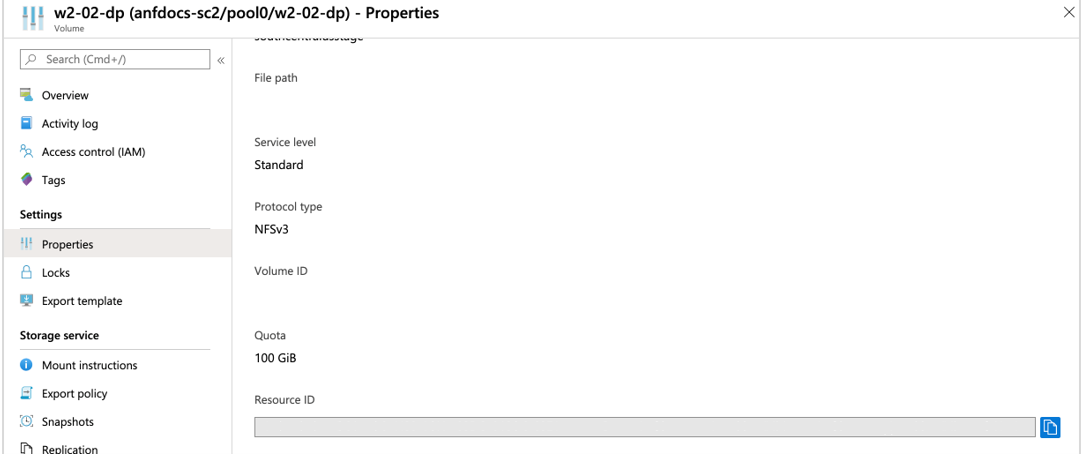
Select the replication destination volume, go to Properties under Settings, and locate the Resource ID of the destination volume. Copy the destination volume resource ID to the clipboard.
In Azure NetApp Files, go to the replication source account and source capacity pool.
Locate the replication source volume and select it. Navigate to Replication under Storage Service then select Authorize.
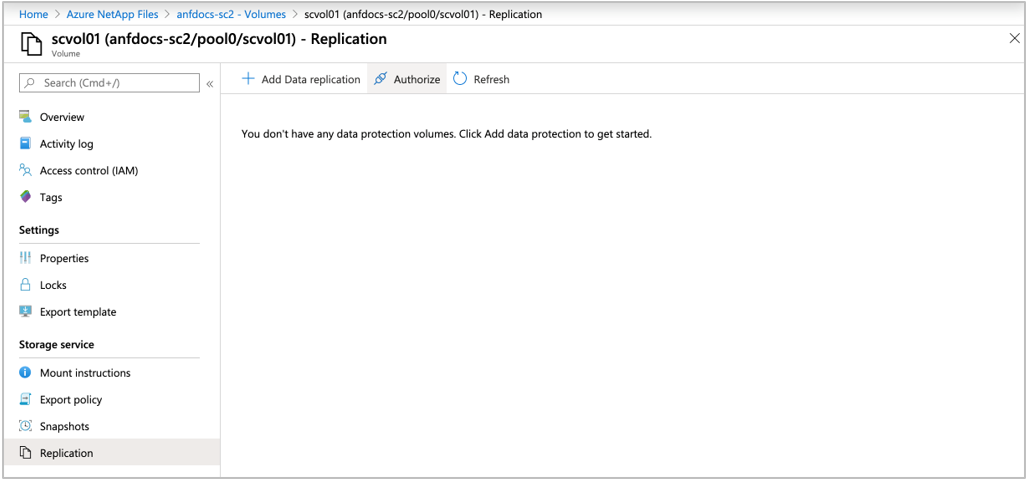
In the Authorize field, paste the destination replication volume resource ID that you obtained in Step 3, then select OK.
Task 4 - Display health and monitor status of replication relationship
In this task, you view replication status on the source volume or the destination volume. You can also set alert rules in Azure Monitor to help you monitor the replication status.
Display replication status
From either the source volume or the destination volume, select Replication under Storage Service for either volume.
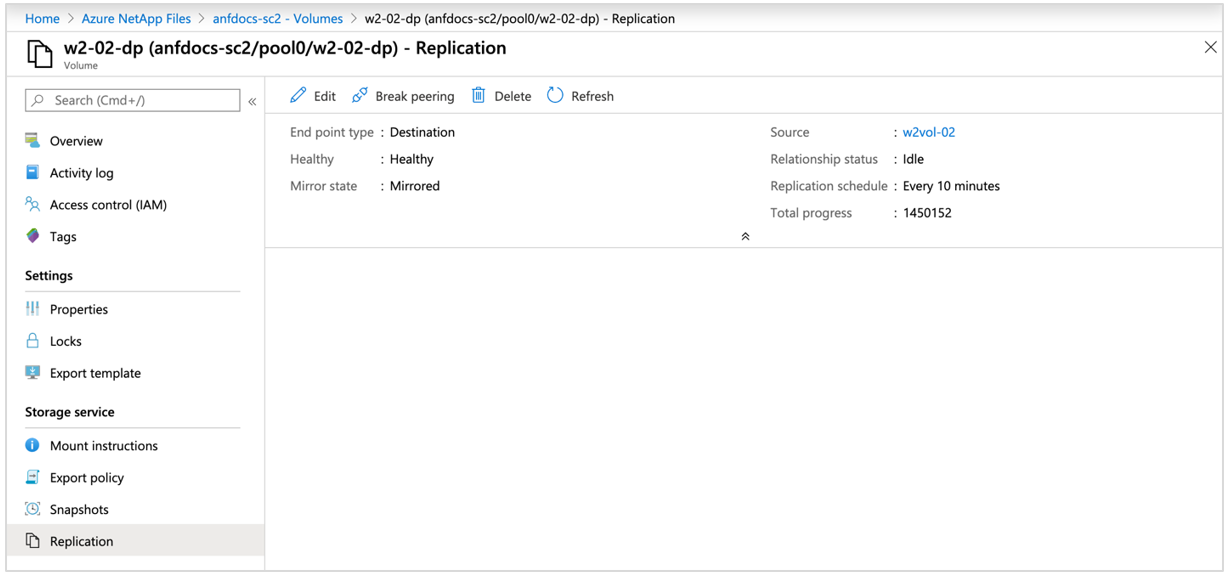
The following information about replication status and health is displayed:
- End point type - Identifies whether the volume is the source or destination of replication.
- Health - Displays the health status of the replication relationship.
- Mirror state - Shows one of the following values:
- Uninitialized: This is the initial and default state when a peering relationship is created. The state remains uninitialized until the initialization completes successfully.
- Mirrored: The destination volume has been initialized and is ready to receive mirroring updates.
- Broken: This is the state after you break the peering relationship. The destination volume is 'RW' and snapshots are present.
- Relationship status - Shows one of the following values:
- Idle: No transfer operation is in progress and future transfers aren't disabled.
- Transferring: A transfer operation is in progress and future transfers aren't disabled.
- Replication schedule - Shows how frequently incremental mirroring updates will be performed when the initialization (baseline copy) is complete.
- Total progress - Shows the total number of cumulative bytes transferred over the lifetime of the relationship. This amount is the actual bytes transferred, and it might differ from the logical space that the source and destination volumes report.
Task 5 - Set alert rules to monitor replication
Create alert rules in Azure Monitor to help you monitor the status of cross-region replication:
In Azure Monitor, select Alerts.
From the Alerts window, select the Create dropdown then Alert rule.
From the Scope tab of the Create an Alert Rule page, choose Select scope. The Select a Resource page appears.
From the Browse tab, enter "Volumes" in the Search to filter items... field.
Select the target volume you'd like to monitor and select Apply.
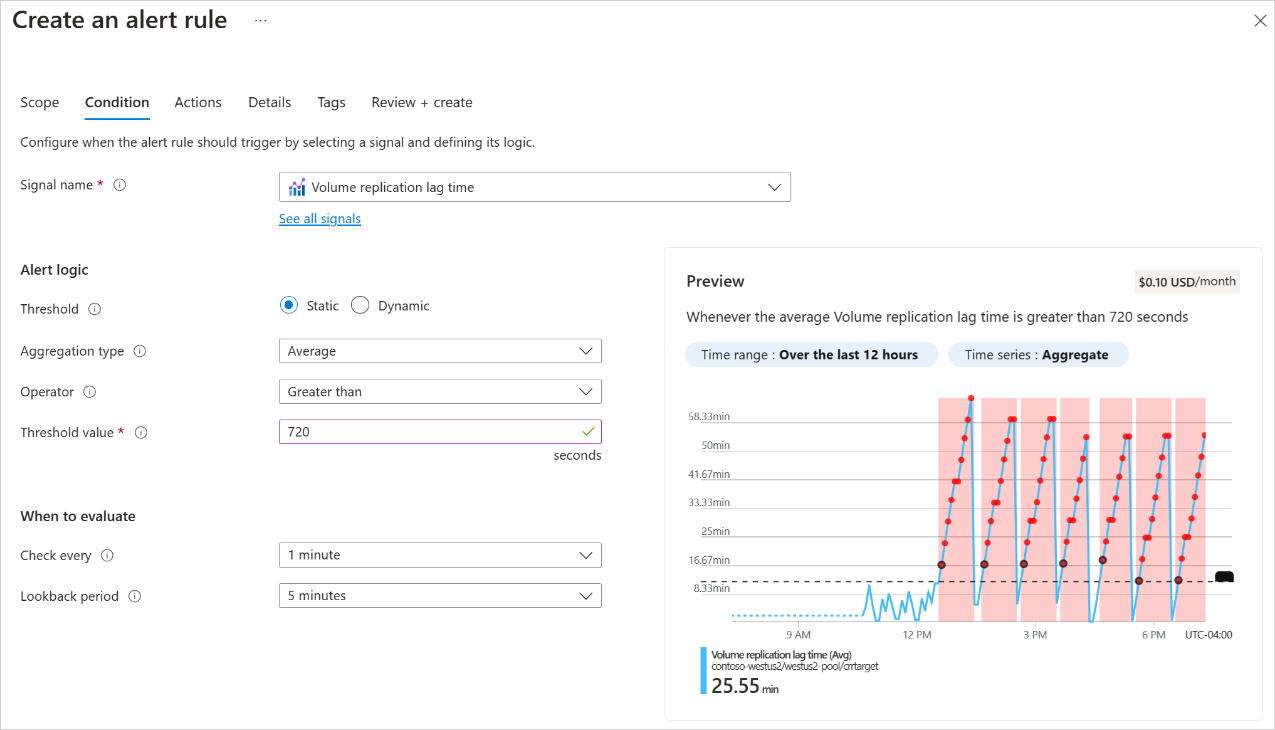
From the Condition tab, use the Signal name dropdown to select See all signals. Identify the Volume replication lag time signal then select Apply.
Confirm Greater than is selected for the Operator field.
For the Threshold value field, enter the number of seconds equal to your replication schedule plus 20%. For example:
- If your replication schedule is 10 minutes, enter 720 (10 minutes * 60 seconds * 1.2).
- If your replication schedule is hourly, enter 4,320 (60 minutes * 60 seconds * 1.2).
- If your replication schedule is daily, enter 103,680 (24 hours * 60 minutes * 60 seconds * 1.2).
Select Review + create. The alert rule is ready for use.
Task 6 - Manage disaster recovery using Azure NetApp Files
In this task, when an ongoing replication prepares you for a disaster recovery event, you'll fail over to the destination volume, enabling the client to read and write to the destination volume. And after disaster recovery, you can perform a resync operation to fail back to the source volume. You then reestablish the source-to-destination replication and remount the source volume for the client to access.
Fail over to destination volume
Failover is a manual process. When you need to activate the destination volume (for example, when you want to fail over to the destination region), you need to break replication peering then mount the destination volume.
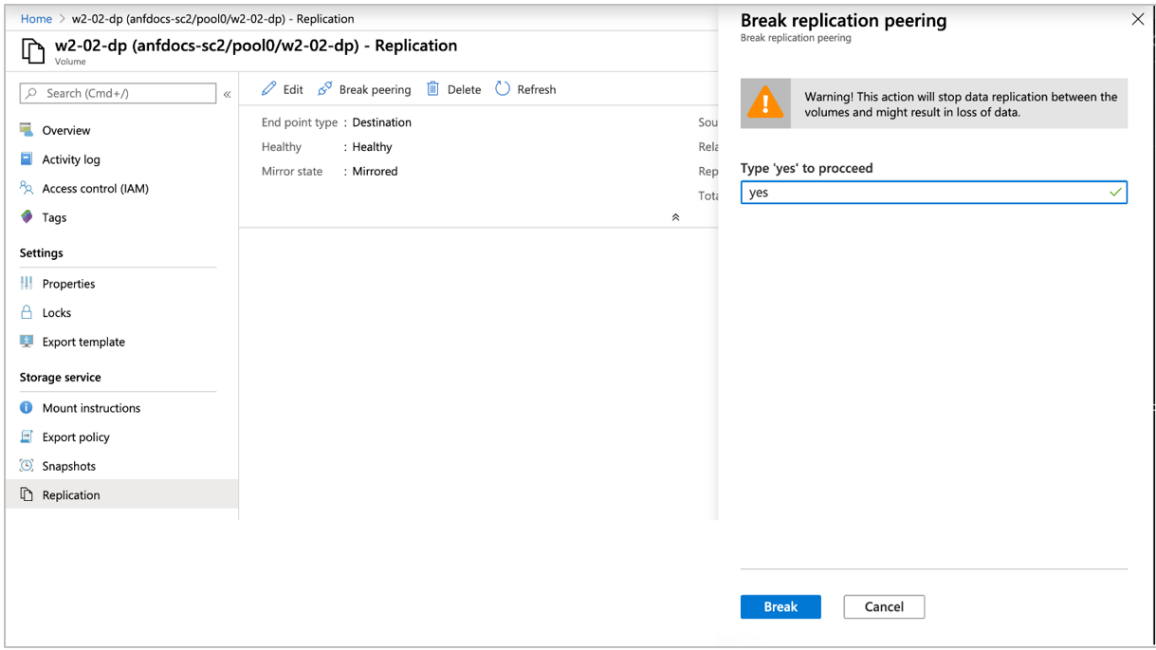
To break replication peering, select the destination volume. Select Replication under Storage Service.
Check the following fields before continuing:
Ensure that Mirror State shows Mirrored. Don't attempt to break replication peering if Mirror State shows Uninitialized.
Ensure that Relationship Status shows Idle. Don't attempt to break replication peering if Relationship Status shows Transferring.
Select Break Peering.
Type Yes when prompted and then select Break.
Mount the destination volume by following the steps in Mount or unmount a volume for Windows or Linux virtual machines.
This step enables a client to access the destination volume.
Resync volumes after disaster recovery
After disaster recovery, you can reactivate the source volume by performing a reverse resync operation. The reverse resync operation reverses the replication process and synchronizes data from the destination volume to the source volume.
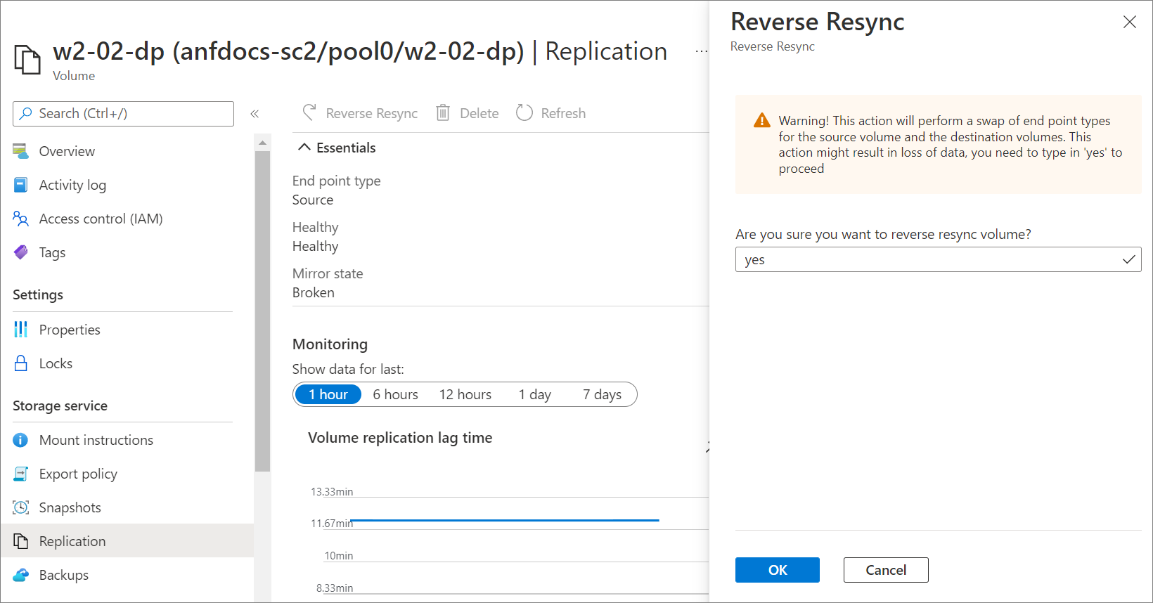
To reverse resync replication, select the source volume. Select Replication under Storage Service. Then select Reverse Resync.
Type Yes when prompted then select OK.
Monitor the source volume health status by following steps in Task 4 - Display health status of replication relationship.
Reestablish source-to-destination replication
After the resync operation from destination to source is complete, you need to break replication peering again to reestablish source-to-destination replication. You should also remount the source volume so that the client can access it.
Break the replication peering:
Select the destination volume. Select Replication under Storage Service.
Check the following fields before continuing:
- Ensure that Mirror State shows Mirrored. Don't attempt to break replication peering if Mirror State shows uninitialized.
- Ensure that Relationship Status shows Idle. Don't attempt to break replication peering if Relationship Status shows transferring.
Select Break Peering.
Type Yes when prompted then select Break.
Resync the source volume with the destination volume:
Select the destination volume. Select Replication under Storage Service. Then select Reverse Resync.
Type Yes when prompted then select OK.
Remount the source volume by following the steps in Mount a volume for Windows or Linux virtual machines.
This step enables a client to access the source volume.
Task 7 - Delete volume replications or volumes
In this task, you delete volume replications and also delete the source or destination volume.
Here, you terminate the replication connection between the source and the destination volumes by deleting volume replication and also delete source or destination volumes.
Ensure that the replication peering has been broken before you delete volume replication. To break the replication peering:
Select the destination volume. Select Replication under Storage Service.
Check the following fields before continuing:
- Ensure that Mirror State shows Mirrored. Don't attempt to break replication peering if Mirror State shows Uninitialized.
- Ensure that Relationship Status shows Idle. Don't attempt to break replication peering if Relationship Status shows Transferring.
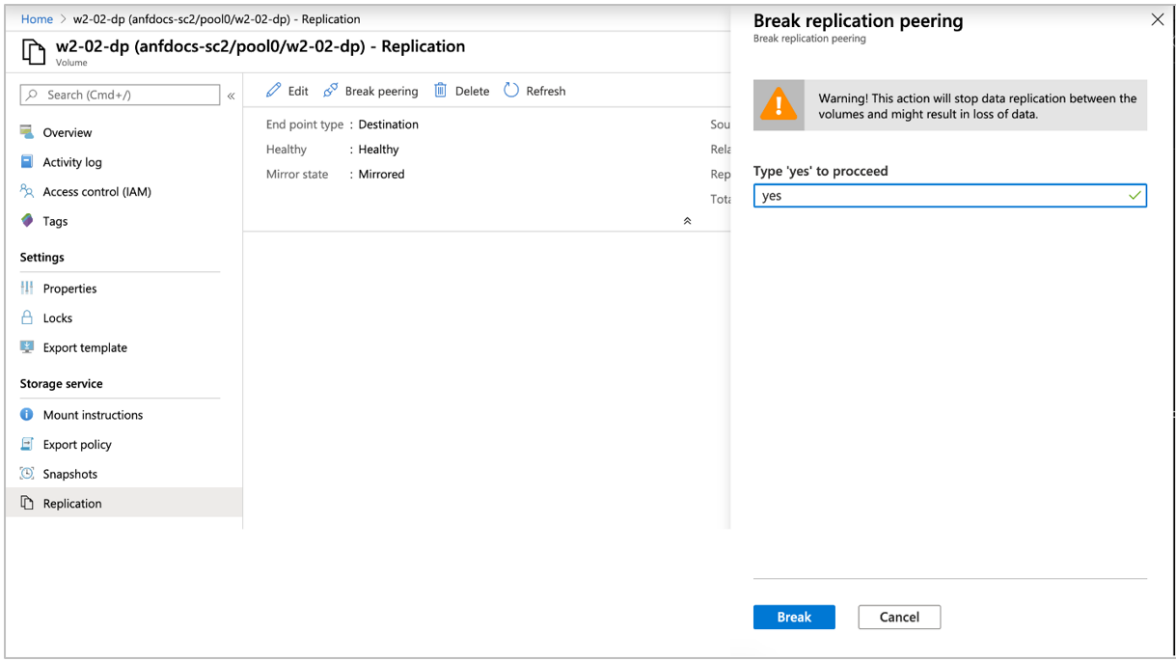
Select Break Peering.
Type Yes when prompted then select Break.
To delete volume replication, select Replication from the source or the destination volume.
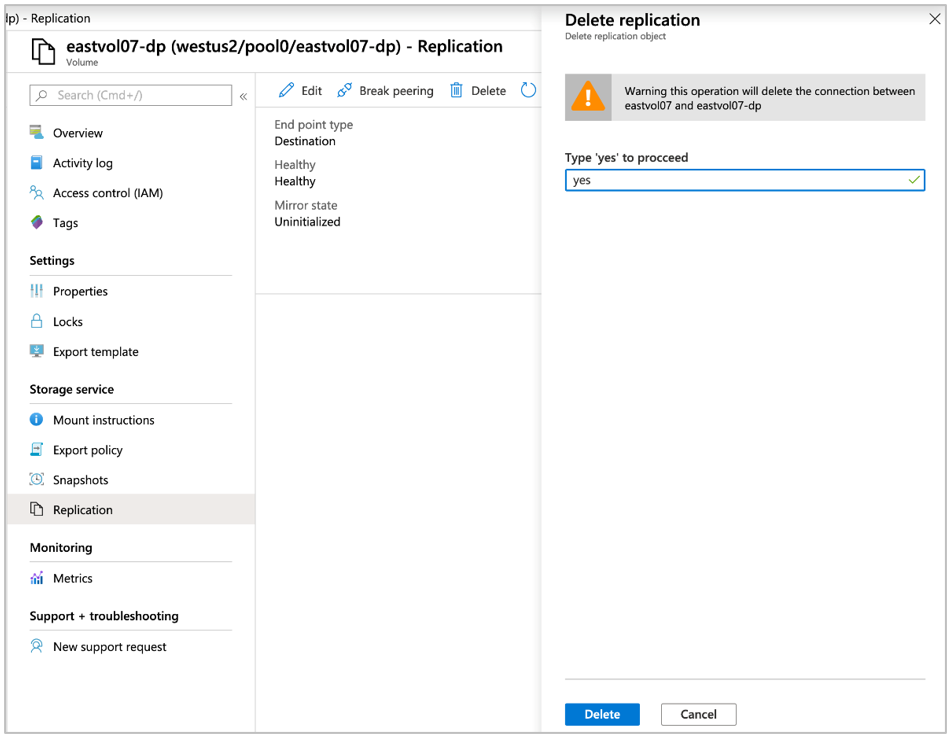
Click Delete.
Confirm deletion by typing Yes and selecting Delete.
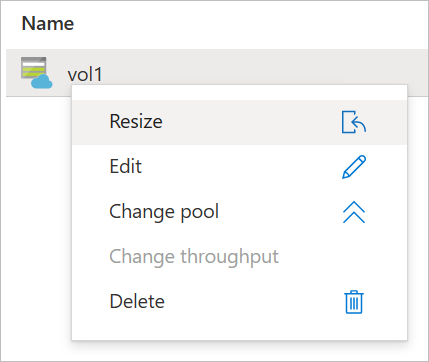
After deleting the volume replication, delete the destination or source volume as needed by right clicking the volume name and select Delete.
Task 8 - Create a volume with an availability zone
You can deploy new volumes in the logical availability zone of your choice. You can also populate existing volumes with availability zone information.
Select Volumes from your capacity pool. Then select + Add volume to create a volume.
In the Create a Volume page, under the Basic tab, select the Availability Zone pulldown to specify an availability zone where Azure NetApp Files resources are present.
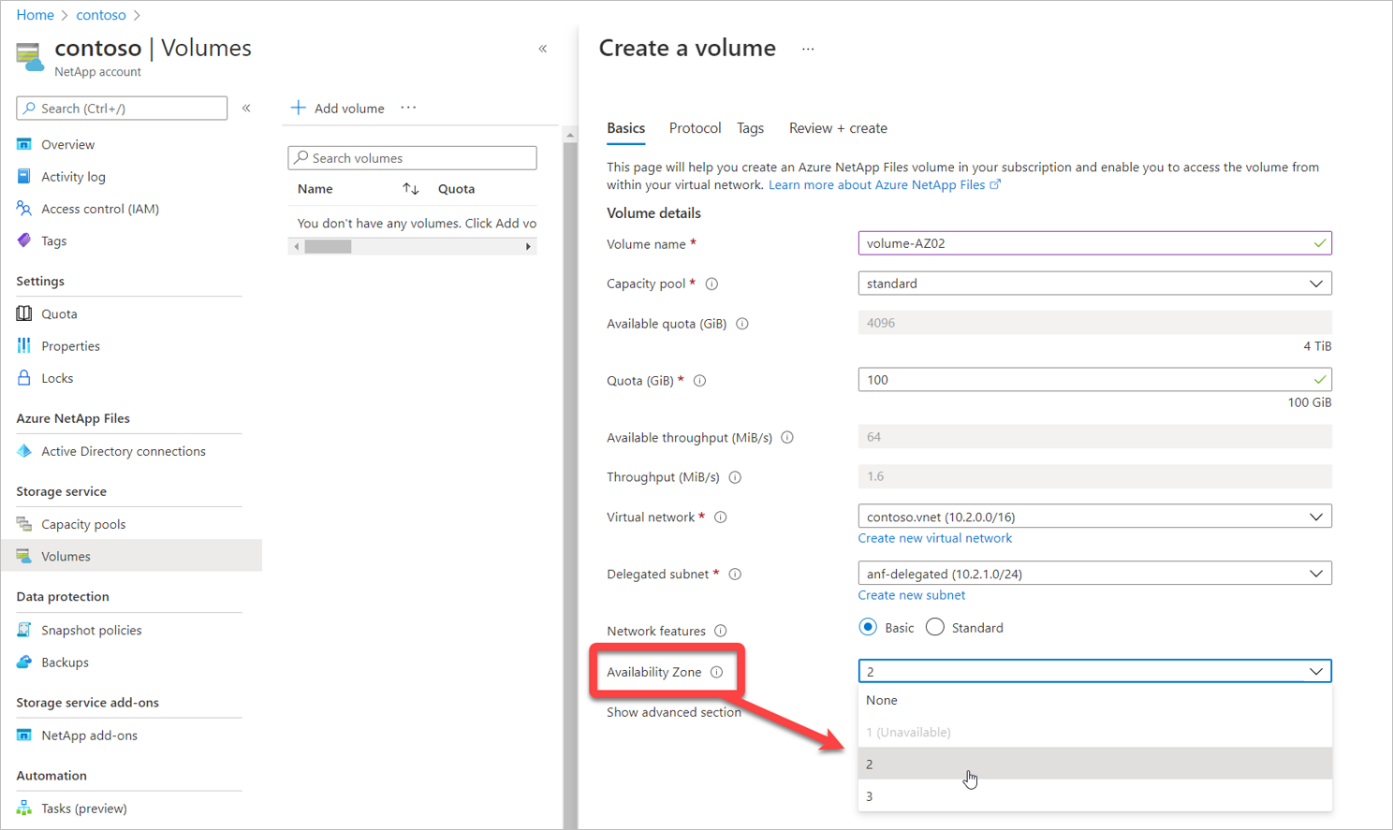
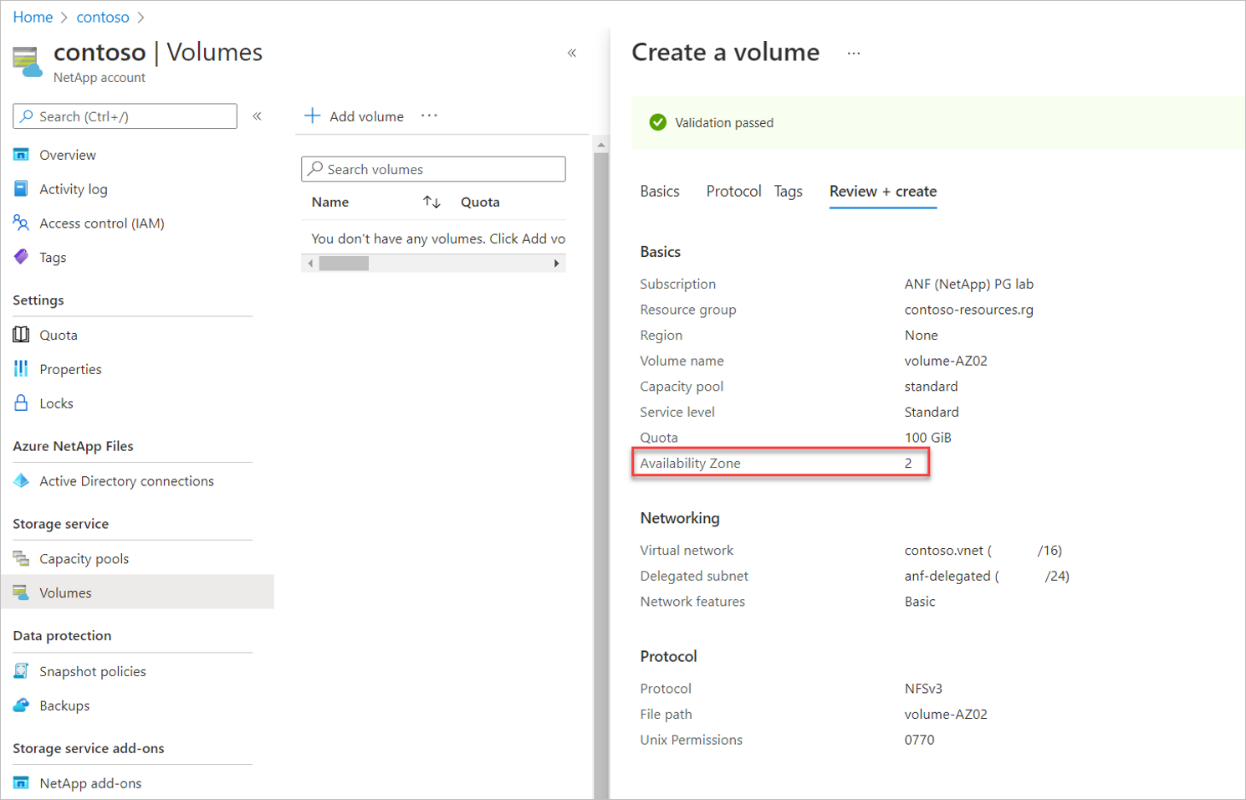
Follow the UI to create the volume. The Review + Create page shows the selected availability zone you specified.
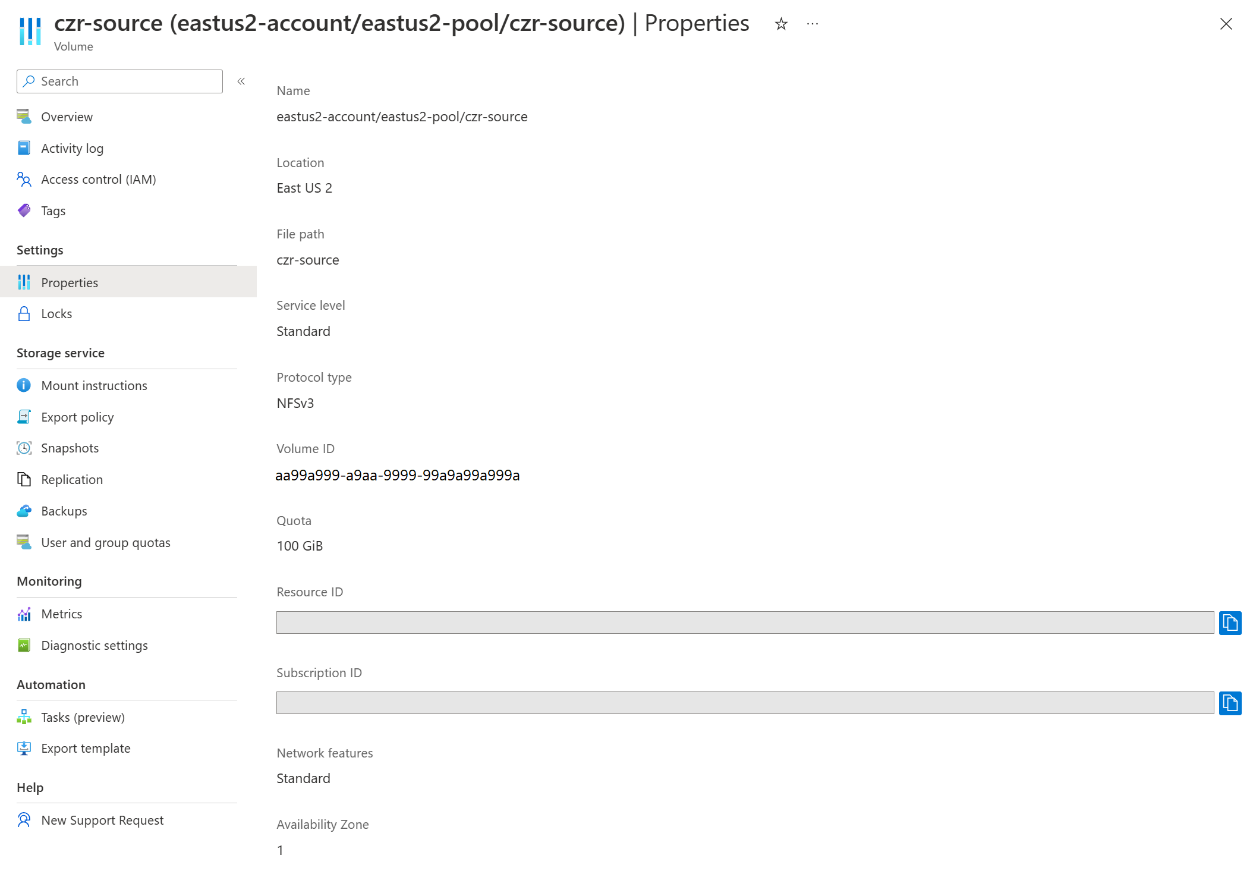
Navigate to Properties to confirm your availability zone configuration.
Task 9 - Create the source volume with an availability zone
Select Volumes from your capacity pool. Then select + Add volume to create a volume.
In the Create a Volume page, under the Basic tab, select the Availability Zone pulldown menu to specify an availability zone where Azure NetApp Files resources are present.
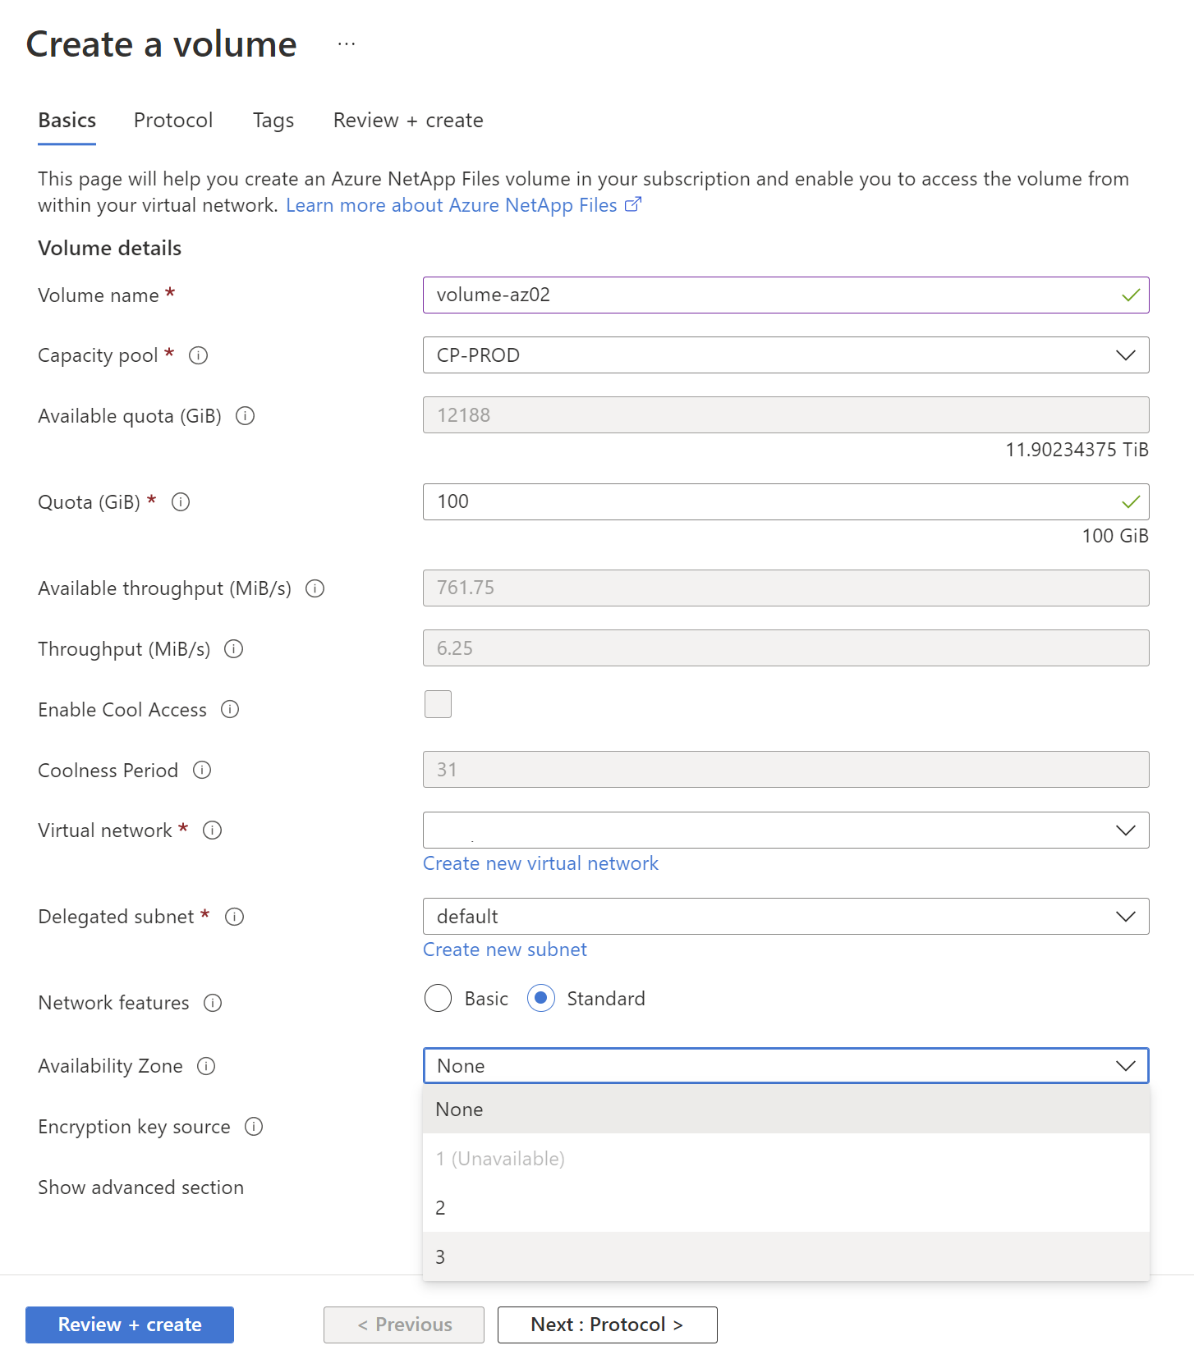
Follow the steps indicated in the interface to create the volume. The Review + Create page shows the selected availability zone you specified.
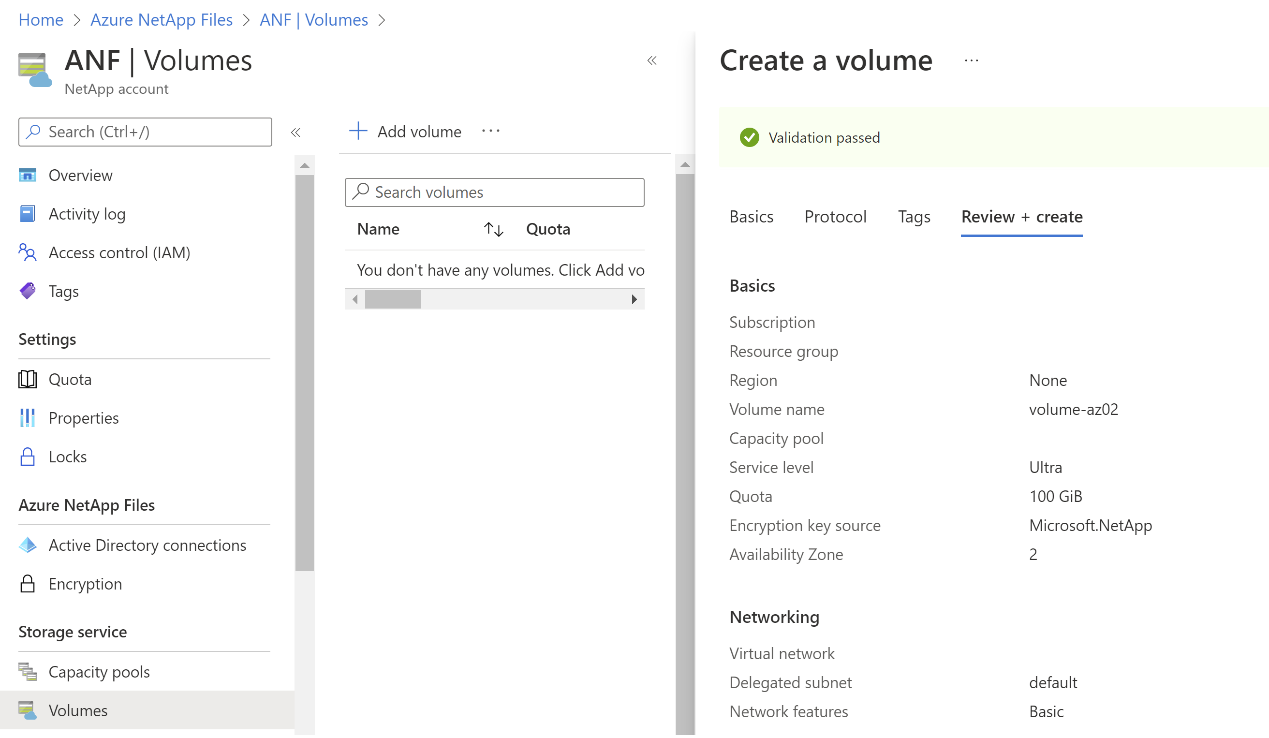
After you create the volume, the Volume Overview page includes availability zone information for the volume.