Create a new user in Microsoft Entra ID
Create a new user
Sign in to the Microsoft Entra admin center as at least a User Administrator.
Browse to Identity > Users > All users.
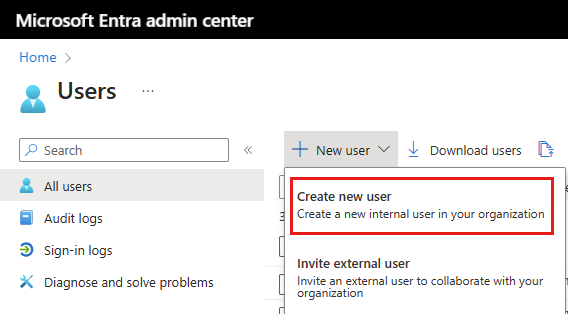
Select New user > Create new user.
Complete the remaining tabs in the New user page.
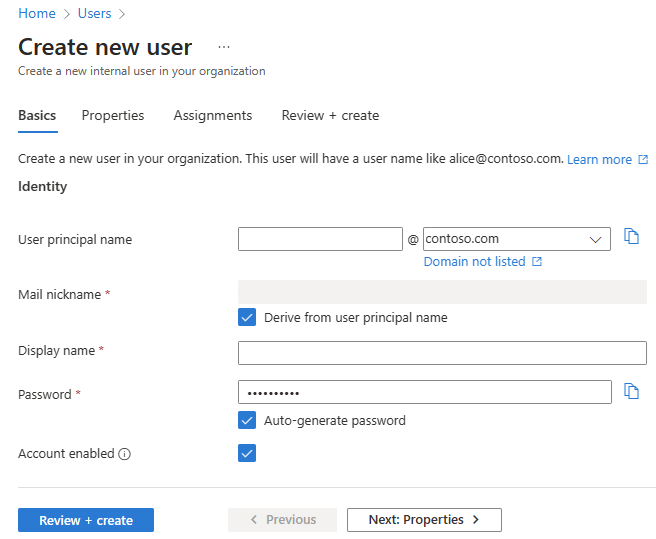
Basics
The Basics tab contains the core fields required to create a new user. Before you begin, review the guidance on user name properties.
- User principal name: Enter a unique username and select a domain from the menu after the @ symbol. Select Domain not listed if you need to create a new domain. For more information, see Add your custom domain name.
- Mail nickname: If you need to enter an email nickname that is different from the user principal name you entered, uncheck the Derive from user principal name option, then enter the mail nickname.
- Display name: Enter the user's name, such as Chris Green or Chris A. Green
- Password: Provide a password for the user to use during their initial sign-in. Uncheck the Auto-generate password option to enter a different password.
- Account enabled: This option is checked by default. Uncheck to prevent the new user from being able to sign-in. You can change this setting after the user is created. This setting was called Block sign in in the legacy create user process.
Select Next: Properties to complete the next section.
Either select the Review + create button to create the new user or Next: Properties to complete the next section.
Properties
There are five categories of user properties you can provide. These properties can be added or updated after the user is created. To manage these details, go to Identity > Users > All users and select a user to update.
- Identity: Enter the user's first and last name. Set the User type as either Member or Guest.
- Job information: Add any job-related information, such as the user's job title, department, or manager.
- Contact information: Add any relevant contact information for the user.
- Parental controls: For organizations like K-12 school districts, the user's age group may need to be provided. Minors are 12 and under, Not adult are 13-18 years old, and Adults are 18 and over. The combination of age group and consent provided by parent options determine the Legal age group classification. The Legal age group classification may limit the user's access and authority.
- Settings: Specify the user's global location.
Either select the Review + create button to create the new user or Next: Assignments to complete the next section.
Assignments
You can assign the user to an administrative unit, group, or Microsoft Entra role when the account is created. You can assign the user to up to 20 groups or roles. You can only assign the user to one administrative unit. Assignments can be added after the user is created.
To assign a group to the new user:
- Select + Add group.
- From the menu that appears, choose up to 20 groups from the list and select the Select button.
- Select the Review + create button.
To assign a role to the new user:
- Select + Add role.
- From the menu that appears, choose up to 20 roles from the list and select the Select button.
- Select the Review + create button.
To add an administrative unit to the new user:
- Select + Add administrative unit.
- From the menu that appears, choose one administrative unit from the list and select the Select button.
- Select the Review + create button.
- The final tab captures several key details from the user creation process.