Exercise - Use the SPFx PnP reusable property pane controls
In this exercise, you'll learn how to use existing third-party controls from the popular PnP SPFx Reusable Property Pane Controls project.
Prerequisites
Important
In most cases, installing the latest version of the following tools is the best option. The versions listed here were used when this module was published and last tested.
- Node.js v18.*
- Gulp-cli v3.*
- Yeoman v5.*
- Yeoman Generator for SharePoint v1.19.*
- Visual Studio Code
Create a new SharePoint Framework solution and web part
Open a command prompt and change to the folder where you want to create the project.
Run the SharePoint Framework Yeoman generator by executing the following command:
yo @microsoft/sharepoint
Use the following to complete the prompt that is displayed (if more options are presented, accept the default answer):
- What is your solution name?: HelloPnPControls
- Which type of client-side component to create?: WebPart
- What is your Web part name?: HelloPnPControls
- Which template would you like to use?: No framework
After provisioning the folders required for the project, the generator will install all the dependency packages using npm.
Install the PnP SPFx reusable property pane controls
Open a command prompt and change to the folder for the root of the project. Execute the following command to install the controls:
npm install @pnp/spfx-property-controls -PE
Add the People Picker control to the web part
Open the project folder in Visual Studio Code.
Locate the web part class in the .\src\webparts\helloPnPControls\HelloPnPControlsWebPart.ts file.
Within the web part class, add the following import statements to the top of the file after the existing import statements:
import {
  IPropertyFieldGroupOrPerson,
  PropertyFieldPeoplePicker,
  PrincipalType
} from '@pnp/spfx-property-controls/lib/PropertyFieldPeoplePicker';
Locate the interface IHelloPnPControlsWebPartProps after the import statements. Add the following property to the interface to store the people selected by the new control you're about to add to the property pane:
people: IPropertyFieldGroupOrPerson[];
Display the selected people
Locate the web part's render() method. Within this method, find the following lines in the HTML output:
<div>
  <h3>Welcome to SharePoint Framework!</h3>
  <p>
  The SharePoint Framework (SPFx) is a extensibility model for Microsoft Viva, Microsoft Teams and SharePoint. It's the easiest way to extend Microsoft 365 with automatic Single Sign On, automatic hosting and industry standard tooling.
  </p>
  <h4>Learn more about SPFx development:</h4>
    <ul class="${styles.links}">
      <li><a href="https://aka.ms/spfx" target="_blank">SharePoint Framework Overview</a></li>
      <li><a href="https://aka.ms/spfx-yeoman-graph" target="_blank">Use Microsoft Graph in your solution</a></li>
      <li><a href="https://aka.ms/spfx-yeoman-teams" target="_blank">Build for Microsoft Teams using SharePoint Framework</a></li>
      <li><a href="https://aka.ms/spfx-yeoman-viva" target="_blank">Build for Microsoft Viva Connections using SharePoint Framework</a></li>
      <li><a href="https://aka.ms/spfx-yeoman-store" target="_blank">Publish SharePoint Framework applications to the marketplace</a></li>
      <li><a href="https://aka.ms/spfx-yeoman-api" target="_blank">SharePoint Framework API reference</a></li>
      <li><a href="https://aka.ms/m365pnp" target="_blank">Microsoft 365 Developer Community</a></li>
    </ul>
</div>
Replace the lines you located with the following:
<div class="selectedPeople"></div>
Add the following code at the end of the render() method. If any people have been selected, this will display their full names and email addresses in the <div> element you just added to the rendering:
if (this.properties.people && this.properties.people.length > 0) {
  let peopleList: string = '';
  this.properties.people.forEach((person) => {
    peopleList = peopleList + `<li>${ person.fullName } (${ person.email })</li>`;
  });

  this.domElement.getElementsByClassName('selectedPeople')[0].innerHTML = `<ul>${ peopleList }</ul>`;
}
Add the property pane field control to the property pane
Locate the web part's getPropertyPaneConfiguration() method.
Within the groupFields array, add the following people picker field control. This will bind the field control to the people property previously added to the web part's properties:
PropertyFieldPeoplePicker('people', {
  label: 'Property Pane Field People Picker PnP Reusable Control',
  initialData: this.properties.people,
  allowDuplicate: false,
  principalType: [PrincipalType.Users, PrincipalType.SharePoint, PrincipalType.Security],
  onPropertyChange: this.onPropertyPaneFieldChanged,
  context: this.context as any, // eslint-disable-line @typescript-eslint/no-explicit-any
  properties: this.properties,
  deferredValidationTime: 0,
  key: 'peopleFieldId'
})
Configure the hosted workbench
Locate and open the file config/serve.json
In the serve.json file, locate the initialPage setting. It's currently configured with a placeholder URL.
"initialPage": "https://{tenantDomain}/_layouts/workbench.aspx",
The {tenantDomain} string is replaced automatically by the gulp serve task using an environment variable on your workstation. Set the environment variable SPFX_SERVE_TENANT_DOMAIN to the domain of your hosted SharePoint Online site you want to use for testing.
Tip
Learn more how to set environment variables on your development platform of choice:
Windows: set (environment variable) macOS: Use environment variables in Terminal on Mac Setting the SharePoint Framework Hosted Workbench Test Site
Start the local web server using the provided gulp serve task without the nobrowser switch. This will build the project, start a local web server, and load the hosted workbench at the URL configured in serve.json in combination with your environment variable.
Test the web part
The benefit of using the people picker control is that it contains the logic necessary to call the SharePoint APIs that list users and groups within the current site.
Start the project by executing gulp serve from the command line in the root of the project.
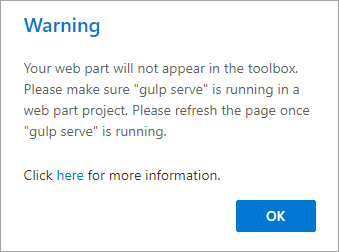
If you see this warning in the hosted workbench, switch back to the command prompt, wait for the reload subtask to finish executing, and then refresh the hosted workbench.
Add the web part to the page using the same process from the previous exercises.
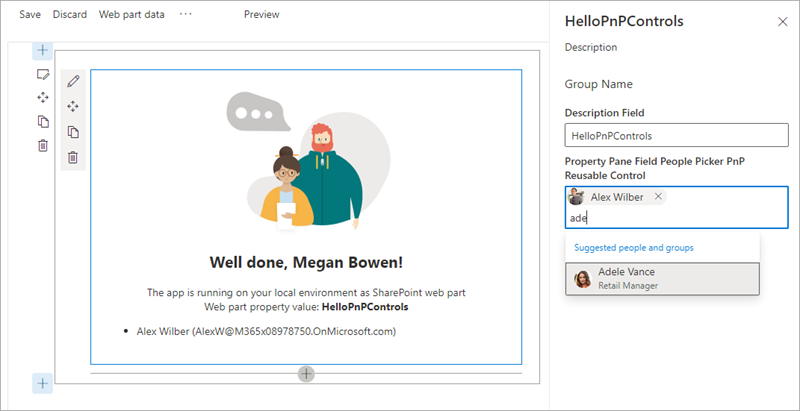
Once the web part has been added to the page, open the property pane with the edit web part icon using the same process from the previous exercises. Use the input control to find and select a user from the current site as shown in the following figure:
Add the Collection Data control to the web part
Locate the web part class in the .\src\webparts\helloPnPControls\HelloPnPControlsWebPart.ts file.
Within the web part class, add the following import statements to the top of the file after the existing import statements:
import {
  PropertyFieldCollectionData,
  CustomCollectionFieldType
} from '@pnp/spfx-property-controls/lib/PropertyFieldCollectionData';
Locate the interface IHelloPnPControlsWebPartProps after the import statements. Add the following property to the interface to store the collection of data entered in the new control you're about to add to the property pane:
expansionOptions: any[]; // eslint-disable-line @typescript-eslint/no-explicit-any
Display the expansionOptions property data
Locate the web part's render() method and add the following immediately after the <div class="selectedPeople"></div> element that you added previously:
<div class="expansionOptions"></div>
Add the following code at the end of the render() method. If any regions have been added, this will display their names and associated comments in the <div> element you just added to the rendering:
if (this.properties.expansionOptions && this.properties.expansionOptions.length > 0) {
  let expansionOptions: string  = '';
  this.properties.expansionOptions.forEach((option) => {
    expansionOptions = expansionOptions + `<li>${ option.Region }: ${ option.Comment } </li>`;
  });
  if (expansionOptions.length > 0) {
    this.domElement.getElementsByClassName('expansionOptions')[0].innerHTML = `<ul>${ expansionOptions }</ul>`;
  }
}
Add the property pane field control to the property pane
Locate the web part's getPropertyPaneConfiguration() method.
Within the groupFields array, add the following field collection control. This will bind the field control to the expansionOptions property previously added to the web part's properties:
PropertyFieldCollectionData('expansionOptions', {
  key: 'collectionData',
  label: 'Possible expansion options',
  panelHeader: 'Possible expansion options',
  manageBtnLabel: 'Manage expansion options',
  value: this.properties.expansionOptions,
  fields: [
    {
      id: 'Region',
      title: 'Region',
      required: true,
      type: CustomCollectionFieldType.dropdown,
      options: [
        { key: 'Northeast', text: 'Northeast' },
        { key: 'Northwest', text: 'Northwest' },
        { key: 'Southeast', text: 'Southeast' },
        { key: 'Southwest', text: 'Southwest' },
        { key: 'North', text: 'North' },
        { key: 'South', text: 'South' }
      ]
    },
    {
      id: 'Comment',
      title: 'Comment',
      type: CustomCollectionFieldType.string
    }
  ]
})
Test the web part
If you stopped the local web server after adding the people picker control, start the project by executing gulp serve from the command line in the root of the project and add the web part to the page using the same process from the previous exercises. Otherwise, refresh the workbench.
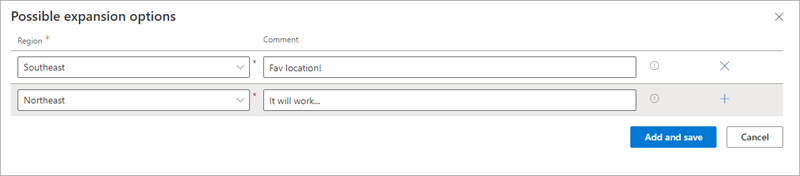
Open the property pane with the edit web part icon using the same process from the previous exercises. Select the Manage expansion options button.
Enter a few values in the provided fields, then select Save.
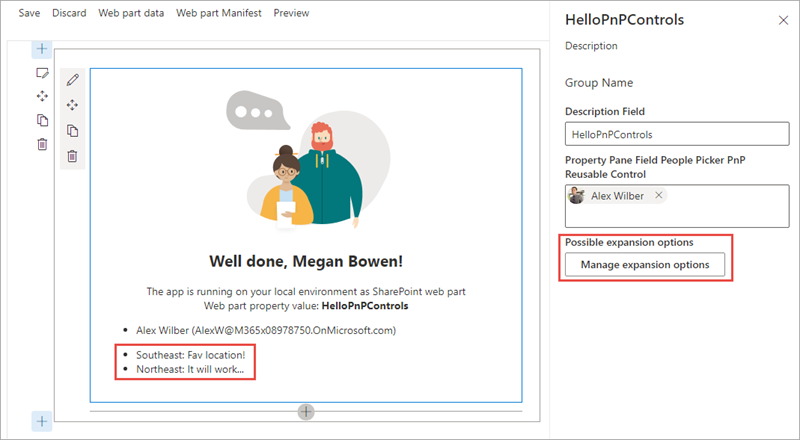
Notice the values entered are displayed within the web part:
Summary
In this exercise, you learned how to use existing third-party controls from the popular PnP SPFx reusable property pane controls project.