Build the Dashboard
Once you’ve set up the home site, you can build the Dashboard. In this unit, you’ll learn how to create a Dashboard, use different kinds of cards, apply audience targeting, preview the experience, and publish the dashboard.
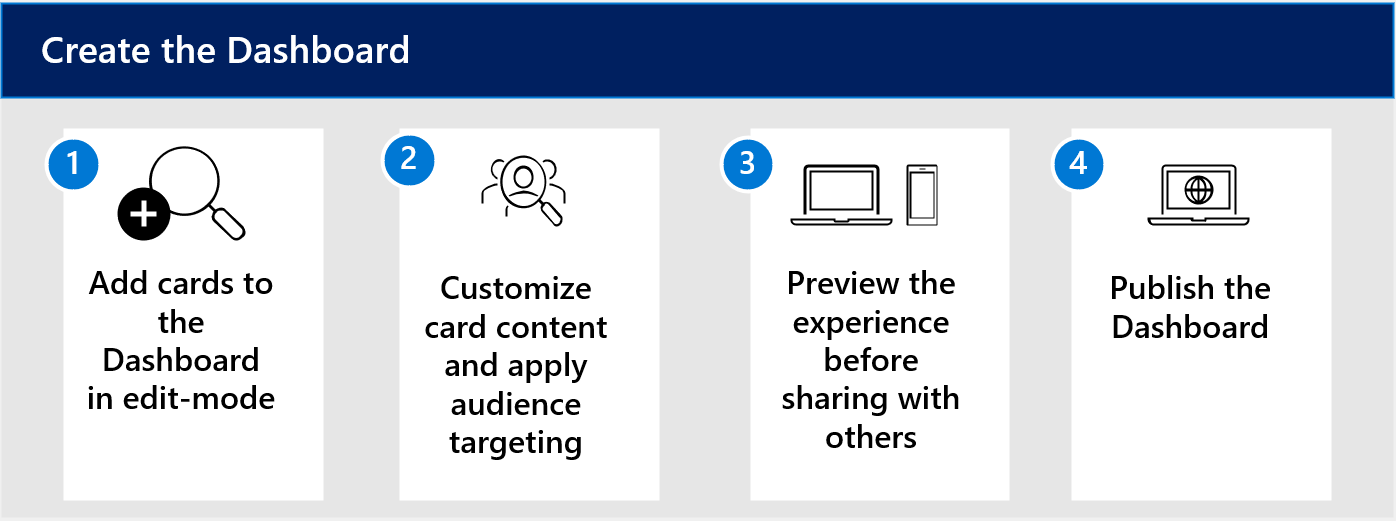
Summary of steps to create the Dashboard
Choose and add cards to the Dashboard in edit mode.
Apply audience targeting strategies to ensure the correct audiences have access to the right information.
Preview your edits by using preview mode to view the experience from the perspectives of different audiences and on different devices (mobile and desktop).
Publish the Dashboard after previewing it to make it available to end users.
How to create the Dashboard
Start from your organization’s home site. Add cards and preview the experience as you build. Learn more about creating a Dashboard.
Go to your home site and select Settings.
Select Manage Viva Connections.
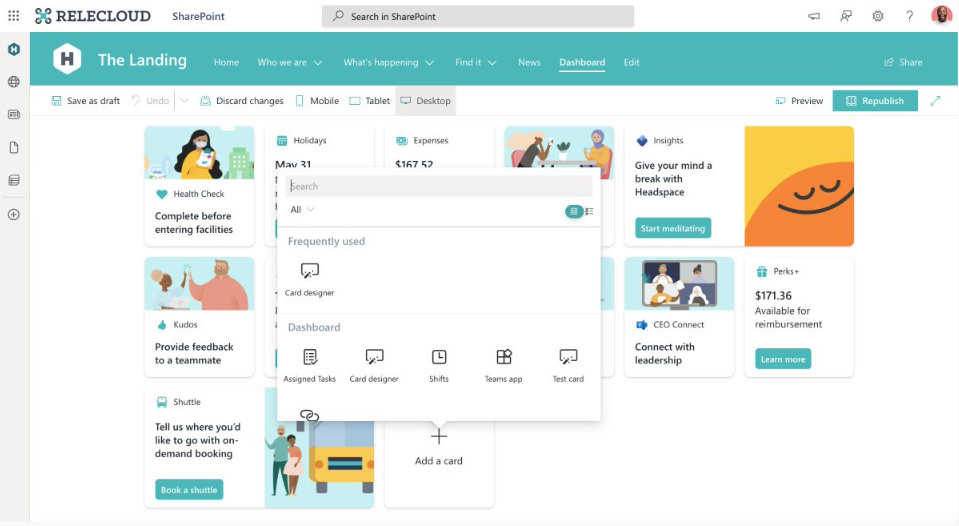
Select on + Create Dashboard.
Select on + Add a card.
Preview the Dashboard under the preview mode.
Select Publish once you've selected the cards you want, and completed the targeting audience process.
Best practices while building the Dashboard include:
Choose images and labels that encourage your users to interact with the cards. In other words, each card will have its own style, and selecting compelling images can distinguish one card from another. Additionally, you can access images easier if you enable Content Delivery Network (CDN). You must be a SharePoint admin to do so.
Target audiences for the cards you select. Audience targeting is a key step that ensures the right audience receives the right information. Without targeting audiences, you risk not providing information end users need to carry out their jobs successfully and efficiently.
Preview the experience on different devices and for different audiences: Check both mobile and desktop views. Preview the experience can prevent errors and ensure your Viva Connections works on both types of platforms. You can take this step by using the preview mode.
Choosing cards for the Dashboard
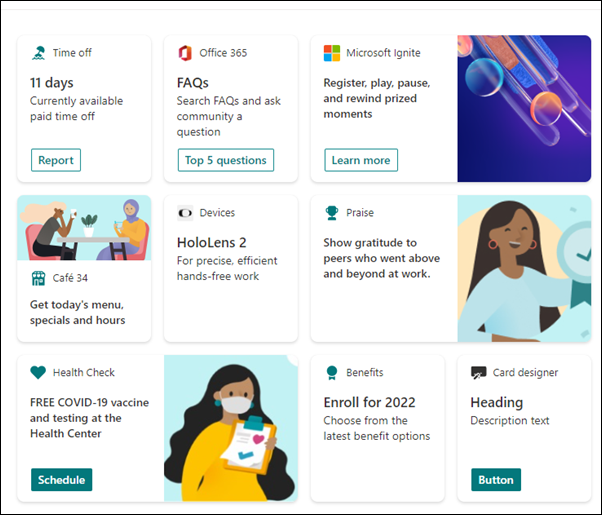
Out-of-the-box cards are cards that have already been configured for the Dashboard. They make it easy to link to a SharePoint site, to an app in Teams, and more. Without cards, the Dashboard would be a plain screen with no end user tools or quick access to important resources.
To access out-of-box cards, you'll need to have page editing permission. Just be sure you have followed previous steps that ensure a successful Viva Connections implementation, including enabling global connection and modernizing your sites.
Here is a summary of the current out-of-the-box cards:
| Card name | Card function |
|---|---|
| Approvals | Use Approvals for vacation requests, sign-off on documents, and approve expense reports. |
| Assigned Tasks | Use Tasks to manage your team's work, assign tasks, and track tasks. |
| Card designer | Customize your own card with a secondary panel that’s called a quick view. |
| Shifts | Let users clock-in, clock-out, and get more information about the next or current shift from the Shifts app in Teams. |
| Teams app card | Use to open a Teams personal app or bot specified by the Dashboard author. |
| Third-party cards | Use cards that integrate third-party services through the SharePoint Store (for example, ADP, ServiceNow, etc.) |
| Top news card | Set up the Top news card to surface boosted news from SharePoint. |
| Web link | Access a site without leaving the Viva Connections app (most popular card and used to link to SharePoint portals and external links.) |
![]()
See how Lamna Healthcare builds the Dashboard
![]() Now that requirements have been met, it's time for you to work as the site owner of the home site to create the Viva Connections Dashboard. The planning team has organized the top scenarios that will be supported by Viva Connections Dashboard so you can easily implement the design.
Now that requirements have been met, it's time for you to work as the site owner of the home site to create the Viva Connections Dashboard. The planning team has organized the top scenarios that will be supported by Viva Connections Dashboard so you can easily implement the design.
| Card function | Roles impacted | Regions impacted | Card type | Desktop/mobile |
|---|---|---|---|---|
| Clock in and out | Hourly paid employees | All | Shifts card | Mobile |
| Approvals for purchase orders | People managers and finance professionals | All | Approvals card | Desktop |
| Access to self-service HR benefits | Employees who work more than 30 hours a week | All | ACE framework | Desktop and mobile |
| Work-life balance and wellness | All | All | Third party card | Desktop and mobile |
| Organization news posts need to be viewed by certain roles and regions | Physicians, surgeons, nurse practitioners, and office administrators | Regions A and D | Top news card | Desktop |
| View holiday schedules | All | All | Card designer | Desktop and mobile |
| View café menus | All | All | Link card | Desktop and mobile |
You start by adding dashboard cards based on the planning spreadsheet. First, you add the Shifts card to make it easier to clock-in-clock-out, take breaks, and manage schedules for all hourly employees like nurses and janitorial staff. Since this tool is in high demand, you choose the medium card size and position this card at the top of the Dashboard. You then apply audience targeting scoped to all hourly employees to make sure this card displays prominently for this specific audience.
Next, you add the Approvals card to help reduce the repetitive workflows that currently exist. The Approvals card will address one of the high impact scenarios and help streamline the approval processes for people who constantly deal with expense reports, and purchase orders. You apply audience targeting so only the roles who have expense and purchase approval requests will see the card on their Dashboard.
You continue adding and editing cards until all the priority scenarios in the planning spreadsheet have been captured. Then, you preview the experience before publishing. While previewing, you make sure to preview the layouts made available with each targeted audience group, and to ensure there aren't any gaps in the layout of the cards for each audience group. You also make sure to check the experience on both desktop and mobile device for accessibility on both devices. Then, you toggle between different audience groups to review the experience for different roles and regions. While previewing, you notice some adjustments should be made to card images and labels. You make the adjustments and preview the experience again before sharing it with the rest of the planning team.
Next, you invite the planning team to review the draft Dashboard. After reviewing, the planning team makes some recommendations for small adjustments. The planning team also has identified a group of early adopters that will test the experience. These testers will test all Viva Connections tasks, resources, and workflows to ensure them functioning properly before the experience is rolled out to the entire organization. To get the environment ready to test, you publish the Dashboard.
Create custom Dashboard cards
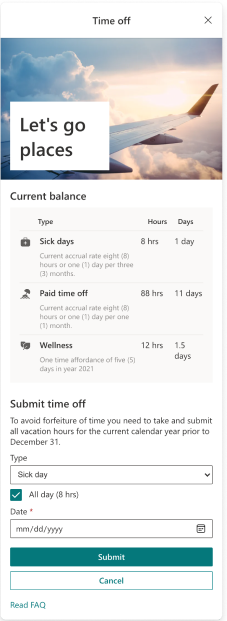
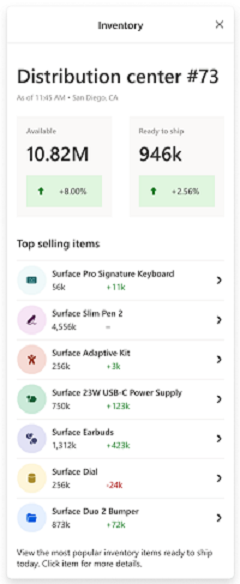
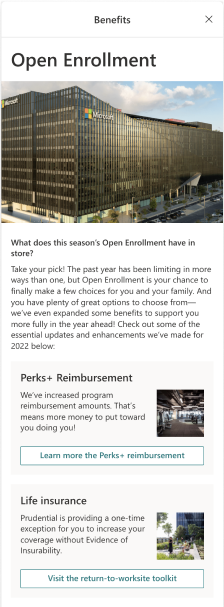
Cards on the Dashboard can be customized to fit the unique needs of your organization. There are two ways cards can be customized – using the Card designer card or using the SharePoint Framework. Card designer enables users to create custom cards with JSON configuration and SharePoint Framework cards require custom code. Card Designer cards can be used to show static information. The code driven SharePoint Framework cards, on the other hand, enable you to connect to external systems and information using Microsoft Graph or other APIs hosted in Microsoft Azure. Card can also take advantage of the Quick View option to render the most common operations or information directly in the dashboard without forcing user to move to a specific application.**Here are three examples of custom cards with quick views:
| Scheduling time off | Keep track of inventory | Open enrollment for benefits |
|---|---|---|
|
|
|
Get started using the Card designer card

You can choose the Card designer from the card toolbox on the Dashboard to design your own card that includes a quick view. To do this, you should be familiar with JSON and Adaptive Card templates. For more information, see Adaptive Cards Templating.
Get started creating ACE cards
Use this toolkit to help you design custom cards for your Dashboard. You'll learn the structure of cards, how users can interact with them, and the design principles to help you make them attractive and engaging for mobile and desktop. Review the different capabilities of ACE cards and get familiar with how to use in the Adaptive card designer. Next, build your first adaptive card.
Viva Connections offers various extensibility solutions. See more details on the ACE card extensibility options from this module.
![]()
Learn how Lamna Healthcare uses custom cards
You have added several out-of-the-box cards that connect to Teams apps and other links. However, the current list of out-of-box cards doesn't provide a solution for quickly and easily accessing payroll information and self-service HR benefits.
After discussion, the Office of Information Technology at Lamna Healthcare proposed to have their developers take on the task of developing a customized Dashboard card using Adaptive Card Extensions. You informed them that the card needs to allow employees to:
- Review their current benefit selections
- Select benefits during open enrollment period
- Provide self-service options such as submitting claims, making adjustments, and reviewing balances.
The developers take this information and create a custom benefits card. Once deployed, the Benefit self-service card can be accessed by the roles eligible for benefits that were identified in the needs assessment in the planning phase. It's expected that this custom card will reduce the volume of requests to the HR team so that they have more time to focus on higher impact work.
Connect third-party tools to cards on the Dashboard
Within your Viva Connections Dashboard, you can add third-party tools and applications to services that help manage payroll, IT tickets, and wellness in the workplace. Third-party services are outside of the Microsoft 365 suite. Review third-party integrations that are available for Viva Connections.
Third party tools and services can be incorporated into the Viva Connection dashboard using the Microsoft AppSource, from the SharePoint store or directly from the third-party developer.
![]()
Learn how Lamna Healthcare uses third-party cards
During the needs assessment, the planning team has identified a large demand for a tool that can help with work-life balance and wellness in the workplace. Currently, Lamna Healthcare offers well-being benefits through healthcare services, but would like to offer more options for people in the flow of work. The leadership has researched and compared existing tools. They then have decided to enroll in services from a third-party wellness app.
You know that once a service plan has been established, this new resource can be displayed as a card on the Dashboard. A member of the planning team works with you and SharePoint admin to get the third-party card from the SharePoint store. Once it's been provisioned, the third-party card will display in the card toolbox while in edit-mode on the Dashboard. Next, you can add the third-party card, apply audiences, and preview the experience before sharing with others.
Preview the Dashboard before sharing it with others
While you're creating or editing the Dashboard, you can preview the experience on different devices and for different audiences before publishing.
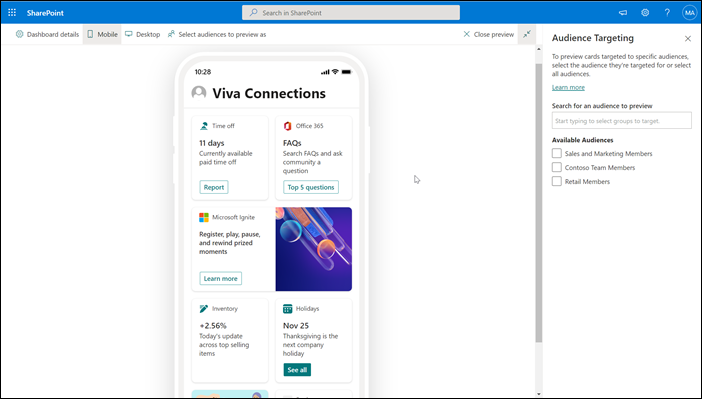
From the Dashboard, select Preview. Then, Select audiences to preview as to view the Dashboard for different audiences that were targeted to cards. Cards that haven't been targeted will be seen by the entire organization. After selecting an audience, toggle between the Mobile and Desktop views.
When you're done previewing, select Close preview.