Note
Access to this page requires authorization. You can try signing in or changing directories.
Access to this page requires authorization. You can try changing directories.
Applies to: ✔️ Windows VMs
This article provides steps to resolve issues where Windows Server 2008 virtual machines crash with an error message that states that there was a hardware malfunction.
Symptoms
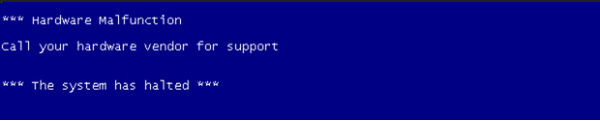
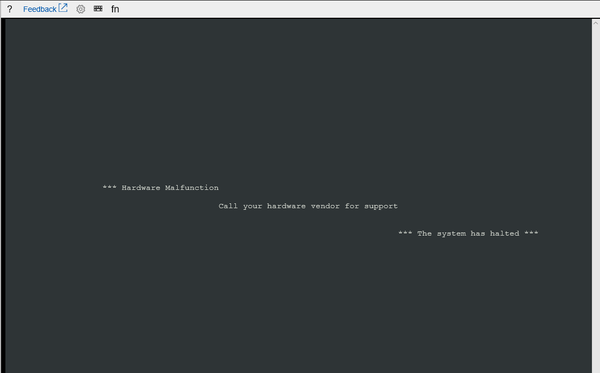
When you use Boot diagnostics to view the screenshot of the VM, you'll see that the screenshot displays a blue screen with the message:
*** Hardware Malfunction
Call your vendor for support
*** The system has halted ***
Blue screen
Serial console
Cause
This screen will appear when the Guest OS wasn't set up correctly and a Non-Maskable Interrupt (NMI) was sent. The error message indicates that a kernel-mode program generated an exception, which the handler didn't catch. You can identify which exception was generated by collecting a memory dump.
Solution
Process Overview
Tip
If you have a recent backup of the VM, you may try restoring the VM from the backup to fix the boot problem.
- Set up the Non-Maskable Interrupt (NMI) Registry Key
- Create and Access a Repair VM
- Enable Serial Console and Memory Dump Collection
- Rebuild the VM
Set up the Non-Maskable Interrupt (NMI) registry key
Using the Azure portal, restart the VM so that the Guest OS boots normally.
Once some access to the VM has been restored, open an elevated command prompt (run as administrator).
Set up the NMI registry key with the following command:
REG ADD "HKLM\SYSTEM\CurrentControlSet\Control\CrashControl" /v NMICrashDump /t REG_DWORD /d 1 /f(Optional) Setup memory dump collection:
REG ADD "HKLM\SYSTEM\CurrentControlSet\Control\CrashControl" /v CrashDumpEnabled /t REG_DWORD /d 1 /f
REG ADD "HKLM\SYSTEM\CurrentControlSet\Control\CrashControl" /v DumpFile /t REG_EXPAND_SZ /d "%SystemRoot%\MEMORY.DMP" /f
(Optional) Setup serial console access:
BCDEDIT /ems {current} on, or bcdedit /ems '{current}' on if you are using PowerShell BCDEDIT /emssettings EMSPORT:1 EMSBAUDRATE:115200Restart the VM with the following command:
SHUTDOWN /r /t 0 /f
Important
The issue should now be fixed!
Note
After restarting, test your VM to make sure it is functioning like normal. If you are still experiencing issues, then you can continue to the next section for further instructions.
Tip
It is recommended to setup the non-maskable interrupt (NMI) registry key in the section above, however if your VM didn't boot normally afterwards then intended changes to the Guest OS registry may not have taken place. If that's the case, you can follow the directions below to manually add the registry settings instead.
Create and access a repair VM
- Use steps 1-3 of the VM Repair Commands to prepare a Repair VM.
- Connect to the Repair VM using Remote Desktop Connection.
Enable serial console and memory dump collection
Before rebuilding the VM, it is recommended to enable memory dump collection and Serial Console. To do this, follow these steps:
Open an elevated command prompt session as an administrator.
Run the following BCDEdit commands using the /ems and /emssettings options:
Enable the serial console:
bcdedit /store <volume-letter-containing-the-bcd-folder>:\boot\bcd /ems {<boot-loader-identifier>} ON
bcdedit /store <volume-letter-containing-the-bcd-folder>:\boot\bcd /emssettings EMSPORT:1 EMSBAUDRATE:115200
Verify that the free space on the OS disk is larger than the memory size (RAM) on the VM.
If there isn't enough space on the OS disk, change the location where the memory dump file is created, and refer that location to any data disk attached to the VM that has enough free space. To change the location, replace
%SystemRoot%with the drive letter of the data disk, such asF:, in the following commands.To enable the OS dump file, run the following load, add, and unload commands to implement the suggested configuration using the reg tool:
Load the registry hive from the broken OS disk:
reg load HKLM\<broken-system> <volume-letter-of-broken-os-disk>:\windows\system32\config\SYSTEMEnable on ControlSet001:
reg add "HKLM\<broken-system>\ControlSet001\Control\CrashControl" /v CrashDumpEnabled /t REG_DWORD /d 1 /f
reg add "HKLM\<broken-system>\ControlSet001\Control\CrashControl" /v DumpFile /t REG_EXPAND_SZ /d "%SystemRoot%\MEMORY.DMP" /f
reg add "HKLM\<broken-system>\ControlSet001\Control\CrashControl" /v NMICrashDump /t REG_DWORD /d 1 /f
Enable on ControlSet002:
reg add "HKLM\<broken-system>\ControlSet002\Control\CrashControl" /v CrashDumpEnabled /t REG_DWORD /d 1 /f
reg add "HKLM\<broken-system>\ControlSet002\Control\CrashControl" /v DumpFile /t REG_EXPAND_SZ /d "%SystemRoot%\MEMORY.DMP" /f
reg add "HKLM\<broken-system>\ControlSet002\Control\CrashControl" /v NMICrashDump /t REG_DWORD /d 1 /f
Unload the broken OS disk:
reg unload HKLM\<broken-system>
Rebuild the virtual machine
- Use step 5 of the VM Repair Commands to rebuild the VM.
Next steps
Contact us for help
If you have questions or need help, create a support request, or ask Azure community support. You can also submit product feedback to Azure feedback community.