Note
Access to this page requires authorization. You can try signing in or changing directories.
Access to this page requires authorization. You can try changing directories.
In this article, you learn how to build an ASP.NET Core project to act as an API backend and an Angular project to act as the UI.
Visual Studio includes ASP.NET Core Single Page Application (SPA) templates that support Angular and React. The templates provide a built-in client app folder in your ASP.NET Core solution that contains the base files and folders of each framework.
You can use the method described in this article to create ASP.NET Core Single Page Applications that:
- Put the client app in a separate project, outside of the ASP.NET Core project
- Create the client project based on the framework CLI installed on your computer
Note
This article describes the project creation process using the updated template in Visual Studio 2022 version 17.8.
Prerequisites
Make sure to install the following:
- Visual Studio 2022 version 17.8 or later with the ASP.NET and web development workload installed. Go to the Visual Studio downloads page to install it for free. If you need to install the workload and already have Visual Studio, go to Tools > Get Tools and Features..., which opens the Visual Studio Installer. Choose the ASP.NET and web development workload, then choose Modify.
- npm (
https://www.npmjs.com/), which is included with Node.js - Angular CLI (
https://angular.dev/tools/cli), which can be the version of your choice. The front-end project is created using the framework CLI tools you have installed on your local machine, so this determines the Angular version used in the template.
Create the app
In the Start window (choose File > Start Window to open), select Create a new project.

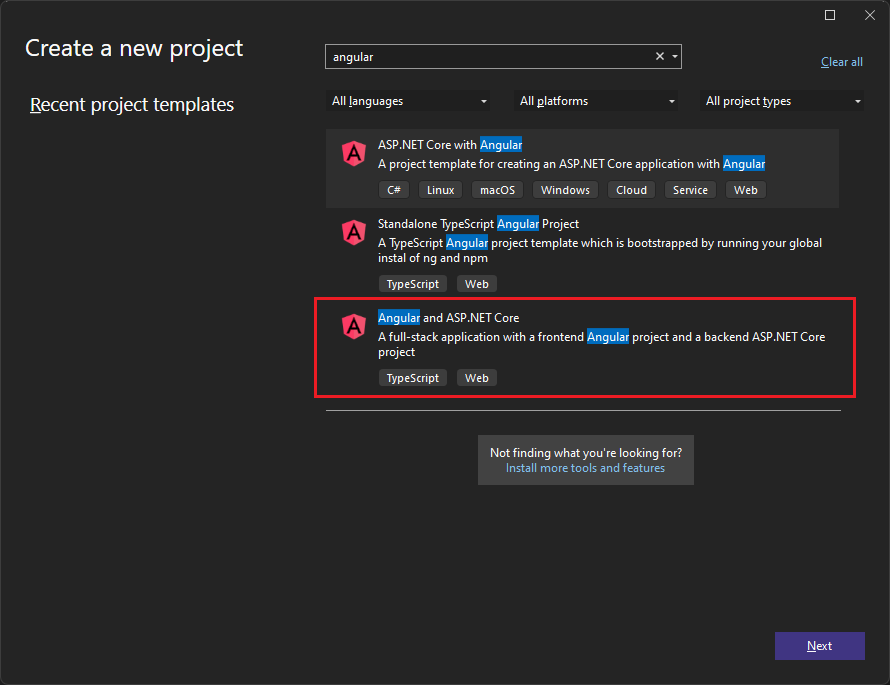
Search for Angular in the search bar at the top and then select Angular and ASP.NET Core.

In the Start window (choose File > Start Window to open), select Create a new project.
Search for Angular in the search bar at the top and then select Angular and ASP.NET Core.
Note
There is a compatibility issue with Angular 20.x.x and the Angular and ASP.NET Core template in Visual Studio 2022. To use Angular 20.x.x in Visual Studio 2022, it's recommended that you create an ASP.NET Core project first, add an Angular project to the solution, and then add a project reference to the Angular project from the ASP.NET Core project. You can use this method instead of using the combined template described in this article. For more information about the issue, see Creating a new Solution with Angular.
Name the project AngularWithASP and then select Next.
In the Additional Information dialog, make sure that Configure for HTTPS is enabled. In most scenarios, leave the other settings at the default values.
Select Create.
Solution Explorer shows the following:
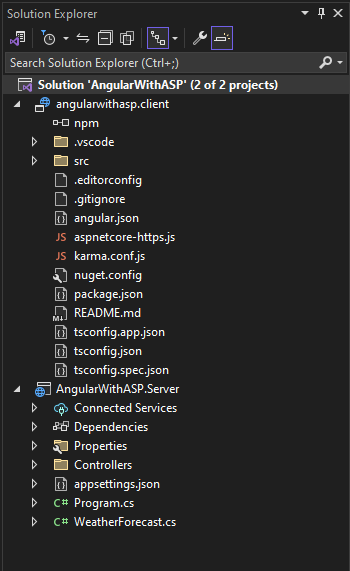
Compared to the standalone Angular template, you see some new and modified files for integration with ASP.NET Core:
- aspnetcore-https.js
- proxy.conf.js
- package.json(modified)
- angular.json(modified)
- app.components.ts
- app.module.ts
For more information on some of these project files, see Next steps.
Set the project properties
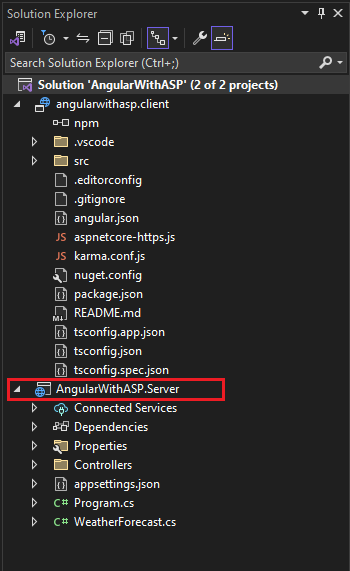
In Solution Explorer, right-click the AngularWithASP.Server project and choose Properties.
In the Properties page, open the Debug tab and select Open debug launch profiles UI option. Uncheck the Launch Browser option for the https profile or the profile named after the ASP.NET Core project, if present.

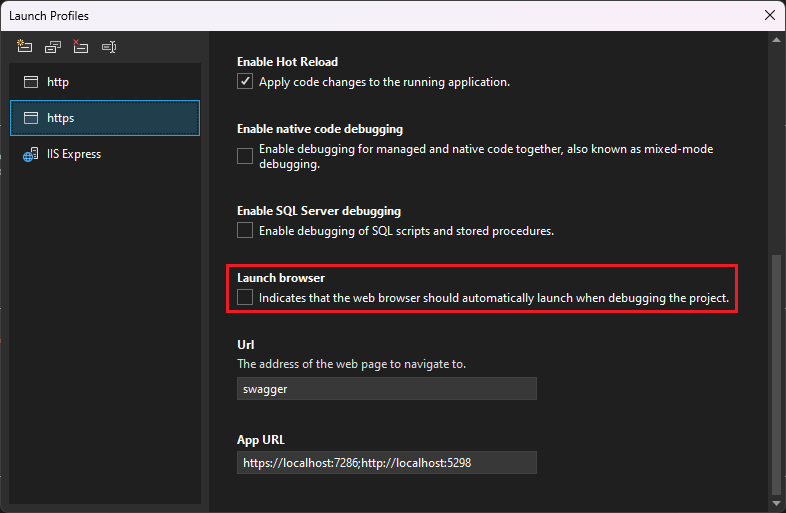
This value prevents opening the web page with the source weather data.
Note
In Visual Studio,
launch.jsonstores the startup settings associated with the Start button in the Debug toolbar.launch.jsonmust be located under the.vscodefolder.Right-click the solution in Solution Explorer and select Properties. Verify that the Startup project settings are set to Multiple projects, and that the Action for both projects is set to Start.
Start the project
Press F5 or select the Start button at the top of the window to start the app. Two command prompts appear:
- The ASP.NET Core API project running
- The Angular CLI running the ng start command
Note
Check console output for messages. For example there might be a message to update Node.js.
The Angular app appears and is populated via the API (the localhost port may vary from the screenshot).
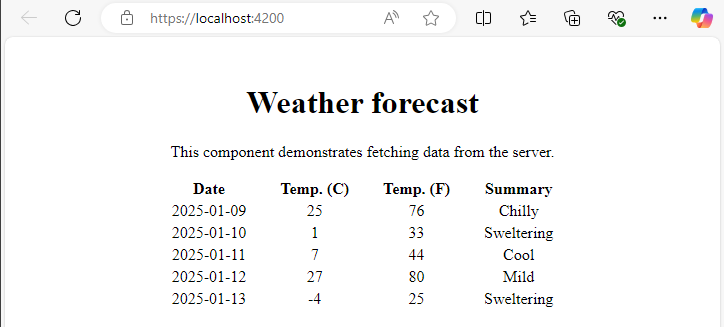
If you don't see the weather forecast data in the browser, see Troubleshooting.
Publish the project
Starting in Visual Studio 2022 version 17.3, you can publish the integrated solution using the Visual Studio Publish tool.
Note
To use publish, create your JavaScript project using Visual Studio 2022 version 17.3 or later.
In Solution Explorer, right-click the AngularWithASP.Server project and select Add > Project Reference.
Make sure the angularwithasp.client project is selected.
Choose OK.
Right-click the ASP.NET Core project again and select Edit Project File.
This opens the
.csprojfile for the project.In the
.csprojfile, make sure the project reference includes a<ReferenceOutputAssembly>element with the value set tofalse.This reference should look like the following:
 <ProjectReference Include="..\angularwithasp.client\angularwithasp.client.esproj">
   <ReferenceOutputAssembly>false</ReferenceOutputAssembly>
 </ProjectReference>
Right-click the ASP.NET Core project and choose Reload Project if that option is available.
In Program.cs, make sure the following code is present.
app.UseDefaultFiles();
app.UseStaticFiles();

// Configure the HTTP request pipeline.
if (app.Environment.IsDevelopment())
{
   app.UseSwagger();
   app.UseSwaggerUI();
}
To publish, right click the ASP.NET Core project, choose Publish, and select options to match your desired publish scenario, such as Azure, publish to a folder, etc.
The publish process takes more time than it does for just an ASP.NET Core project, since the
npm run buildcommand gets invoked when publishing. The BuildCommand runsnpm run buildby default.If you publish to a folder, see ASP.NET Core directory structure for more information on the files added to the publish folder.
Troubleshooting
Outdated versions of Node.js or the template
If you experience issues not described elsewhere in this section, try updating Node.js to the current version and update Visual Studio to get the latest version of the template.
Proxy error
You may see the following error:
[HPM] Error occurred while trying to proxy request /weatherforecast from localhost:4200 to https://localhost:5001 (ECONNREFUSED) (https://nodejs.org/api/errors.html#errors_common_system_errors)
If you see this issue, most likely the frontend started before the backend.
- Once you see the backend command prompt up and running, just refresh the Angular app in the browser.
- Also, verify that the backend is configured to start before the front end. To verify, select the solution in Solution Explorer, choose Properties from the Project menu. Next, select Configure Startup Projects and make sure that the backend ASP.NET Core project is first in the list. If it's not first, select the project and use the Up arrow button to make it the first project in the launch list.
Verify port
If the weather data doesn't load correctly, you may also need to verify that your ports are correct.
Go to the
launchSettings.jsonfile in your ASP.NET Core project (in the Properties folder). Get the port number from theapplicationUrlproperty.If there are multiple
applicationUrlproperties, look for one using anhttpsendpoint. It should look similar tohttps://localhost:7049.Then, go to the
proxy.conf.jsfile for your Angular project (look in the src folder). Update the target property to match theapplicationUrlproperty in launchSettings.json. When you update it, that value should look similar to this:target: 'https://localhost:7049',
Docker
If you create the project with Docker support enabled, take the following steps:
After the app loads, get the Docker HTTPS port using the Containers window in Visual Studio. Check the Environment or Ports tab.
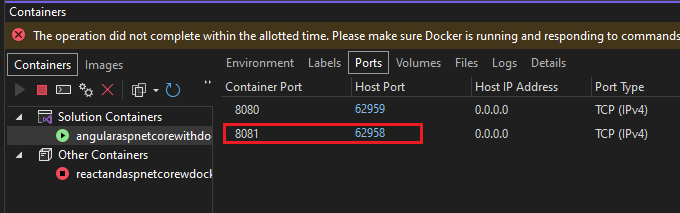

Open the
proxy.conf.jsfile for the Angular project. Update thetargetvariable to match the HTTPS port in the Containers window. For example, in the following code:const target = env.ASPNETCORE_HTTPS_PORT ? `https://localhost:${env.ASPNETCORE_HTTPS_PORT}` : env.ASPNETCORE_URLS ? env.ASPNETCORE_URLS.split(';')[0] : 'https://localhost:7209';Change
https://localhost:7209to the matching HTTPS port (in this example,https://localhost:62958).Note
If the HTTPS port is missing in the Containers window, you can use launchSettings.json file to add the port. In the section
Container (Dockerfile)and after the entry"useSSL": true, add"sslPort": <any port>. In this example, use the following:"sslPort": 62958.Restart the app.
Next steps
For more information about SPA applications in ASP.NET Core, see the Angular section under Developing Single Page Apps. The linked article provides additional context for project files such as aspnetcore-https.js and proxy.conf.js, although details of the implementation are different due to project template differences. For example, instead of a ClientApp folder, the Angular files are contained in a separate project.
For MSBuild information specific to the client project, see MSBuild properties for JSPS.