Note
Access to this page requires authorization. You can try signing in or changing directories.
Access to this page requires authorization. You can try changing directories.
Visual Studio provides the capability to publish a Python web app directly to Azure App Service on Linux. Publishing to Azure App Service on Linux includes copying the necessary files to the server and setting up an appropriate web.config file that instructs the web server how to launch your app.
Note
Linux is the only operating system option for running Python apps in App Service. Python on Windows is no longer supported, as described in App Service Linux Docs - Python Support. For Windows, you can build your own custom Windows container image and run the image in App Service. For more information, see Use a custom Docker image.
Prerequisites
Visual Studio. To install the product, follow the steps in Install Visual Studio.
A Python web app project based on the Bottle, Flask, or Django framework. You can create a test project to try the publishing process.
To publish to Azure, you need a target Azure App Service for your Azure subscription.
If you don't already have an Azure subscription, start with a free full Azure account. Also consider signing up for Visual Studio Dev Essentials.
Visual Studio versions
The publishing process differs between Visual Studio 2017 and later and Visual Studio 2015. Both approaches are described in this article.
Visual Studio 2015 automates some of the installation steps, including creation of the
web.configfile, but this automation limits long-term flexibility and control.Visual Studio 2017 and later requires more manual installation steps, but it provides more exact control over your Python environment.
For more information about the changes between Visual Studio 2015 and Visual Studio 2017 and later, see the blog post, Publish to Azure in Visual Studio 2017.
Create a test project
If you don't have an existing project to publish, you can create a test project to try the process.
In Visual Studio, select File > New > Project from the toolbar menu to open the Create a new project dialog.
In the dialog, enter bottle in the Search box, select the Bottle Web Project template, and then select Next.
The Bottle Web Project template is included with the Python development workload. For more information, see Python web application project templates.
Enter a name and a path location for the project, then select Create.
Follow the prompts to install external packages, select Install into a virtual environment, and choose your preferred base interpreter for the virtual environment.
The virtual environment typically matches the version of Python installed on App Service.
When you're ready, you can test the project locally by selecting Debug > Start Debugging or use the keyboard shortcut F5.
Create the target Azure App Service
Publishing to Azure requires a target Azure App Service for an Azure subscription.
Create an App Service with an empty web app as follows:
Sign into the Azure portal.
Go to the App Services page.
Select Create and choose Web App from the dropdown menu. The Create Web App page opens.
On the Basics tab, configure the following settings:
Setting Description Resource Group Ignore this field. The system updates this value after you choose the runtime setting. Name Enter a name for the web app. Publish Select Code. Runtime stack Choose the appropriate Python runtime from the dropdown menu. After you choose an item, the system updates the Resource Group field. Region Select any Azure region near you. Pricing plan Select the Free F1 plan. For the examples in this article, you can ignore the settings on the other tabs.
Select Review + Create. Review your selections, and then select Create.
(Optional) After the App Service is ready, you can go to the resource, select Download publish profile, and save the file locally.
Configure Python on Azure App Service
After you have an App Service with an empty web app running in your subscription, install your desired version of Python. For publishing from Visual Studio 2017 and later, record the exact path to the Python interpreter installed with the site extension. For more information, see Install Python interpreters.
If desired, you can also install the bottle package. However, this package is installed in a later step in this walkthrough.
Publish to App Service - Visual Studio 2017 and later
Publishing to Azure App Service from Visual Studio 2017 and later copies only the files in your project to the server. You need to create the necessary files to configure the server environment.
In Visual Studio Solution Explorer, right-click the project and select Add > New Item. In the dialog, select the Azure web.config (Fast CGI) template, and select Add. This step creates a
web.configfile in your project root.Modify the
PythonHandlerentry in theweb.configfile so the path matches the Python installation on the server, as described in IIS Configuration Reference (iis.net). For example, for Python 3.6.1 x64 the entry should appear as follows:<system.webServer> <handlers> <add name="PythonHandler" path="*" verb="*" modules="FastCgiModule" scriptProcessor="D:\home\Python361x64\python.exe|D:\home\Python361x64\wfastcgi.py" resourceType="Unspecified" requireAccess="Script"/> </handlers> </system.webServer>Set the
WSGI_HANDLERentry in theweb.configfile as appropriate for the framework you're using:Bottle: Add parentheses after the
app.wsgi_appvalue as shown in this example. The parentheses are necessary because the object is a function rather than a variable. You can see the syntax in theapp.pyfile.<!-- Bottle apps only --> <add key="WSGI_HANDLER" value="app.wsgi_app()"/>Flask: Change the
WSGI_HANDLERvalue to<project_name>.appwhere<project_name>matches the name of your project. You can find the exact identifier by looking at thefrom <project_name> import appstatement in therunserver.pyfile. For example, if the project is named "FlaskAzurePublishExample," the entry appears as follows:<!-- Flask apps only: Change the project name to match your app --> <add key="WSGI_HANDLER" value="FlaskAzurePublishExample.app"/>Django: Two changes are needed to the
web.configfile for Django projects.Change the
WSGI_HANDLERvalue todjango.core.wsgi.get_wsgi_application(). The object is in thewsgi.pyfile.<!-- Django apps only --> <add key="WSGI_HANDLER" value="django.core.wsgi.get_wsgi_application()"/>Add the following entry immediately after the entry for the
WSGI_HANDLERkey. Replace the valueDjangoAzurePublishExamplewith the name of your project:<add key="DJANGO_SETTINGS_MODULE" value="django_iis_example.settings" />
Django apps only: In the Django project's
settings.pyfile, add your site URL domain or IP address to theALLOWED_HOSTSentry. Replace 'vspython-test-02.azurewebsites.net' with your URL:# Change the URL to your specific site ALLOWED_HOSTS = ['vspython-test-02.azurewebsites.net']If you don't add your URL to the array results, you see the following error:
DisallowedHost at / Invalid HTTP_HOST header: '\<site URL\>'. You might need to add '\<site URL\>' to ALLOWED_HOSTS.When the array is empty, Django automatically allows
'localhost'as a host. If you add your production URL,'localhost'isn't automatically allowed as a host. For this reason, you might want to maintain separate development and production copies of thesettings.pyfile, or use environment variables to control the runtime values.Select the template.
- In Solution Explorer, expand your project folder.
- Right-click the static folder, and select Add > New Item.
- Select the Azure Static files web.config template, and select Add.
This action creates another
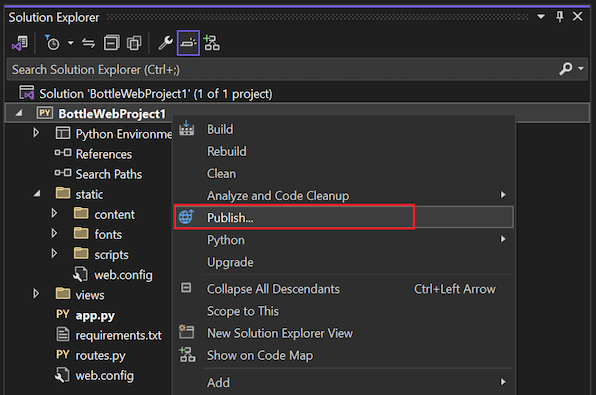
web.configfile in the static folder that disables Python processing for that folder. This configuration sends requests for static files to the default web server rather than using the Python application.In Solution Explorer, save your project, and then right-click your project and select Publish.
In the Publish window, specify the publishing target:
For the Target, select Azure, and then select Next.
For the Specific target, select Azure App Service (Windows), and select Next.
- If the dialog indicates that other Required components are necessary to complete the installation, select Finish. The Visual Studio Installer opens. Confirm the options, and select Install.
For the App Service, select the appropriate App Service for your subscription, and select Finish.
After the publish creation process completes, select Close.
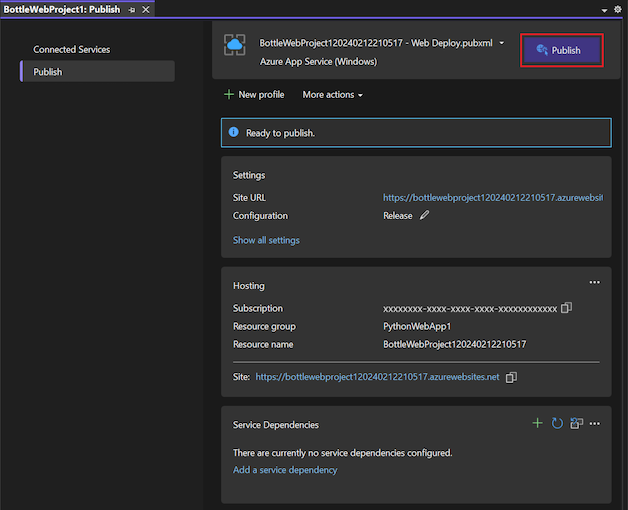
Visual Studio displays status in a "Web Publish Activity" window and also in the Publish profile creation progress window. When you see the "Ready to publish" message for the web app, select Publish.
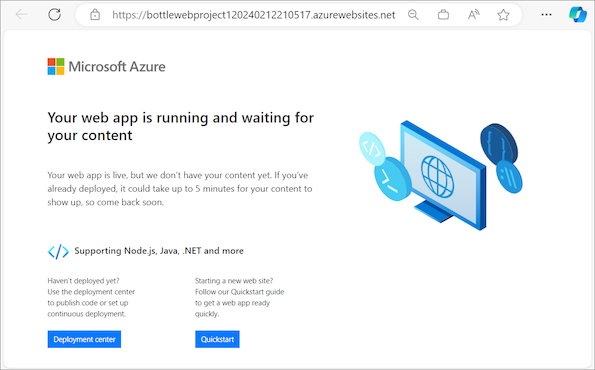
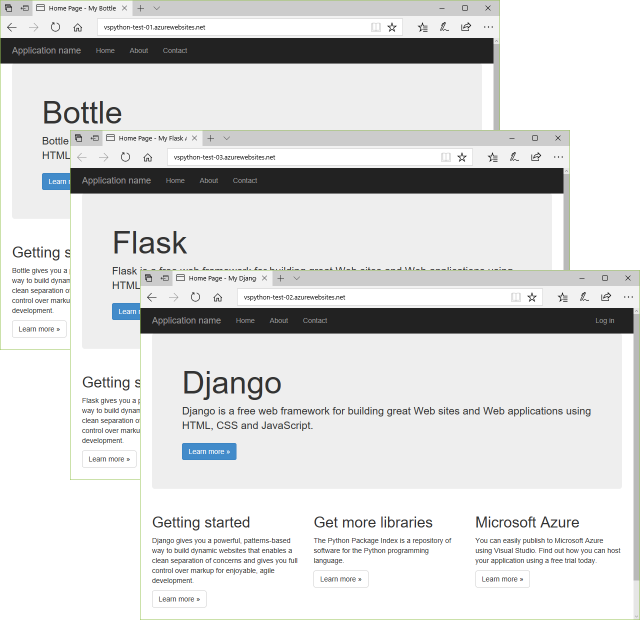
When publishing succeeds, the default browser opens on the site URL. The site URL is also shown in the Publish window.
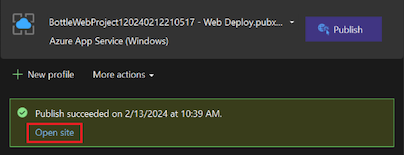
If the site URL doesn't automatically open, select Open site to view the web app in the browser:
When the browser opens, you might see the message, "The page cannot be displayed because an internal server error has occurred." This message indicates that your Python environment on the server isn't fully configured, in which case do the following steps:
Make sure you have an appropriate Python site extension installed. For more information, see Quickstart: Deploy a Python (Django or Flask) web app to Azure App Service.
Double-check the path to the Python interpreter in your
web.configfile. The path must exactly match the install location of your chosen site extension.Use the Kudu console to upgrade any packages listed in your app's
requirements.txtfile. Browse to the same Python folder used in theweb.configfile, such as/home/python361x64. Run the following command, as described in the Kudu console section:python -m pip install --upgrade -r /home/site/wwwroot/requirements.txtIf you see permission errors when you run this command, confirm you're running the command in your site extension folder. Don't run the command in a folder that has one of App Service's default Python installations. Because you can't modify those default environments, attempting to install packages certainly fails.
For detailed error output, add the following line to the
web.configfile within the<system.webServer>node, which provides more detailed error output:<httpErrors errorMode="Detailed"></httpErrors>Try restarting the App Service after installing new packages. A restart isn't necessary when changing the
web.configfile, as App Service does an automatic restart whenever theweb.configfile changes.Tip
If you make any changes to your app's
requirements.txtfile, be sure to again use the Kudu console to install any packages that are now listed in that file.
After you fully configure the server environment, refresh the page in the browser to see the web app:
Publish to App Service - Visual Studio 2015
Follow these steps to publish your Python web app to Azure App Service in Visual Studio 2015.
In Solution Explorer, right-click the project and select Publish.
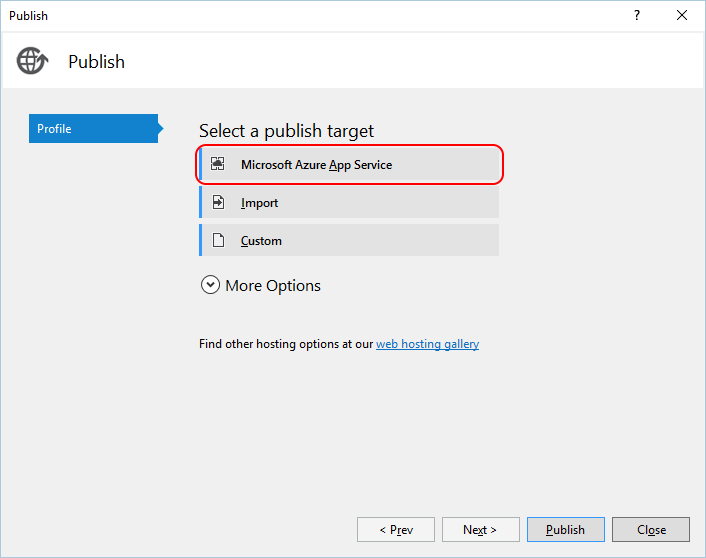
In the Publish dialog, select Microsoft Azure App Service:
Select Microsoft Azure App Service as the publishing target. In the next dialog, select an existing App Service or select New to create a new one.
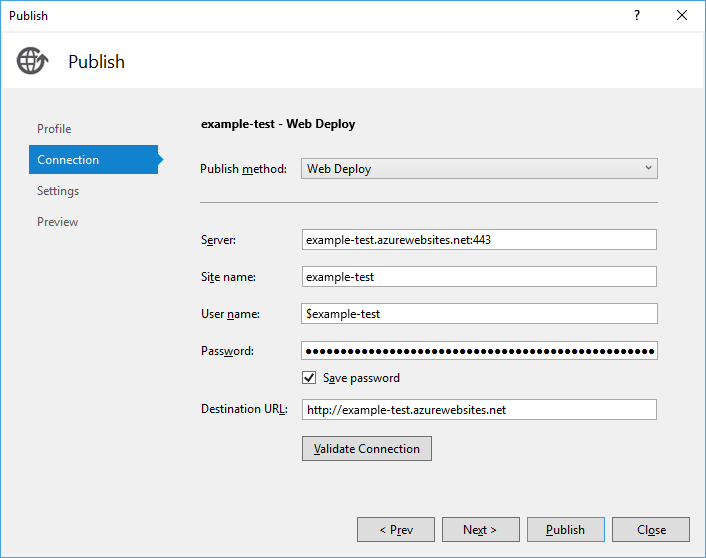
The App Service details appear in the Connection tab of the Publish dialog:
As needed, select Next to review other settings.
Select Publish. After your application deploys to Azure, your default browser opens on the site URL.
As part of this process, Visual Studio also completes the following steps:
- Creates a
web.configfile on the server that contains appropriate pointers to the app'swsgi_appfunction and to App Service's default Python 3.4 interpreter. - Turns off processing for files in the project's static folder. (The rules for this action are in the
web.configfile.) - Publishes the virtual environment to the server.
- Adds a
web.debug.configfile and the debugging tools to enable remote debugging. For Visual Studio 2019 version 16.4 and earlier, the debugging tools are ptvsd. For Visual Studio 2019 version 16.5 and later, the debugging tools are debugpy.
As mentioned earlier, these automatic steps simplify the publishing process, but they can make it more difficult to control the Python environment. For example, the web.config file is created only on the server but not added to your project. The publishing process also takes longer because it's copying the whole virtual environment from your development computer rather than relying on the server configuration.
Eventually, you might want to maintain your own web.config file and use the requirements.txt file to maintain packages on the server directly. When you use the requirements.txt file, in particular, you can help guarantee that your development and server environments always match.
