Deploy and configure Workplace Analytics Azure Templates
These templates are only available as part of a Microsoft service engagement.
Important
As of February 2022, this product is no longer supported. If you're not using the templates, see Cancel the service for how-to steps in the Azure portal.
Before you can use Workplace Analytics Azure Templates for advanced data analysis, you need to do the following:
Configure the registered apps in Microsoft Entra ID - Only do this if you chose to register the apps in Microsoft Entra ID before deployment.
Additional configuration and deployment options: Incoming data, Account mapping, Other configuration options, and Audit logs
Security considerations
Before deploying and configuring these templates, review the following security principles.
- Data is stored in your Azure subscription.
- Data is encrypted on disk and all access to and communication between Azure Resources and these templates are enabled and secured with the Secure Sockets Layer (SSL) certification.
- Authentication leverages Microsoft Entra ID.
- Authorization is set at the Azure Databricks and Azure Templates level by the Azure administrator who installs and sets up the Workplace Analytics Azure Templates.
- An Azure Template Configuration log is created during installation.
Prerequisites
Before deploying Workplace Analytics Azure Templates, confirm or complete the following:
Confirm that Workplace Analytics is set up and ready to use.
Enable Workplace Analytics Data export for the Azure tenant.
Do the following for the Azure subscription that will host these templates and the data exported from Workplace Analytics:
- Confirm you have either an Azure Admin or an Azure Contributor role to deploy these templates.
- Get applicable Microsoft Entra permissions for yourself (or the admin doing the deployment) from your Microsoft 365 global administrator.
- If the Workplace Analytics team is deploying the templates, confirm that the vendor accounts are set up for the team and that the Technical Operations engineer also has the applicable Microsoft Entra permissions to install and set up the templates.
Choose a registration path
These templates require a Microsoft Entra application registration for the Web App service UI, the Web App service API, the Azure Analysis service, and the Azure key vault.
You can register these apps in one of the following ways:
- Register the apps in Step 10 during deployment - You can also automatically register the apps during deployment through the Microsoft AppSource solution template deployment site.
- Register and configure the apps in Microsoft Entra ID - Alternatively, you can register the required apps in Microsoft Entra ID before deployment, which enables the Microsoft identify platform to provide authentication and authorization. After registering, you must deploy the templates through the template deployment site. After deployment, come back to Microsoft Entra ID and configure the registered apps. You can then proceed with the steps to generate the SAS URI for data export, add users, and process the data.
Register and configure the apps in Microsoft Entra ID
You can register the required apps in the Azure portal to get the Microsoft identify platform to authenticate and authorize them, which is required for deployment.
Registering the apps before deployment enables Microsoft Entra ID to provide authentication.
See Register an application with the Microsoft identity platform and Register an app in Microsoft Entra ID for details.
To register the apps and create client secrets
- Sign in to the Azure portal with an account that has permissions to register Microsoft Entra applications, such as an Azure Application developer account.
- In Microsoft Entra ID, under Manage, select App registrations, and then select New registration.
- Enter a name for the Web App service UI with a consistent naming convention, such as: wpaapps + YYYYMM + role = App registration name. For example: wpaapps202011-ui.
- In Supported account types, select Accounts in this organizational directory only for a single tenant, and then select Register.
- Select Certificates & secrets, and then in Client secrets, select New client secret, type a description, select when it expires, and then select Add to create a secret for the app service.
- Copy and save this new secret to use during deployment.
- Select New registration again for the Web App service API and enter a name for it, such as: wpaapps202011-api.
- In Supported account types, select Accounts in this organizational directory only for a single tenant, and then select Register.
- In Supported account types, select Accounts in this organizational directory only for a single tenant, and then select Register.
- Copy and save the Application (client) ID for both the app service and app API service.
- Select Certificates & secrets, and then in Client secrets, select New client secret, type a description, select when it expires, and then select Add to create a secret for the API service.
- Copy and save this new secret to use during deployment.
- Complete the deployment steps and in Step 10, select Authentication and update the Redirect URI for each app with the Application (client) ID and secret you saved in the previous steps.
To configure the registered apps
After completing the deployment steps for the templates, sign in to the Azure portal with an account that has permissions, and then open Microsoft Entra ID.
Select the Web App service API > API permissions, and confirm the Microsoft Graph > User.Read > Delegated default is listed.
Select Expose an API, and then select Save and continue to grant delegated permission.
In Add a scope > Scope name, enter user_impersonation.
In Admin consent display name, enter user_impersonation again.
In the descriptions, enter something like: Allows access to the wpa app API.
Confirm Enabled is selected, and then select Add scope.
Select Authentication > Add a platform > Web, and then enter the Redirect URI for the Web App service API. The format will be similar to this:
https://wpaapps202011-api.azurewebsites.net/.auth/login/aad/callbackSelect the Web App service UI > API permissions, confirm the Microsoft Graph > User.Read > Delegated default is listed, as shown in the graphic.

Select Add a permission > APIs my organization uses, and then search for and select the Web App service API (for example: wpaapps202011-api).
Select Delegated permissions, select user_impersonation, and then select Add permissions.
Select Authentication > Add a platform > Web, and then enter the Redirect URI for the Web App service UI. The format will be similar to this:
https://wpaapps202011-ui.azurewebsites.net/In Implicit grant, select both Access tokens and ID tokens, and then select Configure.
Select API permissions, and then select user_impersonation, and then select Grant admin consent for Microsoft to enable API consent.
Then proceed with the steps to generate the SAS URI for data export.
Deployment
Get and open the Azure deployment link for the Workplace Analytics Azure Templates from the Workplace Analytics team.
On the Getting Started page, select Next.
When prompted, select the applicable Azure subscription.
For Resource group, you can select to:
- Create new to create a new resource group.
- Use existing to use an existing resource group and append the existing group with what's needed for this template, including any updates for any of the other templates in this group.
Select the applicable Region and then select Next.
On the Choose SKU page, select the SKU or Pricing Tier for one or more of the Azure Components that you'll use with the templates. You should've gotten these SKU recommendations with the deployment URL or during your team deployment meeting.
On the Deployment Review page, confirm the selections, and then select Next.
After the Azure Databricks workspace deployment is done, you are automatically signed in to Azure Databricks. If you're not, you need to sign in manually.
On the Databricks Token page, you need to generate the Azure Databricks Token for the App source and then select Next.
In Deployment Review, do the following:
If you registered the apps before deployment, select Authentication and update the Redirect URI for each of the apps listed.
Otherwise the apps are registered automatically during this step. Review the information for the following supported Azure components that the templates might use. For example, confirm the Databricks cluster is assigned. If it's empty, no resources will be deployed for it.
Select Next to start the two-phase deployment, which can take up to 60 minutes to complete.
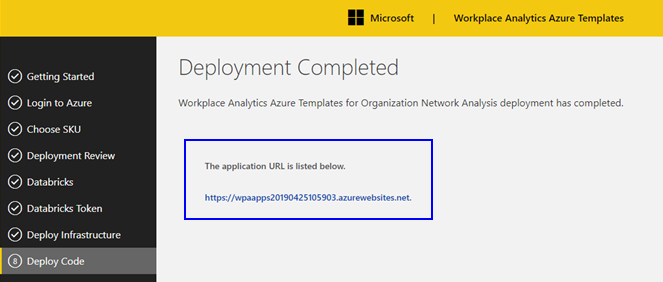
After the deployment is complete, open, copy, and save the deployed website link for the templates, similar to the one shown in the following graphic.
Important
You must save this deployment link because you and the other users you add need the link to configure and use the templates.
If you registered the apps before deployment, go back and configure the registered apps in Microsoft Entra ID. Otherwise, proceed to the next steps to generate the SAS URI for data export.
Generate SAS URI for data export
After deployment, you need to create a write-only SAS URI on the raw data container in the storage account created during the deployment. The SAS URI is given to the Viva Insights or Workplace Analytics to configure data exports that are required by some of the templates.
Use Storage Explorer (or Storage Explorer (preview) web) application to view the raw data container in the storage account created during deployment.
Right-click the rawdata folder and select Get Shared Access Signature.
In Shared Access Signature, select an expiration time.
In Permissions, confirm only Write is selected, and then select Create.
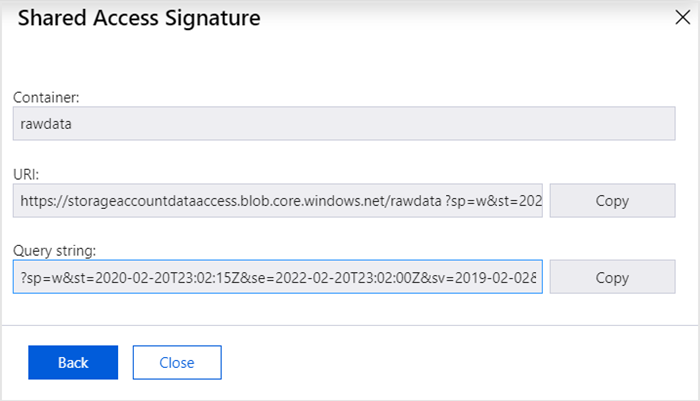
For the URI, select Copy to copy the complete URI, which will be similar to the example URI in the following graphic.
Give the new URI that you copied in the previous step to your admin, who needs it to configure data exports.
Add users and assign roles
As the Azure Templates Admin, you can use the Admin page to manage security, privacy settings, and other administrative processes. Before other people can use the templates, you need to add them as users and assign them one of the following roles based on the tasks they need to accomplish with the templates:
Azure Templates Admin
- Can add other users and assign roles for the templates.
- Can share the templates website link with other users.
- Can share the link to access the Azure Databricks Workspace with assigned Data scientists.
- Configure specific template settings on the Configuration page.
- Access and audit logs.
Analyst
- Can access, use, and customize the analytical templates available through a Workplace Analytics Azure Templates website link.
- Can access, use, and customize the Power BI reports and dashboards connected to the Workplace Analytics Azure Templates.
API User
- Can access and use a limited set of templates available through a Workplace Analytics Azure Templates website link.
- Assign to allow automated processes access to data from specific scenarios.
Data Owner
- Can access, use, and customize the same analytical templates and Power BI reports and dashboards as an Analyst.
- Owns and can access and use incoming data to create datasets.
- Can share access to data they own with other users.
- For the Join Datasets Azure Template, can share access to their joined datasets with other template users.
Data Scientist (beta)
- Can access, use, and customize the same analytical templates and Power BI reports and dashboards as an Analyst.
- Can also access the Azure Databricks Workspace and use Python or R scripts to derive new insights.
To add users and assign them roles:
Use the website link (from the last step in Deployment) to open the Workplace Analytics Azure Templates.
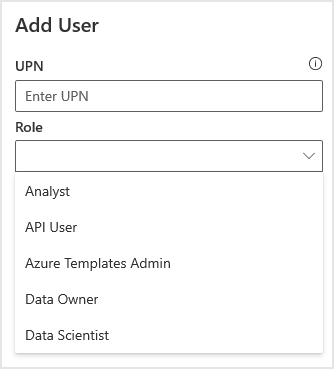
Select Admin > User Management > Add New User.
Type the email address for the new user and select the applicable role for this user, as shown in the following graphic.
In Scenarios, select the applicable templates for which the user needs access. Users can only access and use templates that are selected from this list.
Process the data
After adding users, you need to process the Workplace Analytics data that you want to use with these templates:
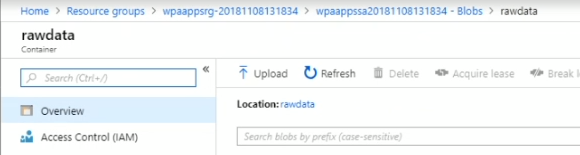
In Azure Resource groups, locate the folder that the deployment just created. The new resource group name begins with wpaappsrg and includes the deployment date and time, as shown in the following graphic.

The new storage group contains a rawdata folder, as shown in the following graphic.
Confirm that the following .csv files are in the new rawdata folder:
- MailParticipants.csv
- Mails.csv, MeetingParticipants.csv
- Meetings.csv
- PersonalHistorical.csv
If these .csv files are not already in the rawdata folder, you need to use the Azure Storage Explorer (or other comparable tool) to connect to the Azure storage group that currently stores your Workplace Analytics data set, and select and copy these files into that folder.
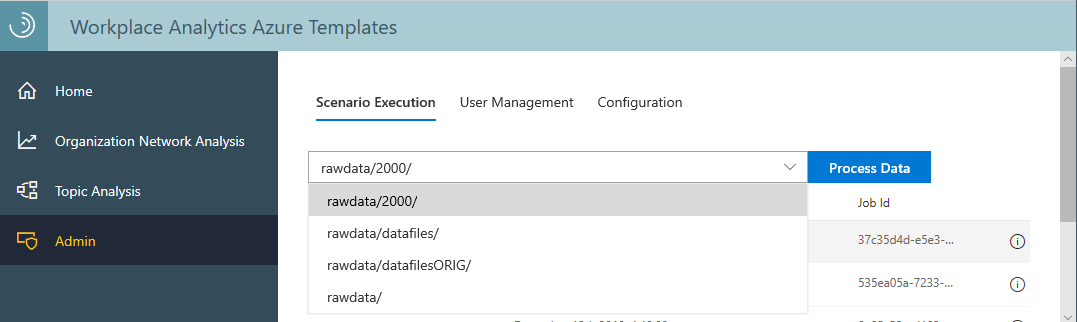
In the Workplace Analytics Azure Templates app, select Admin > Scenario Execution, select the rawdata folder, and then select Process data.
Incoming data
On the Admin > Incoming Data page, you can see a list of the most recent data uploads in descending order, including the data's path, the date it was uploaded, the status, and the option to delete it. This list populates the list you can use to create new datasets with the Process Explorer Azure template. Also, use this page to easily delete data (trash can icon in far right column) that's outdated or no longer needed.
Other configuration options
As an admin, you can configure template settings in Admin > Configuration, including:
- The minimum group size, maximum number of nodes and links in data analysis with the Organizational Network Analysis Azure Template.
- If the Process Explorer Azure Template either surfaces and uses, or does not surface or use, email subjects in blob storage datasets to help train the model for categorization.
- Set the number of days to retain data created and saved as joined datasets with the Join Datasets Template.
Account mapping
Before creating analysis, you need to upload the exported CRM data (.csv) data files for your customer accounts and contacts and create a mapping file in the template. See Required file formats for details about what the files must include based on the type of CRM.
Note
If CRM data is unavailable, or you want to start without it, you can skip adding a mapping file and when prompted while adding new analysis, select None for the account mapping. With no mapping file, the analysis will only show external domain-level data.
To add a new account mapping:
In Workplace Analytics Azure Templates, select Account Mapping > Add New Mapping (at top right) to upload a new set of files for customer accounts and contacts.
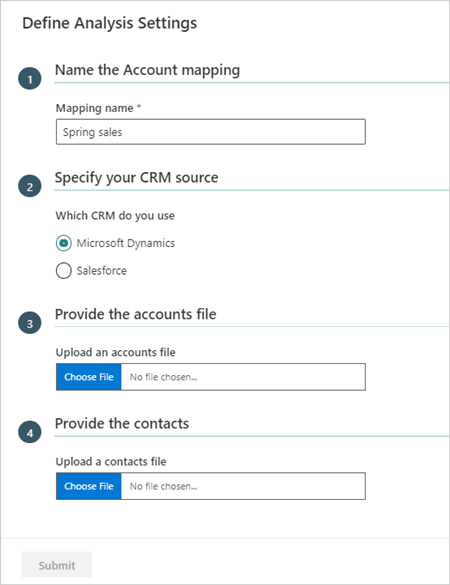
In Name the Account mapping, enter a friendly name for the mapping file.
In Specify your CRM source, select the CRM source for your accounts and contacts.
In Provide the accounts file and Provide the contacts, select Choose File, and then select the .csv files for accounts and contacts, which must be in the required format as described in Required CRM file formats.
Required CRM file formats
The following are examples of what the .csv file formats for accounts and contacts must include.
Important
The column names are case-sensitive and must match the contact and account names in the .csv files exactly. Column names in the accounts and contacts files must be unique. If the files share the same column names, you must rename the duplicate names in one of the files before the upload.
Dynamics accounts

Dynamics contacts

Salesforce accounts

Salesforce contacts

Audit logs
As an admin, you can audit user activity in Admin > Logs. Select the information (i) icon in the Message column to see more details about a specific activity.