Nota
El acceso a esta página requiere autorización. Puede intentar iniciar sesión o cambiar directorios.
El acceso a esta página requiere autorización. Puede intentar cambiar los directorios.
En este artículo aprenderá a actualizar una red virtual emparejada modificando, agregando o eliminando un espacio de direcciones mediante Azure Portal. Estas actualizaciones no suponen interrupciones de tiempo de inactividad. Esta característica es útil cuando necesita aumentar o cambiar el tamaño de las redes virtuales en Azure después de escalar las cargas de trabajo.
Requisitos previos
Hay dos elementos:
Una red virtual emparejada existente con dos redes virtuales
Si agrega un espacio de direcciones, asegúrese de que no se superponga a otros espacios de direcciones.
Modificación del prefijo del intervalo de direcciones de un intervalo de direcciones existente
En esta sección, modificará el prefijo del intervalo de direcciones de un intervalo de direcciones existente dentro de la red virtual emparejada.
En el cuadro de búsqueda de la parte superior de Azure Portal, escriba redes virtuales. En los resultados de la búsqueda, seleccione Redes virtuales.
En la lista de redes virtuales, seleccione la red virtual que desee modificar.
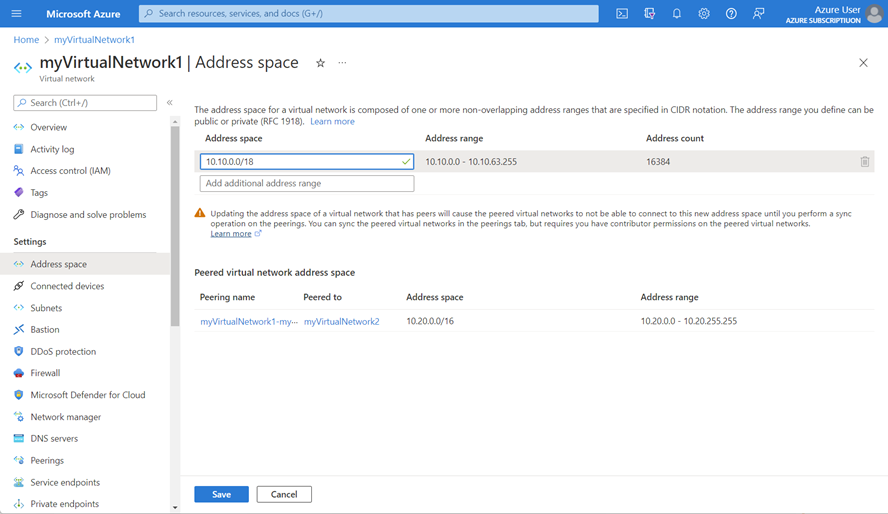
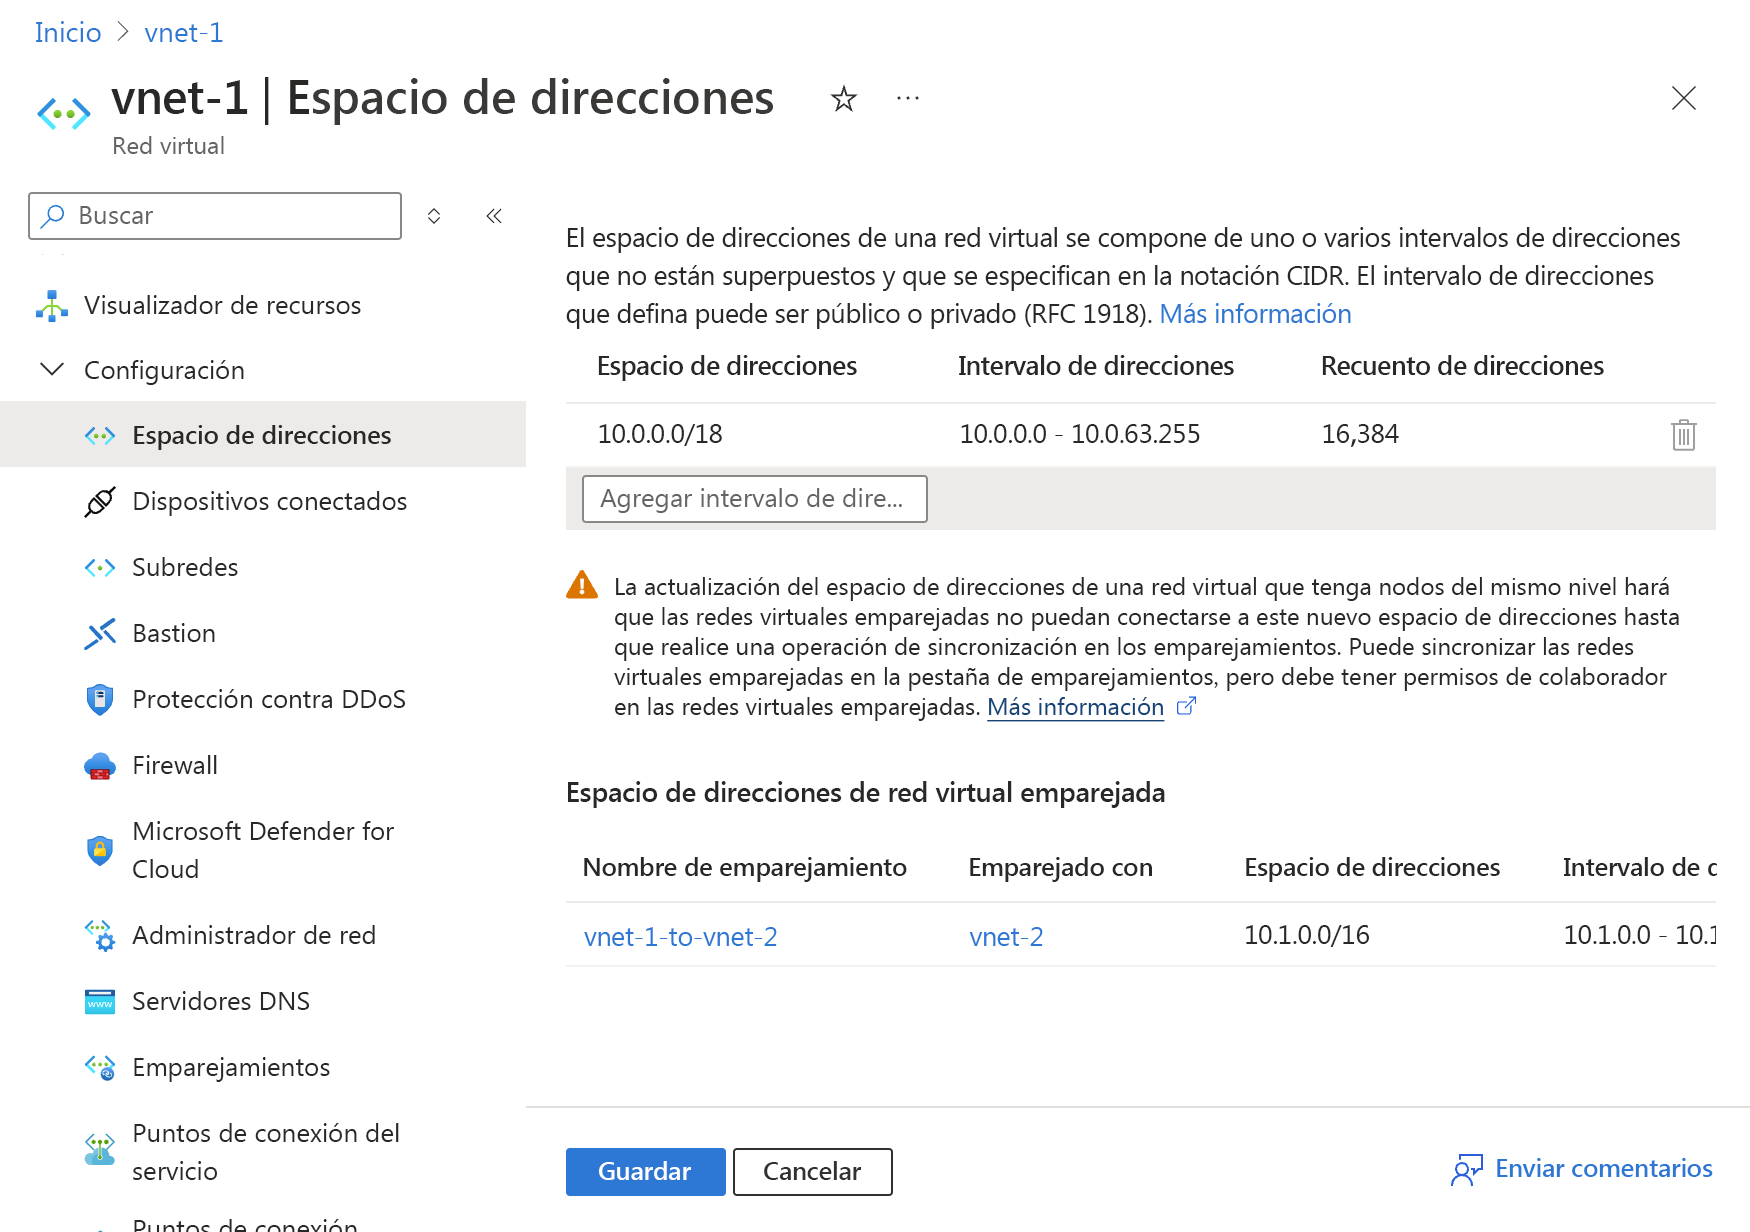
En Configuración, seleccione Espacio de direcciones.
En la página Espacio de direcciones, cambie el prefijo del intervalo de direcciones como necesite y seleccione Guardar.
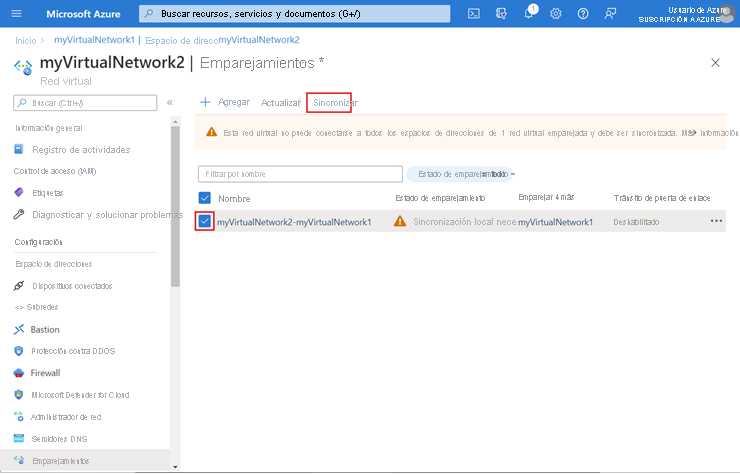
En Configuración, seleccione Emparejamientos y active la casilla para el emparejamiento que desea sincronizar.
Seleccione Sincronización en la barra de tareas.
Seleccione el elemento del mismo nivel para volver a sincronizar. Seleccione el directorio para autenticarse si es necesario en Sincronización de emparejamiento de red virtual.
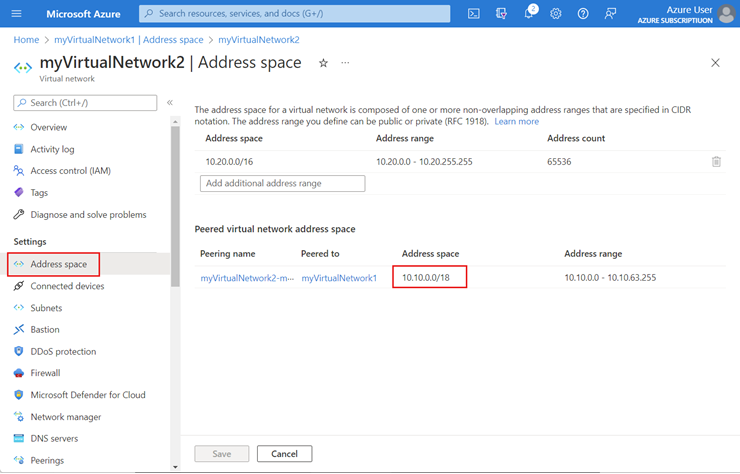
En Configuración de la red virtual emparejada, seleccione Espacio de direcciones y compruebe que se ha actualizado el espacio de direcciones que aparece.
Nota
Al actualizar el espacio de direcciones de una red virtual, tiene que sincronizar el emparejamiento de la red virtual para cada red virtual remota emparejada. Se recomienda ejecutar la sincronización después de cada operación de espacio de direcciones de cambio de tamaño, en lugar de realizar varias operaciones de cambio de tamaño y, posteriormente, ejecutar la operación de sincronización.
Las siguientes acciones requieren que sincronice:
- Modificación del prefijo del intervalo de direcciones de un intervalo de direcciones existente; por ejemplo, cambio de 10.1.0.0/16 a 10.1.0.0/18
- Incorporación de intervalos de direcciones a una red virtual
- Eliminación de intervalos de direcciones de una red virtual


Incorporación de un intervalo de direcciones
En esta sección agregará un intervalo de direcciones IP al espacio de direcciones IP de una red virtual emparejada.
En el cuadro de búsqueda de la parte superior de Azure Portal, escriba redes virtuales. En los resultados de la búsqueda, seleccione Redes virtuales.
En la lista de redes virtuales, seleccione la red virtual donde va a agregar un intervalo de direcciones.
En Configuración, seleccione Espacio de direcciones.
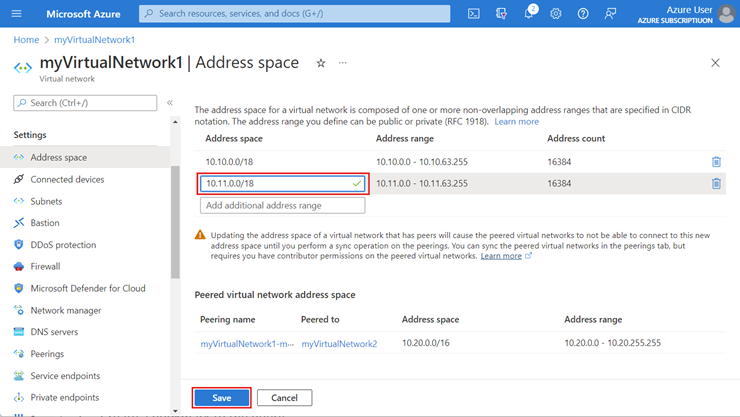
En la página Espacio de direcciones, agregue el intervalo de direcciones que necesite y seleccione Guardar cuando haya terminado.
En Configuración, seleccione Emparejamiento y sincronice la conexión de emparejamiento.
En Configuración de la red virtual emparejada, seleccione Espacio de direcciones y compruebe que se ha actualizado el espacio de direcciones que aparece.

Eliminación de un intervalo de direcciones
En esta tarea, se elimina un intervalo de direcciones IP de una subred de una red virtual emparejada.
Importante
Para poder eliminar un espacio de direcciones, debe estar vacío. Si existe un recurso o servicio en el intervalo de direcciones, no se puede quitar el intervalo de direcciones. Para quitar un intervalo de direcciones, debe quitar cualquier recurso o servicio mediante el intervalo de direcciones dentro de la subred.
En el cuadro de búsqueda de la parte superior de Azure Portal, escriba redes virtuales. En los resultados de la búsqueda, seleccione Redes virtuales.
En la lista de redes virtuales, seleccione la red virtual de la que va a eliminar el intervalo de direcciones.
En Configuración, seleccione Espacio de direcciones.
A la derecha del intervalo de direcciones que desea quitar, seleccione el icono de papelera.

Seleccione Guardar después de completar los cambios.
En Configuración, seleccione Emparejamiento y sincronice la conexión de emparejamiento.
En Configuración de la red virtual emparejada, seleccione Espacio de direcciones y compruebe que se ha actualizado el espacio de direcciones que aparece.