Nota
El acceso a esta página requiere autorización. Puede intentar iniciar sesión o cambiar directorios.
El acceso a esta página requiere autorización. Puede intentar cambiar los directorios.
Proporciona un breve tutorial sobre cómo agregar efectos de dibujo de cliente a una aplicación de DirectWrite que muestra texto mediante la interfaz IDWriteTextLayout y un representador de texto personalizado.
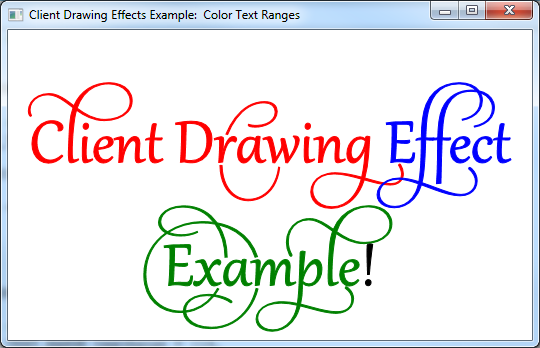
El producto final de este tutorial es una aplicación que muestra texto que tiene intervalos de texto con un efecto de dibujo de color diferente en cada uno, como se muestra en la siguiente captura de pantalla.
Nota:
Este tutorial está diseñado para ser un ejemplo simplificado de cómo crear efectos de dibujo de cliente personalizados, no un ejemplo de un método sencillo para dibujar texto de color. Consulte la página de referencia de IDWriteTextLayout::SetDrawingEffect para obtener más información.
Este tutorial contiene las siguientes partes:
- Paso 1: Crear un diseño de texto
- Paso 2: Implementar una clase de efecto de dibujo personalizada
- Paso 3: Implementar una clase de representador de texto personalizado
- Paso 4: Crear el representador de texto
- Paso 5: Crear una instancia de los objetos de efecto de dibujo de color
- Paso 6: Establecer el efecto de dibujo para intervalos de texto específicos
- Paso 7: Dibujar el diseño de texto mediante el representador personalizado
- Paso 8: Limpieza
Paso 1: Crear un diseño de texto
Para empezar, necesitará una aplicación con un objeto IDWriteTextLayout . Si ya tiene una aplicación que muestra texto con un diseño de texto o está usando el código de ejemplo drawingEffect personalizado, vaya al paso 2.
Para agregar un diseño de texto, debe hacer lo siguiente:
Declare un puntero a una interfaz IDWriteTextLayout como miembro de la clase .
IDWriteTextLayout* pTextLayout_;Al final del método CreateDeviceIndependentResources , cree un objeto de interfaz IDWriteTextLayout llamando al método CreateTextLayout .
// Create a text layout using the text format.
if (SUCCEEDED(hr))
{
    RECT rect;
    GetClientRect(hwnd_, &rect);
    float width  = rect.right  / dpiScaleX_;
    float height = rect.bottom / dpiScaleY_;

    hr = pDWriteFactory_->CreateTextLayout(
        wszText_,      // The string to be laid out and formatted.
        cTextLength_,  // The length of the string.
        pTextFormat_,  // The text format to apply to the string (contains font information, etc).
        width,         // The width of the layout box.
        height,        // The height of the layout box.
        &pTextLayout_  // The IDWriteTextLayout interface pointer.
        );
}
Por último, recuerde liberar el diseño de texto en el destructor.
SafeRelease(&pTextLayout_);
Paso 2: Implementar una clase de efecto de dibujo personalizada
Aparte de los métodos heredados de IUnknown, una interfaz de efecto de dibujo de cliente personalizado no tiene requisitos para lo que debe implementar. En este caso, la clase ColorDrawingEffect simplemente contiene un valor de D2D1_COLOR_F y declara métodos para obtener y establecer este valor, así como un constructor que puede establecer el color inicialmente.
Después de aplicar un efecto de dibujo de cliente a un intervalo de texto en un objeto IDWriteTextLayout , el efecto de dibujo se pasa al método IDWriteTextRenderer::D rawGlyphRun de cualquier ejecución de glifo que se va a representar. Los métodos del efecto de dibujo están disponibles para el representador de texto.
Un efecto de dibujo de cliente puede ser tan complejo como desee, llevar más información que en este ejemplo, así como proporcionar métodos para modificar glifos, crear objetos que se usarán para dibujar, etc.
Paso 3: Implementar una clase de representador de texto personalizado
Para aprovechar el efecto de dibujo de un cliente, debe implementar un representador de texto personalizado. Este representador de texto aplicará el efecto de dibujo pasado por el método IDWriteTextLayout::D raw a la ejecución del glifo que se está dibujando.
El constructor
El constructor del representador de texto personalizado almacena el objeto ID2D1Factory que se usará para crear objetos Direct2D y el destino de representación de Direct2D en el que se dibujará el texto.
CustomTextRenderer::CustomTextRenderer(
    ID2D1Factory* pD2DFactory,
    ID2D1HwndRenderTarget* pRT
    )
:
cRefCount_(0),
pD2DFactory_(pD2DFactory),
pRT_(pRT)
{
    pD2DFactory_->AddRef();
    pRT_->AddRef();
}
DrawGlyphRun (método)
Una ejecución de glifo es un conjunto de glifos que comparten el mismo formato, incluido el efecto de dibujo del cliente. El método DrawGlyphRun se encarga de la representación de texto de una ejecución de glifo especificada.
En primer lugar, cree un ID2D1PathGeometry y un ID2D1GeometrySink y, a continuación, recupere el esquema de ejecución del glifo mediante IDWriteFontFace::GetGlyphRunOutline. Después, transforme el origen de la geometría mediante el método Direct2DID2D1Factory::CreateTransformedGeometry , como se muestra en el código siguiente.
HRESULT hr = S_OK;

// Create the path geometry.
ID2D1PathGeometry* pPathGeometry = NULL;
hr = pD2DFactory_->CreatePathGeometry(
        &pPathGeometry
        );

// Write to the path geometry using the geometry sink.
ID2D1GeometrySink* pSink = NULL;
if (SUCCEEDED(hr))
{
    hr = pPathGeometry->Open(
        &pSink
        );
}

// Get the glyph run outline geometries back from DirectWrite and place them within the
// geometry sink.
if (SUCCEEDED(hr))
{
    hr = glyphRun->fontFace->GetGlyphRunOutline(
        glyphRun->fontEmSize,
        glyphRun->glyphIndices,
        glyphRun->glyphAdvances,
        glyphRun->glyphOffsets,
        glyphRun->glyphCount,
        glyphRun->isSideways,
        glyphRun->bidiLevel%2,
        pSink
        );
}

// Close the geometry sink
if (SUCCEEDED(hr))
{
    hr = pSink->Close();
}

// Initialize a matrix to translate the origin of the glyph run.
D2D1::Matrix3x2F const matrix = D2D1::Matrix3x2F(
    1.0f, 0.0f,
    0.0f, 1.0f,
    baselineOriginX, baselineOriginY
    );

// Create the transformed geometry
ID2D1TransformedGeometry* pTransformedGeometry = NULL;
if (SUCCEEDED(hr))
{
    hr = pD2DFactory_->CreateTransformedGeometry(
        pPathGeometry,
        &matrix,
        &pTransformedGeometry
        );
}
A continuación, declare un objeto de pincel sólido direct2D .
ID2D1SolidColorBrush* pBrush = NULL;
Si el parámetro clientDrawingEffect no es NULL, consulte el objeto de la interfaz ColorDrawingEffect . Esto funcionará porque establecerá esta clase como efecto de dibujo del cliente en los intervalos de texto del objeto de diseño de texto.
Una vez que tenga un puntero a la interfaz ColorDrawingEffect , puede recuperar el valor de D2D1_COLOR_F que almacena mediante el método GetColor . A continuación, use el D2D1_COLOR_F para crear un ID2D1SolidColorBrush en ese color.
Si el parámetro clientDrawingEffect es NULL, simplemente cree un ID2D1SolidColorBrush negro.
// If there is a drawing effect create a color brush using it, otherwise create a black brush.
if (clientDrawingEffect != NULL)
{
    // Go from IUnknown to ColorDrawingEffect.
    ColorDrawingEffect *colorDrawingEffect;

    clientDrawingEffect->QueryInterface(__uuidof(ColorDrawingEffect), reinterpret_cast<void**>(&colorDrawingEffect));

    // Get the color from the ColorDrawingEffect object.
    D2D1_COLOR_F color;

    colorDrawingEffect->GetColor(&color);

    // Create the brush using the color specified by our ColorDrawingEffect object.
    if (SUCCEEDED(hr))
    {
        hr = pRT_->CreateSolidColorBrush(
            color,
            &pBrush);
    }

    SafeRelease(&colorDrawingEffect);
}
else
{
    // Create a black brush.
    if (SUCCEEDED(hr))
    {
        hr = pRT_->CreateSolidColorBrush(
            D2D1::ColorF(
            D2D1::ColorF::Black
            ),
            &pBrush);
    }
}
Por último, dibuje la geometría de contorno y llene con el pincel de color sólido que acaba de crear.
if (SUCCEEDED(hr))
{
    // Draw the outline of the glyph run
    pRT_->DrawGeometry(
        pTransformedGeometry,
        pBrush
        );

    // Fill in the glyph run
    pRT_->FillGeometry(
        pTransformedGeometry,
        pBrush
        );
}
The Destructor
No olvide liberar el generador de Direct2D y representar el destino en el destructor.
CustomTextRenderer::~CustomTextRenderer()
{
    SafeRelease(&pD2DFactory_);
    SafeRelease(&pRT_);
}
Paso 4: Crear el representador de texto
En los recursos CreateDeviceDependent , cree el objeto representador de texto personalizado. Depende del dispositivo porque usa id2D1RenderTarget, que depende del propio dispositivo.
// Create the text renderer
pTextRenderer_ = new CustomTextRenderer(
                        pD2DFactory_,
                        pRT_
                        );
Paso 5: Crear una instancia de los objetos de efecto de dibujo de color
Cree una instancia de los objetos ColorDrawingEffect en rojo, verde y azul.
// Instantiate some custom color drawing effects.
redDrawingEffect_ = new ColorDrawingEffect(
    D2D1::ColorF(
        D2D1::ColorF::Red
        )
    );

blueDrawingEffect_ = new ColorDrawingEffect(
    D2D1::ColorF(
        D2D1::ColorF::Blue
        )
    );

greenDrawingEffect_ = new ColorDrawingEffect(
    D2D1::ColorF(
        D2D1::ColorF::Green
        )
    );
Paso 6: Establecer el efecto de dibujo para intervalos de texto específicos
Establezca el efecto de dibujo para intervalos de texto específicos mediante el método IDWriteTextLayou::SetDrawingEffect y una estructura de DWRITE_TEXT_RANGE .
// Set the drawing effects.

// Red.
if (SUCCEEDED(hr))
{
    // Set the drawing effect for the specified range.
    DWRITE_TEXT_RANGE textRange = {0,
                                   14};
    if (SUCCEEDED(hr))
    {
        hr = pTextLayout_->SetDrawingEffect(redDrawingEffect_, textRange);
    }
}

// Blue.
if (SUCCEEDED(hr))
{
    // Set the drawing effect for the specified range.
    DWRITE_TEXT_RANGE textRange = {14,
                                   7};
    if (SUCCEEDED(hr))
    {
        hr = pTextLayout_->SetDrawingEffect(blueDrawingEffect_, textRange);
    }
}

// Green.
if (SUCCEEDED(hr))
{
    // Set the drawing effect for the specified range.
    DWRITE_TEXT_RANGE textRange = {21,
                                   8};
    if (SUCCEEDED(hr))
    {
        hr = pTextLayout_->SetDrawingEffect(greenDrawingEffect_, textRange);
    }
}
Paso 7: Dibujar el diseño de texto mediante el representador personalizado
Debe llamar al método IDWriteTextLayout::D raw en lugar de a los métodos ID2D1RenderTarget::D rawText o ID2D1RenderTarget::D rawTextLayout .
// Draw the text layout using DirectWrite and the CustomTextRenderer class.
hr = pTextLayout_->Draw(
        NULL,
        pTextRenderer_,  // Custom text renderer.
        origin.x,
        origin.y
        );
Paso 8: Limpieza
En el destructor DemoApp, libere el representador de texto personalizado.
SafeRelease(&pTextRenderer_);
Después, agregue código para liberar las clases de efecto de dibujo del cliente.
SafeRelease(&redDrawingEffect_);
SafeRelease(&blueDrawingEffect_);
SafeRelease(&greenDrawingEffect_);