Remote provisioning and sign in for Teams Phones
IT admins can remotely provision and sign into a Teams Android device. This is useful when deploying devices to many desks and reducing the need for first sign-in and setup by the end user. It enables technicians to provide device information and verification codes to IT admins who can then, once a device is allocated to the user shortly after, ensure the device is ready to use.
To provision a device remotely, the admin needs to upload the MAC IDs of the devices being provisioned and create a verification code. The entire process can be completed remotely from the Teams admin center.
Prerequisites for remote provisioning
Before you can use remote provisioning features, you must use devices that are compatible with remote provisioning and run compatible firmware. If you're repurposing devices, then ensure updates are applied before attempting to reset and use remote provisioning. If you're buying new devices, confirm with the supplier that the correct level of firmware updates is already applied.
Performing remote provisioning
To remotely provision a new device, perform the following steps in written order:
Navigate to the Teams admin center at https://admin.teams.microsoft.com
Sign in to the Teams admin center with an account that has the Teams Administrator role.
Select and expand Devices.
Then select Provision new device from the Actions tab.
In the Provision new devices window, you can either add the MAC address manually or upload a file.
To manually add a device MAC address, From the Awaiting Activation tab, select Add MAC ID.
In the following picture, you can see the Microsoft Teams admin center portal on the Provision new devices window with the Add MAC IDs section highlighted.

Enter the MAC ID, enter a location, which helps technicians identify where to install the devices and select Apply when finished.
To upload a file with multiple MAC addresses, from the Awaiting Activation tab, select Upload MAC IDs. Download the file template and enter MAC IDs and locations and save the file.
Next choose Select file, and then select Upload.
You need a verification code for the devices to perform activation. The verification code is generated in bulk or at the device level and is valid for 24 hours. From the Awaiting Activation tab, select an existing MAC ID. A password is created for the MAC address and is shown in the Verification Code column.
Provide the list of MAC IDs and verification codes to the field technicians. You can export the detail directly in a file and share the file with the technician who is doing the actual installation work. This procedure can significantly speed up deployments and lower administrative overhead.
Provision the device
When the device is powered on and connected to the network, you as an engineer or an on-site technician can provision the device at the location it shall be used in the future. These steps are completed on the Teams device and identical across different vendors.
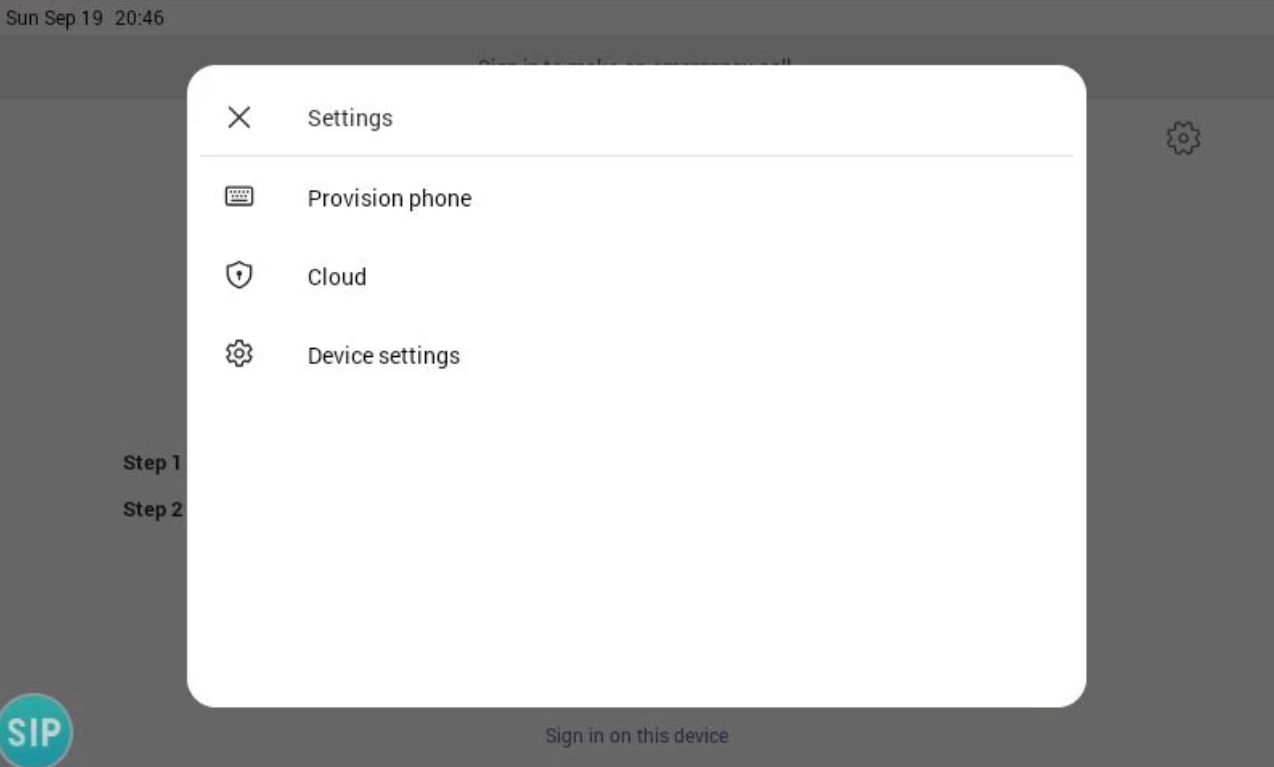
Select Provision device from the Settings screen as shown in the picture below.
Then enter the device-specific verification code in the provided input field.

Once the device is provisioned successfully, the tenant’s name appears on the sign-in page. On the following picture, you can see how the page looks like and how you or an onsite technician is guided to finish the setup procedure.

Back in the Microsoft Teams admin center, the provisioned device appears in the Awaiting sign in tab. Start the remote sign-in process by selecting the individual device. Select a device from the Awaiting sign in tab.

Follow the instructions in Sign in a user, and then select Close.

You have successfully completed the provisioning of a device, and is ready for the user.