Configure the Cost control workspace
Because Cost accounting analysis content highlights variances between the actual costs and budgeted costs, managers can be notified about positive and negative trends for their operational units. Managers can drill down to the cost element hierarchies or individual cost elements. In this way, managers can gain detailed insight into how cost variances have occurred, and then take effective action.
The Cost control workspace in Cost accounting > Cost control is designed as a page. Therefore, all managers who are responsible for a cost object can be granted access. The access to the page and data in the form can be controlled.
The list of reports that are available for users, such as managers, is controlled by the setting of the Published option on the Cost control workspace configurations page.
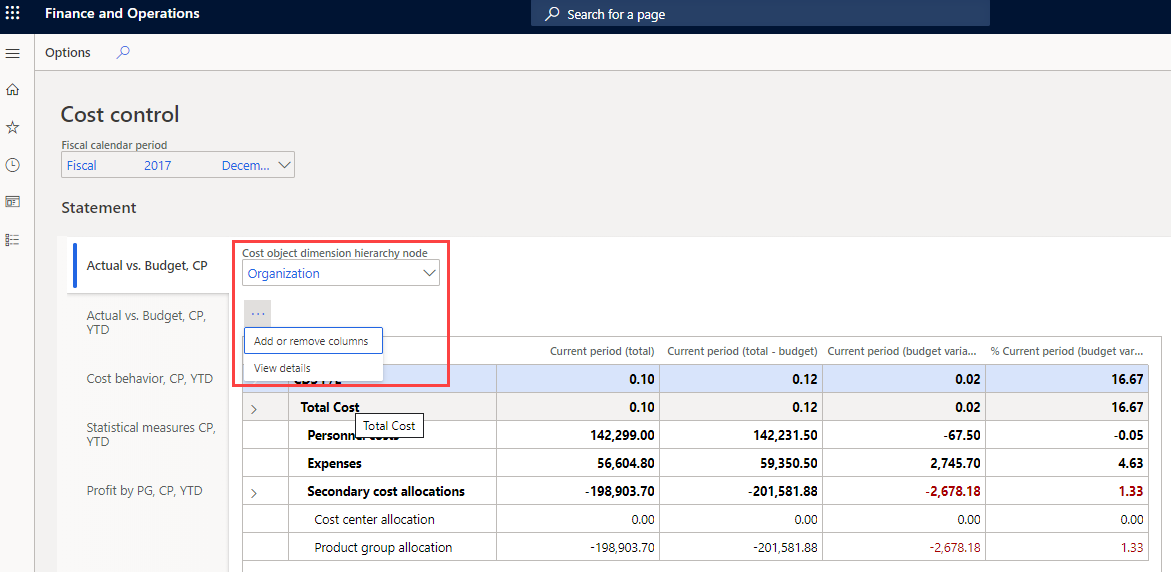
A manager can select the fiscal calendar period to view. The session date is used to determine the default current period.
The values in the fiscal calendar period are determined by the report name and the fiscal calendar that is selected for the cost accounting ledger that is associated with the report name on the Cost control workspace configurations page.
In the cost object dimension hierarchy, users can select the aggregation level at which balances should be shown. By enabling access-level security, you control the permissions so that users can view the entire hierarchy. However, users are only able to view balances for Chief Officers, such as the CEO and CFOs, who have been granted access.
Users can customize the columns on a report to fit their requirements.
View details
Users can drill into the details behind the balances that are shown in the workspace. If users select a cost element dimension hierarchy node, and then select View details, the Cost element details dialog box shows detailed information for the node.
A grid shows each cost element that is associated with the cost element dimension hierarchy node and its values. The columns that appear in the grid match the workspace settings. Two charts show a summary of actual versus budget and budget variance by period.
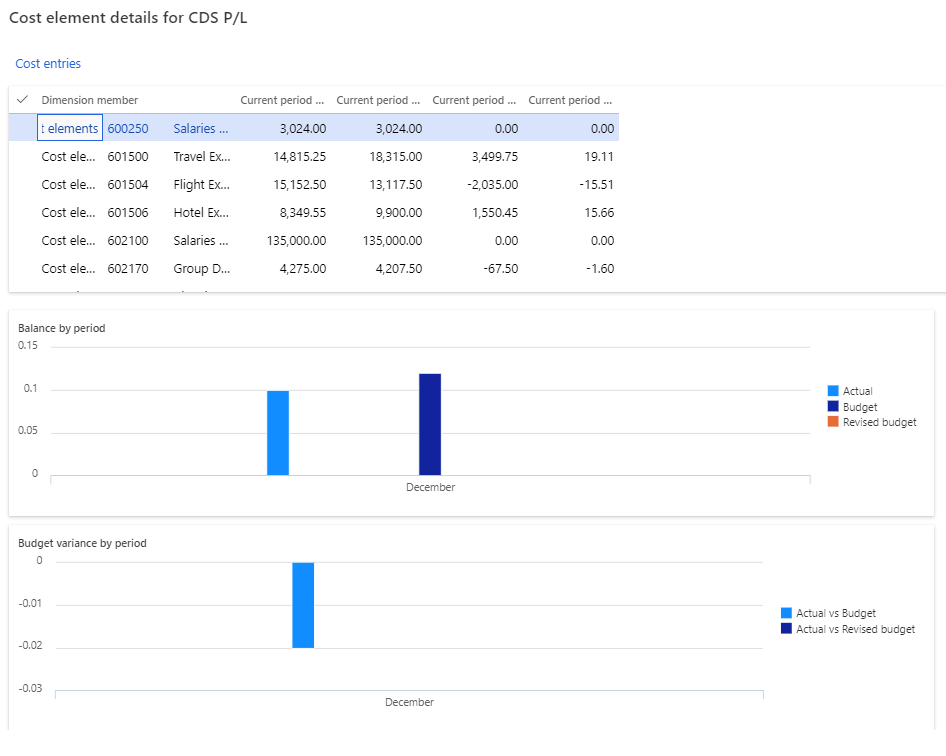
Users can select Cost entries to drill down into the entry details as required in Cost accounting > Cost control > View details > Cost entries.

For example, rent is an expenditure that is distributed to cost centers. A user who wants to understand the rent cost that his or her cost center must carry can drill down to view how rent has been calculated.
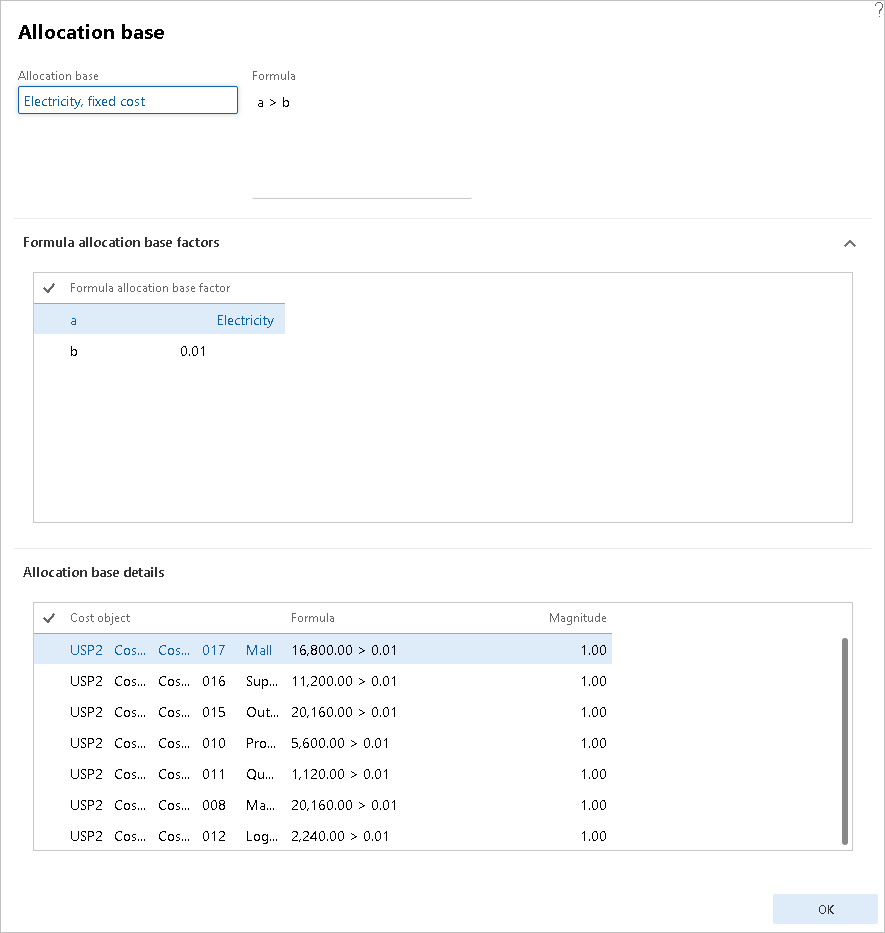
If users select Allocation base on the Cost entries page, a dialog box appears. Users can then assign the allocation base to the rule and view the corresponding statistical measures that are registered for the period.
In the following example, the allocation base is of the Formula allocation base type, and the formula is shown. The factors that define the formula are listed in Cost accounting > Cost control > View details > Cost entries > Allocation base. Additionally, a grid shows the calculation that is done per cost object.
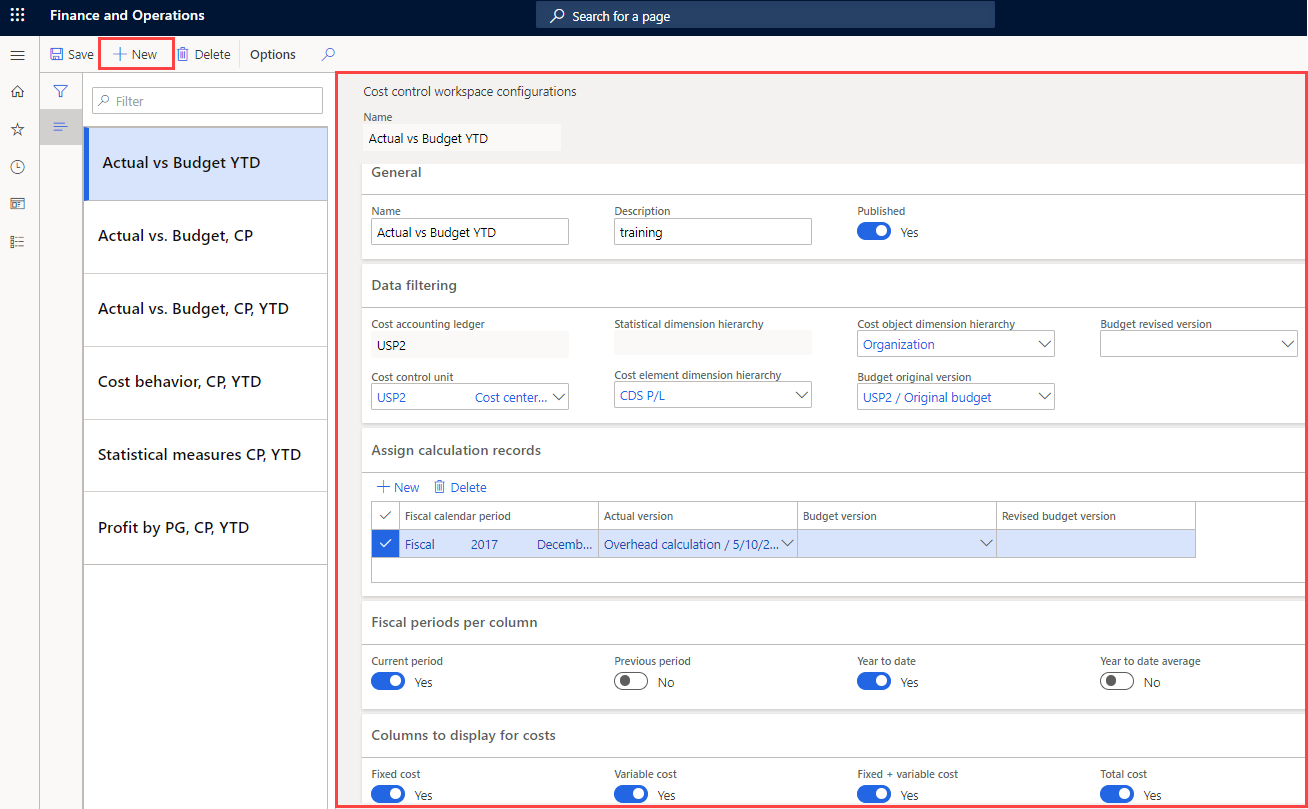
Configure cost control workspace parameters
Use the following procedure to configure the Cost control workspace so that managers at various levels in an organization can gain insight into their cost objects, such as cost centers and product groups.
Go to Cost accounting > Setup > Cost control workspace configurations.
Select New.
In the Name field, type a value.
In the Description field, type a value.
Select Yes in the Published field.
If you set this option to Yes, users who are assigned one of these roles can view the report in the Cost control workspace: cost accounting manager, cost accountant, cost accountant clerk, or cost object controller.
If you set this option to No, only users who are assigned one of these roles can view the report in the Cost control workspace: cost accounting manager, cost accountant, or cost accountant clerk.
Expand the Data filtering section.
In the Cost control unit field, enter or select a value.
In the Budget original version field, enter or select a value.
In the Cost element dimension hierarchy field, enter or select a value.
In the Cost object dimension hierarchy field, enter or select a value.
Expand the Assign calculation records section.
Select New.
In the list, highlight the selected row.
In the Fiscal calendar period field, enter or select a value.
In the Actual version field, enter or select a value.
Expand the Fiscal periods per column section.
Select Yes in the Current period field.
Expand the Columns to display for Costs section.
Select Yes in the Fixed cost field.
Select Yes in the Variable cost field.
Select Yes in the Total cost field.
Select Save.
Close the page.
Go to Cost accounting > Workspaces > Cost control.
In the Fiscal calendar period field, enter or select a value.
In the Cost object dimension hierarchy node field, enter or select a value.
After you've selected a Cost object dimension hierarchy, expand the Cost element dimension hierarchy in Cost accounting > Setup > Cost control workspace configuration to view the desired cost values. For example, you can expand the hierarchy to Manufacturing overhead to see the value.