Muistiinpano
Tämän sivun käyttö edellyttää valtuutusta. Voit yrittää kirjautua sisään tai vaihtaa hakemistoa.
Tämän sivun käyttö edellyttää valtuutusta. Voit yrittää vaihtaa hakemistoa.
Applies to: ✔️ Front Door Standard ✔️ Front Door Premium
By using Microsoft Entra ID managed identities, your Azure Front Door Standard or Premium instance can securely access other Microsoft Entra protected resources, such as Azure Blob Storage, without the need to manage credentials. For more information, see What is managed identities for Azure resources?
After you enable managed identity for Azure Front Door and grant the managed identity necessary permissions to your origin, Front Door uses the managed identity to get an access token from Microsoft Entra ID for accessing the specified resource. After successfully getting the token, Front Door sets the value of the token in the Authorization header by using the Bearer scheme and then forwards the request to the origin. Front Door caches the token until it expires.
Note
This feature isn't currently supported for origins with Private Link enabled in Front Door.
Azure Front Door supports two types of managed identities:
- System-assigned identity: This identity is tied to your service and is deleted if the service is deleted. Each service can have only one system-assigned identity.
- User-assigned identity: This identity is a standalone Azure resource that you can assign to your service. Each service can have multiple user-assigned identities.
Managed identities are specific to the Microsoft Entra tenant where your Azure subscription is hosted. If you move a subscription to a different directory, you need to recreate and reconfigure the identity.
Prerequisites
An Azure account with an active subscription. Create an account for free.
An Azure Front Door Standard or Premium profile. To create a new profile, see create an Azure Front Door.
Enable managed identity
Go to your existing Azure Front Door profile. Select Identity under Security in the left menu.
Choose either a System assigned or User assigned managed identity.
System assigned: A managed identity that's tied to the Azure Front Door profile lifecycle.
User assigned: A standalone managed identity resource with its own lifecycle.
System assigned
Toggle the Status to On and select Save.
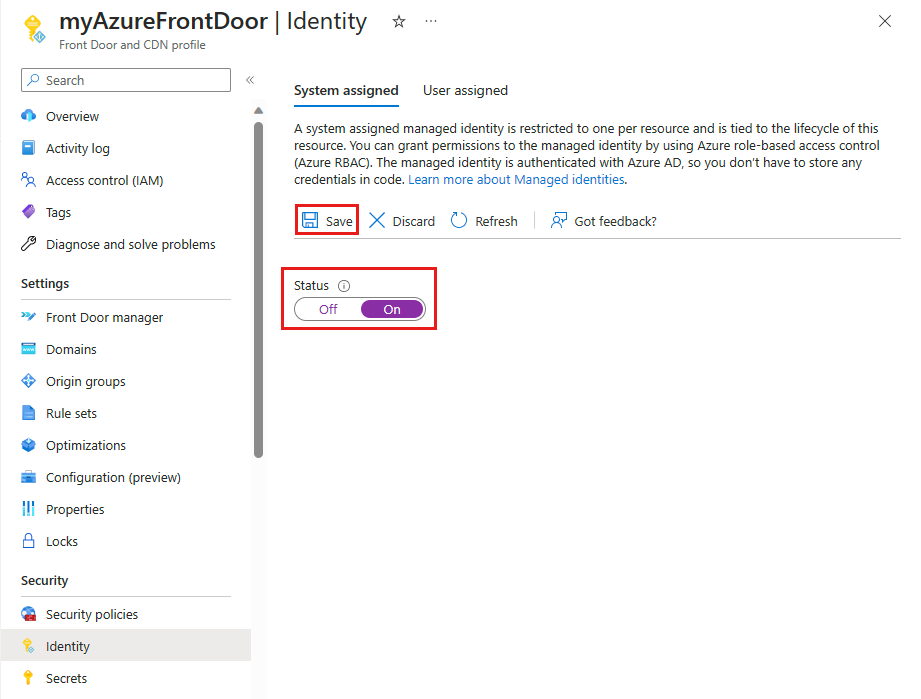
Confirm the creation of a system managed identity for your Front Door profile by selecting Yes when prompted.
User assigned
To use a user-assigned managed identity, you must already have one created. For instructions on creating a new identity, see create a user-assigned managed identity.
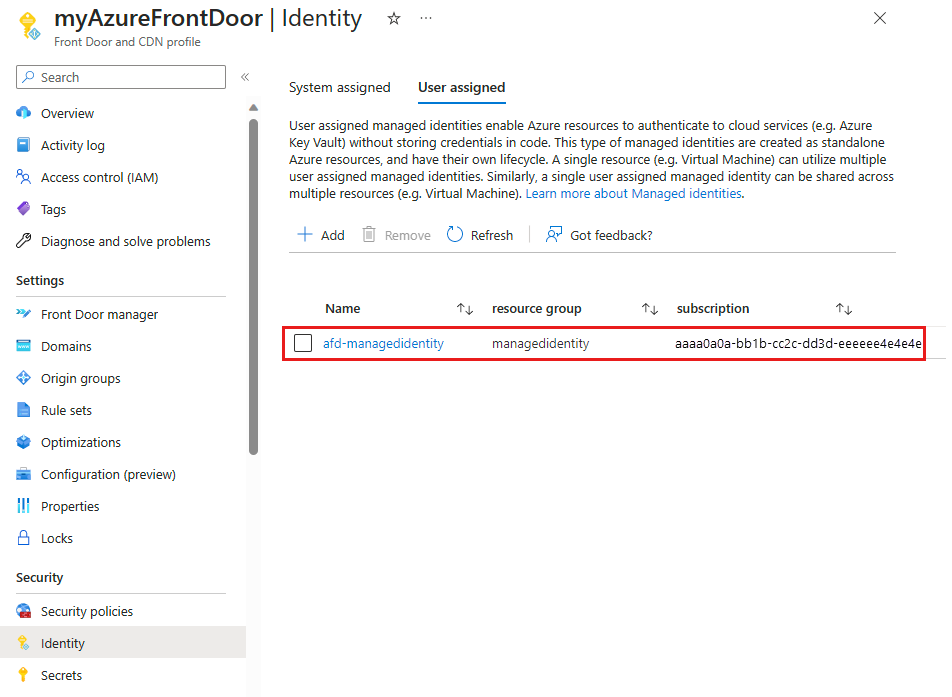
In the User assigned tab, select + Add to add a user-assigned managed identity.
Search for and select the user-assigned managed identity. Then select Add to attach it to the Azure Front Door profile.
The name of the selected user-assigned managed identity appears in the Azure Front Door profile.
Associate the identity to an origin group
Note
The association works only if all the following conditions are true:
- The origin group doesn't contain any origins with private link enabled.
- The health probe protocol is set to
HTTPSunder origin group settings. - The forwarding protocol is set to
HTTPS Onlyunder route settings. - The forwarding protocol is set to
HTTPS Onlyif you're using aRoute configuration overrideaction in rulesets.
Warning
If you use origin authentication between Azure Front Door and Azure Storage, the sequence of steps for enabling origin authentication is very important. If you don't follow the appropriate sequence, you might encounter problems.
- If you use a storage account with public anonymous access enabled, follow the steps in the exact sequence: Associate the identity to an origin group followed by Provide access at the origin resource. When you complete all the steps, you can disable public anonymous access to only allow access to your storage account from Front Door.
- If you use a storage account with public anonymous access disabled, follow a different sequence. First, complete the steps for Provide access at the origin resource followed by Associate the identity to an origin group. Start sending traffic through Azure Front Door to the storage account only after you complete all the steps in the aforementioned sequence.
Go to your existing Azure Front Door profile and open origin groups.
Select an existing origin group that has origins already configured.
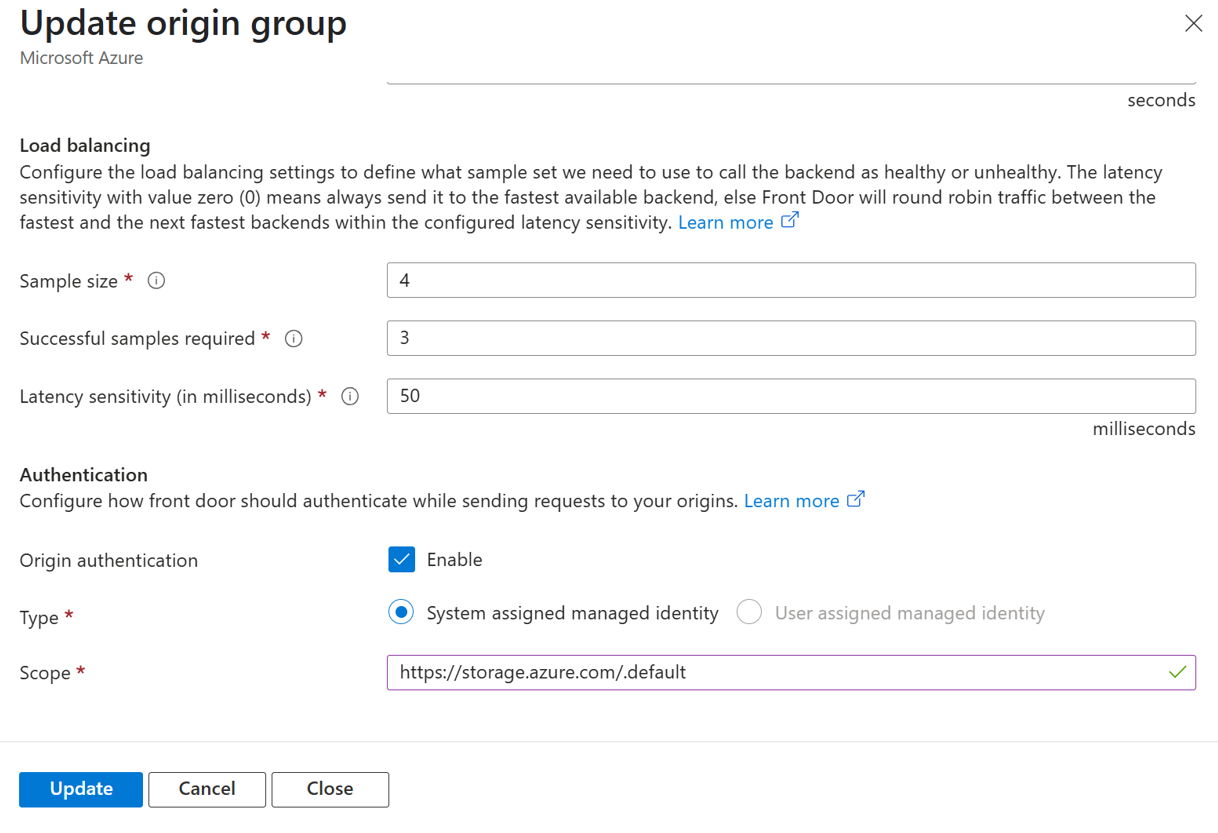
Scroll down to the Authentication section.
Enable Origin authentication.
Choose between system assigned or user assigned managed identity.
Enter the correct scope within the Scope field. The Scope field specifies the Microsoft Entra resource (audience) for which Azure Front Door requests an access token. The access token issued by Microsoft Entra ID contains permissions applicable to that target resource. As a security measure, Azure Front Door only supports an explicit allowlist of scopes for origin authentication. The following scopes are supported. If you specify any other scope, Azure Front Door returns a validation error and rejects the configuration.
https://storage.azure.com/.defaultapi://<GUID>/.default(for custom Microsoft Entra applications, including common API Management and App Service scenarios)https://appconfig.azure.com/.defaulthttps://appconfig-staging.azure.com/.default
Select Update.
Provide access at the origin resource
Go to the management page for your origin resource. For example, if the origin is an Azure Blob Storage, go to that Storage Account management page.
Note
The next steps assume your origin is an Azure Blob Storage. If you're using a different resource type, make sure to select the appropriate job function role during role assignment. Otherwise, the steps remain the same for most resource types.
Go to the Access Control (IAM) section and select Add. Choose Add role assignment from the dropdown menu.
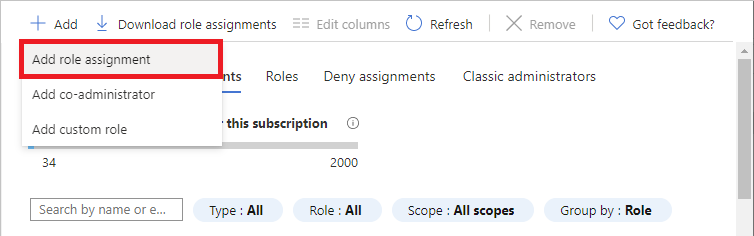
Under Job function roles in the Roles tab, select an appropriate role (for example, Storage Blob Data Reader) from the list and then select Next.
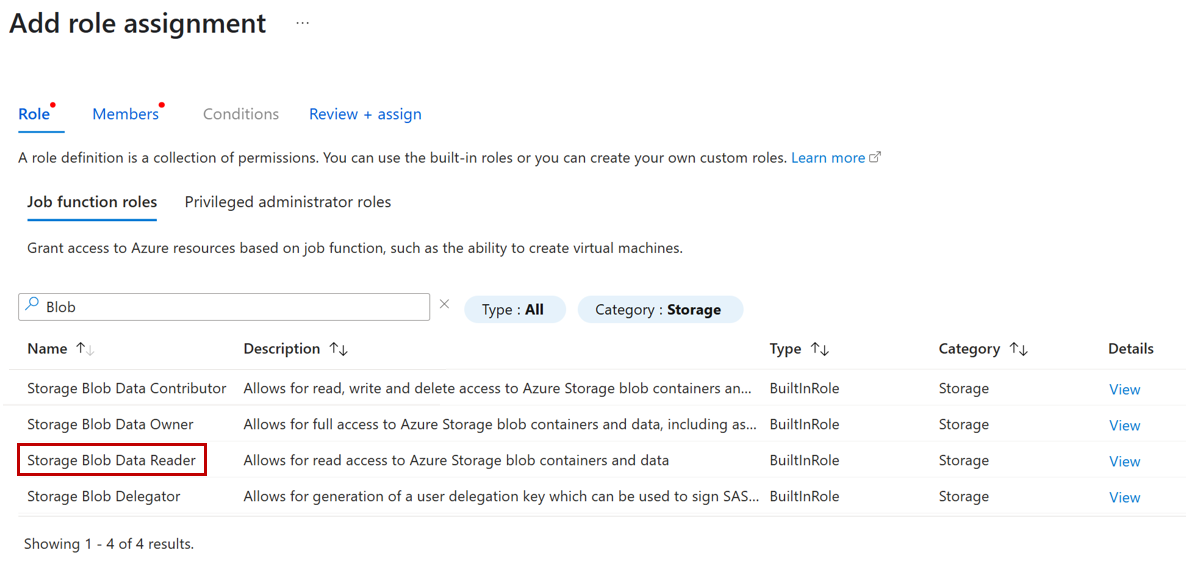
Important
When granting any identity, including a managed identity, permissions to access services, always grant the least permissions needed to perform the desired actions. For example, if a managed identity is used to read data from a storage account, there's no need to grant that identity permissions to also write data to the storage account. Granting extra permissions, such as making the managed identity a contributor of a storage account when it’s not needed, can make requests coming via Azure Front Door capable of write and delete operations.
In the Members tab, under the Assign access to section, choose Managed identity and then select Select members.
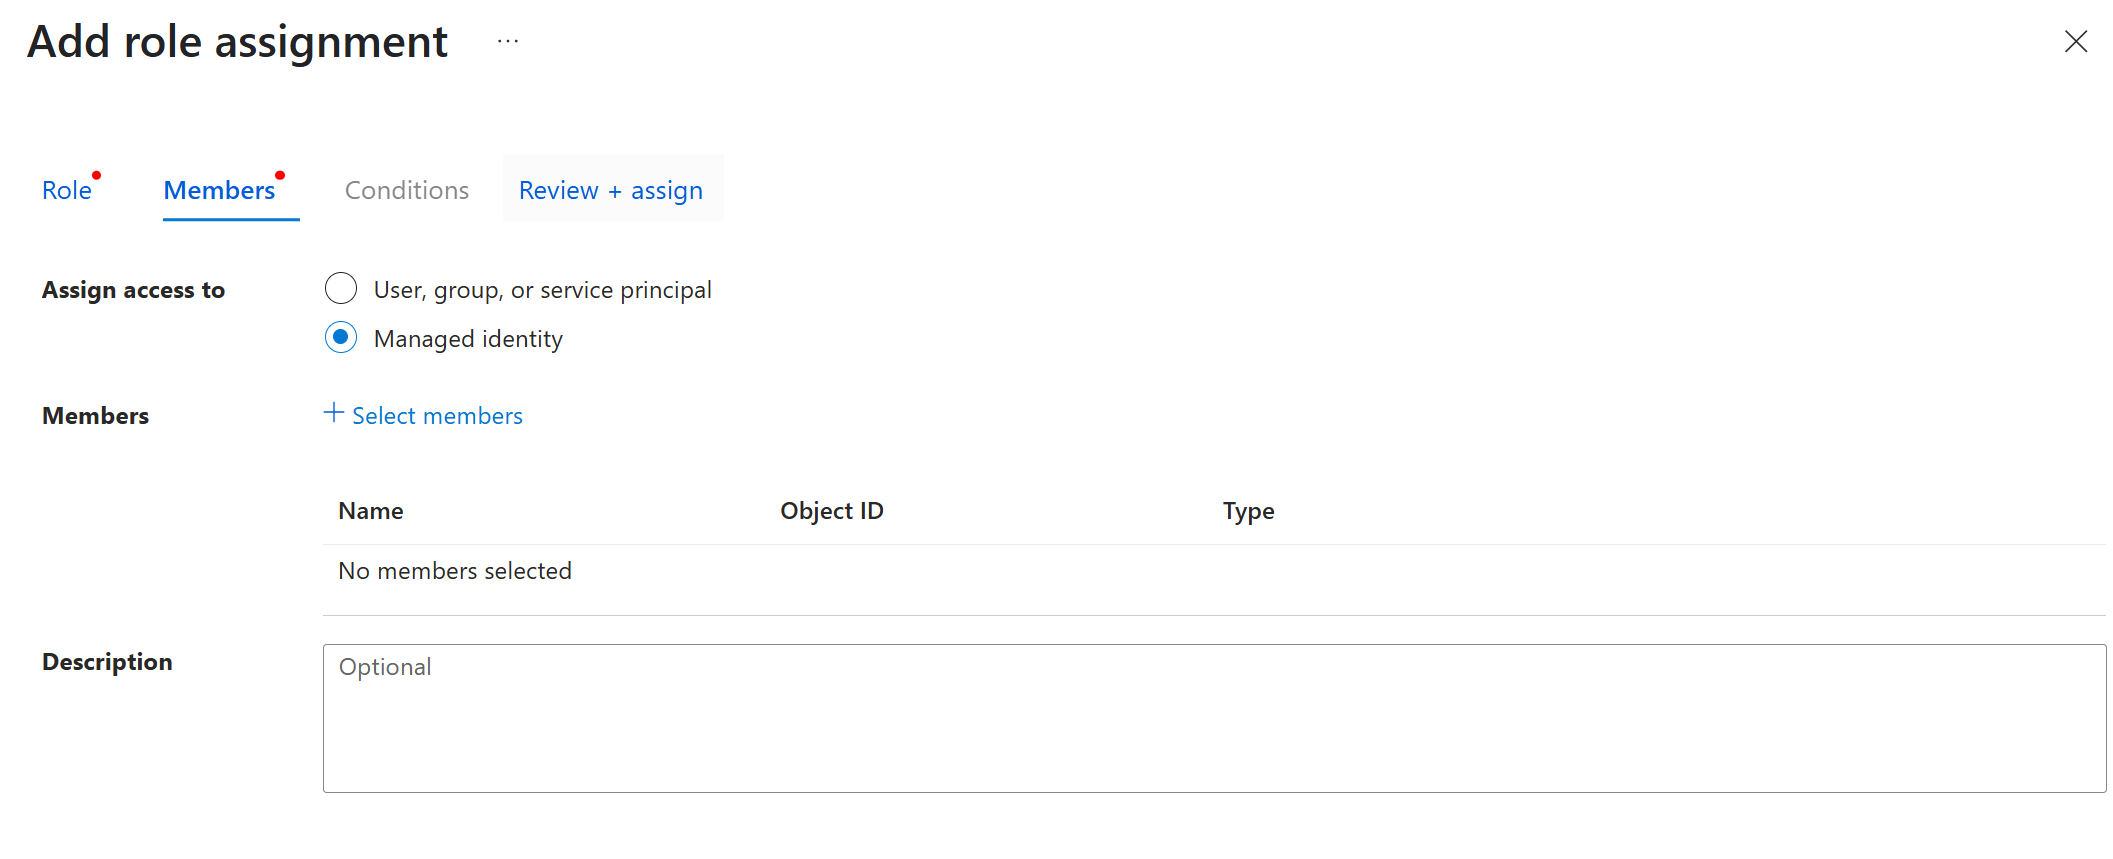
The Select managed identities window opens. Choose the subscription where your Front Door is located. Under the Managed identity dropdown, choose Front Door and CDN profiles. Under the Select dropdown, choose the managed identity created for your Front Door. Select the Select button in the bottom.
Select Review and assign and then select Review and assign once more after the validation is complete.
Manage and troubleshoot origin authentication
Troubleshoot configuration errors
If you encounter errors during origin group configuration, verify that:
- The health probe protocol is set to HTTPS.
- The forwarding protocol for the route and any route configuration override is set to HTTPS Only.
- The origin group doesn't contain an origin that uses Private Link.
If the origin returns an access-denied response, verify that the managed identity has the required role on the origin resource.
Migrate from SAS tokens
To avoid downtime when you migrate Azure Storage from shared access signature (SAS) tokens:
- Enable a managed identity for your Azure Front Door profile.
- Associate the managed identity with the origin group.
- Stop using SAS tokens.
Disable origin authentication
To disable origin authentication without interrupting access to your origin:
- Configure the origin's Access Control (IAM) to accept requests that don't use managed identity authentication.
- Disable origin authentication on the origin group.
- Wait for the configuration change to propagate.
- Disable or delete the managed identity.
Additional considerations
Azure Front Door overwrites an existing
Authorizationheader with its origin authentication token. To preserve the client token, configure a rule that uses the{http_req_header_Authorization}server variable to send the token under a separate header.
Azure Front Door includes the access token in the
Authorizationheader for health probes and end-user traffic requests.Use separate managed identities for origin authentication and Azure Front Door access to Azure Key Vault.