Manage Azure resources by using the Azure portal
Learn how to use the Azure portal with Azure Resource Manager to manage your Azure resources. For managing resource groups, see Manage Azure resource groups by using the Azure portal.
Note
This article provides steps about how to delete personal data from the device or service and can be used to support your obligations under the GDPR. For general information about GDPR, see the GDPR section of the Microsoft Trust Center and the GDPR section of the Service Trust portal.
Deploy resources to a resource group
After you create a Resource Manager template, use the Azure portal to deploy your Azure resources. For creating a template, see Quickstart: Create and deploy Azure Resource Manager templates by using the Azure portal. For deploying a template using the portal, see Deploy resources with Resource Manager templates and Azure portal.
Open resources
The Azure portal organizes resources by Azure service and resource group. The following procedures show how to open a storage account called mystorage0207. The virtual machine resides in a resource group called mystorage0207rg.
To open a resource by the service type:
Sign in to the Azure portal.
In the left pane, select the Azure service. In this case, select Storage accounts. If you don't see the service listed, select All services, and then select the service type.
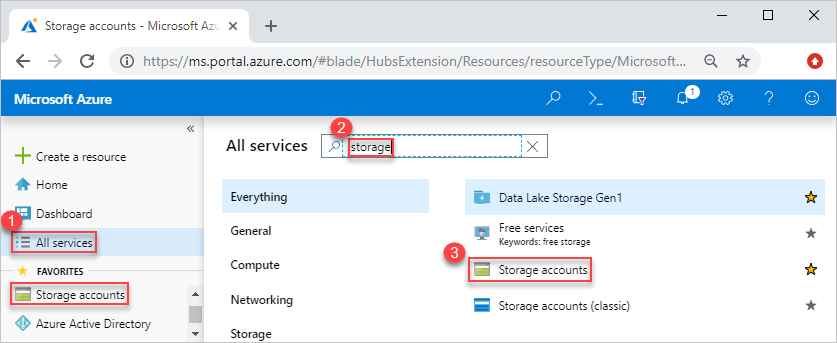
Select the resource you want to open.
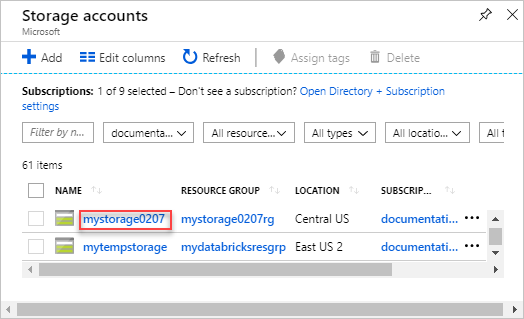
A storage account looks like:
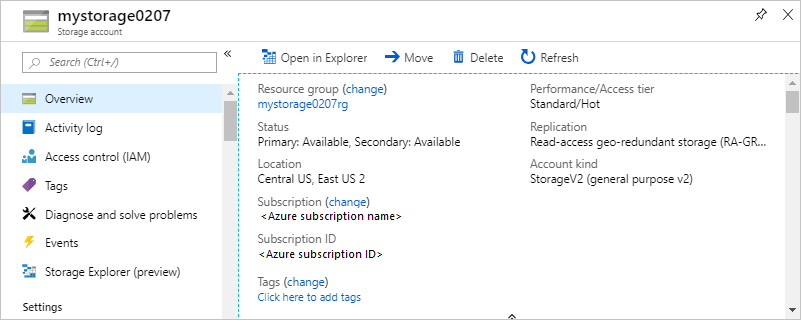
To open a resource by resource group:
- Sign in to the Azure portal.
- In the left pane, select Resource groups to list the resources within the group.
- Select the resource you want to open.
Manage resources
When you view a resource in the portal, you see the options for managing that particular resource.

The preceding screenshot shows the management options for an Azure virtual machine. You can perform operations such as starting, restarting, and stopping a virtual machine.
Delete resources
Open the resource in the portal. For the steps, see Open resources.
Select Delete. The following screenshot shows the management options for a virtual machine.

To confirm the deletion, type the name of the resource and select Delete.
For more information about how Azure Resource Manager orders the deletion of resources, see Azure Resource Manager resource group deletion.
Move resources
Open the resource in the portal. For the steps, see Open resources.
Select Move. The following screenshot shows the management options for a storage account.

Select Move to another resource group or Move to another subscription depending on your needs.
For more information, see Move resources to new resource group or subscription.
Lock resources
Locking prevents other users in your organization from accidentally deleting or modifying critical resources, such as Azure subscription, resource group, or resource.
Open the resource in the portal. For the steps, see Open resources.
Select Locks. The following screenshot shows the management options for a storage account.
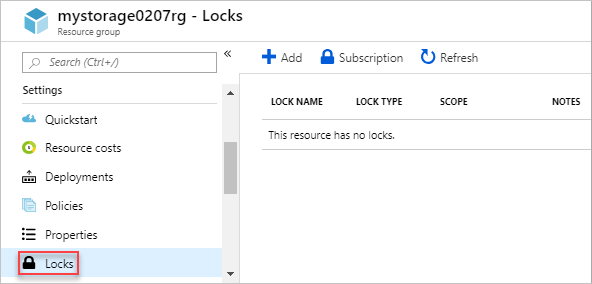
Select Add, and then specify the lock properties.
For more information, see Lock resources with Azure Resource Manager.
Tag resources
Tagging helps you organize your resource group and resources logically.
Open the resource in the portal. For the steps, see Open resources.
Select Tags. The following screenshot shows the management options for a storage account.
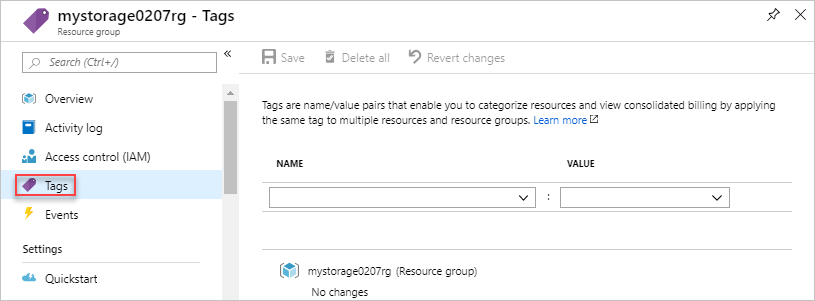
Specify the tag properties, and then select Save.
For more information, see Using tags to organize your Azure resources.
Monitor resources
When you open a resource, the portal presents default graphs and tables for monitoring that resource type. The following screenshot shows the graphs for a virtual machine:
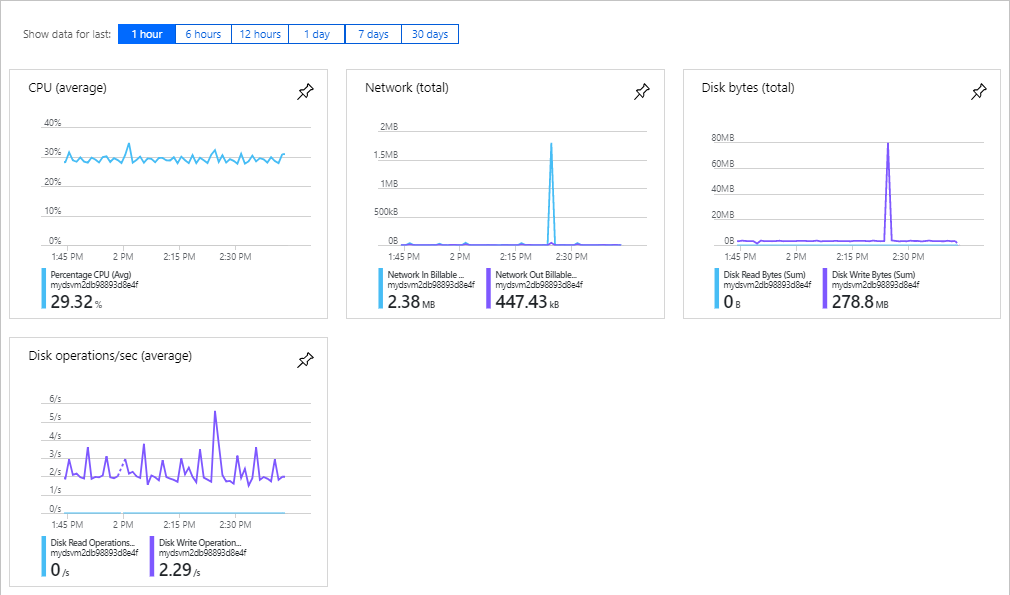
To pin the graph to the dashboard, select the pin icon on the upper right corner of the graphs. To learn about working with dashboards, see Creating and sharing dashboards in the Azure portal.
Manage access to resources
Azure role-based access control (Azure RBAC) is the way that you manage access to resources in Azure. For more information, see Assign Azure roles using the Azure portal.
Next steps
- To learn Azure Resource Manager, see Azure Resource Manager overview.
- To learn the Resource Manager template syntax, see Understand the structure and syntax of Azure Resource Manager templates.
- To learn how to develop templates, see the step-by-step tutorials.
- To view the Azure Resource Manager template schemas, see template reference.