Lab - Configure intercompany relations
Read this first - before you start the lab!
Important
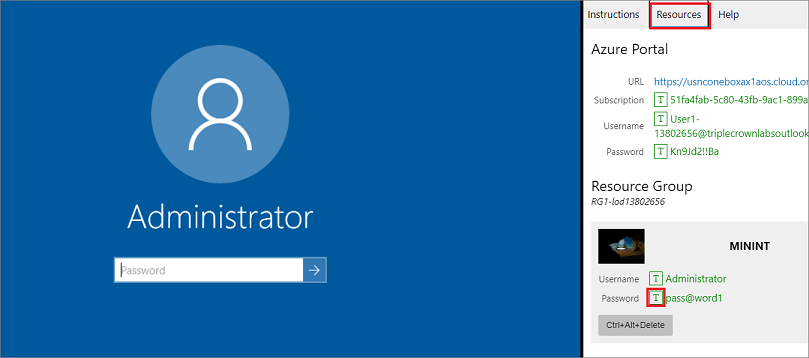
For this lab, you CANNOT sign in with your own credentials. Use the following steps to sign in to your lab environment with the correct credentials.
Ensure that you are signed in to Microsoft Learn.
Select Launch VM mode or Sign in to launch VM mode in this unit.
In the Resources tab on the lab side bar, select the T icon next to Password in the MININT box, to have the administrator password for the Virtual Machine entered for you.
Select Enter.
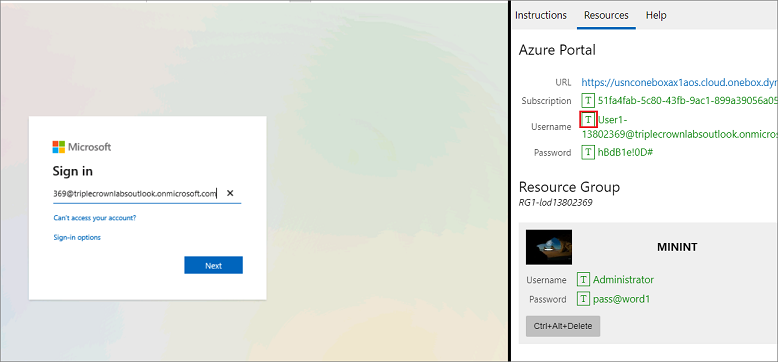
Microsoft Edge will open. Wait for it to navigate to the Sign in page for finance and operations.
On the Microsoft Sign in page in finance and operations, place your mouse cursor into the Username field.
On the Resources tab of the lab side bar, below the Azure portal heading, select the T icon next to Username, then press Enter.
Your mouse cursor will now be in the Password page.
On the Resources tab of the lab side bar, below the Azure portal heading, select the T icon next to select Password, then press Enter.
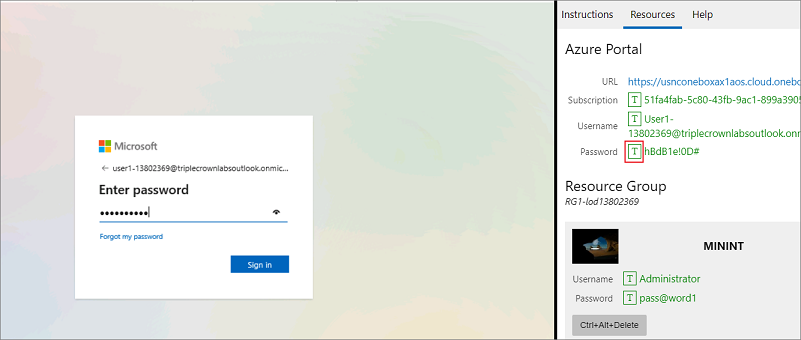
Don't stay signed in or store the password on the virtual machine.
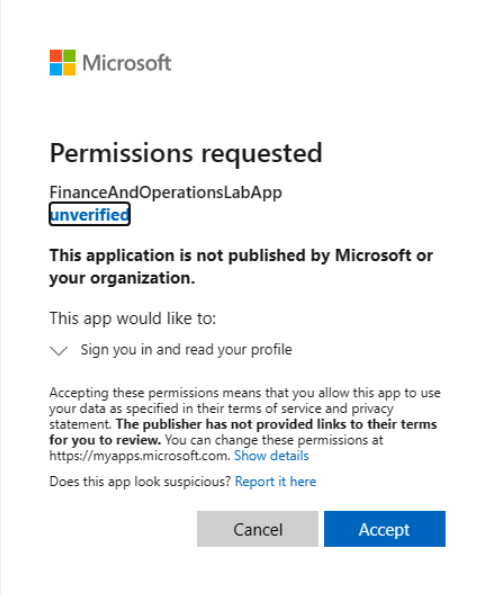
Select Accept in the Permissions requested page.
To see the lab instructions, select the Instructions tab on the lab side bar.
You can now begin your work on this lab.
Set up action policies
You work for the company USMF, and now USRT needs the ability to buy products through an intercompany relationship from USMF.
To facilitate this buy/sell relationship, you must create an intercompany trading relationship between customer US-040 in USMF and vendor 9001 in USRT.
This intercompany trading relationship will include action policies. Use the following information to set up the appropriate action policies:
Purchase order policies:
- Original sales order (direct delivery)
- Post invoice automatically
- Print invoice automatically
- Intercompany purchase order prices
- Allow price edit
- Allow discount edit
- Intercompany purchase order intercompany sales order
- Sync customer information on the header Sales order policies:
- Intercompany sales order creation
- Use Company + original number for the sales order numbering.
- Allow summary update of documents for original customer.
- Print picking list automatically.
- Payment
- Use the CustPay payment journal.
- Post the journal automatically.
- Intercompany sales order prices
- Price and discount search
- Allow price edit
- Allow discount edit
- Intercompany sales order intercompany purchase order
- Sync customer information on the header
Switch the company to USRT
- Select the USMF company in the top right corner of the application.
- Select company USRT in the list.
- Now you are working in the USRT company. You will see Contoso Retail USA in the banner.
Create a trading relationship with USMF vendor 9001
Note
If you are using demo data, an intercompany trade relation already exists between USMF and DEMF.
- In company USRT, go to the Accounts payable module or the Procurement and sourcing module.
- Go to Vendors and then All vendors.
- Select Vendor account 9001.
- On the General tab of the Action Pane at the top, in the Set up group, select Intercompany.
- Select the Trading relationship tab.
- Under ACTIVATION, select Yes.
- Under the PURCHASE RELATION section, the My Company field will auto-populate with USRT. The Vendor account field will auto-populate with 9001.
- In the SALES RELATION section, Customer company field, select USMF. In the My account field, select US-040.
- Select Save in the Action Pane.
Configure the purchase order action policies
- While on the Intercompany page for Vendor 9001, select Purchase order policies in the left navigation area.
- Check the boxes for the following options:
- Post invoice automatically
- Print invoice automatically
- Allow price edit
- Allow discount edit
- Customer information on the header in the Original Sales Order > Intercompany Purchase Order group
- Select Save in the Action Pane.
Configure the sales order action policies
- Select Sales order policies in the left navigation area of the Intercompany page.
- In the Sales order numbering drop-down list under the INTERCOMPANY SALES ORDER CREATION section, select Company + original number.
- Select the Allow summary update of documents for original customer check box in the INTERCOMPANY SALES ORDER CREATION section.
- Select the Print picking list automatically check box in the INTERCOMPANY SALES ORDER CREATION section.
- Select CustPay in the Payment journal drop-down list in the PAYMENT section.
- Select the Post journal automatically check box in the PAYMENT section.
- Select the Price and discount search check box in the INTERCOMPANY SALES ORDER PRICES section.
- Select the Allow price edit check box in the INTERCOMPANY SALES ORDER PRICES section.
- Select the Allow discount edit check box in the INTERCOMPANY SALES ORDER PRICES section.
- Select the Customer information on the header check box in the INTERCOMPANY SALES ORDER > INTERCOMPANY PURCHASE ORDER section.
- Select Save on the Action Pane.
- Select Yes on any warning messages you receive.
Manage order agreement action policies
To facilitate the buy/sell relationship, an intercompany trading relationship has been created between customer US-040 in USMF and vendor 9001 in USRT.
The intercompany trading relationship will include purchase and sales agreement policies.
Allow all options for the purchase and sales agreement policies
- In the top-right corner of the page, change the company from USRT to USMF.
- Navigate to Accounts receivable > Customers > All customers
- Select Account US-040.
- On the General tab of the Action Pane, in the Set up group, select Intercompany.
Configure the purchase agreement policies
- Select Purchase agreement policies tab in the left pane.
- Select the Allow setting on hold/effective check box in the INTERCOMPANY PURCHASE AGREEMENT section.
- Select the Allow edit of validity period check box in the INTERCOMPANY PURCHASE AGREEMENT section.
- Select the Allow price edit check box in the INTERCOMPANY PURCHASE AGREEMENT PRICES section.
- Select the Allow discount edit check box in the INTERCOMPANY PURCHASE AGREEMENT PRICES section.
Configure the sales agreement policies
- Select Sales agreement policies tab in the left pane.
- Select the Allow setting on hold/effective check box in the INTERCOMPANY SALES AGREEMENT section.
- Select the Allow edit of validity period check box in the INTERCOMPANY SALES AGREEMENT section.
- Select the Allow price edit check box in the INTERCOMPANY SALES AGREEMENT PRICES section.
- Select the Allow discount edit check box in the INTERCOMPANY SALES AGREEMENT PRICES section.
- Select Save in the Action Pane.
Configure value-mapping
Now you must define the value-mapping for this relationship. Configure the purchase and sales value-mapping for the intercompany trading relationship between USRT and USMF, vendor 9001.
Set up Purchase value mapping
Switch back to the USRT company.
Navigate to Accounts payable > Vendors > All vendors
Select Contoso Entertainment System USA (vendor 9001).
On the General tab of the Action Pane, in the Set Up section, select Intercompany.
Configure the Purchase value-mapping by selecting Purchase value-mapping in the left pane.
Select Our in the drop-down lists for:
- Mode of delivery code
- Delivery terms codes
- Charges code
- Return reason code
- Disposition code
- Classification
Select Save in the Action Pane.
Configure the Sales value-mapping
Select Sales value-mapping in the left pane of the Intercompany page for Vendor 9001.
Select Our in the drop-down lists for:
- Mode of delivery code
- Delivery terms codes
- Charges code
- Return reason code
- Disposition code
- Classification
Select Save and close the page.
Close the lab environment
- Select Done in the Instructions pane in the lab side bar.
- In the Lab is complete window, select Continue, and then select Leave to return to the next unit in the module.